CAUTION
RISK OF ELECTRIC SHOCK
DO NOT OPEN
SAFETY INSTRUCTIONS (EUROPEAN)
The conductors in theAC power cord are colored in accordance with the following code.
GREEN & YELLOW—Earth BLUE—Neutral BROWN—Live
U.K. MAIN PLUG WARNING: Amolded main plug that has been cut off from the cord is
unsafe. NEVERUNDERANYCIRCUMSTANCESSHOULDYOU INSERTADAMAGED
OR CUT MAIN PLUG INTOAPOWER SOCKET.
IMPORTANT! FOR YOUR PROTECTION, PLEASE READ THE FOLLOWING:
WATER AND MOISTURE: Appliance should not be used near water (near a bathtub, washbowl,
kitchen sink, laundry tub, in a wet basement, or near a swimming pool, etc). Care should be taken
so that objects do not fall and liquids are not spilled into the enclosure through openings.
POWER SOURCES: The appliance should be connected to a power supply only of the type described
in the operating instructions or as marked on the appliance.
GROUNDING OR POLARIZATION: Precautions should be taken so that the grounding or polar-
ization means of an appliance is not defeated.
POWER CORD PROTECTION: Power supply cords should be routed so that they are not likely
to be walked on or pinched by items placed upon or against them, paying particular attention
to cords at plugs, convenience receptacles, and the point where they exit from the appliance.
SERVICING: The user should not attempt to service the appliance beyond that described in the
operating instructions. All other servicing should be referred to qualified service personnel.
FUSING: If your unit is equipped with a fuse receptacle, replace only with the same type fuse.
Refer to replacement text on the unit for correct fuse type.
This symbol is intended to
alert the user to the pres-
ence of uninsulated “dan-
gerous voltage” within the
product’s enclosure that may be of suf-
ficient magnitude to constitute a risk of
electric shock to persons.
This symbol is
intended to alert the
user to the presence of
important operating
and maintenance (servicing) instruc-
tions in the literature accompanying
the appliance.
LIMITED WARRANTY
Your Carvin product is guaranteed against failure for ONE YEAR unless otherwise stated. Carvin will
service and supply all parts at no charge to the customer providing the unit is under warranty. Shipping
costs are the responsibility of the customer. CARVIN DOES NOT PAY FOR PARTS OR SERVICING OTHER
THAN OUR OWN. A COPY OF THE ORIGINAL INVOICE IS REQUIRED TO VERIFY YOUR WARRANTY.
This warranty does not cover, and no liability is assumed, for damage due to: dropping, moisture damage,
accidents, abuse, natural disasters, loss of parts, lack of reasonable care, incorrect use, or failure to
follow instructions. This warranty is in lieu of all other warranties, expressed or implied. No repre-
sentative or person is authorized to represent or assume for Carvin any liability in connection with the
sale or servicing of Carvin products. CARVIN SHALL NOT BE LIABLE FOR INCIDENTAL OR CONSE-
QUENTIAL DAMAGES.
When RETURNING merchandise to the factory, you may call for a return authorization number. Describe
the problem in writing.
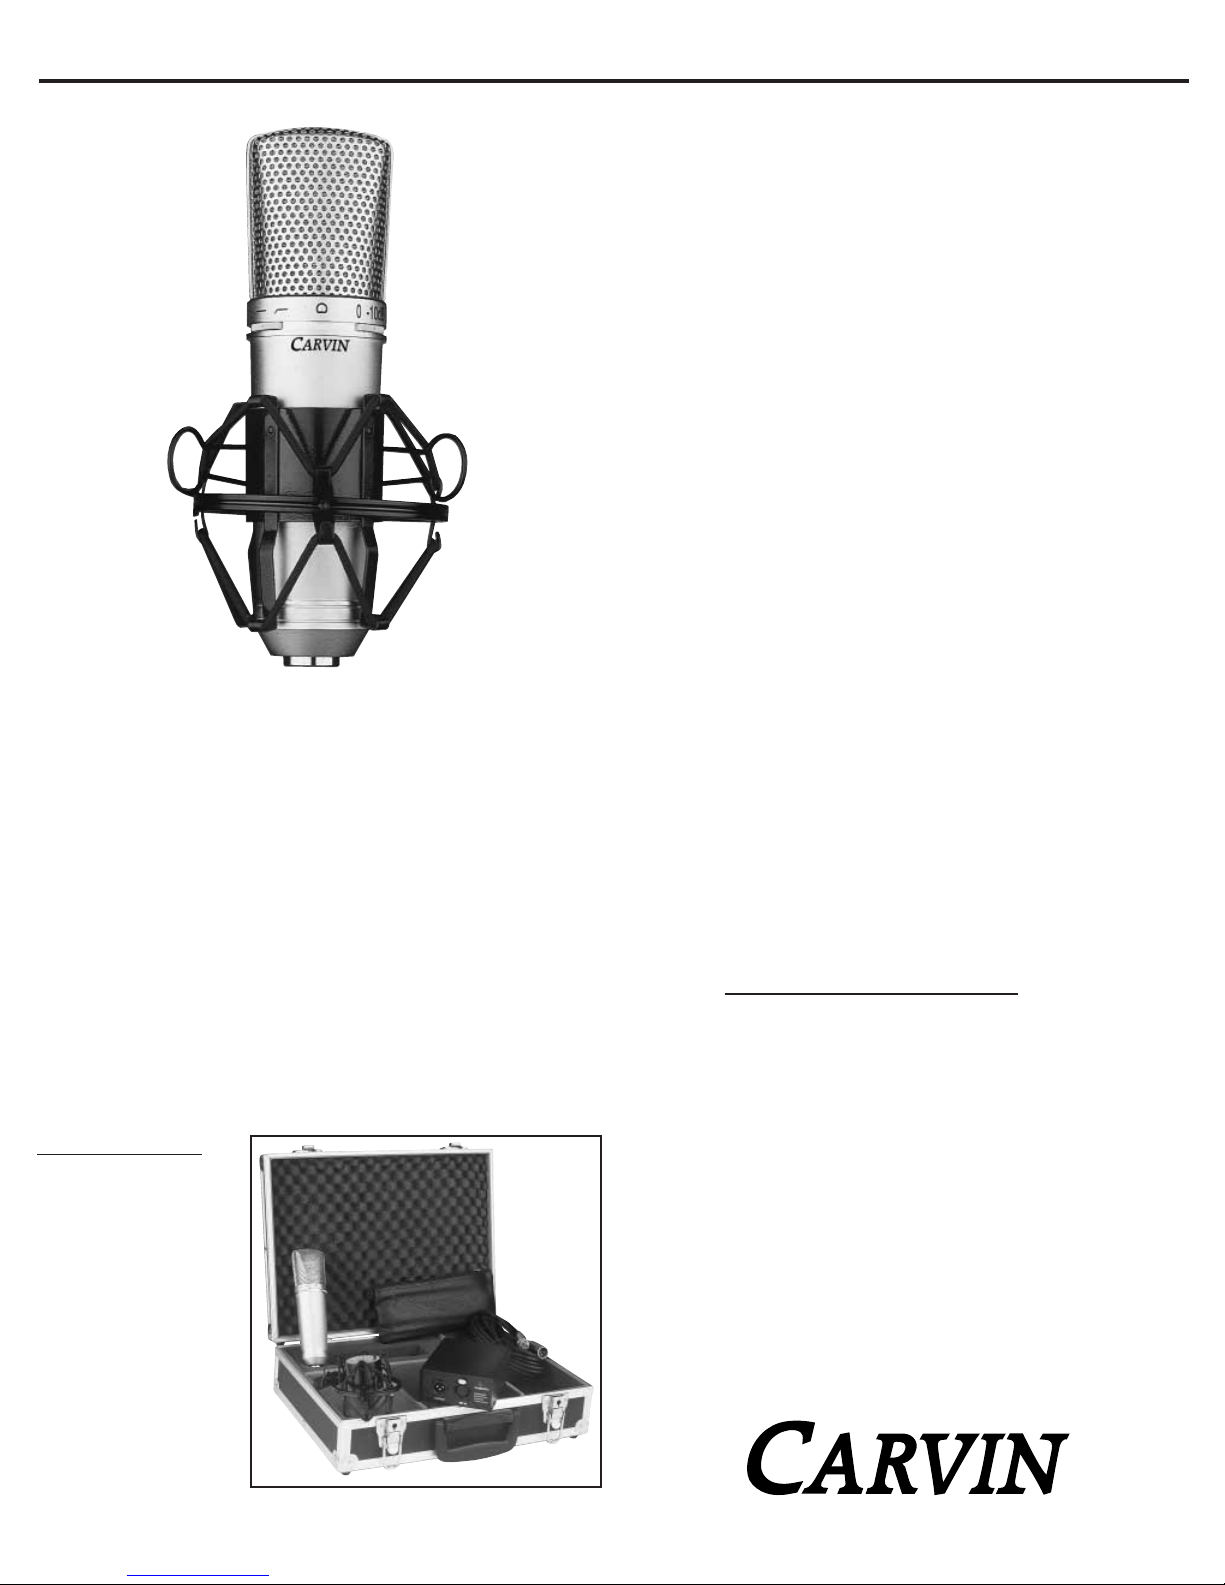
RECORDING TIPS
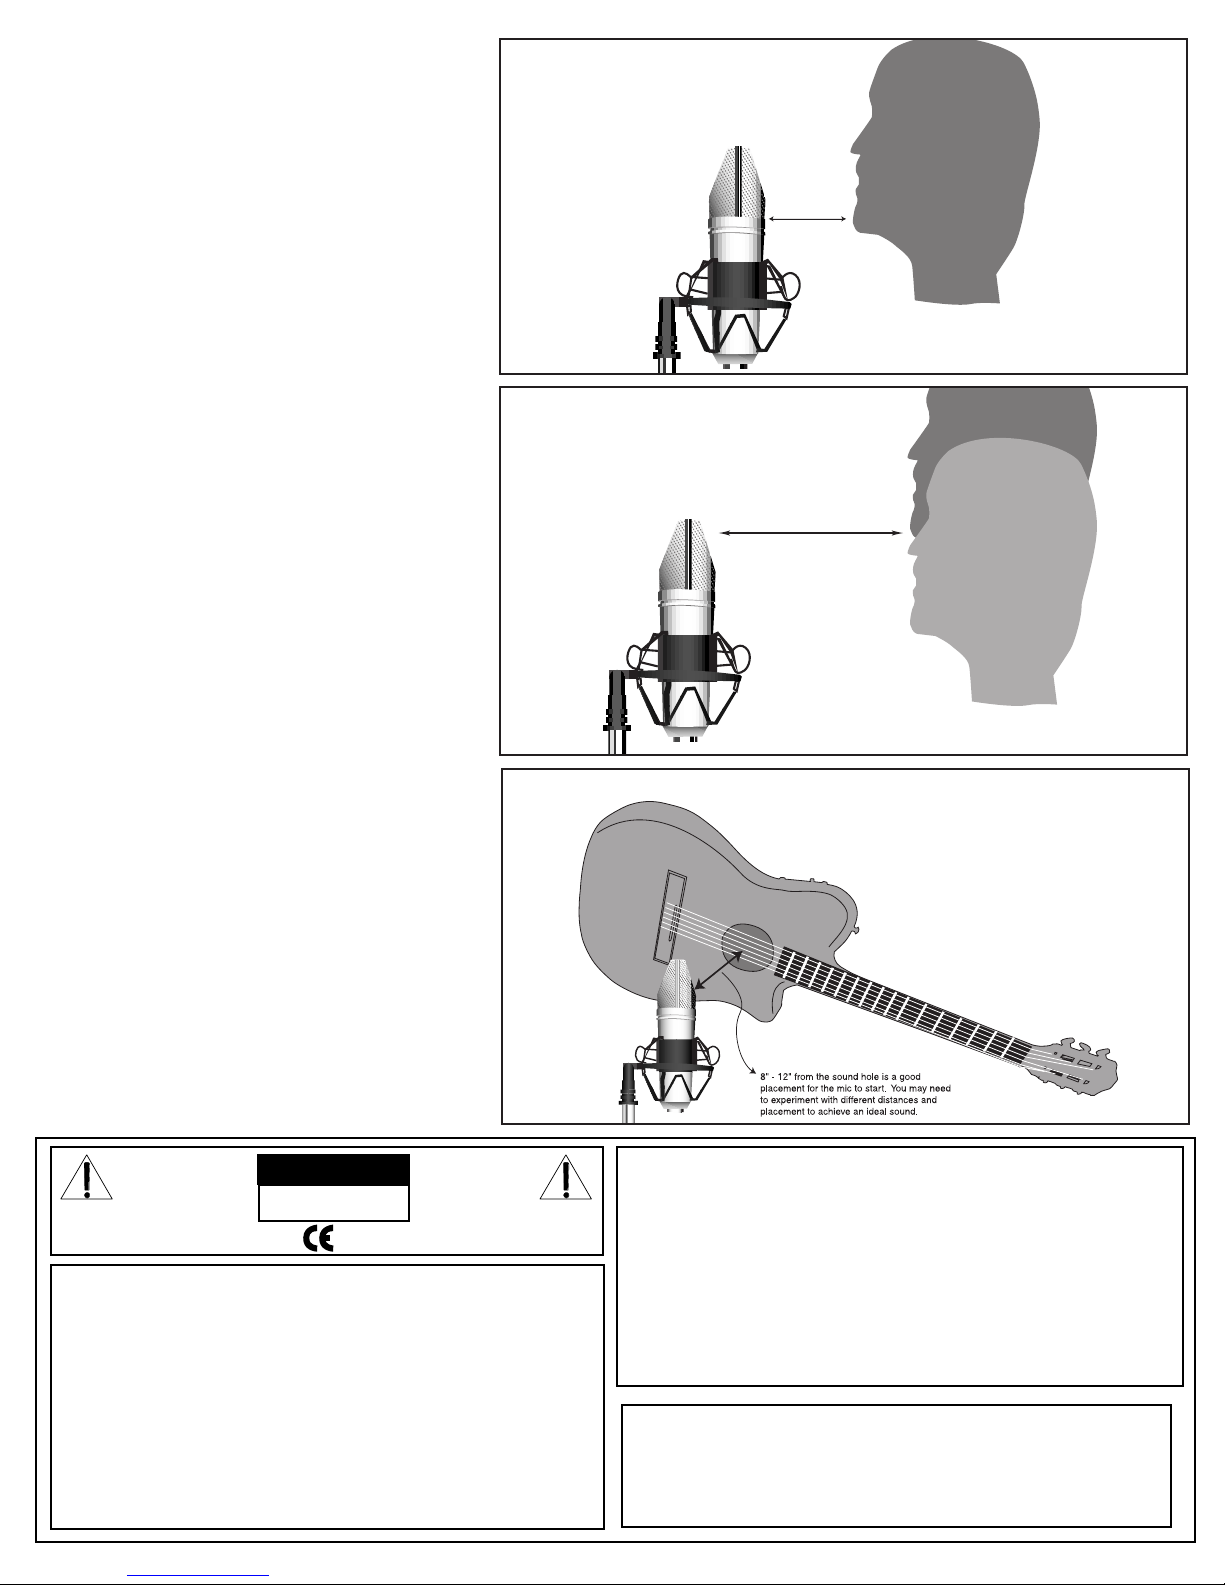
Lead Vocals
For micing vocals, the element should be close to the height
of the singer’s mouth while in a normal, comfortable singing posi-
tion, although, some vocalists prefer the microphone slightly ele-
vated. While proper mic positioning is important for good sound,
a relaxed, comfortable singer is more important, so position the
mic to the singer’s liking (within reason!). Typically 6 to 12 inches
away from the mic is ideal for lead vocals, but feel free to exper-
iment. Every mic has a “sweet spot” where the voice reproduc-
tion sounds best. That spot is unique for each voice! Experiment
with distances to arrive at the “sweet spot”. When getting in close
to the mic, remember to use a pop screen to prevent “popping”
your “P’s” and excessive moisture from hitting the mic element.
Background Vocals
If you want the feeling of distance or space, move the mic fur-
ther away. Just be aware that as you get further away, you may
need more gain to achieve the desired recording levels. And with
more gain comes the possibility of picking up unwanted back-
ground noise. When recording multiple vocalists on one mic,
test each person’s levels individually before recording them
together. If one vocalist is louder than the other, have that person
take one step back. Repeat this process until all vocalists can
be recorded at even levels with a single mic.
Recording Instruments
For instrument or percussion micing, there really is no right
or wrong placement except when you are recording multiple
instruments, where proper “close micing” techniques must be
used to prevent excessive “bleed-through” between instrument
tracks. Never be afraid to try various positions or angles. Feel
free to change the acoustic properties of the recording envi-
ronment by using sound absorbent panels and materials.
Additionally, try using multiple CM-87S’s at different placements
and distances. Example: When micing an electric guitar cabi-
net, try using one CM-87S up close (within several inches of the
speaker) and another CM-87S at a further distance as an “ambi-
ence” mic. You will achieve a totally different sound than with
one mic alone. Micing an acoustic guitar can be a whole art in
itself. Start out by placing the mic near the sound hole. Try
moving the mic closer to the bridge of the guitar for a brighter
sound and closer to the neck and sound hole to add low end
frequencies. Using a second mic at a distance can again give
you a totally different sound on tape. The different sound pos-
sibilities are limited only by your creativity and imagination!