manuals.online logo
Brands
  1. Home
  2. •
  3. Brands
  4. •
  5. CARVIN
  6. •
  7. Microphone
  8. •
  9. CARVIN CM30D User manual

CARVIN CM30D User manual

CARVIN ENGINEERING DATA CM30D Drum Mics OPERATING MANUAL
-25
-20
-15
-10
-5
0dB
0°
30°
60°
90°
120°
150° 180° 150°
120°
90°
60°
30°
200Hz
1,000 Hz
6,000Hz
Congratulations on purchasing Carvin’s CM30D drum and instrument
microphones. The CM30D mic kit is capable of handling high sound pres-
sure levels without distortion making them ideal for live or recording close-
miking of all types of drums and percussion instruments. They are also
accurate for use in sonic reproduction of brass, woodwind and other
instruments producing high sound fields.
FEATURES
• Cardioid pattern allows close miking to minimize bleed-through from other
drums or stage instruments.
• Neodymium element delivers maximum output.
• Up to 140dB SPL handling capacity for distortion free reproduction of
even the loudest drums.
• Transformerless moving-coil dynamic design for enhanced bass and fast
transient response.
• All metal construction for maximum reliability.
• Special rubber shockmount mic holder minimizes floor vibration pick-up.
• Incredibly small, low-profile design for minimum visibility and close
miking placement around the drum kit.
• Gold plated XLR connectors for maximum conductivity.
• Full frequency response for sonic punch with exceptional clarity.
SPECIFICATIONS
Type
Dynamic, neodymium cartridge
Directional Pattern
Unidirectional Cardioid
Frequency Response
Snare-Tom Mic CMST1:
70Hz to 15kHz
Bass Drum Mic CMBD1:
30Hz to 15kHz
Sensitivity
(@1kHz, 74dB SPL)
Snare-Tom Mic CMST1:
-73dB, ± 3dB
Bass Drum Mic CMBD1:
-72dB, ± 3dB
Impedance
Snare-Tom Mic CMST1:
600Ω
Bass Drum Mic CMBD1:
250Ω
Maximum SPL (@1%THD)
Snare-Tom Mic CMST1:
>130dB
Bass Drum Mic CMBD1:
>140dB
Dimensions & Weight
Snare-Tom Mic CMST1:
1.65” x 4.5” Wt 8.5oz
Bass Drum Mic CMBD1:
2.1” x 4.7” Wt 10.6oz
Material
Holder Mount: rubber, plastic with brass insert.
Ballscreen: steel mesh
Gold-plated XLR contacts
GETTING STARTED QUICKLY
If you are like most people, you probably want to get started right away.
Great! In order to get started, you will need your new CM30D mics and
XLR Mic Cables. You will also need a microphone stand to hold your
CM30D mics. Carvin recommends our MS line of stands (MS11, MS13,
MS15). Other equipment needed is your mixer (sound system or record-
ing system).
1. With the mixer power off, plug the CM30D mics into your mixer using bal-
anced XLR cables.
2. Please see the other side of this manual for suggested Mic Placement. Each
mic can be mounted on a mic stand with the built-in mount. Depending on
the threading of your mic stand, you many need to remove the inner
threaded adapter. Use a large flat screwdriver or coin to assist you.
3. Once the mics have been placed into position, you can turn the mixer ON
(make sure all volume, gain knobs, or faders on your mixer are turned OFF).
4. Bring the channel volume or fader up to 0 dB.
5. Play each drum individually and turn the mixer’s gain up on each channel
and stop just before the signal peaks. This should be done at the loudest
volume you will perform at. Check for transients that can cause the signal
to peak and adjust your gain up or down as needed. It might be a good idea
to do a second signal check while playing the entire kit. Drummers can
tend to play louder during a song with other band members playing along.
6. With the signal levels set, adjust any EQ that might be needed.
7. You are now ready to use your new CM30D mics.
CHECK LIST OF PARTS
Included with your CM30D is:
• One CMBD1 Bass drum mic with extended low-end response.
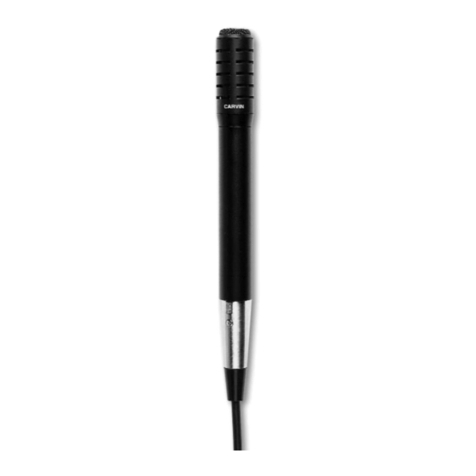
• Two CMST1 Snare-Tom mics for close-miking snares, toms,
percussion, brass and woodwinds.
• One molded carry case with internal padding
TYPICAL POLAR PATTERNS
Cardioid — rotationally symmetrical about microphone axis, uniform with frequency
12340 World Trade Drive, San Diego, CA 92128
(800) 854-2235
www.carvin.com
CMBD1
CMST1
CMST1
Floor Tom Snare
Tom Tom
cutaway view of
Tom Tom so snare
mic placement can
be seen behind
use condenser
mics for overhead
cymbal pickup.
cutaway view of
front Bass drum
head. Place mic
inside drum using
front port.
MIC PLACEMENT
Ask any studio or live sound engineer and they’ll have their own preference on how to
mic a drum kit. There are numerous ways to close-mic, distance-mic or stereo-mic a
drum kit. The drum kit and drummer can also be a large factor in how it will sound.
The one hard rule is “whatever works for you is correct”.
For beginners here is a quick overview on how to close-mic a drum kit.
KICK (BASS) DRUM
For a tight punchy sound place the CMBD1 mic inside the drum at a distance of
approximately 1 to 6 inches from the beater head. Move the mic until the desired
sound is obtained. Placing a blanket or small pillow inside the drum is helpful to
reduce rattle and help muffle a bass drum that resonates too much.
SNARE DRUM
The CMST1 snare drum mic is placed just above the top of the head with a 2 to 6 inch
distance. Distance and angle can vary. Very thin or snappy sounding snare drums
may benefit from a mic placement with a minimum of 4 inches from the actual snare
head. If a drummer is not consistent with the attack or power in which they play their
snare, a compressor is extremely helpful to provide a constant level for recording and
helps smooth out transient signals that could cause clipping or distortion.
TOM TOMS
Tom Tom drums can have CMST1 mics placed just above the drum head. Pan the Tom
Toms slightly in the mix for a stereo effect. For Tom Tom drums that have top as well
as bottom heads, be sure to tune both heads for optimum performance. A loose bot-
tom floor Tom Tom head can create unwanted low frequency resonance that is unde-
sirable for both live and recording purposes.
OVERHEADS (CYMBAL MICS)
The CM30D mics are intended for miking drums. Carvin also makes Condenser mics
that are ideal for miking cymbals. The CM90E is ideal for overhead placement of crash,
splash and ride cymbals. It is also excellent for hi-hat use. Some engineers also use a
pair of these mics for placement over the entire kit to add the sound of distant mics to
the mix. Be aware that other instruments in the same room can bleed through into the
overhead mics. Other high-end condenser mics available from Carvin are CM87S and
CM98ST. These two mics are primarily used as studio vocal mics but can also be used
for recording percussion.
One final note. Always try to accommodate the drummer. If the drummer is likely to
smack the mics while playing or if the mic stand is in the way, move them into a better
position. Perfect mic placement must also include a set-up that will allow the drummer
to play comfortably.
CMBD1
CMST1
CMST1
CM90E
CM90E
CM90E

This manual suits for next models

2

Other CARVIN Microphone manuals

CARVIN CM50 User manual

CARVIN

CARVIN CM50 User manual

CARVIN D42-D44 User manual

CARVIN

CARVIN D42-D44 User manual

CARVIN CM98ST User manual

CARVIN

CARVIN CM98ST User manual

CARVIN CM87S User manual

CARVIN

CARVIN CM87S User manual

CARVIN CM68 User manual

CARVIN

CARVIN CM68 User manual

CARVIN CM90E Instruction Manual

CARVIN

CARVIN CM90E Instruction Manual

CARVIN CTM User manual

CARVIN

CARVIN CTM User manual

CARVIN CM67 User manual

CARVIN

CARVIN CM67 User manual

CARVIN EM900 User manual

CARVIN

CARVIN EM900 User manual

CARVIN PM1000 User manual

CARVIN

CARVIN PM1000 User manual

Popular Microphone manuals by other brands

Bona VIKING M302 / Lightning user manual

Bona

Bona VIKING M302 / Lightning user manual

Audio Technica AT4050ST Feature overview

Audio Technica

Audio Technica AT4050ST Feature overview

Soundelux E47 user manual

Soundelux

Soundelux E47 user manual

Baldwin Boxall BVRD series installation instructions

Baldwin Boxall

Baldwin Boxall BVRD series installation instructions

Boya BY-XM6-S1 user manual

Boya

Boya BY-XM6-S1 user manual

ETC VS-61 installation guide

ETC

ETC VS-61 installation guide

RCF MC4040 user manual

RCF

RCF MC4040 user manual

Electro-Voice PolarChoice Desktop Series quick start guide

Electro-Voice

Electro-Voice PolarChoice Desktop Series quick start guide

Sony ECM-221 Service manual

Sony

Sony ECM-221 Service manual

DPA 5100 user manual

DPA

DPA 5100 user manual

Cochlear CP900 Series quick guide

Cochlear

Cochlear CP900 Series quick guide

Polycom PowerMic Installation

Polycom

Polycom PowerMic Installation

PROAIM BMP-40R Assembly manual

PROAIM

PROAIM BMP-40R Assembly manual

DPA DPA 4017 user manual

DPA

DPA DPA 4017 user manual

Sennheiser XS WIRELESS 2 quick guide

Sennheiser

Sennheiser XS WIRELESS 2 quick guide

B&G electronics DUAL-VOX LTC-07 Installation and operation manual

B&G electronics

B&G electronics DUAL-VOX LTC-07 Installation and operation manual

JTS FGM-170T quick start guide

JTS

JTS FGM-170T quick start guide

TONOR TW822 instruction manual

TONOR

TONOR TW822 instruction manual

manuals.online logo
manuals.online logoBrands
  • About & Mission
  • Contact us
  • Privacy Policy
  • Terms and Conditions

Copyright 2025 Manuals.Online. All Rights Reserved.