Casella Apex2 User manual

FIELD GUIDE for Apex2™
Personal Sampling Pump
This field guide is to familiarise you and get you started with the Apex2
TM
Personal Air
Sampling Pump range. We recommend that to get the best from your purchase, you refer to
the full handbook which can be downloaded from the support section of our website;
www.casellasolutions.com. The Airwave™ App for your mobile device can also be
downloaded from our website.
The Apex2™ Personal Sampling Pump is available in one of three models with the following
functionality.

Charging the Apex2™
Docking Stations are used to support both battery charging and USB data downloading (in
Plus and Pro Models). The single way docking station is powered from a PC18 12 volt mains
power adapter, the five way version uses a PC28 adapter.
Please note that in the five-way docking station only the first ‘pocket’ can be used for USB
download of run data and is indicated by the symbol
Charging commences when an Apex2 is placed in the docking
station, the pumps display will show a battery charging icon plus the
batteries percentage state of charge. The display may blank after the
user selected display timeout period however the red LED will flash
continuously during the entire charging cycle. Pressing the power
button will ‘wake’ the display such that the charging progress can
be checked. Once fully charged, a solid Blue LED will be shown.
Typical charge time from empty to full is approximately 6 hours. Shorter charge times will
result in a reduced pro-rata run time.
USB to P.C
for Download
To 12V Power
Adapter

Switching the Apex2 On and Off
To switch the Apex2™ on, press the on/off key . At power up, the pump will display the
start-up screens followed by the Stop mode screens detailing the last run data.
To power off the Apex2 from any screen when the pump is not running, press and hold the
key for 3 seconds. Countdown screens will be displayed:-
Key Lock Modes
The Apex2 can be set to operate in Partial Lock or Fully Locked modes:
Whilst pressing and holding the Up <
> key, press the
enter key <
> 3 times in quick succession to toggle
between the different ‘LOCK’ options.
Partial lock is identified by the open padlock and may be
activated in both Run or Stop modes. In the partial Lock
mode the wearer may only start or stop a sampling run but
cannot access other menus or functions. The wearer is
prevented from resetting values or changing the flow rate.
Full lock mode can only be activated once the pump is
already sampling in a run mode and is identified by a closed
padlock icon. In Full lock mode the keypad is fully de-
activated until it is unlocked again. The wearer cannot stop
the pump.

Warning Messages
The following warning messages are displayed at power up, if relevant. Any key press
clears the message.
The following error messages may be displayed for other faults during normal sampling
applications:-
The Dashboard Display Screens
The Run or Stop Mode ‘dashboard’ displays show data
from either the previous or the current run. The screen
title bars are colour coded; red for ‘stopped’ and green
for when the pump is running. They detail:
•Battery Life, either % or estimated hours (in Plus &
Pro)
•Back Pressure
•Motion %
•Flow rate
•Volume
•Elapsed Duration of run
Blockage Retry: If the pump cannot maintain the target
flow rate within 5% for more than 20 seconds (due to
say a kinked tube or inlet blockage) then it will
automatically halt sampling. After one minute the pump
will attempt to re-start. If the specified number of
attempts to retry is unsuccessful, the pump will
terminate the current sampling run.

The Main Menu
To access the main menu press the Down key <> once from a Stop mode screen. Once in
the menu use the <> <> to scroll through the options and <
> to accept the selected
option.
Stopping and Pausing a Sampling Run
This option will ‘Start’ the pump
run at the specified flow rate.
The ‘Reset’ option clears
accumulated sample volume and
duration data to zero in preparation
for a new Run.
Specify the target flow rate using the <
> <
>
keys and press <
> to accept
To perform a single point calibration, attach a sampling
head and flow tube or other flow-measuring device to
the pump’s inlet nozzle then select the Calibrate option
to accurately set the flow, adjust the flow using the
<> <> keys.
To Stop or Pause a sampling run press and
hold the Enter key <
> for the duration of the
countdown screens. To exit the STOP
operation release the Enter <
> key any time
during the countdown.

Timers (Plus and Pro Models Only)
To use the timers, ensure ‘Advanced mode’ has been activated within the power up
‘Settings’ menu.
Run Duration Timer
(Plus and Pro Models)
Programmable ‘Sequence’ Timer
(Pro Models Only)
The programmable ‘sequence’ timer enables up to 9 ‘on’ and ‘off’ events to be set in
sequence; for instance a daily or weekly timer setup may be defined such that sampling will
pause during a workers breaks or lunch time etc. After activating the sequence timer, the
pump will go to sleep until the next sample ‘on’ time and day has been reached. Timer
sequence is defined within the power-up ‘Settings’ menu.
TWA (Time Weighted Average) Mode
(Pro Models Only)
The Run Duration timer allows the pump to
sample for a fixed period and switch off
automatically when that time has elapsed.
(Plus and Pro Models)
Time weighted average (TWA) mode allows the pump to sample for a fixed proportion of time
over a specified total run time. The instrument calculates the required ON/OFF cycle to
automatically spread the required sample exposure time evenly over the entire run time. In
this example, the pump will run for 1 minute and stop for 1 minute, this will continue for 8
hours.

Power-Up Configuration Menu
To access the Settings menus, press and hold the Up <> and Enter <
> keys
immediately following power up.
Scroll through the items until the desired function is highlighted and accept with the Enter <
> key. Use the scroll keys <> and <> again within the function to choose the desired
option and confirm with the Enter <
> key.
The information screen displays the pumps serial
number and firmware revision.
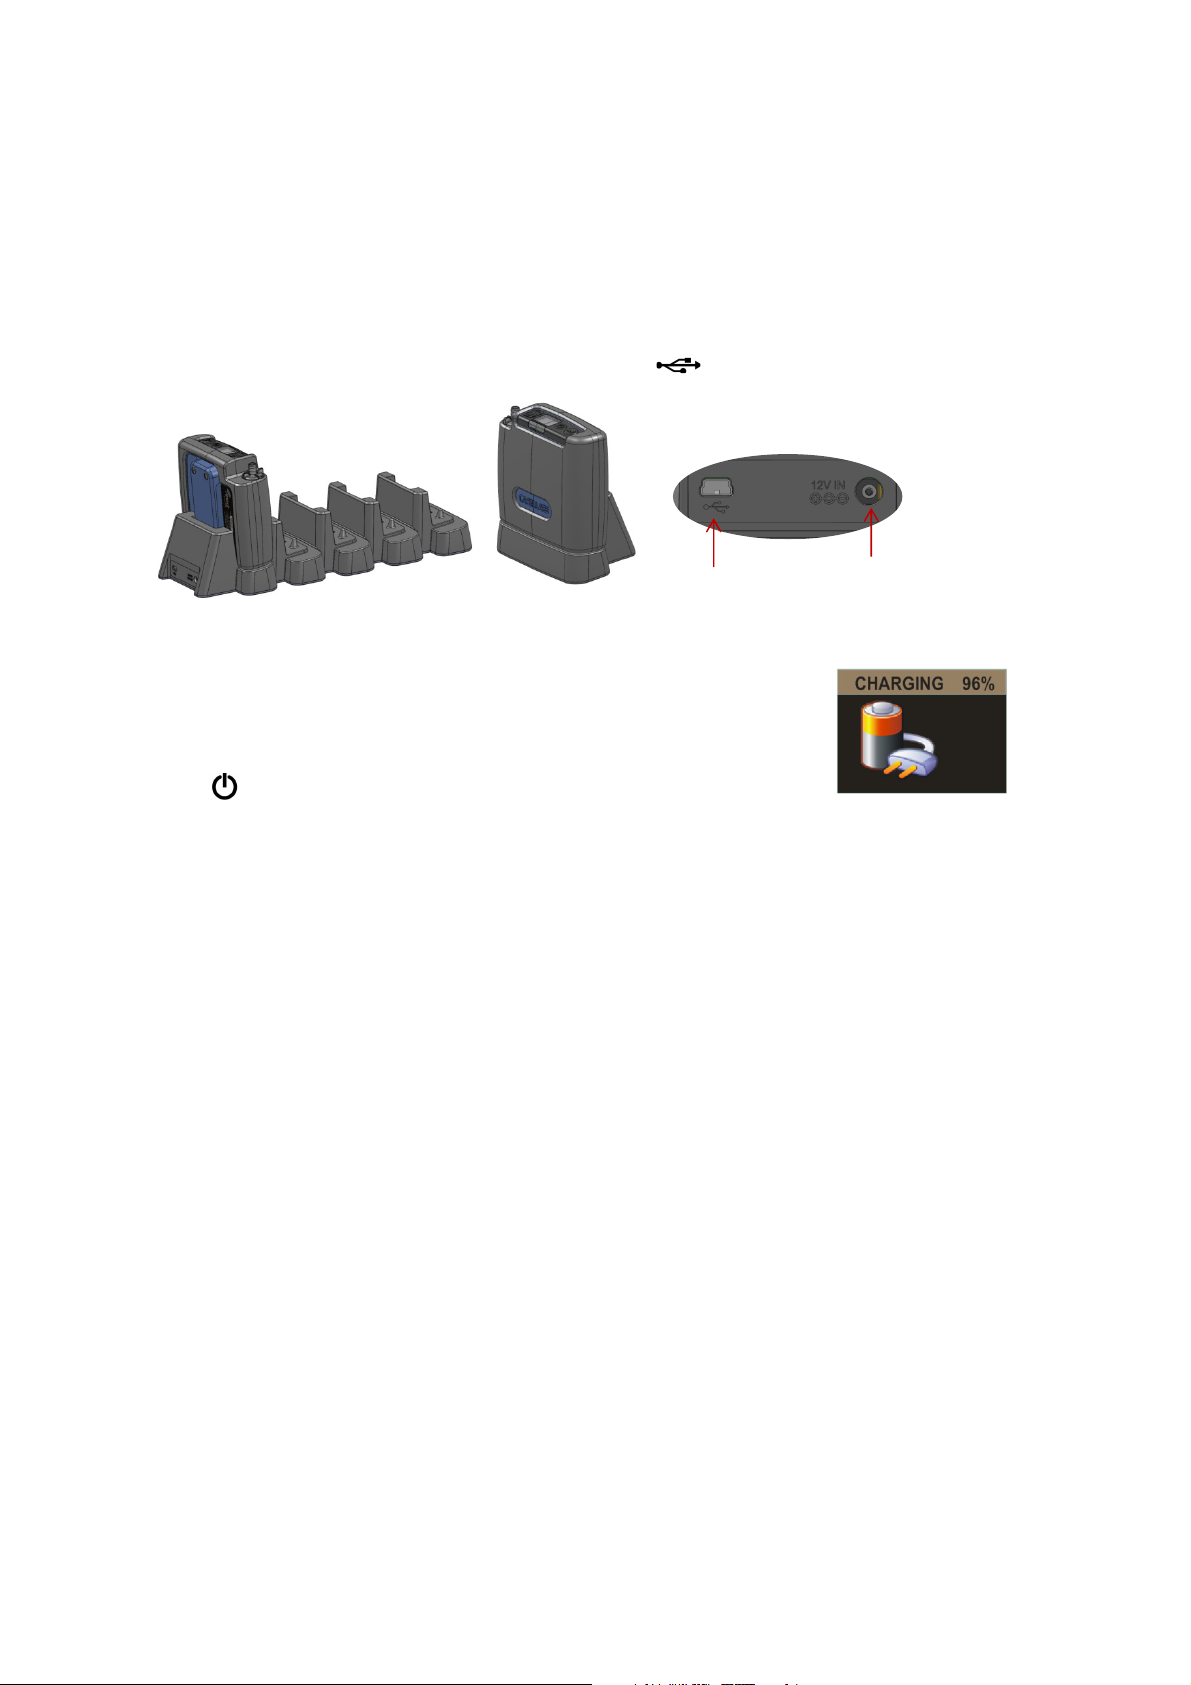
To maximise battery run time it is recommended that
the display is blanked during the sample run. The
Display timeout option specifies how long the display
remains visible. Press any key to wake the display
In application environments sensitive to Radio
transmissions (Medical, Military etc. The Bluetooth
radio maybe fully disabled.
For maximum simplicity, operate the pump with
Advanced mode off. Advanced mode enables
additional menus providing access to the Timer modes
and TWA functionality.
Select the displayed units for Temperature and
inlet Pressure measurements.

App for your mobile device
The Airwave™ App can be downloaded from www.casellasolutions.com for your Android
mobile device. Ensure the Bluetooth® is enabled on the pump. Tap the icon on
your mobile device to open the App.
The dashboard shows the operating status
plus the vital measurement results from all
the instruments in range. The dashboard
provides a condensed ‘snap shot’ of the
instrument’s vital measurement data and
status.
From the Dashboard view, ‘tap’ a specific instrument to
initiate a direct connection with that instrument.
Whilst connected to an instrument a comprehensive set
of measurement results will be displayed.
To Start and Stop an Instrument, touch and hold the
appropriate icon in the lower part of the mobile device’s
display for 3 seconds.
The MENU contains a number of options to
facilitate the convenient transfer of the
measurement results via the device’s email or
clipboard services.
Email run data alongside photos and notes
direct to your laptop.

Data Download Utility
This downloads run data from the Apex2 into an Excel compatible format to allow you to
collate data for your reports. Place your Apex2 in the docking station in the pocket with the
symbol.
The Download Utility can be found on our website at:
http://www.casellasolutions.com/support/software
Maintenance
Service
Casella’s in house service department offers a comprehensive range of repair and
calibration services designed to maintain a fast and efficient back-up for all our products.
The Service Department is operated under the scope of our BSI registration for products
manufactured by us. We will however, undertake the repair of other manufacturer’s
equipment.
For further information please contact our service department at our UK headquarters
salessupport@casellasolutions.com or via approved servicing distributors. We will be happy
to provide quotations for individual repairs or provide annual maintenance under contract.
Make sure the battery pack never stays in a
fully discharged condition for extended
durations.
Do not operate without an inlet filter. Ingested
dirt and dust particles may cause internal
damage, malfunction or erratic flow.
Replace the inlet filters regularly.
Keep the instrument body clean

Casella Contact Details:-
UK: info@casellasolutions.com
USA: info@casellaUSA.com
China: info@casellasolutions.cn
India: Casella[email protected]
For more information or to find out more about Casella and our products, please visit our
website at:
http://www.casellasolutions.com
Apex2 Field Guide
FG66-00.05 English
June 2015
Other manuals for Apex2
2
This manual suits for next models
2
Other Casella Water Pump manuals
Popular Water Pump manuals by other brands

Gecko
Gecko Aqua-Flo Therma-Flo Enviro-Heat Series owner's manual

Borger
Borger Classic FL Series operating manual

Graco
Graco Dyna-Star 224912 instructions

EHEIM
EHEIM compactON 2100 operating instructions

SPIDO
SPIDO JC-800-P2 Original operating instructions

DentalEZ
DentalEZ RAMVAC Bulldog Maintenance instructions

Simer
Simer OD6601G Series owner's manual

Pentair
Pentair JUNG PUMPEN MULTICUT 08/2 ME/1 instruction manual

Franklin Electric
Franklin Electric Little Giant BPLA Series manual

Grundfos
Grundfos SP Series Installation and operation guide

Dover
Dover Wilden Original Series Engineering, operation & maintenance

Raider
Raider RD-WP18 Original instruction manual