2397-2
WORLD TIME
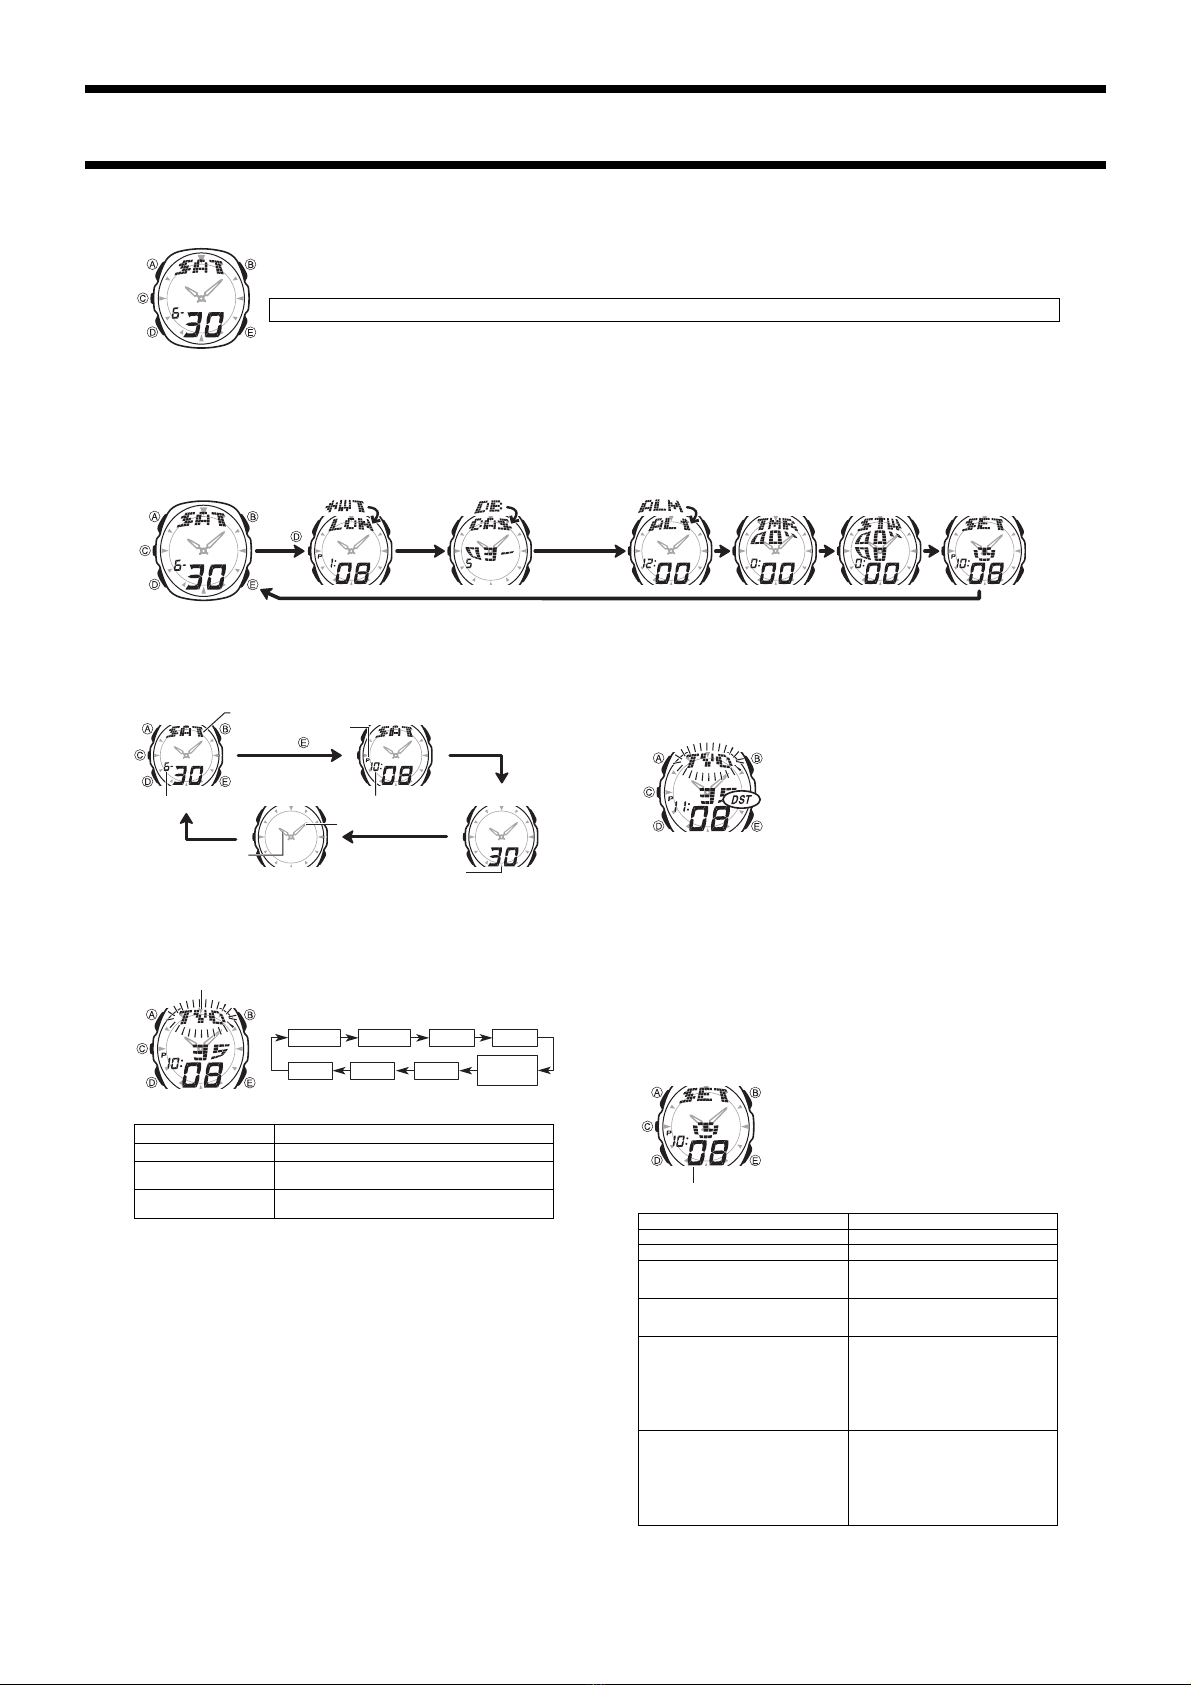
World Time shows the current time in 27 cities (29 time zones) around the world.
•All of the operations in this section are performed in the World Time Mode, which
you enter by pressing D.
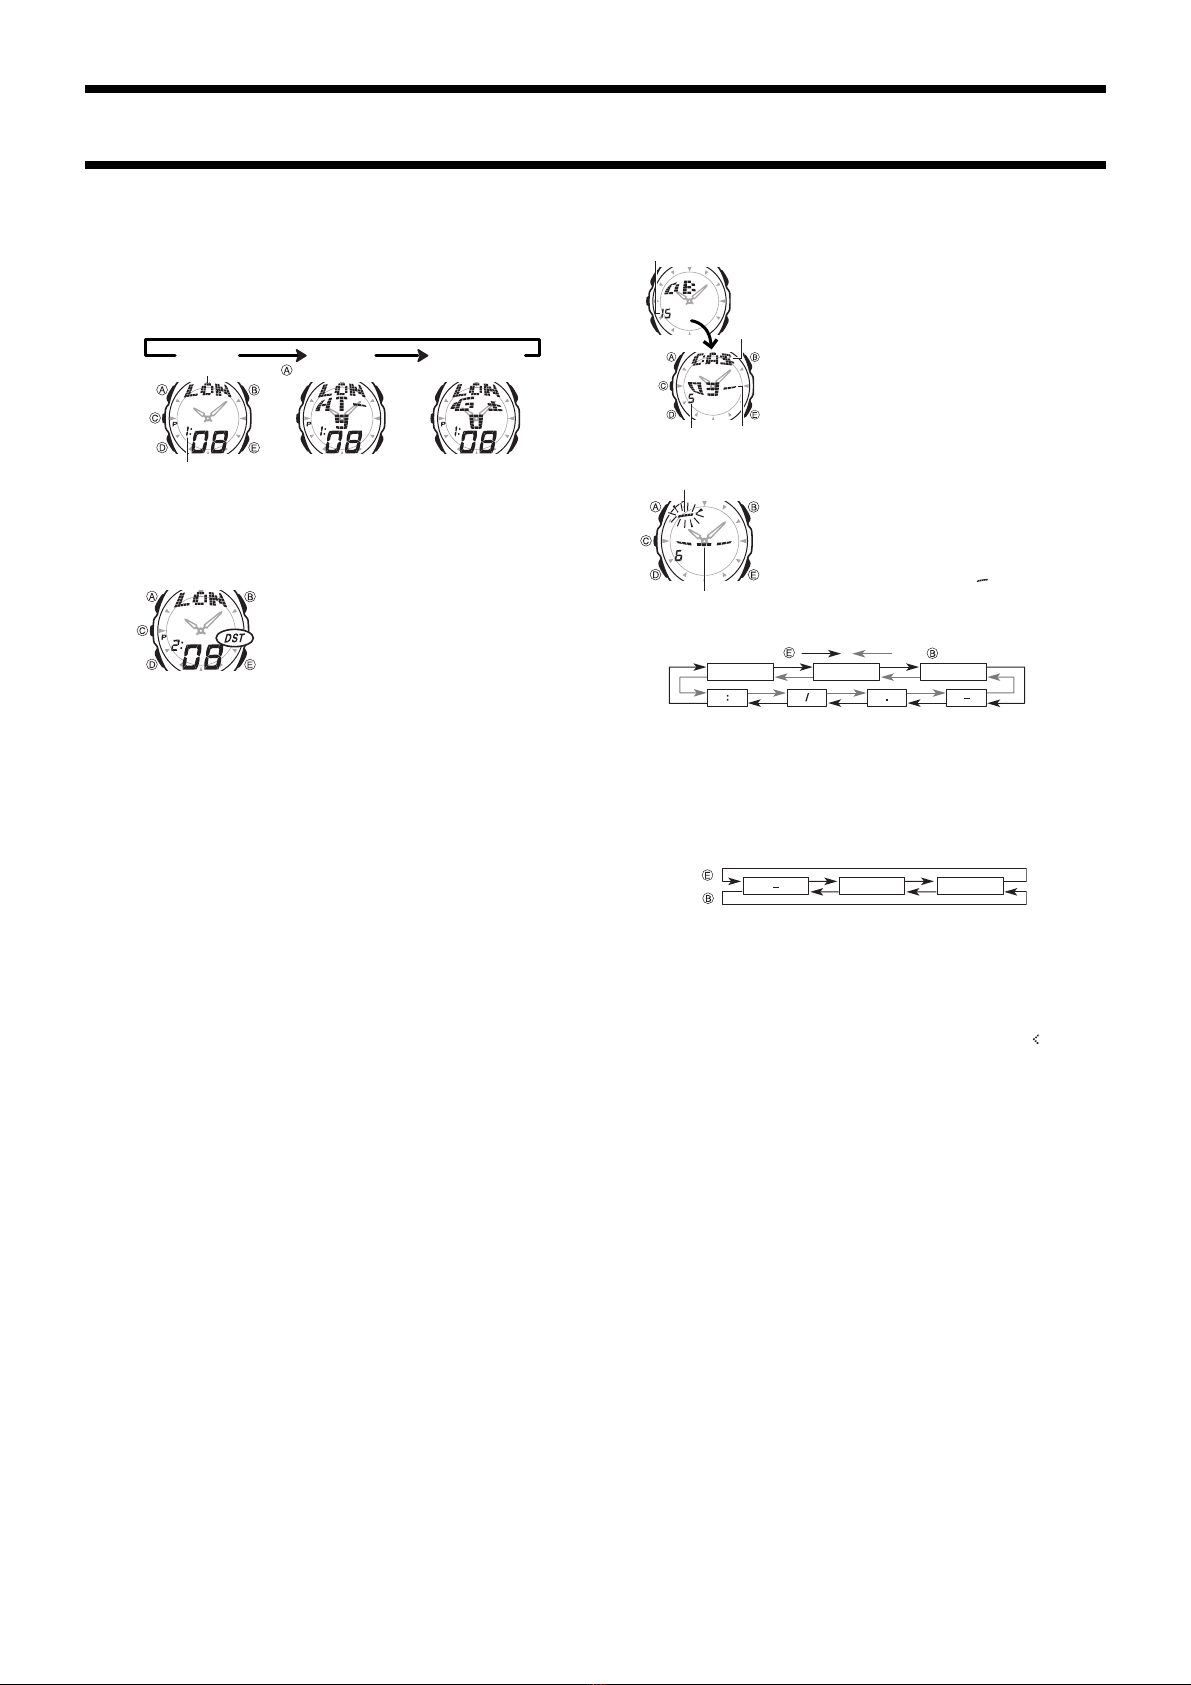
To view the time in another city code
In the World Time Mode, press Eto scroll forward through the city codes. Pressing
Acycles through the three screens shown below for the currently selected city code.
Current time in the zone of the selected city code
City code Home Time
Differential GMT Differential
City code
Press .
•The Home Time Differential indicates time difference between the selected city and
your Timekeeping Mode Home City time, and the GMT Differential indicates time
difference between the selected city and GMT (Greenwich Mean Time).
•For full information about city codes, see the “CITY CODE TABLE”.
•If the current time shown for a city is wrong, check your Timekeeping Mode time and
Home City code settings and make the necessary changes.
To toggle a city code time between standard time and Daylight Saving Time
1. In the World Time Mode, press Eto display the city
code whose standard time/Daylight Saving Time setting
you want to change.
2. Hold down Afor about two seconds to toggle Daylight
Saving Time (DST displayed) and standard time (DST
not displayed).
•The DST indicator is on the display whenever you
display a city code for which Daylight Saving Time is
turned on.
•Note that the DST/Standard Time setting affects only the currently displayed city
code. Other city codes are not affected.
•Note that you cannot switch between standard time and Daylight Saving Time while
GMT is selected as the city code.
Changing Your Home City
Use the World Time Mode to change the city code of your Home City, when you travel
to another time zone. Performing this operation automatically changes the
Timekeeping Mode time and date settings in accordance with the city code you select.
To change the city code of your Home City
Example: When you plan to take a trip from Tokyo (your Home City) to London.
1. In the World Time Mode, display the city code for the city you want to make your
Home City (LON, in this example).
2. Hold down Cfor about one second, until the city code starts to change on the
display. Note that it takes a number of seconds before the city code change
operation (from LON to TYO) is completed by the watch.
•Changing the Home City setting causes the analog hands of the watch to adjust
automatically to the time of the city code you selected in step 1 (London).
•Each time you hold down Cfor about one second at this point toggles the
displayed World Time city code between TYO (indicating LON is the Home City) and
LON (indicating TYO is the Home City).
•Note that you cannot display the Home Time differential screen (by pressing A)
while the analog hands are moving.
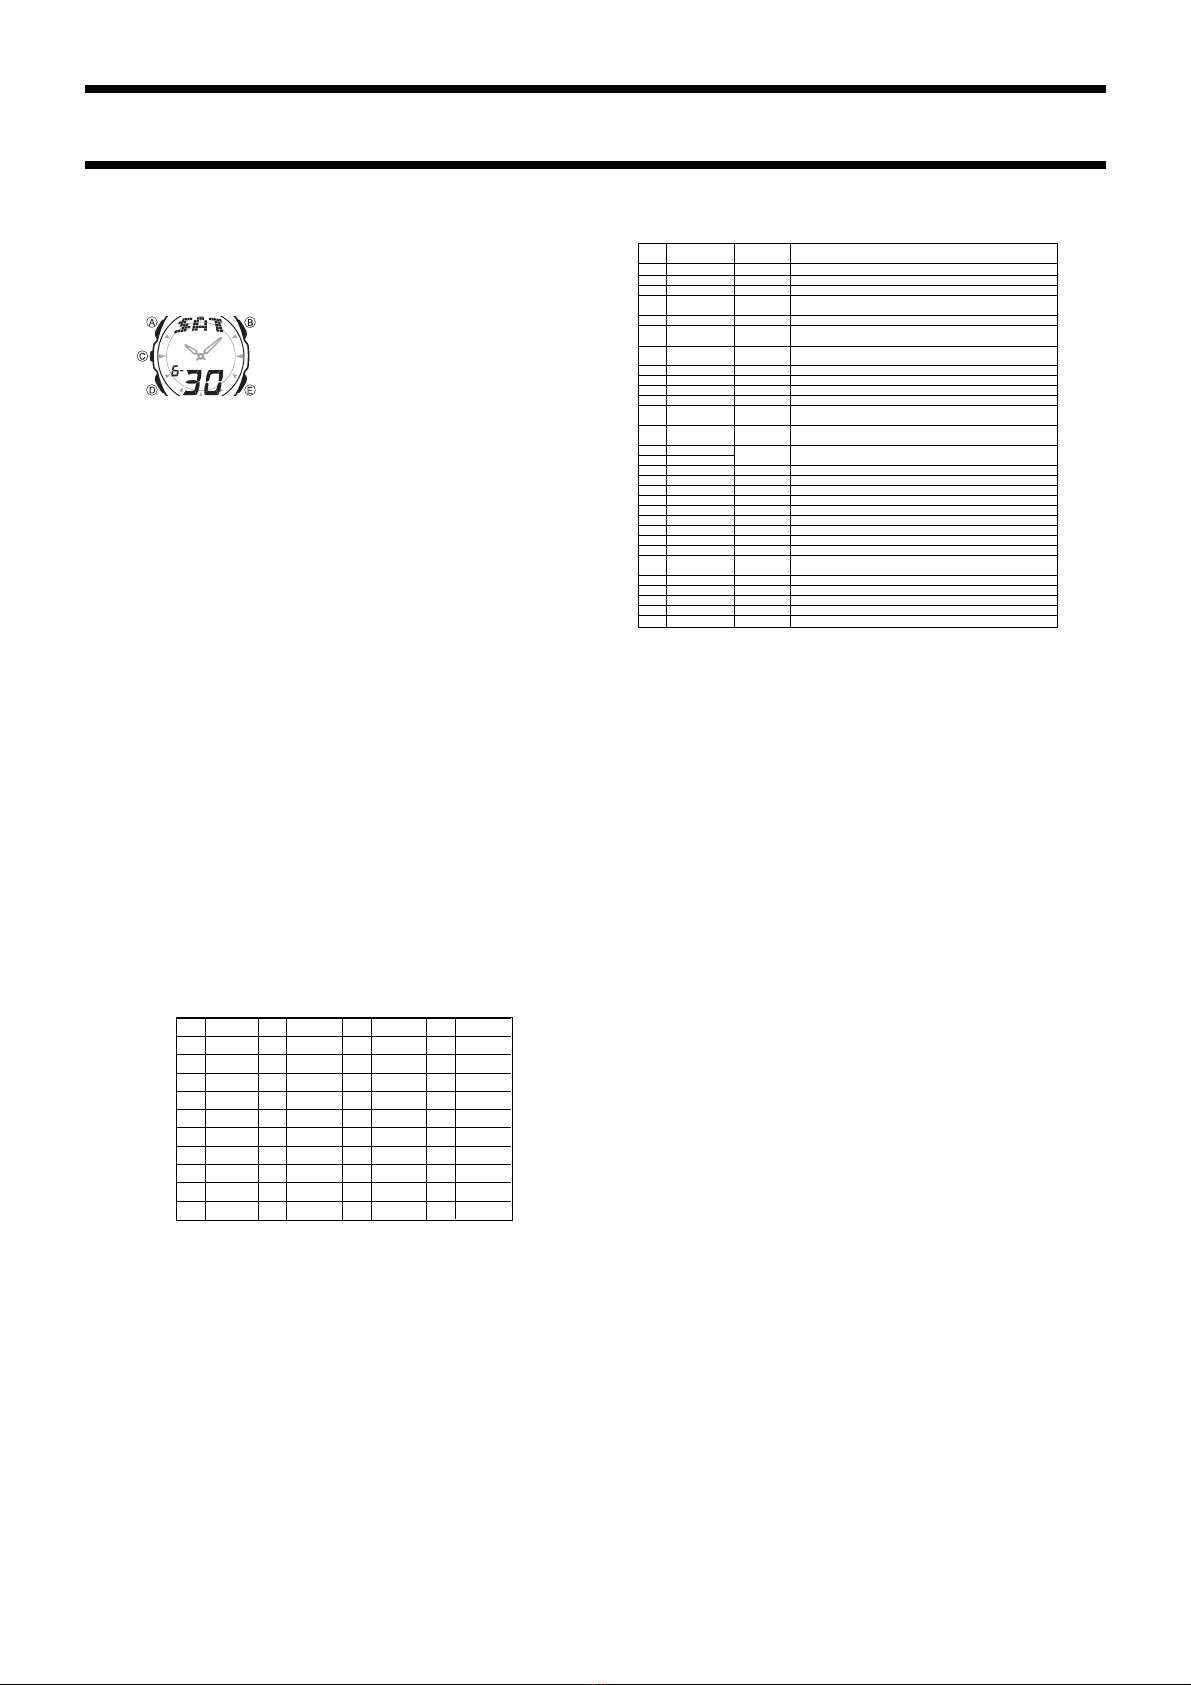
DATA BANK MODE
The Data Bank Mode lets you store up to 20 records,
each containing name and telephone number data.
Records are automatically sorted based on the characters
of the name. You can recall records by scrolling through
them on the display.
•See “CHARACTER LIST” for details on how the watch
sorts records.
•The watch comes with the names OFFICE, HOME, and
FAMILY pre-programmed in the Data Bank Mode. You
can use these names as they are, or you edit or delete
them, if you want.
•All of the operations in this section are performed in the
Data Bank Mode, which you enter by pressing D.
To create a new Data Bank record
1. In the Data Bank Mode, press Euntil the new data
screen appears.
•The new data screen is the one that is blank (contains
no name and telephone number).
•If the message FUL appears on the display, it means
that memory is full. To store another record, you will
first have to delete some of the records stored in
memory.
2. Hold down Auntil the flashing cursor ( ) appears in
the name area of the display, which indicates the
setting screen.
3. Use Eand Bto change the character at the cursor position in the name area.
The character changes in the following sequence.
(space) Ato Z0to 9
Press . Press .
4. When the character you want is at the cursor position, press Dto move the cursor
to the right.
5. Repeat steps 3 and 4 until the name is complete.
•You can input up to eight characters for the name.
6. After you input the name, press Das many times as necessary to move the cursor
to the number area.
•When the cursor is located at the eighth space of the name area, moving the
cursor to the right causes it to jump to the first digit of the number. When the
cursor is at the 12th digit of the number, moving it to the right (by pressing D)
causes it to jump to the first character in the name.
7. Use Eand Bto change the character (hyphen, number, or space) at the cursor
position in the number area. The character changes in the following sequence.
Press .
Press . 0to 9(space)
8. When the character you want is at the cursor position, press Dto move the cursor
to the right.
9. Repeat steps 7 and 8 until you complete number input.
•You can input up to 12 digits for the number.
10. Press Ato store your data and return to the Data Bank record screen (without
the cursor).
•When you press Ato store data, the message SORT appears on the display for a
while, indicating that data is being sorted. After the sort operation is complete, the
Data Bank record screen appears.
•When the name or telephone number has more than three characters, it scrolls from
right to left on the display. The end of the name data is indicated by the symbol .
•Pressing Cpauses the right-to-left scrolling of the name or telephone number.
Press Cagain to resume scrolling.
To recall Data Bank records
In the Data Bank Mode, press E(+) to scroll through Data Bank records on the
display.
To edit a Data Bank record
1. In the Data Bank Mode, scroll through the records and display the one you want to
edit.
2. Hold down Auntil the flashing cursor appears on the display.
3. Use Dto move the flashing to the character you want to change.
4. Use Eand Bto change the character.
•For details on inputting characters, see “To create a new Data Bank record” (step
3 for name input and 7 for number input).
5. After making the changes that you want, press Ato store them and return to the
Data Bank record screen.
To delete a Data Bank record
1. In the Data Bank Mode, scroll through the records and display the one you want to
delete.
2. Hold down Auntil the flashing cursor appears on the display.
3. Press Band Eat the same time to delete the record.
•The message CLEAR appears to indicate that the record is being deleted. After
the record is deleted, the cursor appears on the display, ready for input.
4. Input data or press Ato return to the Data Bank record screen.
Name
Record
number
Te lephone
number
Remaining memory


 User manual")