Catapult VECTOR T7 User manual

VECTOR T7
QUICK START
GUIDE
www.catapultsports.com

32www.catapultsports.com www.catapultsports.com
T7 DEVICE
TURNING DEVICES ON
Press & hold the Power Button for 3 seconds. The status indicators on the front of the device illuminate when the tag is turned on.
The battery status indicator will illuminate either white or red based on the current charge level of the battery.
BATTERY STATUS
•Solid White - Power on and more than 30% battery remaining
•Solid Red - Power on and and less than 30% battery remaining
•Flashing Red - Low power and less than 10% battery remaining
TURNING THE DEVICES OFF
Press & hold Power Button for 3 seconds. No status indicators on the device will be illuminated.
The device turns off automatically when placed in the dock while the dock is turned on.
DEVICE PLACEMENT DURING SESSION
The device should be worn with LED’S at top and Catapult logo at the bottom when placed in either vest or waist pouch.
UWB WIRELESS STATUS
•Solid Orange - Device connected to a receiver
•Flashing Orange - Device searching for a receiver
Battery Status Indicator
Device ID
UWB Wireless Status Indicator
Docking Pins
Power Button
Bottom
Top

54www.catapultsports.com www.catapultsports.comwww.catapultsports.com
T7 DOCK CHARGING DEVICES
Insert each device into a slot in the dock. Connect the dock to a power source using the power adapter provided. The battery status indicator on the device will
illuminate red when it is charging, and green when it is fully charged. Devices will not charge when the dock is running on battery
CHARGING THE DOCK
To charge the Dock, connect the power adapter provided. The battery status indicator on the dock will illuminate red when the dock is charging, and green
when it is fully charged
POWER ON
The “Power On” state for the T7 Dock is it’s primary state. In this state, the Dock has full functionality.
To turn on the T7 Dock either insert the power cord or press the Power Button. The power button will illuminate white when in “power on” mode.
STANDBY
The “Standby” state is a low power mode where the Dock has limited functionality, but can still charge the connected T7 devices and the dock itself. This is the
primary alternative state for the Dock.
To put the dock into “Standby”, press the power button once. The dock will also automatically go into “Standby” when it is left idle using battery for 20 minutes.
The Power Button will illuminate orange when in “Standby” mode.
POWER OFF
The ‘Off’ state is a complete system shutdown, where all processors are powered down and the dock retains no functionality. This state would be principally
used for long term storage.
To power the dock off fully, press and hold the power button until it begins to lash.
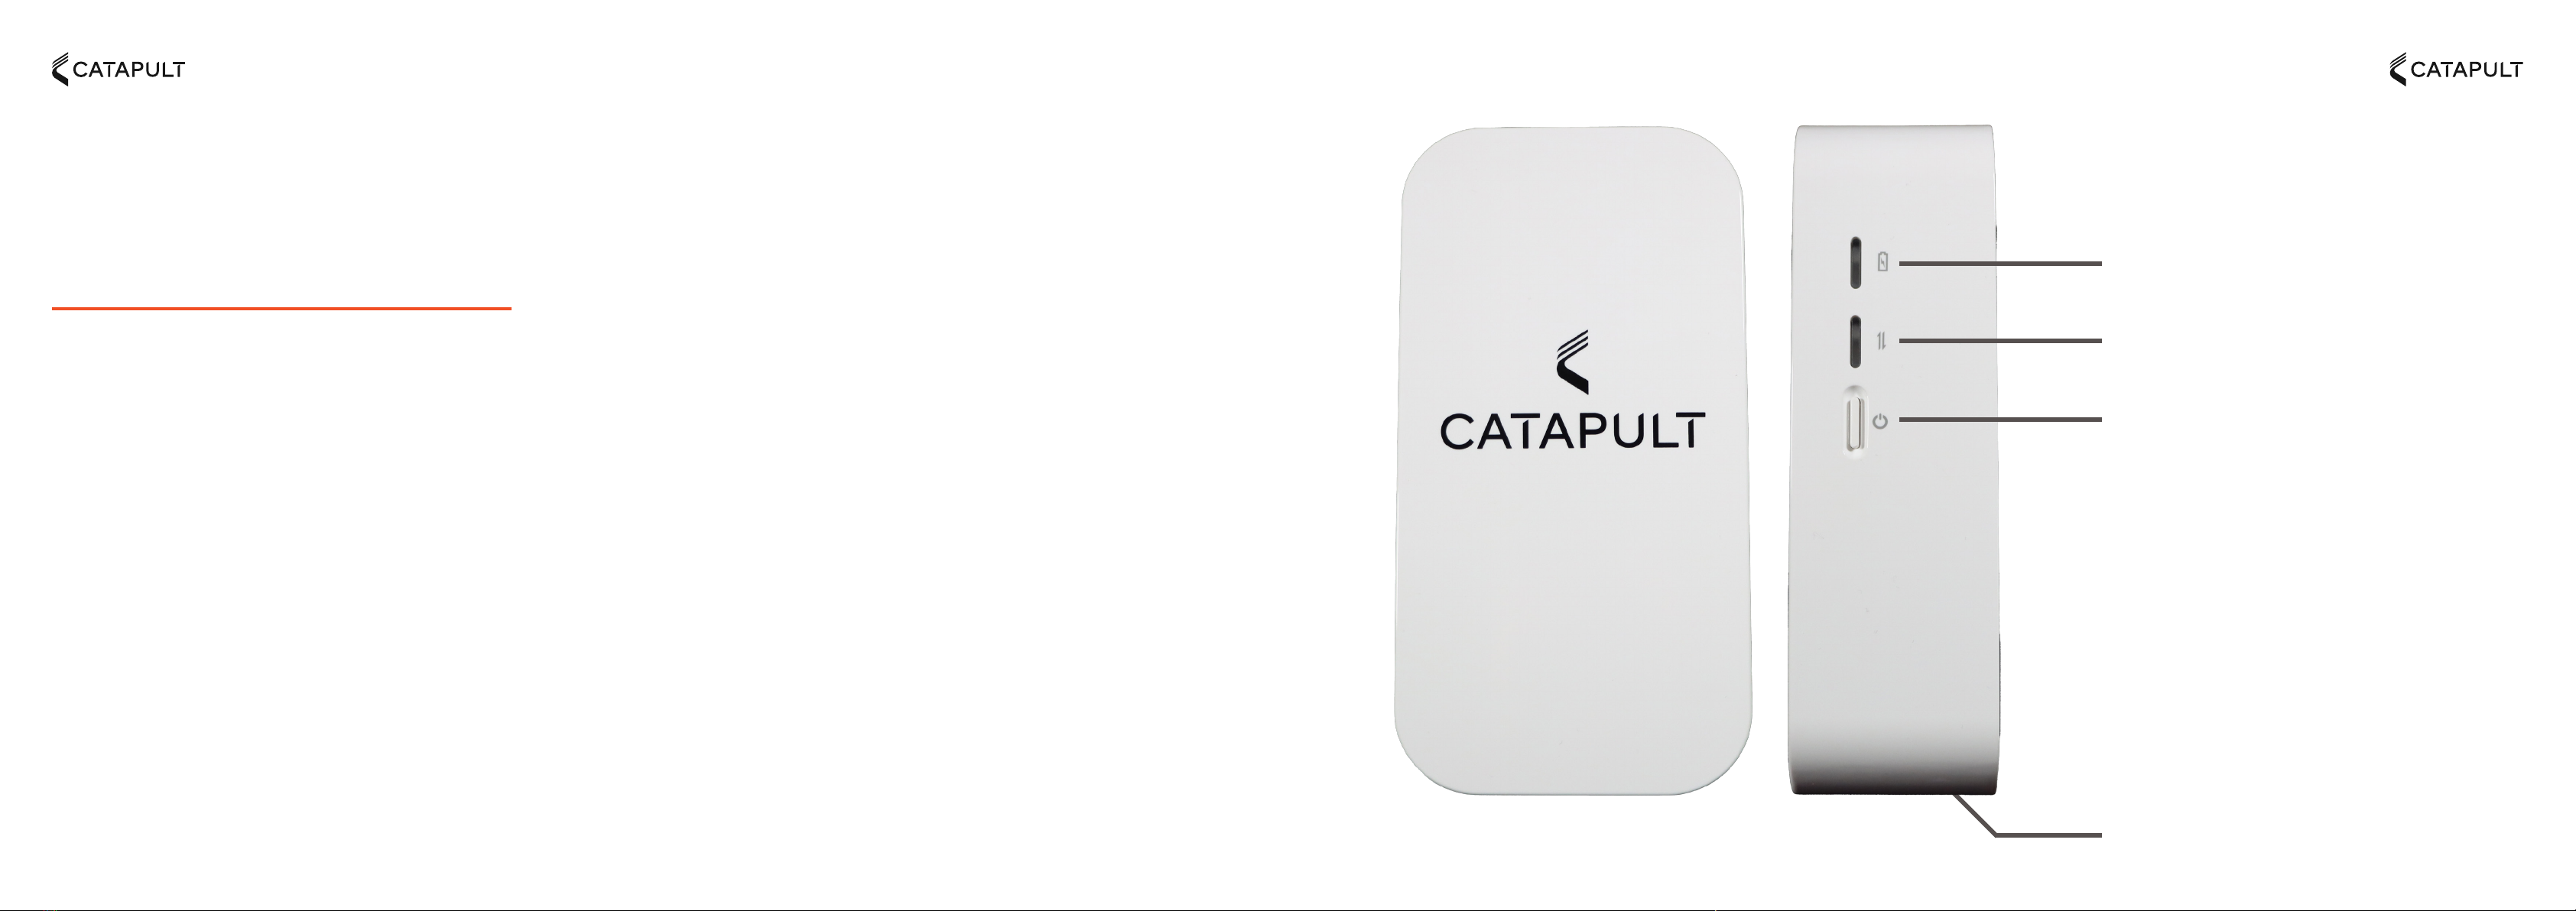
1. Power input
2. USB-C Connection
3. WiFi Indicator
4. USB Connection Indicator
5. Battery Indicator
6. Power Button
7. Device Slot
1 2 3 4 5 6
7

76www.catapultsports.com www.catapultsports.com
USB Connection
T7 RECEIVER
TURNING THE RECEIVER ON
Press and hold the power button until status indicators lash green. The battery indicator will be solid when fully powered on. If the battery indicator is red, the
receiver battery is running low and charging is advised.
TURNING THE RECEIVER OFF
Press and hold the power button until the indicator lights turn off, then release.
CHARGING THE RECEIVER
Connect the receiver to a power source using the USB-C cable and adapter provided. The receiver will not charge via PC and must be connected to main power.
CONNECTING THE RECEIVER TO PC
To connect using WiFi, turn the receiver on and choose the receiver’s name from the list of available WiFi networks on the PC. The security key can be found on
the back of the receiver. When the receiver is connected to the devices, the network indicator lashes blue.
A receiver can also be connected directly to a PC using the USB-C cable provided.
Battery Indicator
Network Indicator
Power Button

98www.catapultsports.com www.catapultsports.com 9www.catapultsports.com
T7 INERTIAL DATA
CAPTURING INERTIAL DATA
1. Ensure the devices are fully charged.
2. Ensure the Receiver is charged.
3. Mount the Receiver to a tripod and connect the Receiver to the PC.
4. In OpenField, ensure there is intermittent seaweed (i.e. orange bars next to the ‘play’ symbol) lowing to conirm the Receiver connection.
5. Map devices to athletes in OpenField.
6. Start a new activity. Ensure the Device Type selected is Inertial (No Position Data).
7. Turn T7 devices on and distribute to assigned athletes. Ensure the Catapult Logo is at the bottom and facing out, relative to the Athlete’s back.

1110www.catapultsports.com www.catapultsports.com
CLEARSKY
CAPTURING CLEARSKY DATA IN A LIVE ENVIRONMENT
1. Ensure the Devices are fully charged.
2. Ensure all Stadium Anchors are Powered.
3. Connect the Master Stadium Anchors to the PC. The method to connect to the Master Stadium Anchors of a ClearSky system will be discussed by the
Catapult Representative who installed the system.
4. In OpenField, ensure there is intermittent seaweed lowing to conirm the Stadium Anchors connection.
5. Map Devices to Athletes in OpenField.
6. Start a new activity. Ensure the Device Type selected is LPS (Clearsky).
7. Turn T7 devices on and distribute to assigned athletes. Ensure the Catapult Logo is at the bottom and facing out, relative to the athlete’s back.
11www.catapultsports.com
10www.catapultsports.com

www.catapultsports.com
UNLEASH
POTENTIAL
Table of contents