10
4
Starting up
YOUR FIRST STEP
123
Connect AC adapter
Turn on power
Attach pulse sensor
Insert start card
Turn on power and attach pulse sensor
• Insert the DC connector of the AC adaptor into the AC adapter inlet at
the rear of the exerciser.
• Insert the AC plug of the AC adaptor into any household AC outlet
(120V).
• Turn on power switch. The control unit should display “WELCOME”
message and prompt you to attach the pulse sensor and to either insert
the data card or to press ADV button.
• Attachthe pulse sensorto your eitherearlobe. When itis coldandthe blood
circulation at the earlobe is not active, massage the earlobe for a while.
Caution Do not use any AC adaptor other than the one supplied with
the Model EC-5000.
Insert the start card (yellow card provided)
• Find the yellow card (start card) in the packaging of the exerciser. Insert
this card into the slot of the control unit (card inlet). If the card is re-
versed, the unit will not work. Be sure to insert as shown in the drawing.
Caution Use only the yellow card at this stage. It is a sample card
with the exercise data already registered in it. The unit will not work
with the black cards since they do not contain any data yet. Refer to
page 32 regarding how to make your own data card.
1
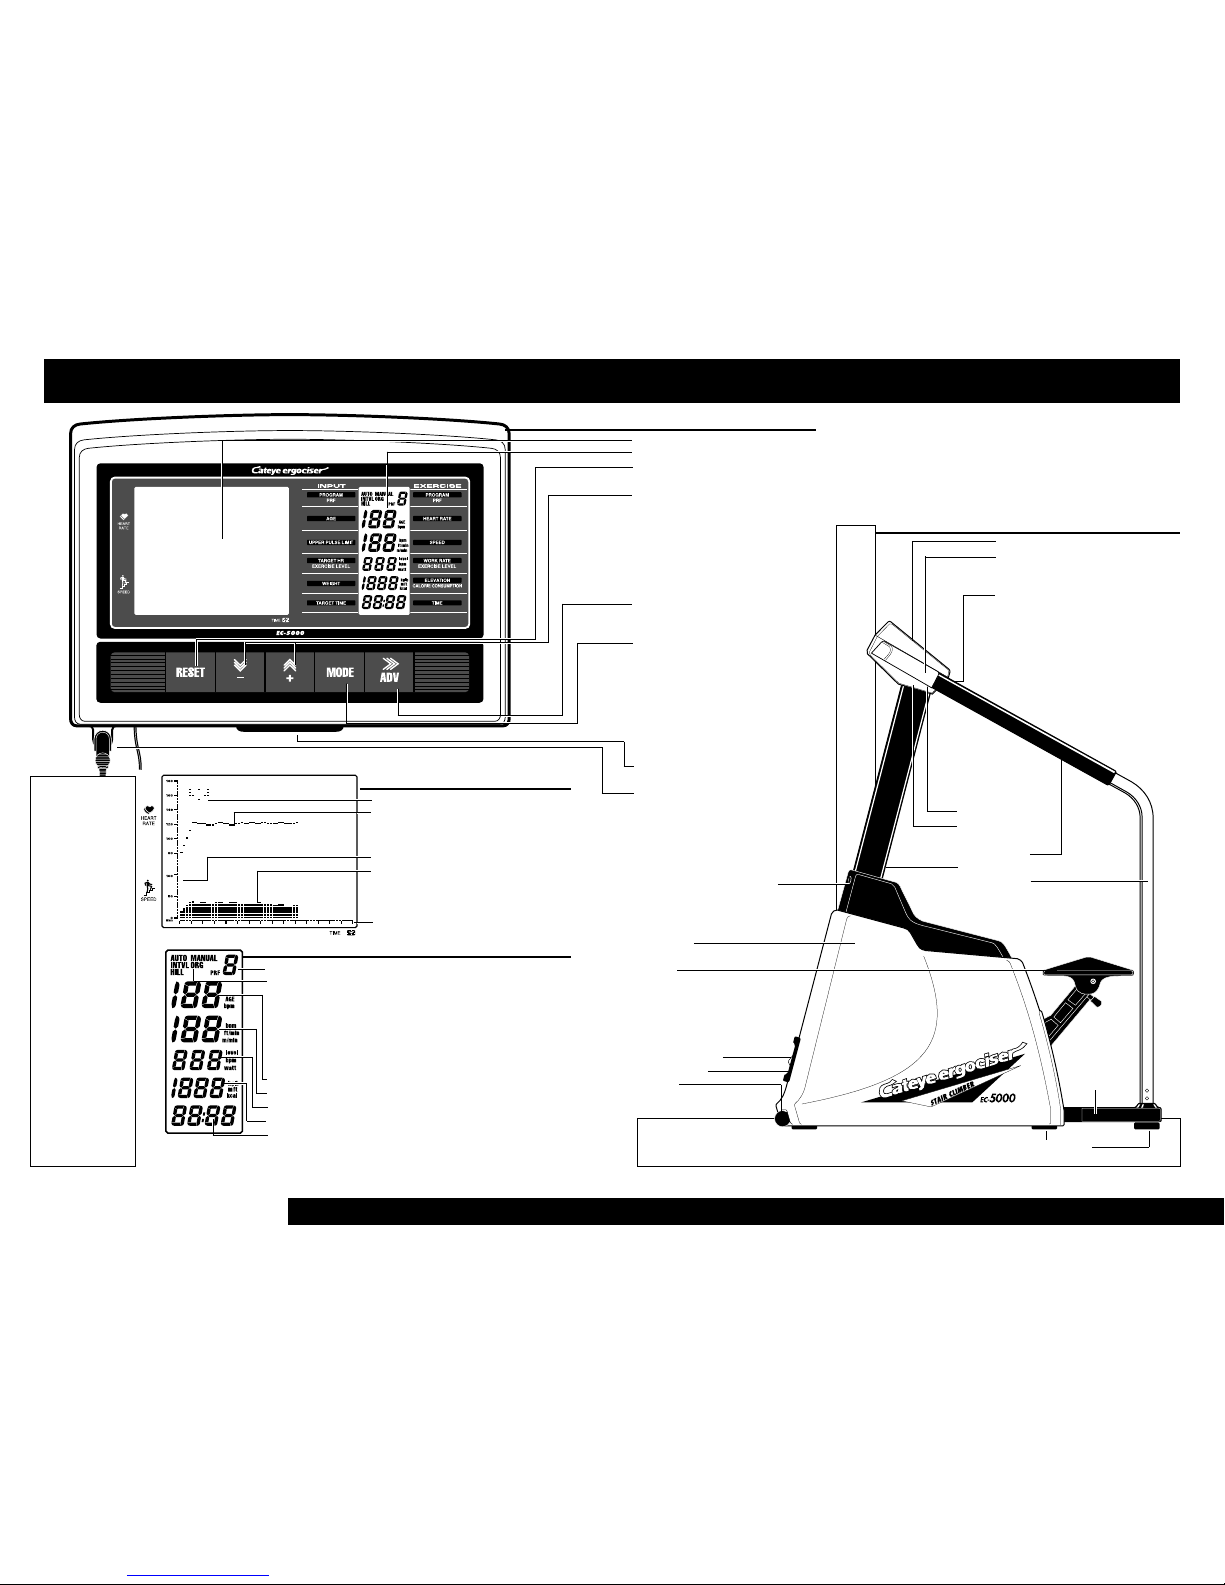
Shifting items to adjust
Adjusting numerical values
AC adapter inlet
power switch
card inlet
Review displays on the
screens
2
3
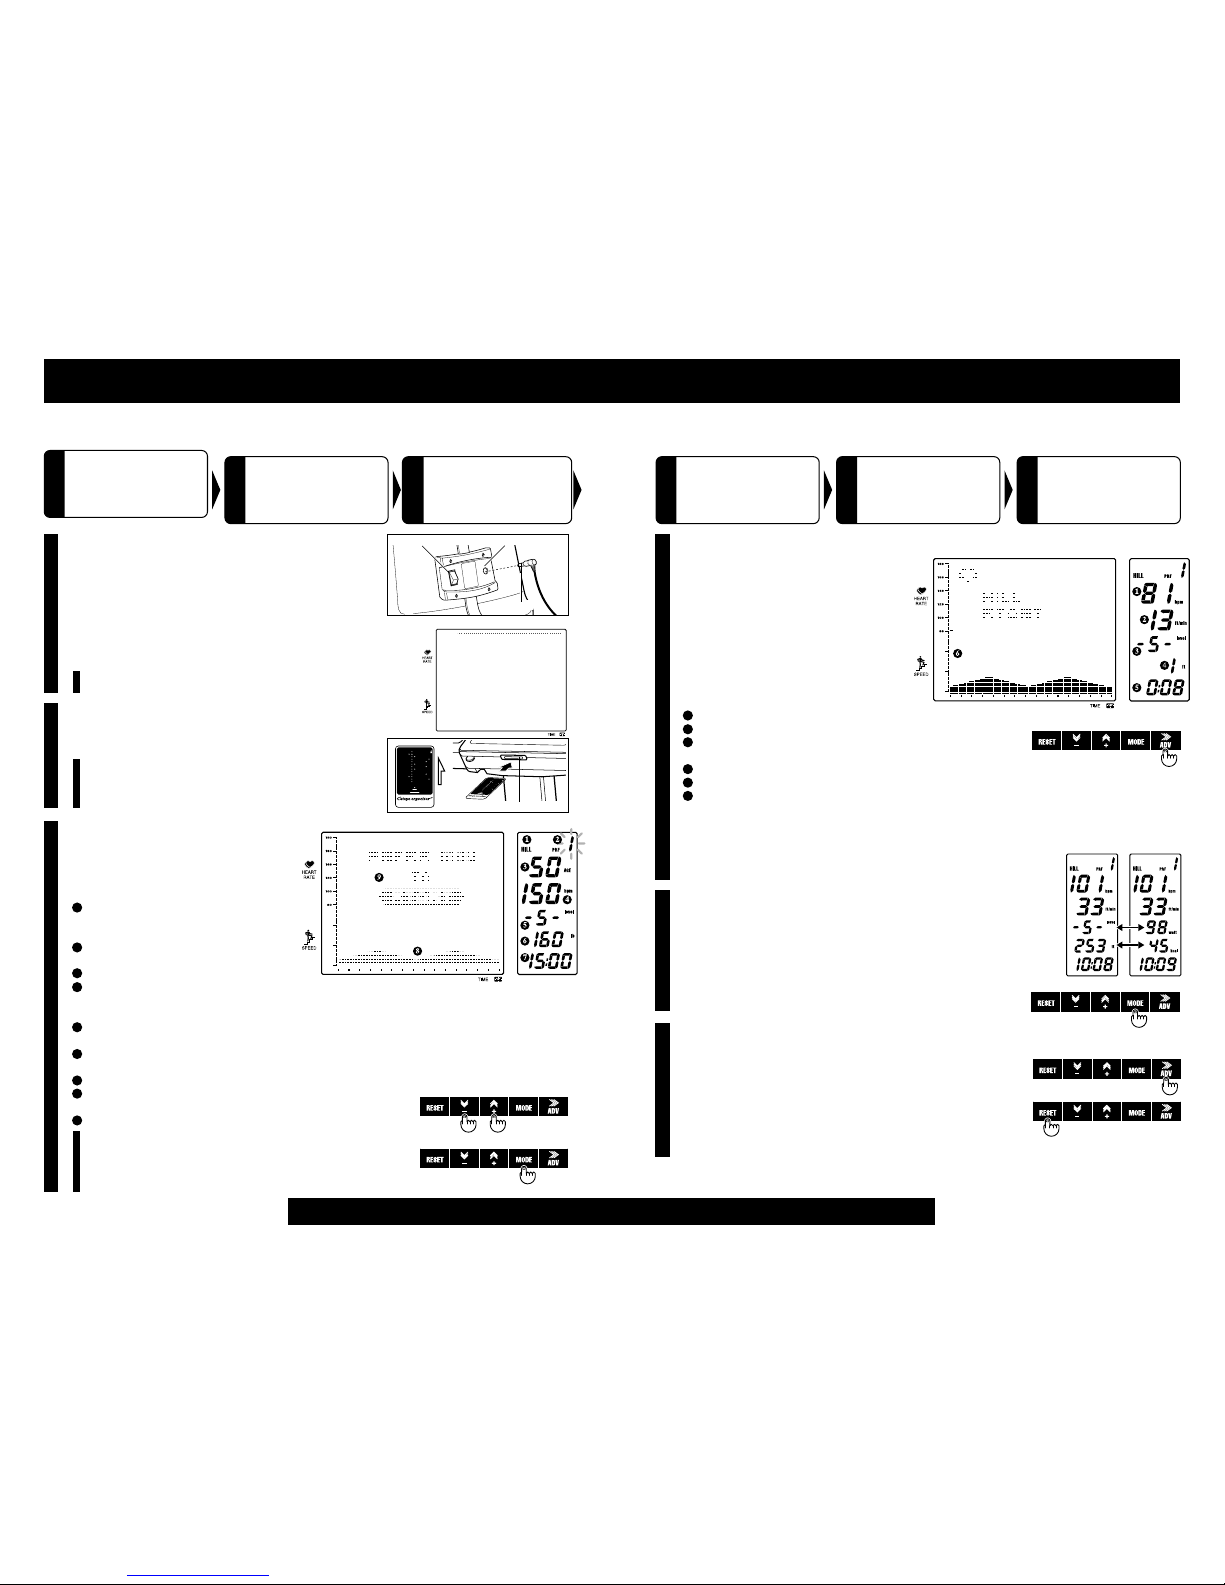
Checking the screen display
• The graph screen prompts you to press ADV button,
and the numeric screen should be as in the drawing. If
these displays do not appear, pull the card out and
slowly insert it again. The numbers in the display rep-
resent training conditions.
1"HILL" which is short for "hill profile training"
shows the type of training to be engaged in. The
pedal speed will automatically change according to
the hill shape.
2"1" indicates the shape of the hill to be climbed.
"1" is the gentlest slope.
3The figure "50" shows the Age.
4"150" is the upper pulse rate limit, automatically set by the machine (200 –
age). If this pulse rate is exceeded while training, an alarm will sound and
the pedal speed will become the minimum.
5“-5-” (level) means the exercise intensity. 5 is standard, and it’s adjustable from
1 (easiest) to 9 (hardest). The difference from one level to the next is about 6%.
6160 is for body weight in pounds. This value is used in the calculation of
calorie consumption.
7Exercise time is shown by "15:00", which means 15 minutes.
8The lower part of the graph screen shows the changes of pedal speed in this
program.
9The upper part of the graph screen shows the message for next procedure.
Remark The data on the screen can be revised at this stage. For instance,
the + – buttons will raise or lower any of the above numbers. The MODE
button will shift the items to adjust. However, the purpose of this section is
to get you acquainted with EC-5000, so if you change any of the numerical
values, please return them to their original setting.
DC connector
start card
11
4
Press MODE button
(Switching displays)
456
Press ADV button
(Start of the exercise)
Start stepping
Press ADV button
(Finishing the exercise)
Press RESET button
(End of entire program)
Press ADV button to start
• Press ADV button.
• A short buzzer beeps, and the message as “HILL
START” blinks several seconds on the graph screen,
to announce the start of a Hill Profile training.
• Start stepping slowly. As time goes on, the descending
speed of the pedal will gradually become faster. Begin
stepping the other pedal before one pedal goes all the
way down.
• The numeric and graph screens will show such data as
in the drawing. The numbers on this screen represent
your current condition, which will keep changing with
the lapse of time.
1Heartbeats per minute.
2Pedal speed represented by feet per minute.
3Exercise level at present. Adjustable by +-buttons during the session, if you
wish.
4Accumulated height (feet) you have climbed since the start of exercise.
5Elapsed time after starting the current session.
6The graph screen shows the changes of your pulse rate in the upper part,
and the pedal speed in the lower part. The dot column of the current time
frame is blinking. As time goes on, the blinking row in the graphic part will
shift one by one toward the right hand. According to the position of the
blinking row you can find how far you have progressed in the current ses-
sion. The graphic display can be recalled after the exercise, though a part of
it is once rolled out of the screen.
Calorie/Watts display
• Pushing MODE button gives you the option of viewing the work rate in watts
(how much power you are generating) and calorie consumption (kcal), instead
of exercise level and total elevation respectively.
• Just keep on pedaling for a while. As you continue, pedal speed will change,
energy expenditure will change, and your pulse rate will also change. The
Model EC-5000 lets you keep track of all such information while you exercise.
Finish of exercise
• When 15 minutes have elapsed, a buzzer will sound and the session will auto-
matically finish.
• You can also stop exercise before completing 15 minutes, by pressing ADV
button.
• The display on the screen will remain even after finishing the exercise. At this
stage, you can review the changes of pedal speed and your pulse rate through-
out the whole session.
• Press RESET button and the program completely ends, and the screen turns to
the initial state of “WELCOME” message.
Start Training
Switching display items
Finishing the exercise half way
Complete end of the program
The description up to this point is only the beginning of the Model EC-5000 Cateye
Stair Climber functions. Let us move on to an explanation of other functions.
6
5