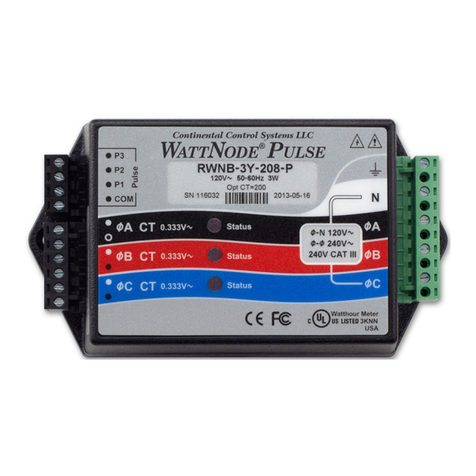
CCS WattNode Pulse Output User manual

WATTNODE
®
Pulse Output
Installation and Operation Manual
Continental Control Systems
http://www.ccontrolsys.com
Rev 1.20eUL

Information in this document is subject to change without notice. No part of this document may be
reproduced or transmitted in any form or by any means, electronic or mechanical without the prior written
permission of Continental Control Systems, LLC.
©2007 Continental Control Systems, LLC. All rights reserved.
Printed in the United States of America.
Document Number: WNP-UL-1.20
Revision Date: March 5, 2007
Continental Control Systems, LLC.
3131 Indian Rd., Suite A
Boulder, CO 80301
(303) 444-7422
FAX: (303) 444-2903
Web: http://www.ccontrolsys.com
WattNode is a registered trademark of Continental Control Systems, LLC.
FCC INFORMATION
This equipment has been tested and found to comply with the limits for a Class A digital device, pursuant
to part 15 of the FCC Rules. These limits are designed to provide reasonable protection against harmful
interference when the equipment is operated in a commercial environment. This equipment generates, uses,
and can radiate radio frequency energy and, if not installed and used in accordance with the instruction
manual, may cause harmful interference to radio communications. Operation of this equipment in a
residential area can cause harmful interference in which case the user will be required to correct the
interference at his own expense.

Contents 1
Contents
OVERVIEW................................................................................................................. 2
WattNode .................................................................................................................................................... 2
Current Transformers.................................................................................................................................. 2
Optoisolator Output .................................................................................................................................... 2
INSTALLATION.......................................................................................................... 2
Precautions.................................................................................................................................................. 3
Measurement Configurations...................................................................................................................... 3
Single-Phase Two-Wire ....................................................................................................................... 4
Single-Phase Three-Wire ..................................................................................................................... 5
Three-Phase Four-Wire Wye................................................................................................................ 6
Three-Phase Three-Wire Delta............................................................................................................. 7
Mounting..................................................................................................................................................... 8
Current Transformers.................................................................................................................................. 9
Approved Current Transformers .......................................................................................................... 9
Connecting Current Transformers........................................................................................................ 9
Connecting Voltage Terminals ................................................................................................................. 10
Connecting Output.................................................................................................................................... 11
Installation Summary ................................................................................................................................ 12
Installation Troubleshooting ..................................................................................................................... 13
OPERATING INSTRUCTIONS................................................................................. 15
Power and Energy Computation ............................................................................................................... 15
Scale Factors ............................................................................................................................................. 16
Specifications............................................................................................................................................ 16
Models................................................................................................................................................ 16
Current Transformers ......................................................................................................................... 16
Accuracy............................................................................................................................................. 17
Electrical............................................................................................................................................. 17
Environmental .................................................................................................................................... 17
Mechanical ......................................................................................................................................... 17
WARRANTY............................................................................................................. 18

2Overview
Overview
WattNode
Congratulations on your purchase of the WattNode®, the most compact instrumentation-grade watt/watt-
hour transducer available. Using state-of-the-art ASIC and surface mount components, the WattNode offers
precision energy and power measurements in a compact package. The WattNode enables you to make
precise power and energy measurements from within existing electric service panels avoiding the costly
installation of subpanels and associated wiring. The WattNode is designed for use in demand side
management (DSM), sub-metering, and energy monitoring applications where accuracy at reasonable cost
is essential. The WattNode outputs a stream of pulses whose frequency is proportional to the instantaneous
power and whose count is proportional to total watt-hours. Models are available for single-phase, three-
phase wye and three-phase delta configurations for voltages from 120 VAC to 600 VAC at 50 to 60 Hz.
Current Transformers
The WattNode uses either toroidal or split-core (opening) current transformers (CTs). The WattNode
requires CTs with burden resistors generating 0 – 0.333 VAC. Split-core CTs offer greater ease of
installation, because they can be installed without disconnecting the circuit being measured (although
connecting the voltage terminals on the WattNode requires that at least one circuit in the service panel be
turned off). Toroidal CTs are more compact, more accurate and less expensive, but installation requires
that the measured circuit be disconnected.
The rated current of the CTs should normally be chosen at or above the maximum current of the circuit
being measured. However, if the circuit will normally operate at some fraction of the maximum current and
greatest accuracy is desired at the normal operating power levels, then a CT rated somewhat above the
normal operating current may be a better choice. Take care that the maximum allowable current for the CT
can not be exceeded without tripping a circuit breaker or fuse (see Table 4: Scale Factors) WattNode can
measure up to 150% of rated maximum power for the chosen voltage range and CT, but accuracy will
suffer as the CT’s core begins to saturate. CTs are also nonlinear at very low power levels and may report
less than the true current.
CTs can measure lower currents than they were designed for by passing the wire through the CT more than
once. For example, to measure currents up to 1 amp with a 5 amp CT, pass the wire through the CT once,
then loop back around the outside of the CT, and pass the wire through the CT again. Repeat until the wire
passes through the CT 5 times. The CT is now effectively a 1 amp CT instead of a 5 amp CT. In general,
the current rating of the CT is divided by the number of times that the wire passes through the CT.
Optoisolator Output
The pulse output of the WattNode passes through an optoisolator to provide 2500 volts of isolation. This
allows the WattNode to be interfaced to monitoring or data logging hardware without concern about
interference, ground loops, shock hazard, etc.
The standard output frequency WattNodes (2.667Hz and 4.000Hz) produce a square-wave output with a
duty cycle very close to 50%. The higher output frequency models generate a less regular output
waveform, since variations in the measured power during a single cycle appear in the output. The medium
output frequency WattNodes (193.3Hz and 290.0 Hz) produce a varying square-wave with random
fluctuations from 25% to 75% duty cycle. The highest output frequency WattNodes (773.3Hz and 1160Hz)
produces a waveform with narrow pulses and varying pulse spacing.Installation

Overview 3
Precautions
Only qualified personnel or electricians should install the WattNode. Different versions of the WattNode
measure circuits with voltages from 120 VAC single-phase to 600 VAC three-phase. These voltages are
lethal! Always adhere to the following checklist:
1) CCS recommends that a licensed electrician install the WattNode.
2) CCS recommends that the WattNode be installed either in an electrical enclosure (panel or
junction box) or in a limited access electrical room.
3) Verify that circuit voltages and currents are within the proper range for the WattNode model.
4) Ensure that the line voltage inputs to the WattNode have either fuses or circuit breakers on each
voltage phase (not needed for the neutral wire).
5) Do not install live voltage wires into screw terminals.
6) Always connect the CTs to the WattNode before connecting the line voltages to the WattNode.
Note: in delta configurations the CT screw terminals will be at line voltage when the WattNode is
powered.
7) Do not place more than one voltage wire in a screw terminal.
8) Remember that the screw terminals are not insulated. Do not contact metal tools to the screw
terminals if the circuit is live!
9) Before turning on power to the WattNode, ensure that all the wires are securely installed by
tugging on each wire.
10) Do not install the WattNode in an environment where it may be exposed to temperatures below -
30°C or above 60°C, excessive moisture, dust or other contamination.
Measurement Configurations
Below is a list of different power measurement configurations, with connections and recommended
WattNode models. Note: Ground wires do not carry current except in the case of a malfunction of the
circuit being measured and are not used by the WattNode.
DANGER — HIGH VOLTAGE HAZARD
WARNING - THESE INSTALLATION/SERVICING INSTRUCTIONS ARE FOR USE
BY QUALIFIED PERSONNEL ONLY. TO AVOID ELECTRICAL SHOCK, DO NOT
PERFORM ANY SERVICING OTHER THAN THAT CONTAINED IN THE
OPERATING INSTRUCTIONS UNLESS YOU ARE QUALIFIED TO DO SO.

4Overview
Single-Phase Two-Wire
The single-phase two-wire 120 VAC configuration is most often seen in homes and offices. The two wires
are neutral and line. Any unused CT inputs must be shorted with an insulated jumper wire. Single-phase
two-wire circuits should be measured with models WNA-1P-240-P or WNA-3Y-208-P. If you wish to
measure a single phase two wire 220 to 240 VAC circuit, use the WNA-3Y-400-P and connect the two
wires to the neutral and phase A terminals.
Phase A
LINE
Neutral
LOAD
Current
Transformer
WHITE
BLACK
Source
Face
120 VAC
Neutral
WNA-1P-240-P
Continental Control Systems
W
ATT
N
ODE
B CT
A CT B 120 VAC
A 120 VAC
BLACK
WHITE
Shorting
Wire
Output
Figure 1: One-Phase Two-Wire Connection

Overview 5
Single-Phase Three-Wire
This is seen in residential and commercial service with 240 VAC for large appliances. The three wires are
neutral and two line voltage wires with AC waveforms 180° out of phase. This results in 120 VAC
between either line wire and neutral, and 240 VAC (or sometimes 208 VAC) between the two line wires.
Any unused CT inputs must be shorted with an insulated jumper wire. Single-phase three-wire circuits
should be measured with models WNA-1P-240-P or WNA-3Y-208-P.
Neutral
Phase A
LINE
Phase B
LOAD
Current
Transformers
WHITE
BLACK
Source
Faces
WHITE
BLACK
Neutral
Output
WNA-1P-240-P
Continental Control Systems
W
ATT
N
ODE
B CT
A CT B 120 VAC
A 120 VAC
Figure 2: One-Phase Three-Wire Connection

6Overview
Three-Phase Four-Wire Wye
This is typically seen in commercial and industrial environments. The wires are neutral and three power
lines with AC waveforms shifted 120° between the successive phases. With this configuration, the line
voltage wires may be connected to the phase A, B and C terminals in any order, so long as the CTs are
connected to matching phases. It is important, however, that you connect the neutral line correctly.
Three-phase four-wire wye circuits should be measured with the WNA-3Y-208-P (208 VAC phase to
phase and 120 VAC phase to neutral), the WNA-3Y-400-P (400 VAC phase to phase and 230 VAC phase
to neutral), the WNA-3Y-480-P (480 VAC phase to phase and 277 VAC phase to neutral), or the
WNA-3Y-600-P (600 VAC phase to phase and 347 VAC phase to neutral), depending on the line voltage.
Neutral
Phase A
LINE
Phase B
Phase C
LOAD
Current
Transformers
WHITE
BLACK
Source
Faces
WHITE
BLACK
WHITE
BLACK
Neutral
Output
WNA-3Y-xxx-P
Continental Control Systems
W
ATT
N
ODE
C CT
B CT
A CT
C VAC
B VAC
A VAC
Figure 3: Three-Phase Four-Wire Wye Connection

Overview 7
Three-Phase Three-Wire Delta
This is typically seen in manufacturing and industrial environments. There is no neutral wire, just three
power lines with AC waveforms shifted 120° between the successive phases. With this configuration, the
line voltage wires may be connected to the phase A, B and C terminals in any order, so long as the CTs are
connected to matching phases. Three-phase three-wire delta circuits should be measured with the
WNA-3D-240-P or the WNA-3D-480-P.
Phase B
LINE
Phase C
Phase A
LOAD
Current
Transformers
WHITE
BLACK
Source
Faces
WHITE
BLACK
Output
WNA-3D-xxx-P
Continental Control Systems
W
ATT
N
ODE
C CT
B CT C VAC
B VAC
A VAC
Figure 4: Three-Phase Three-Wire Delta Connection
WARNING
This configuration is dangerous because there is no neutral wire, and as a result the screw
terminals to connect the CTs will have line voltages on them whenever the WattNode is
powered. Therefore, for safety, it is critical that the WattNode is not powered while
connecting the CTs.

8Overview
Mounting
Mount the WattNode so that it is protected from moisture, direct sunlight and high temperatures. Due to its
exposed screw terminals, the WattNode should always be installed in an electrical service panel, a junction
box, or an electrical closet. The WattNode may be installed in any position.
The WattNode has two 7/32" (5.5 mm) mounting holes spaced 5" (127 mm) apart (center to center). These
mounting holes are normally obscured by the detachable screw terminals. Remove the screw terminals by
pulling outward while rocking from end to end. The WattNode or Figure 5 may be used as a template to
mark mounting hole positions, but do not drill the holes with the WattNode in the mounting position
because the drill bit or chuck may damage the plastic WattNode housing or connectors.
127 mm (5.0")
143.5 mm (5.65")
85.5 mm (3.37")
32.5 mm (1.28") High
Ø 9mm (11/32")
Ø 5.5mm (7/32")
Drawn to Scale
Figure 5: WattNode Dimensions
To protect the WattNode’s plastic case, use washers if the mounting screws could pull through the
mounting hole or damage the case. Also, take care not to over-tighten the mounting screws, as long term
stress on the case may cause cracking.

Overview 9
Current Transformers
Approved Current Transformers
The WattNode should only be used with the following UL recognized current transformers, which are
available from Continental Control Systems. Using non-approved transformers will invalidate the
WattNode’s UL listing.
Manufacturer: Magnelab Corporation
UL File Number: E96927
Approved Models:
CCS Model Number Magnelabs Part # Rated Amps Opening Diameter
CTS-0750-xxx SCT-0750-xxx 5 – 150 0.75" (19.05mm)
CTS-1250-xxx SCT-1250-xxx 70 – 600 1.25" (31.75mm)
CTS-2000-xxx SCT-2000-xxx 600 – 1500 2.00" (50.80mm)
CTT-0300-005 3712-003 5 0.30" (7.62mm)
CTT-0300-015 3825-003 15 0.30" (7.62mm)
CTT-0300-030 2697-003 30 0.30" (7.62mm)
CTT-0500-015 3826-003 15 0.50" (12.70mm)
CTT-0500-030 3827-003 30 0.50" (12.70mm)
CTT-0500-050 3828-003 50 0.50" (12.70mm)
CTT-0500-060 2749-003 60 0.50" (12.70mm)
CTT-0750-030 3829-003 30 0.75" (19.05mm)
CTT-0750-050 3830-003 50 0.75" (19.05mm)
CTT-0750-070 3831-003 70 0.75" (19.05mm)
CTT-0750-100 2685-003 100 0.75" (19.05mm)
CTT-1000-050 3832-003 50 1.00" (25.40mm)
CTT-1000-070 3833-003 70 1.00" (25.40mm)
CTT-1000-100 3834-003 100 1.00" (25.40mm)
CTT-1000-150 3835-003 150 1.00" (25.40mm)
CTT-1000-200 2750-003 200 1.00" (25.40mm)
CTT-1250-070 3836-003 70 1.25" (31.75mm)
CTT-1250-100 3837-003 100 1.25" (31.75mm)
CTT-1250-150 3838-003 150 1.25" (31.75mm)
CTT-1250-200 3839-003 200 1.25" (31.75mm)
CTT-1250-250 3840-003 250 1.25" (31.75mm)
CTT-1250-300 3841-003 300 1.25" (31.75mm)
CTT-1250-400 2686-003 400 1.25" (31.75mm)
Connecting Current Transformers
The WattNode will only work with CTs containing built in burden resistors that produce 0.333 volts output
at rated current. The use of any other CTs will result in incorrect power measurements, and may
permanently damage the WattNode. CTs with 5 amp output will destroy the WattNode and must not be
used.

10 Overview
There are two steps to connecting the current transformers: pass the wire to be measured through the CT
and connect the CT to the WattNode. Note: always remove power before disconnecting any live wires.
Split-core CTs may be mounted around a wire by opening one side of the CT, sliding the CT around the
wire, and then closing the open side of the CT. A split-core CT is opened by pulling the removable section
straight away from the rest of the CT; this may require a strong pull. To reinstall the removable portion of
the CT, check that the ends mate correctly by looking at the exposed laminated steel core on the CT body
and the removable section. When pressing the CT back together, if it seems to jam and will not close, the
steel core pieces are probably not aligned correctly. Do not force the CT, instead, reposition or rock the
removable portion until the CT closes without excessive force. After a split-core CT has been placed
around a wire, a nylon cable tie should be secured around the CT to prevent inadvertent opening.
The WattNode does not measure negative power and will instead indicate zero power. CTs are directional
and if mounted backwards or with their wires reversed the power will be negative. In an installation with
just one CT, the WattNode would output zero power. In a multiple CT installation, if one CT were
backwards and others were mounted correctly, then the reversed CT would cause the power on that phase
to be subtracted from the power measured on the other phases, resulting in a plausible, but incorrect
reading.
CTs are labeled with either a label which says “THIS SIDE TOWARD SOURCE”, or with an arrow.
Mount the CT so the label faces or the arrow points towards the current source—typically the circuit
breaker for the circuit being measured or the utility’s meter box. It is also possible to measure generated
power by treating the generator as the source.
Start by removing power from wires being measured. Toroidal CTs require that the wire be disconnected
before passing it through the opening in the CT. Put the line wires through the CTs as shown in the section
Measurement Configurations.
Next, connect the CTs to the WattNode. The CT inputs to the WattNode are sensitive to ESD (electrostatic
discharge), so you should ground yourself by touching the service panel case or some other grounded metal
object before connecting the CTs to the WattNode. Route the twisted black and white wires from the CT to
the WattNode. Any excess length may be trimmed from the wires if desired. Strip or trim the wires to
expose 1/4" (6 mm) of bare wire. Do not leave more than 5/16" (8 mm) or less than 3/16" (5 mm) of bare
wire. The current transformers connect to the black screw terminal block, and it may be easier to install the
terminal block on the WattNode before connecting the wires from the CTs. Connect each CT, with the
white wire aligned with the white dot on the label, and the black wire aligned with the black dot. Note the
order in which the phases are connected, as the voltage phases must match the current phases for accurate
power measurement. Any unused CT inputs must be shorted. You may trim short sections off the end of
the CT wires to use as jumpers. Be careful to leave insulation on the exposed portion of the jumper(s) to
prevent shock or shorting danger.
Finally record the CT full-scale current as part of the installation record for each WattNode. If the wires
being measured are passed through the CT(s) more than once, then the recorded full-scale CT current is
divided by the number of times that the wire passes through the CT.
Connecting Voltage Terminals
Always disconnect power—by shutting off circuit breaker(s) or removing fuse(s)—before connecting the
voltage lines to the WattNode. The WattNode must be connected to voltage lines which are protected
by fuses or circuit breakers. Connect each voltage phase input to a circuit breaker on the required phase.
If there is more than one circuit breaker on a phase, then any one of the circuit breakers may be used.
When installing multiple WattNodes at the same site, it may be easier to provide separate circuit breaker(s)
for the WattNodes.

Overview 11
When connecting the WattNode, do not place more than one voltage wire in a screw terminal; use separate
wire nuts or terminal blocks if needed. The screw terminals handle wire up to 12 AWG. Prepare the
voltage wires by stripping the wires to expose 1/4" (6 mm) of bare wire. Do not leave more than 5/16" (8
mm) or less than 3/16" (5 mm) of bare wire. Connect each voltage line to the light gray terminal block as
shown in the section Measurement Configurations. Double check that the voltage line phases match
the phases to which the CTs are connected. After the voltage lines have been connected, make sure both
terminal blocks are securely installed on the WattNode.
If there is any doubt that the voltage rating of the WattNode is correct for the circuit being measured, then
before applying power to the WattNode, disconnect the light gray screw terminal from the WattNode and
then turn on the power. Use a voltmeter to measure the voltage between the top two screw terminals—
labeled NEUTRAL and øA on 1P and 3Y models, and labeled øA and øB on 3D models. This voltage
should match the value in the VAC column of Table 2: Power and Energy Parameters.
The WattNode is powered from the voltage inputs: phase A to neutral, or phase A to phase B for delta
models. If the WattNode is not receiving at least 80% of the nominal line voltage, it may stop measuring
power. Since the WattNode consumes some power itself, a decision must be made about whether to place
the CTs before or after the connection for the WattNode, so as to include or exclude the WattNode’s own
power consumption (up to 3 watts).
Connecting Output
The outputs of the WattNode are the collector and emitter of an NPN optoisolator transistor whose base is
driven by the WattNode’s pulse stream. This output may be connected to most devices that expect a
contact closure input. The following schematic illustrates a possible connection to the optoisolator.
0-5V output
+5V
R
c
WattNode
+
–
Figure 6: Optoisolator Output
Under no circumstances, should the optoisolator ever be exposed to collector-emitter voltages greater than
35V, or collector-emitter currents greater than 50mA.
The value chosen for Rcdepends on the maximum pulse frequency expected from the WattNode. If power
consumption is of no concern, then a value around 1KΩwill work for all output frequencies and provide
short rise and fall times. For cases where power consumption is a concern and slow rise and fall times may
be tolerated, then the following table shows the maximum value of Rcfor various maximum pulse
frequencies.
Maximum Frequency Maximum RcRisetime to 4.0V
4.0 Hz 2.2 M Ω70 milliseconds
290 Hz 82 k Ω1.6 milliseconds
1200 Hz 4.7 k Ω100 microseconds
Table 1: Collector Resistors vs. Frequency

12 Overview
The output is completely isolated from all dangerous voltages, so it can be connected at any time. For short
distances (less than 2 meters), any pair of insulated wires are suitable for connection to the monitoring
equipment. For longer distances, a shielded twisted-pair cable is recommended to prevent interference.
Since the output wiring will be in the same location as line voltage wiring, it is recommended that the
output wiring have a 600V rating.
Installation Summary
1) Mount the WattNode.
2) Turn off power before installing toroidal CTs or making voltage connections.
3) Mount the CTs around the line wires being measured. Take care to orient the CTs correctly.
4) Connect the twisted white and black wires from the CT to the black terminal block on the
WattNode, matching the wire colors to the white and black dots on the label of the WattNode.
5) Jumper any unused CT inputs with an insulted shorting wire.
6) Connect the voltage wires to the light gray terminal block of the WattNode, and double check that
the current measurement phases match the voltage measurement phases.
7) Connect the output terminals of the WattNode to the monitoring equipment.
8) Apply power to the WattNode.

Overview 13
Installation Troubleshooting
SYMPTOM: The WattNode is reporting zero power.
Probable Causes Corrective Actions
The WattNode is not receiving the line
voltage that it needs.
First, make sure that the light gray voltage connector is firmly
seated. Then, using a voltmeter, perform the following checks.
For 1P and 3Y models measure the voltage between the
NEUTRAL and øA terminals, for 3D models measure the
voltage between the øA and øB terminals. This voltage should
be within 20% of the values listed in the VAC column of
Table 2: Power and Energy Parameters.
An unused pair of CT screw terminals
has not been jumpered with an insulated
shorting wire.
On any unused CT screw terminals, connect the white and the
black terminals (indicated by dots on the label) together with a
short insulated jumper wire. Strip both ends of the jumper wire
to expose 1/4" (5mm) of bare wire.
One or more CT may be installed
backwards.
If the CT faces towards the load or the white and black wires
have been reversed, then the power for that phase will be
negative. To verify the direction of installation, follow
PROCEDURE A below.
The voltage and CT wires may be wired
out of phase.
The best approach is to visually verify that everything is wired
correctly, but if that is not a feasible option, then follow
PROCEDURE B below.
The CT rating may be too large for the
application or the load being measured
may not be active.
If possible, verify that at least 5% of the CT’s rated current is
flowing through the CT. Follow PROCEDURE C below to
check the CTs.
The WattNode is not functioning
correctly.
If another WattNode with the same model number is installed
and working, a suspect unit may be tested by disconnecting the
screw terminals from the working unit, and plugging them into
the suspect unit. If the suspect unit works correctly, then most
likely it is the wiring to the suspect unit, and not the WattNode
that is at fault.
SYMPTOM: The WattNode is reporting an incorrect power.
Probable Causes Corrective Actions
An unused pair of CT screw terminals
has not been jumpered with an insulated
shorting wire.
On any unused CT screw terminals, connect the white and the
black terminals (indicated by dots on the label) together with a
short insulated jumper wire. Strip both ends of the jumper wire
to expose 1/4" (5mm) of bare wire.
The CTs do not all have the same full-
scale current rating.
Check the current ratings of all the CTs and ensure that they
match.
The CT full-scale current is incorrect. Recheck the CT’s full-scale current ratings. If the wire is
passed through the CT more than once, then divide the full-
scale current rating by the number of times that the wire passes
through the CT.
One or more CT may be installed
backwards.
If the CT faces towards the load or the white and black wires
have been reversed, then the power for that phase will be
negative. To verify the direction of installation, follow
PROCEDURE A below.

14 Overview
The voltage and CT wires may be wired
out of phase.
The best approach is to visually verify that everything is wired
correctly, but if that is not a feasible option, then follow
PROCEDURE B below.
The WattNode is not functioning
correctly.
If another WattNode with the same model number is installed
and working, a suspect unit may be tested by disconnecting the
screw terminals from the working unit, and plugging them into
the suspect unit. If the suspect unit works correctly, then most
likely it is the wiring, and not the WattNode that is at fault.
PROCEDURE A:
1. Either remove power from the WattNode or unplug the CT screw terminals before working with the
CT wires.
2. Check each CT in turn. Disconnect all other CTs and jumper their screw terminals with a shorting
wire.
3. Check that the power is not zero. If the power is zero, then reverse the CT wires (white to black and
black to white) and check again. If the power is still zero, then go to PROCEDURE B.
PROCEDURE B:
1. Either remove power from the WattNode or unplug the CT screw terminals before working with the
CT wires.
2. Check each CT in turn. Disconnect all other CTs and jumper their screw terminals with a shorting
wire.
3. To order the phases correctly, match each CT to the pair of screw terminals that results in the largest
power. If the reported power on a pair of screw terminals is zero, then also try reversing the CT wires.
Throughout this test, unused CT inputs must be jumpered with a shorting wire between the white and
black dots. In addition, if the power level of the load being measured is changing significantly, then
this test may not yield correct results.
PROCEDURE C:
1. Since some CTs may produce little or no output below 5% of rated current, verify that at least 5% of
the CT’s rated current is flowing through the CT. Use a clamp-on style current meter to measure the
current in the wire that passes through the CT. If a clamp-on current meter is not available, go on to
step 2.
2. Measure AC voltage across the CT wires (probe the screw terminals). If the voltage is less than 3 mV,
then a) less then 5% of the CT’s rated current is flowing, or b) the CT is defective. If the voltage is
more than 333 mV, then a) more than the CT’s rated current is flowing, b) the CT is defective, or c)
the CT is not a 333 mV output CT. If you suspect that the CT may be defective, then a clamp on
current probe may be used to verify the current flowing in the wire. If the clamp-on probe indicates
that an AC current ranging from 5% to 100% of the CT’s rated current is flowing and yet the voltage
across the CT is not in the range of 3 to 333 mV, then the CT is probably bad. As a final test, unplug
the CT screw terminals from the WattNode and measure the voltage again. If it is significantly
different, then the WattNode may be defective.

Operating Instructions 15
Operating Instructions
Power and Energy Computation
The power is a function of the pulse frequency, while the energy is a function of the count of pulses. The
variable nCTs is the maximum number of CTs that the WattNode model can use. The variable CTAmps is
the full-scale current rating of the CTs. Note: If the wires being measured are passed through the CT(s)
more than once, then the full-scale CT current is divided by the number of times that the wire passes
through the CT. VAC is the nominal phase voltage of the WattNode model. The variable PulseFreq is the
pulse frequency from the WattNode, while Pulses is the total accumulated count of pulses. FSHz is the
full-scale pulse frequency printed on the rear label of the WattNode. The values of the constant parameters
are in the following table.
WattNode Model(s) Possible FSHz Values nCTs VAC
WNA-1P-240-P 2.667, 193.3, or 773.3 Hz 2 120
WNA-3Y-208-P 4.000, 290.0, or 1160 Hz 3 120
WNA-3Y-400-P 4.000, 290.0, or 1160 Hz 3 240
WNA-3Y-480-P 4.000, 290.0, or 1160 Hz 3 277
WNA-3Y-600-P 4.000, 290.0, or 1160 Hz 3 347
WNA-3D-240-P 2.667, 193.3, or 773.3 Hz 2 240
WNA-3D-480-P 2.667, 193.3, or 773.3 Hz 2 480
Table 2: Power and Energy Parameters
Below are the equations used to compute the power and energy.
Power(W) =
Energy(WH) = nCTs · VAC · CTAmps · Pulses
nCTs · VAC · CTAmps · PulseFreq
FSHz
FSHz · 3600
The following table provides an alternate means of computing the power and/or energy being reported by a
WattNode.
WattHours per Pulse per CT Rated Amp
Full-scale Pulse
Model Frequency
2.667 or 4.0 Hz 193.3 or 290 Hz 773.3 or 1160 Hz
WNA-1P-240-P 2.500×10⁻² 3.448×10⁻⁴ 8.621×10⁻⁵
WNA-3Y-208-P 2.500×10⁻² 3.448×10⁻⁴ 8.621×10⁻⁵
WNA-3Y-400-P 5.000×10⁻² 6.897×10⁻⁴ 1.724×10⁻⁴
WNA-3Y-480-P 5.771×10⁻² 7.960×10⁻⁴ 1.990×10⁻⁴
WNA-3Y-600-P 7.229×10⁻² 9.971×10⁻⁴ 2.493×10⁻⁴
WNA-3D-240-P 5.000×10⁻² 6.897×10⁻⁴ 1.724×10⁻⁴
WNA-3D-480-P 1.000×10⁻¹ 1.379×10⁻³ 3.448×10⁻⁴
Table 3: WattHours per Pulse
Example: a WNA-3Y-208-P with 15 amp CTs and a full-scale pulse frequency of 4 Hz will output 1 pulse
for every 0.375 WattHours.
(2.500×10⁻²)•(15.0 amps)•(1 pulse) = 0.375 WattHours

16 Operating Instructions
Scale Factors
Pulses Per kilowatt-hour Watt-hours per pulse
CT Size
(amps) 1P-240
3Y-208 3D-240
3Y-400 3Y-480 3D-480 3Y-600 1P-240
3Y-208 3D-240
3Y-400 3Y-480 3D-480 3Y-600
5 8000.00 4000.00 3465.70 2000.00 2766.571 0.125 0.250 0.289 0.500 0.361
15 2666.67 1333.33 1155.24 666.667 922.190 0.375 0.750 0.866 1.500 1.084
30 1333.33 666.667 577.617 333.333 461.095 0.750 1.500 1.731 3.000 2.169
50 800.000 400.000 346.570 200.000 276.657 1.250 2.500 2.885 5.000 3.615
60 666.667 333.333 288.809 166.667 230.548 1.500 3.000 3.463 6.000 4.338
70 571.429 285.714 247.550 142.857 197.612 1.750 3.500 4.040 7.000 5.060
100 400.000 200.000 173.285 100.000 138.329 2.500 5.000 5.771 10.000 7.229
150 266.667 133.333 115.523 66.667 92.219 3.750 7.500 8.656 15.000 10.844
200 200.000 100.000 86.643 50.000 69.164 5.000 10.000 11.542 20.000 14.458
250 160.000 80.000 69.314 40.000 55.331 6.250 12.500 14.427 25.000 18.073
300 133.333 66.667 57.762 33.333 46.110 7.500 15.000 17.313 30.000 21.688
400 100.000 50.000 43.321 25.000 34.582 10.000 20.000 23.083 40.000 28.917
600 66.667 33.333 28.881 16.667 23.055 15.000 30.000 34.625 60.000 43.375
800 50.000 25.000 21.661 12.500 17.291 20.000 40.000 46.167 80.000 57.833
1000 40.000 20.000 17.329 10.000 13.833 25.000 50.000 57.708 100.00 72.292
1200 33.333 16.667 14.440 8.333 11.527 30.000 60.000 69.250 120.00 86.750
1500 26.667 13.333 11.552 6.667 9.222 37.500 75.000 86.563 150.00 108.438
2000 20.000 10.000 8.664 5.000 6.916 50.000 100.00 115.42 200.00 144.583
3000 13.333 6.667 5.776 3.333 4.611 75.000 150.00 173.13 300.00 216.875
Table 4: Scale Factors
Specifications
Models
Model VAC phase
to neutral
VAC phase
to phase
Phases Wires
WNA-1P-240-P 115 208–240 1 2 or 3
WNA-3Y-208-P 115 208–240 3 4
WNA-3Y-400-P 230 400 3 4
WNA-3Y-480-P 277 480 3 4
WNA-3Y-600-P 347 600 3 4
WNA-3D-240-P N/A 208–240 3 3
WNA-3D-480-P N/A 480 3 3
Table 5: WattNode Models
Current Transformers
The WattNode uses CTs with integral burden resistors generating 0.333 VAC at rated current. The maximum
allowable current is dependent only on the physical size of the CT, not the rated current. Exceeding the
maximum allowable current may damage CTs.
The accuracy of the split-core CTs is rated as 1% from 10% to 130% of rated current, the phase angle error is
less then or equal to 2 degrees. The accuracy of the toroidal CTs is rated as 1% from 10% to 130% of rated
current, the phase angle error is less than or equal to 1 degree. The following tables show the available split-core
and toroidal CTs. The CT suffix (-yyy) is the rated current.

Operating Instructions 17
Model I.D. Rated Amps Max. Amps
CTS-0750-yyy 0.75" 5, 15, 20, 30, 50, 70, 100, 150 200
CTS-1250-yyy 1.25" 70, 100, 150, 200, 250, 300, 400, 600 800
CTS-2000-yyy 2.00" 600, 800, 1000, 1200, 1500 2000
Table 6: Split-core CTs
Model I.D. Rated Amps Max. Amps
CTT-0300-yyy 0.30" 5, 15, 20, 30 40
CTT-0500-yyy 0.50" 15, 20, 30, 50, 60 80
CTT-0750-yyy 0.75" 30, 50, 70, 100 130
CTT-1000-yyy 1.00" 50, 70, 100, 150, 200 260
CTT-1250-yyy 1.25" 70, 100, 150, 200, 250, 300, 400 520
Table 7: Toroidal CTs
Accuracy
The WattNode’s minimum accuracy is 0.45% of reading plus 0.05% of full-scale. The total system
accuracy is subject to CT accuracy.
The WattNode can measure power from 0.1% to 150% of full-scale power at reduced accuracy, which
provides extra range for occasional high loads. Due to their nonlinearity, however, the CTs may not
produce accurate readings at very low power levels, and may saturate at very high power levels.
Electrical
Power Consumption: up to 3 watts
Maximum Operating Voltage Range: 80% to 120% of nominal
Operating Frequency Range: 48 to 62 Hz
Optoisolator Output:
Isolation: 2500 V
Collector–emitter breakdown voltage: 35 V
Maximum collector–emitter current: 50 mA
Output waveform (2.667Hz and 4.000Hz models): square-wave, 50% duty cycle
Environmental
Temperature: -30° to +60°C
Humidity: 5 to 90% RH (non-condensing)
Mechanical
Enclosure: High impact, ABS plastic
Flame Resistance Rating: 94HB
Size: 143mm × 85mm × 32mm (5.63" × 3.34" × 1.25")
Connectors: Euroblock style pluggable terminal blocks
Light gray: 22 to 12 AWG, 600 V
Black: 26 to 16 AWG, 300 V

18 Warranty
Warranty
All products sold by Continental Control Systems, LLC (CCS) are guaranteed against defects in material
and workmanship for a period of one year from date of shipment. CCS’s responsibility is limited to repair,
replacement, or refund, any of which may be selected by CCS at its sole discretion. CCS reserves the right
to substitute functionally equivalent new or serviceable used parts.
This warranty covers only defects arising under normal use and does not include malfunctions or failures
resulting from: misuse, neglect, improper application, improper installation, acts of nature, or repairs by
anyone other than CCS.
Except as set forth herein, CCS makes no warranties, expressed or implied, and CCS disclaims and negates
all other warranties, including without limitation, implied warranties of merchantability and fitness for a
particular purpose. Some states or jurisdictions do not allow limitations on implied warranties, so these
limitations may not apply to you.
In no event shall CCS be liable for any indirect, special, incidental, or consequential damages. Some states
or jurisdictions do not allow the exclusion or limitation of incidental or consequential damages, so the
above exclusion or limitation may not apply to you.
This manual suits for next models
7
Table of contents
Other CCS Transducer manuals
Popular Transducer manuals by other brands

FuehlerSysteme
FuehlerSysteme RAF/A operating manual

aci
aci WPR2 Series Installation and operation instructions

Trimec
Trimec DUALPULSE 490 instruction manual

GEM
GEM 3220 Installation, operating and maintenance instructions

Lowrance
Lowrance Simrad LiveSight Ice installation guide

Simrad
Simrad ES38-12 - REV C datasheet