CCTV Imports H1169 User manual

H1169 –Installation and User manual
H1169
Real time D1/16ch DVR with HD Display

2
H1169 installation and user manual
This page is intentionally left blank

3
H1169 installation and user manual
CE Information
The product must be installed according to the currently valid installation regulations
for EMC to guarantee the designed use and to prevent EMC problems.
The device supplied with this manual is according to the EC, EMC Directive,
89/336/EEC & LVD 73/23/EEC
Standard used for showing compliance with the essential requirements of the device:
EN 55022
EN 61000-3-2
EN 61000-3-3
EN 50130-4
EN 55024
LVD: EN60950-1
Safety Precautions
Caution Before Use
Please read this manual before installing or using the Vista Quantum DVR.
Please keep this manual in a safe place, to allow for future reference
For the safety and proper use, The DVR is marked with various symbols. Please read these
to prevent injury of financial loss.
Installation Site
Ensure installation position is level, secure and adequately ventilated.
Avoid installing close to sources of humidity or water.

4
H1169 installation and user manual
This page is intentionally left blank

5
H1169 installation and user manual
Contents
OVERVIEW .......................................................................................................................................... 7
1. CONTENTS OF PACKING ................................................................................................................. 7
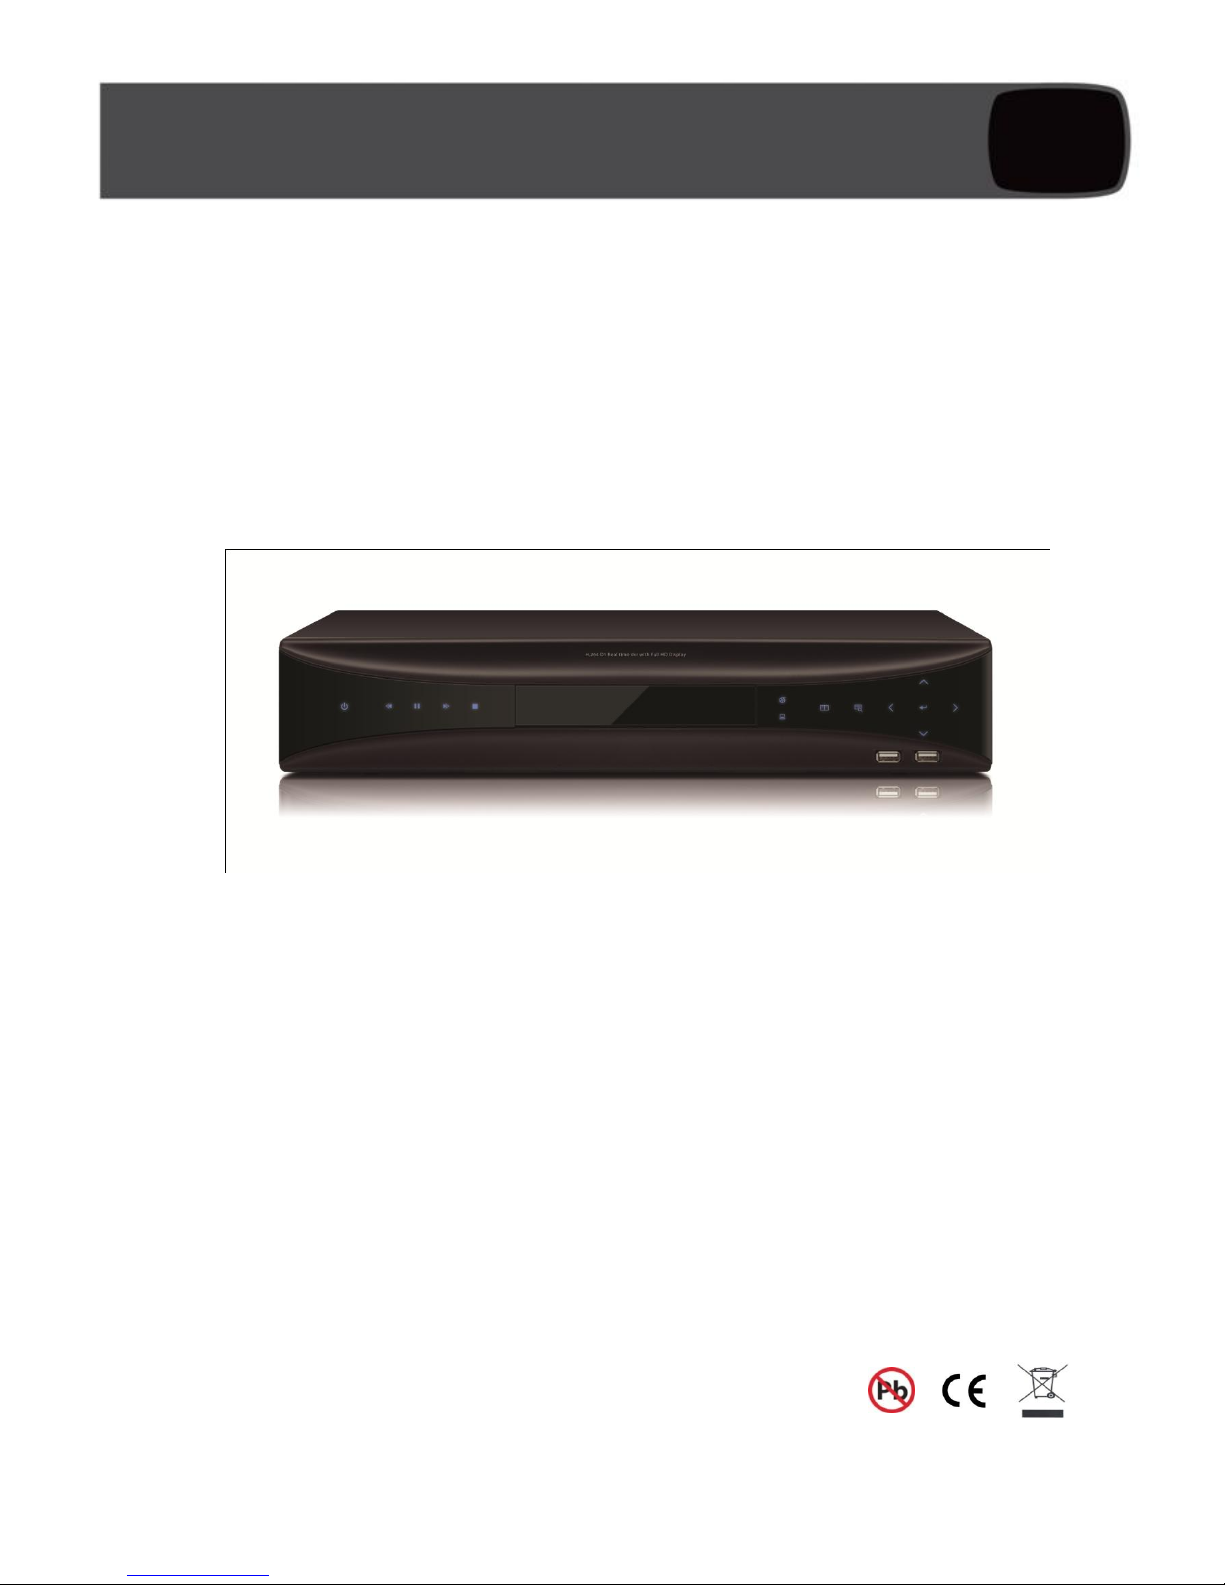
2. FEATURES ....................................................................................................................................... 8
INSTALLATION................................................................................................................................... 9
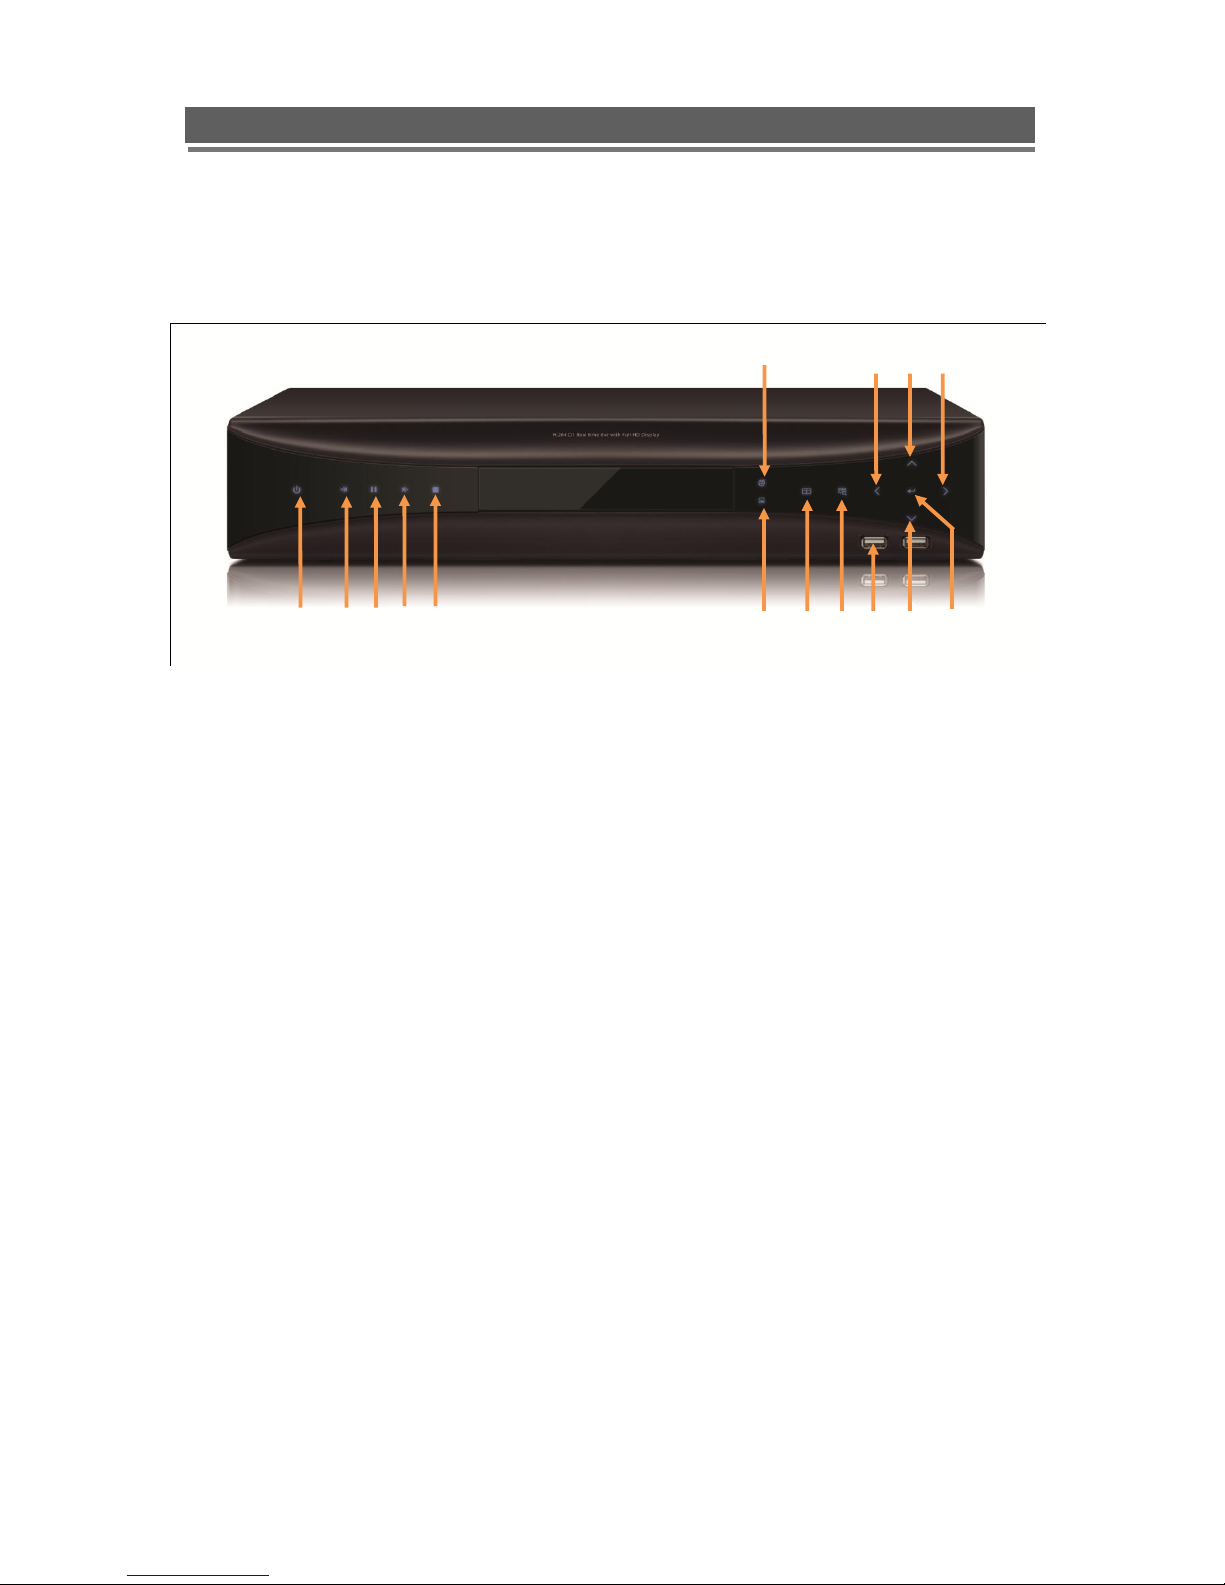
1. FRONT PANEL CONTROLS .............................................................................................................. 9
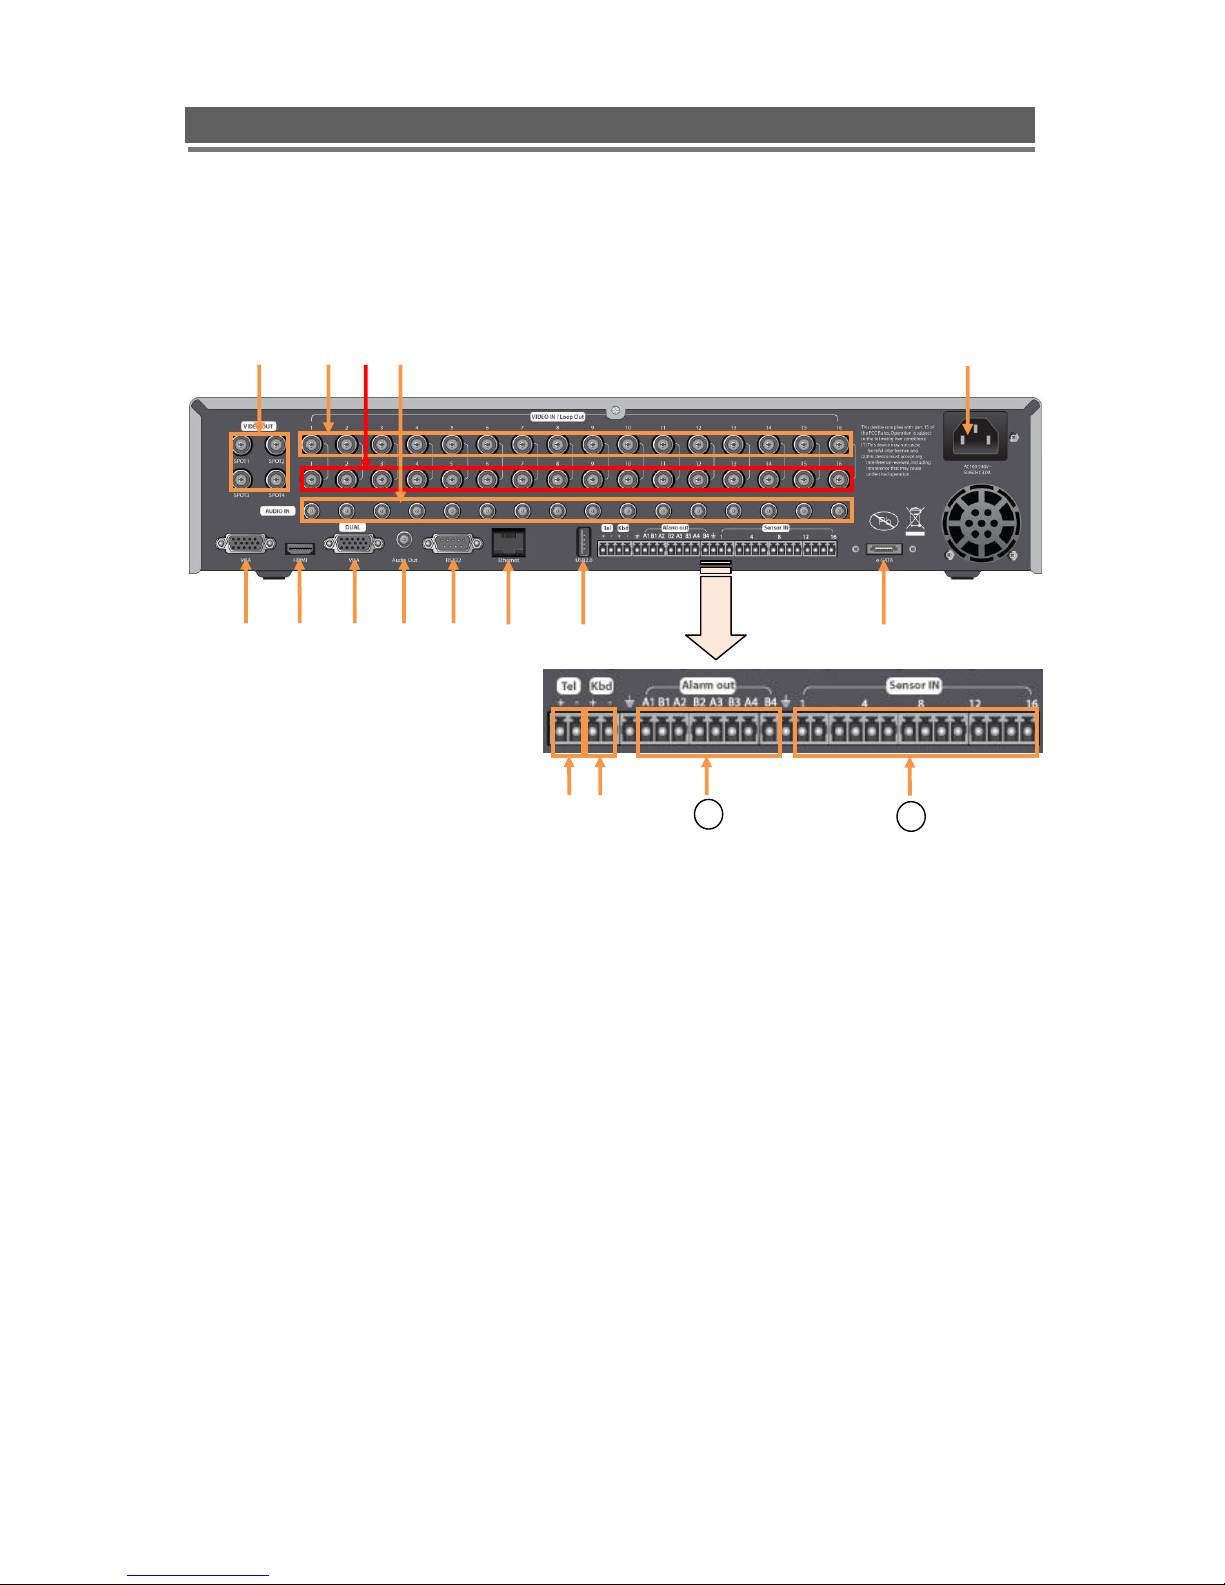
2. REAR PANEL CONNECTORS ......................................................................................................... 10
3. REMOTE CONTROL....................................................................................................................... 12
4. CONNECTION GUIDE..................................................................................................................... 13
5. TURNING ON THE DVR................................................................................................................. 15
OPERATION....................................................................................................................................... 16
1. NAVIGATION................................................................................................................................... 16
1-1. Mouse Control........................................................................................................................................ 16
1-2. Menu Navigation .................................................................................................................................... 16
2. MONITORING ................................................................................................................................. 17
2-1. OSD Description..................................................................................................................................... 17
2-2. Select Channel....................................................................................................................................... 17
2-3. Digital Zoom........................................................................................................................................... 18
3. PLAYBACK...................................................................................................................................... 19
3-1. OSD Description..................................................................................................................................... 19
3-2. Playback Control .................................................................................................................................... 19
3-3. Playback Search .................................................................................................................................... 20
4. PTZ CONTROL.............................................................................................................................. 21
4-1. PTZ Control by mouse............................................................................................................................ 21
4-2. PTZ Control by remote keyboard ........................................................................................................... 23
4-3. PTZ Control by remote controller ........................................................................................................... 23
4-4. PTZ Control by Client software............................................................................................................... 23
SETUP MENU..................................................................................................................................... 24
1. DISPLAY......................................................................................................................................... 26
1-1. Camera Setting ...................................................................................................................................... 26
1-2. Spot Setting............................................................................................................................................ 27
1-3. Live Setting............................................................................................................................................. 28
2. RECORDING................................................................................................................................... 29
2-1. Frame..................................................................................................................................................... 29
2-2. Schedule ................................................................................................................................................ 30
2-3. Event Configuration................................................................................................................................ 31
2-4. Action ..................................................................................................................................................... 32
3. SYSTEM......................................................................................................................................... 33
3-1. Basic....................................................................................................................................................... 33
3-2. Account................................................................................................................................................... 36
4. NETWORK...................................................................................................................................... 37
4-1. IP Set...................................................................................................................................................... 37
4-2. DDNS Set............................................................................................................................................... 37
4-3. NTP Set.................................................................................................................................................. 37
5. EVENT............................................................................................................................................ 38
5-1. Beeper/E-mail Setup .............................................................................................................................. 38
5-2. E-Mail Registration................................................................................................................................. 38
5-3. SMTP Mode............................................................................................................................................ 38
SEARCHING RECORDED DATA ................................................................................................... 39
1. DATE/TIME SEARCH...................................................................................................................... 40
2. EVENT SEARCH............................................................................................................................. 42

6
H1169 installation and user manual
3. LOG SEARCH................................................................................................................................. 43
4.ARCHIVING EVIDENCE TO DVD/CD OR USB.............................................................................. 44
CLIENT VIEWER SOFTWARE....................................................................................................... 46
1. LIVE MONITORING......................................................................................................................... 49
2. REMOTE SEARCH.......................................................................................................................... 52
2-1. Search.................................................................................................................................................... 52
2-2. Archive.................................................................................................................................................... 54
2-3. Remote Log............................................................................................................................................ 57
3. REMOTE SETUP (MENU SETTINGS -SAME AS DVR)................................................................... 58
3-1. Display.................................................................................................................................................... 58
3-2. Recording............................................................................................................................................... 59
3-3. System ................................................................................................................................................... 60
3-4. Network.................................................................................................................................................. 60
3-5. Event...................................................................................................................................................... 61
4. LOCAL SEARCH (VIEWING DOWNLOADED FOOTAGE).................................................................. 62
4-1. Search.................................................................................................................................................... 62
4-2. Log ......................................................................................................................................................... 64
4-3. Info ......................................................................................................................................................... 64
5. LOCAL SETUP................................................................................................................................ 65
5-1. Global..................................................................................................................................................... 65
5-2. Opacity................................................................................................................................................... 65
5-3. Audio Buffer............................................................................................................................................ 66
6. TELEMETRY CONTROL (PAN/TILT/ZOOM/FOCUS)....................................................................... 67
6-1. Pan / Tilt / Zoom / Focus ........................................................................................................................ 67
6-2. Preset / Learn......................................................................................................................................... 68
7. FIRMWARE UPGRADE ................................................................................................................... 69
APPENDIX 1....................................................................................................................................... 70
DYNAMIC IP(SUPPORTING DDNS SERVER)................................................................................... 70
APPENDIX 2....................................................................................................................................... 72
SETUP FOR DVR PORT &WEB SERVER PORT USING IPSHARING ROUTER................................ 72
APPENDIX 3....................................................................................................................................... 73
SPECIFICATION.................................................................................................................................. 73

7
H1169 installation and user manual
Overview
1. Contents of Packing
Mouse
Power Cable
User Manual
Remote Controller
Battery

8
H1169 installation and user manual
2. Features
● Convenience
- User-friendly GUI (Graphical User Interface)
-Easy-to-use menu structure
-Easy-to-use recorded data search (Time, Date, Motion, and Alarm)
- Easy-to control via Front Panel, IR remote control and USB 2.0 mouse.
● Stability
- Auto restart after power interruption
-DB structure offers data stabilisation and better storage utilisation
● Expandability
-Remote DVR‟s can be controlled using the supplied software client viewer.
●Technology
- Embedded LINUX OS
- Maximum record rate 400fps(PAL)/ 480fps(NTSC)
- High-resolution & high-quality H.264 algorithm
- Uses watermarking & scrambling technologies,
- H.264 : 1 ~ 2 Kbytes per image with resolution 360x240
●Functionality
- Variable recording function (normal, alarm, motion, schedule, duration, Time Lapse,)
- RS485 Telemetry
- Full channel real-time monitoring
- Live monitoring, recording, playback, backup, remote access simultaneously
- Multi channel playback
- Variable events notification to e-mail, buzzer or PC Client system

9
H1169 installation and user manual
Installation
1. Front Panel Controls
①Power
System Power On/Off
②Reverse Play / Rewind
Reverse play of recorded data. When in play mode press again to enter fast rewind mode.
③Pause
To freeze picture on playback mode and live mode.
④Forward Play
Playback of the recorded data. When in play mode press again to enter fast forward mode.
⑤Stop
To stop playback and go back to live mode.
⑥Menu
Displays the menu on the screen
⑦Search
Entering search mode
⑧Select
Menu selection
⑨-⑫Arrow Buttons
Moves the cursor while in menu mode
⑬REC Indicator
Recording status. When recording is on, the light will be illuminated.
⑭Network Indicator
Network status. When network is connected, the light will flash.
⑮USB Port
USB connector for mouse control & downloading to USB memory.
①
②
③
④
⑤
⑧
⑥
⑦
⑭
⑩
⑫
⑪
⑬
⑮
⑨

10
H1169 installation and user manual
2. Rear Panel Connectors
①Spot Monitor Outputs
Spot Video Output (Composite Video)
②Video Inputs
16 camera inputs
③Video Outputs
16 camera loop outputs
④Audio Input
Audio input through line
⑤AC Power Input
AC 100-240V 50/60Hz
⑥VGA Output (Main Monitor)
VGA video output for main monitor (1920x1080)
⑥
⑦
⑧
⑨
⑩
⑪
⑫
⑬
①
②
③
④
⑤
⑭
⑮
16
17

11
H1169 installation and user manual
⑦HDMI Output
HDMI output port (1080p)
⑧VGA Output (Dual Monitor)
VGA video output for dual monitor (1024x768)
⑨Audio Output
Audio output
⑩RS232
Serial Communication (for service)
⑪Network Port
Connecting to the Quantum DVR through Internet or LAN
⑫USB Port
USB 2.0 port for mouse
⑬E-SATA Port
Port for e-SATA HDD
⑭PTZ Camera Controller
Serial Communication for Pan / Tilt Camera
⑮Keyboard Controller
Serial Communication for P/T/Z Control Keyboard
Alarm Output
Alarm(relay) output port
Sensor Input
16 Sensor input ports
16
17

12
H1169 installation and user manual
3. Remote Control
①POWER : Power on/off
②P/T/Z : Entering PTZ Setup menu directly
③REC : Start & Stop Recording
④Numbers and letters (1 to 9)
⑤INFO : Direct access system infomation
ID : Entering remocon ID set mode
MUTE : Audio Mute
AUDIO : Switches through Audio channels
⑥MENU: Entering system menu
SEARCH: Entering search
ARROW : Left, Right, Up and Down
SEL : Select/Enter
⑦VOL +/- : Up, down volume
⑧CH +/- : Up, down channel
⑨(◀)◀: Reverse play
▶(▶) :Play (or fast forward)
I I : Pause
■: Stop playback
⑩OSD : On Screen Display ON/OFF
SEQ : Sequence operation
LOG : Direct access Log list
⑪CAM : Changing PTZ icon
P/T : Pan &Tilt
Z/F : Zoom/ & Focus
DIS : Channel Division
⑩
①
②
③
④
⑤
⑥
⑧
⑨
⑦
⑪

13
H1169 installation and user manual
4. Connection Guide
Connecting the monitor
There are four available monitor outputs on DVR.
●HDMI output : Connect to the HDMI port of the main monitor.
●VGA(main) output : Connect to the VGA port of the main monitor.
●VGA(sub) output : Connect to the VGA port of the sub monitor.
●Composite output : Connect to the Video Input of the spot monitor.
Spot
Monitor
Camera
Mic
Main
Monitor
Sub
Monitor
Speaker
System
PC
(Client)
99Main
Monitor
Keyboard
Mouse
PTZ
Camera
Siren
Sensor
e-SATA
HDD

14
H1169 installation and user manual
Connecting cameras
This unit comes with 16 video inputs. Each video input has a corresponding looping output
beneath it for passing the video signal to another monitoring/recording device.
●Video input : Connect to the video out of the camera.
Connecting audio
To record audio on the DVR, connect to the audio source.
●Audio input : Connect to the audio out of the microphone.
To listen to live or recorded audio, connect to an amplified speaker system.
●Audio output : Connect to the audio in of the audioAMP.
Connecting to a network
Use the ethernet port to connect to remote PC via ethernet network.
Connecting to a sensor input
There are 16 individual alarm inputs marked as Sensor In (1-16).
●Sensor inputs : Connect to (+) terminal of a sensor.
●Common GND : Connect to (–) terminals of sensors.
Connecting to a alarm output
The DVR can activate external devices such as buzzers or lights using the relay.
There are 4 relay outputs marked as Alarm out.
●Alarm outputs : Connect to (+) terminal of buzzer or light.
●Common GND : Connect to (–) terminals of buzzers or lights.
Common
GND
Sensor
Inputs
Common
GND
Alarm
Outputs

15
H1169 installation and user manual
Connecting to a PTZ camera
This RS485 connector can be used to control Pan / Tilt / Zoom camera.
●Telemetry (+) : Connect to RS485 Rx(+) of PTZ camera.
●Telemetry (-) : Connect to RS485 Rx(-) of PTZ camera.
Connecting to a remote keyboard
This RS485 connector is for a control keyboard.
●Keyboard (+) : Connect to RS485 Tx(+) of the keyboard.
●Keyboard (-) : Connect to RS485 Tx(-) of the keyboard.
Connecting to a mouse
●USB 2.0 : Connect to the mouse.
Connecting to a external HDD
To expand the HDD capacity, connect the external storage.
●e-SATA : Connect to the e-Sata HDD storage.
5. Turning on the DVR
1. Connect the power cable.
2. Connect camera cables.
3. Connect a network cable and a monitor cable.
4. Press the POWER button on the front panel and wait until the main screen is displayed on
the connected monitor; this process may take a couple of minutes.
(+)
(-)
(+)
(-)

16
H1169 installation and user manual
Operation
1. Navigation
You can navigate the on screen menus using the front panel buttons, remote controller or
mouse.
1-1. Mouse Control
Right clicking the mouse brings up the following popup menu.
①Setup Menu
②Search Menu
③PAN/Tilt Menu
④Focus/Zoom Menu
⑤Instant Record Button
⑥Playback Button
⑦Channel Up/Down Button
⑧Eject Button
⑨Power Button
1-2. Menu Navigation
To enter the Setup menu, the user has to have the required access rights and be logged on.
Press the Menu button or right click with mouse on screen and select the menu icon.
The following screen will be displayed asking for password.
①Select the user ID.
②Enter the password.
The default password is 00000000(8 zeros).
③Press OK, the setup menu will be displayed
on screen.
All menus are navigated around using the Left/
Right/ Up/ Down and the Select button or mouse.
To step back out of the menus, press MENU button
or click the right button of the mouse.
①
②
③
④
⑤
⑦
⑧
⑥
⑨
①
②
③

17
H1169 installation and user manual
2. Monitoring
2-1. OSD Description
The Status Bar on screen shows HDD capacity, network connection, current time, etc.
①HDD capacity : Used capacity / Total capacity
②Network connection : It is shown that admin or user is connected.
③Mouse connection
④~⑧Multiscreen Display Buttons
⑨Current Date/Time
2-2. Select Channel
Use the Multiscreen display buttons on the status bar to select the display mode.
Single Channel 4 Channel 9 Channel
Live 1ch Live 4ch Live 9ch
16 Channel 17 Channel
Live 16ch Live 4ch + Play 1ch
①
②
③
⑥
⑨
④
⑤
⑦
⑧

18
H1169 installation and user manual
You can view the 16 live videos and 1 playback video simultaneously in the 17 channel
display mode.
Also you can use the DIS button on the remote controller to change the display mode.
Display switches in the following order when the DIS button is pressed.
Single Channel 4 Channel 9 Channel 16 Channel 17 Channel
2-3. Digital Zoom
When the system is in full-screen playback mode, drag your mouse in the screen to select a
section and then left click mouse to realize digital zoom.
You can right click mouse to exit.
[ Playback Video ]
Channel Up/Down
Playback Control Buttons

19
H1169 installation and user manual
3. Playback
Click the right button on the mouse, the popup menu will be displayed on screen.
To begin playback, press the Play button on the popup menu.
3-1. OSD Description
The Control Bar on screen shows Playback control buttons, Progress bar, Display mode
buttons, Playback time, etc.
①Play Forward button ⑧Stop button
②Reverse Play button ⑨Display mode buttons (1/4/9/16CH)
③Pause button ⑩Playback Speed
④Frame Advance button ⑪Playback Date & Time
⑤Frame Rewind button ⑫Time Bar
⑥Fast Forward button ⑬Previous button
⑦Fast Backward button ⑭Next button
3-2. Playback Control
Play Forward
When the Play Forward button(①) is pressed, the unit will play forward at the rate the data
was recorded. While in the play mode, the user may change the playback direction, playback
speed. To return to play forward operations, press the Play Forward button(①).
Reverse Play
To begin reverse playback, press the Reverse Play button(②).
Pause
During playback, press the Pause button(③). This feature pauses all full screen and
multiscreen images. When this button is pressed in the pause mode, the unit will play.
①
④
③
②
⑤
⑦
⑥
⑧
⑩
⑪
⑨
⑫
⑬
⑭

20
H1169 installation and user manual
Single Frame Advance
During the pause mode, press the Frame Advance button(④) to view the frame directly after
the frame displayed on screen.
Single Frame Rewind
During the pause mode, press the Frame Rewind button(⑤) to view the frame directly before
the frame displayed on screen.
Fast Forward
In playback mode, press the Fast Forward button(⑥) to switch between various fast play
modes such as x2, x4, x8, x16 play.
Fast Backward
In reverse playback mode, press the Fast Backward button(⑦) to switch between various
reverse play modes such as x2, x4, x8, x16 reverse play.
Stop
To stop playback and return to the live mode, press the Stop button(⑧).
3-3. Playback Search
The user can search the recorded video during playback.
The recorded video is indicated by a colour bar on the time bar(⑫).
You can use the Previous(⑬) or Next(⑭) button to view if there are more recorded data.
Click the mouse at the desired point of the colour bar, you can view the recorded data.
Table of contents