CDA RC 9322 Reference manual

Customer Care Department • The Group Ltd. • Harby Road • Langar • Nottinghamshire • NG13 9HY
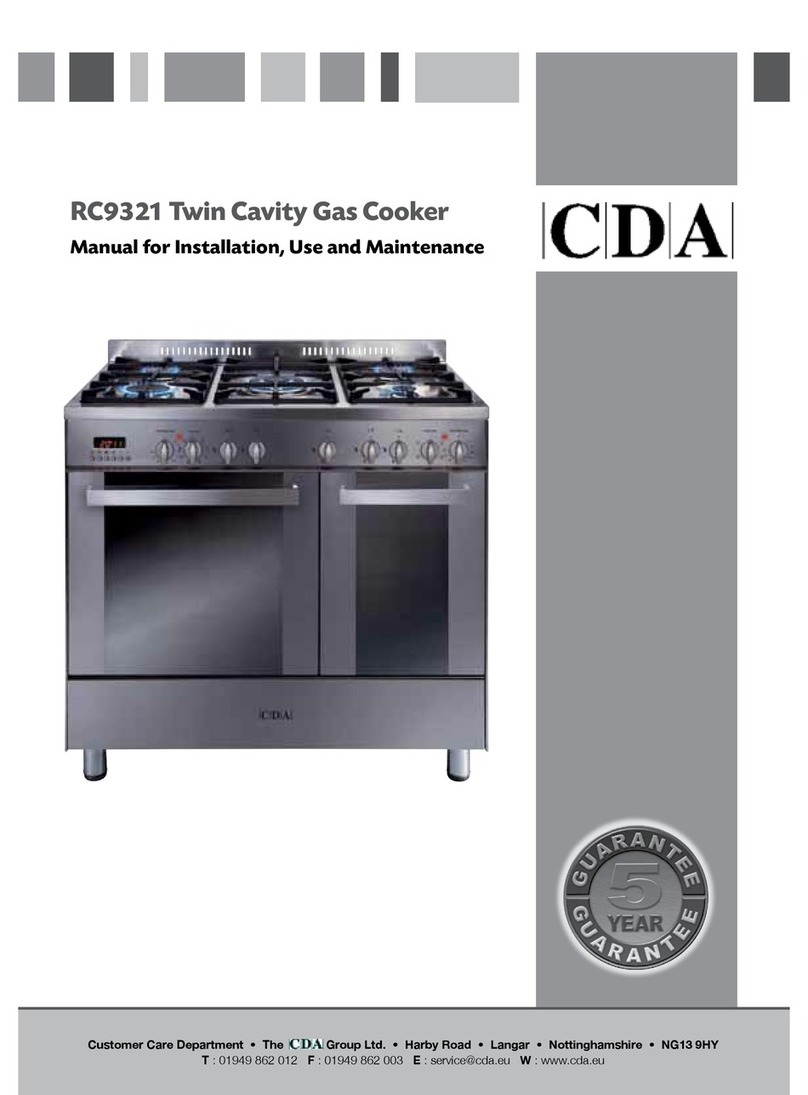
RC 9322 .. Twin Cavity Gas Cooker
Manual for Installation, Use and Maintenance
GB

2
Important
This appliance is designed and manufactured solely for the cooking of domestic (household) food and is not
suitable for any non domestic application and therefore should not be used in a commercial environment.
The appliance guarantee will be void if the appliance is used within a non domestic environment i.e. a semi
commercial, commercial or communal environment.
The CDA Group Ltd cannot be held responsible for injuries or losses caused by incorrect use or installation of
this product. Please note that CDA reserve the right to invalidate the guarantee supplied with this product
following incorrect installation or misuse of the appliance.
Appliance Information:
Please enter the details on the appliance rating plate below for reference, to assist CDA Customer Care in the
event of a fault with your appliance and to register your appliance for guarantee purposes.
Appliance Model
Serial Number
Declaration of CE Conformity
This cooker has been designed, constructed and marketed in compliance with:
• Safety requirements of EU Directive “Gas” 2009/142/EC;
• Safety requirements of EU Directive “Low Voltage” 2006/95/EC;
• Protection requirements of EU Directive“EMC” 2004/108/EC;
• Requirements of EU Directive 93/68/EEC.
Important Information for Correct Disposal of the Product in Accordance with
EC Directive 2002/96/EC.
At the end of its working life, the product must not be disposed of as urban waste. It
must be taken to a special local authority dierentiated waste collection centre or to
a dealer providing this service.
Disposing of a household appliance separately avoids possible negative consequen-
ces for the environment and health deriving from inappropriate disposal and enables
the constituent materials to be recovered to obtain signicant savings in energy and
resources. As a reminder of the need to dispose of household appliances separately,
the product is marked with a crossed-out wheeled dustbin.

3
IMPORTANT SAFETY PRECAUTIONS AND RECOMMENDATIONS
IMPORTANT: This appliance is designed and manufactured so-
lely for the cooking of domestic (household) food and is not sui-
table for any non domestic application and therefore should not
be used in a commercial environment.
The appliance guarantee will be void if the appliance is used
within a non domestic environment i.e. a semi commercial, com-
mercial or communal environment.
Read the instructions carefully before installing and using the
appliance.
• After having unpacked the appliance, check to ensure that it is not dama-
ged and that the oven door closes correctly.
In case of doubt, do not use it and consult your supplier or a professionally
qualied technician.
• Packing elements (i.e. plastic bags, polystyrene foam, nails, packing straps,
etc.) should not be left around within easy reach of children, as these may
cause serious injuries.
• Some appliances are supplied with a protective lm on steel and alumi-
nium parts. This lm must be removed before using the appliance.
• IMPORTANT: The use of suitable protective clothing/gloves is recommen-
ded when handling or cleaning this appliance.
• Do not attempt to modify the technical characteristics of the appliance as
this may become dangerous to use. The manufacturer declines all respon-
sibility for any inconvenience resulting from the inobservance of this con-
dition.
• CAUTION: this appIiance must only be installed in a permanently ventilated
room in compliance with the applicable regulations.
• Do not operate your appliance by means of an external timer or separate
remote-control system.
• Do not carry out cleaning or maintenance operations on the appliance wi-
thout having previously disconnected it from the electric power supply.
• WARNING: Ensure that the appliance is switched o before replacing the
oven lamp to avoid the possibility of electric shock.

4
• Do not use a steam cleaner because the moisture can get into the applian-
ce thus make it unsafe.
• Do not touch the appliance with wet or damp hands (or feet).
• Do not use the appliance whilst in barefoot.
• If you should decide not to use this appliance any longer (or decide to sub-
stitute another model), before disposing of it, it is recommended that it be
made inoperative in an appropriate manner in accordance to health and
environmental protection regulations, ensuring in particular that all poten-
tially hazardous parts be made harmless, especially in relation to children
who could play with unused appliances.
• The various components of the appliance are recyclable. Dispose of them
in accordance with the regulations in force in your country. If the appliance
is to be scrapped, remove the power cord.
• After use, ensure that the knobs are in the o position.
• Children less than 8 years of age shall be kept away unless continuously
supervised.
• This appliance can be used by children aged from 8 years and above and
persons with reduced physical, sensory or mental capabilities or lack of ex-
perience and knowledge if they have been given supervision or instruction
concerning use of the appliance in a safe way and understand the hazards
involved. Children shall not play with the appliance. Cleaning and user
maintenance shall not be made by children without supervision.
• The manufacturer declines all liability for injury to persons or damage to
property caused by incorrect or improper use of the appliance.
• WARNING: During use the appliance and its accessible parts become hot;
they remain hot for some time after use.
–Care should be taken to avoid touching heating elements (on the hob
and inside the oven).
–The door is hot, use the handle.
–To avoid burns and scalds, young children should be kept away.
• Make sure that electrical cables connecting other appliances in the proxi-
mity of the cooker cannot come into contact with the hob or become en-
trapped in the oven door.
• WARNING: Unattended cooking on a hob with fat or oil can be dangerous
and may result in re. NEVER try to extinguish a re with water, but switch
o the appliance and then cover ame e.g. with a lid or a re blanket.
5
• WARNING: Danger of re: do not store items on the cooking surfaces.
• WARNING: When correctly installed, your product meets all safety require-
ments laid down for this type of product category. However special care
should be taken around the rear or the underneath of the appliance as the-
se areas are not designed or intended to be touched and may contain sharp
or rough edges, that may cause injury.
• FIRST USE OF THE OVEN - it is advised to follow these instructions:
–Furnish the interior of the oven as described in the chapter “CLEANING
AND MAINTENANCE”.
–Switch on the empty oven on max to eliminate grease from the heating
elements.
–Disconnect the appliance from the electrical power supply, let the oven
cool down and clean the interior of the oven with a cloth soaked in water
and neutral detergent; then dry carefully.
• CAUTION: Do not use harsh abrasive cleaners or sharp metal scrapers to cle-
an the oven door glass since they can scratch the surface, which may result
in shattering of the glass.
• Do not line the oven walls with aluminium foil. Do not place baking trays or
the drip tray on the base of the oven chamber.
• FIRE RISK! Do not store ammable material in the oven or in the storage
compartment.
• Always use oven gloves when removing the shelves and food trays from the
oven whilst hot.
• Do not hang towels, dishcloths or other items on the appliance or its handle
– as this could be a re hazard.
• Clean the oven regularly and do not allow fat or oils to build up in the oven
base or tray. Remove spillages as soon as they occur.
• Do not stand on the cooker or on the open oven door.
• Always stand back from the appliance when opening the oven door to al-
low steam and hot air to escape before removing the food.
• SAFE FOOD HANDLING: Leave food in the oven for as short a time as possi-
ble before and after cooking. This is to avoid contamination by organisms
which may cause food poisoning. Take particular care during warmer we-
ather.
• WARNING: Take care NOT to lift the cooker by the door handle.

6
GAS BURNERS
1. Auxiliary burner (A) 1,00 kW
2. Semi-rapid burner (SR) 1,75 kW
3. Rapid burner (R) 3,00 kW
4. Triple-ring burner (TR) 3,50 kW
Features and Technical Data
Important Notes:
– The electric ignition is incorporated in the knobs.
– The appliance has a safety valve system tted, the ow of gas will be stopped if and when the ame
should accidentally go out.
2
431
1
2
Left
Gas oven
Right
Gas oven
Fig. 1

7
Controls Description
1. Left gas oven/gas grill control knob
2. Left oven light control knob
3. Minute counter
4. Right oven rotisserie / light control knob
5. Front left burner control knob
6. Rear left burner control knob
7. Front central burner control knob
8. Rear central burner control knob
9. Rear right burner control knob
10. Front right burner control knob
11. Right gas oven/gas grill control knob
109 1187654321
Control Panel
Fig. 2

8
Minute Counter
Minute Counter
The minute counter is a timed acoustic warning
device which can be set for a maximum of 60 mi-
nutes.
The knob (Fig. 3) must be rotated clockwise as far as
the 60 minute position and then set to the required
time by rotating it anticlockwise.
IMPORTANT WARNING: This is only a mechanical
timer.
Remember to turn o the oven/grill manually.
Fig. 3

9
How to Use the Hob Burners
Hob Burners
Each hob burner is controlled by a separate gas valve
operated by a control knob (g. 4) which has 3 positions
marked on the control panel, these are:
– Symbol : Tap closed (burner o)
– Symbol : High (maximum)
– Symbol : Low (minimum)
Push in and turn the knob anti-clockwise to the selected
position.
The maximum aperture position permits rapid boiling of
liquids, whereas the minimum aperture position allows
slower warming of food or maintaining boiling condi-
tions of liquids.
To reduce the gas ow to minimum, rotate the knob further anticlockwise to point the indicator towards the
small ame symbol.
Other intermediate operating adjustments can be achieved by positioning the indicator between the maxi-
mum and minimum aperture positions, not between the maximum aperture and closed positions.
Note: When the hob is not being used, set the gas knobs to their closed positions and also close the cock
valve on the gas bottle or the main gas supply line.
Lighting of the Hob Burners
To ignite the burner, the following instructions are to be followed:
1. Press in the corresponding knob and turn counter-clockwise to the full ame position marked by the
symbol (g. 4) and hold the knob in until the ame has been lit.
In the case of a mains failure light the burner with a match or lighted taper.
2. Wait about ten seconds after the gas lighting before releasing the knob (starting time for the valve).
3. Adjust the gas valve to the desired power.
Important
If the burner ame should go out for some reason, the safety valve will automatically stop the gas ow.
To re-light the burner, return the knob to the closed position, wait for at least 1 minute and then repeat the
lighting procedure.
If your local gas supply makes it dicult to light the burner with the knob set to maximum, set the knob to
minimum and repeat the operation.
Fig. 4

10
Choice of Burner
The burner must be choosen according to the diameter of the
pans and energy required. Saucepans with handles which are
excessively heavy, in relationship to the weight of the pan, are
safer as they are less likely to tip. Pans which are positioned
centrally on burners are more stable than those which are of-
fset.
It is far safer to position the pan handles in such a way that
they cannot be accidentally knocked.
When deep fat frying ll the pan only one third full of oil.
DO NOT cover the pan with a lid and DO NOT leave the pan
unattended.
In the unfortunate event of a re, leave the pan where it is and turn o all controls. Place a damp cloth or cor-
rect tting lid over the pan to smother the ames.
DO NOT use water on the re.
Leave the pan to cool for at least 30 minutes.
Do not use pans with concave or convex bases
Burner Size Minimum Pan Diameter (cm) Maximum Pan Diameter (cm)
Auxiliary 12 14
Semi-Rapid 16 24
Rapid 24 26
Triple Ring 26 28
Wok max 36 cm
Fig. 5

11
CORRECT
WRONG
CORRECT USE OF TRIPLE-RING BURNER
• Flat-bottomed pans are to be placed directly onto the pan-support.
• To use the WOK, you must place the wok stand in the CORRECT position as shown in gs. 6 - 7.
IMPORTANT
The special grille for wok pans (g. 7) MUST BE PLACED ONLY over the pan-rest for the triple-ring
burner.
Fig. 6 Fig. 7

12
How to use the gas oven (left oven)
General Features
The oven is furnished completely clean; it is advisable, however, upon rst use, to turn
the oven on to the maximum temperature (position ) to eliminate possible traces
of grease from the oven burner.
The same operation should be followed for grill burner.
The gas oven is provided with two burners:
a. Oven burner, mounted on the lower part of the oven (wattage: 3,70 kW)
b. Grill burner, mounted on the upper part of the oven (wattage: 2,50 kW).
Oven burner
It carries out normal“oven cooking”.
The gas ow to the burner is regulated by a thermostat which allow to maintain the oven temperature con-
stant.
The control of the temperature is assured by a thermostatic probe positioned inside the oven.
The probe must be always kept in its housing, in a clean condition, as an incorrect position or encrustment may
cause an alteration in the control of the temperature.
Oven thermostat
The oven thermostat (g. 8) is marked with numbers, these correspond to the oven temperature, in addition
the “OFF” position is shown by the symbol .
To choose the required oven temperature, turn the control knob until its line mark is level with the temperature
required on the control panel (fascia).
Fig. 7
Attention:
The oven door be-
comes very hot du-
ring operation.
Keep children away.
WARNING:
The door is hot, use
the handle.
Fig. 8

13
Lighting the oven gas burner
The thermostat allows the automatic control of the temperature.
The gas delivery to the oven burner is controlled by a two way thermostatic tap (oven and grill burners) with
ame-failure device.
To light the oven burner operate as follow:
1. Open the oven door
WARNING: Risk of explosion! The oven door must be open during this operation.
2. Lightly press and turn the thermostat knob anti-clockwise to max position“ ” (g. 10).
3. Press the knob right down to prime the electric ignition.
In case of power cut, press the knob and immediately approach a lighted match to the opening “A” (g.
9). Never continue this operation for more than 15 seconds. If the burner has still not ignited, wait
for about 1 minute prior to repeating the ignition.
4. Wait about 10/15 seconds after the burner lighting before releasing the knob (time of priming of the
valve).
5. Close the oven door slowly and adjust the burner according to the power required.
Should the ame of the burner extinguish for any reason, the safety valve will cut o automatically the
gas ow to the tap.
To re-start operation, turn the knob to the “ ” OFF position, wait for at least 1 minute and repeat ope-
rations as explained above.
Oven cooking
For ecient oven preheating, we recommend that grill trays and racks are removed from the oven and
replaced after about 15 minutes.
Before introducing the food, preheat the oven to the desired temperature.
For a correct preheating operation, it is advisable to remove the tray from the oven and introduce it together
with the food, when the oven has reached the desired temperature.
Check the cooking time and turn o the oven 5 minutes before the theoretical time to recuperate the stored
heat.
A
Fig. 9 Fig. 10

14
How to use the gas grill (left oven)
Lighting the grill gas burner
The grill burner generates the infra-red rays for grilling.
To light the grill burner operate as follow:
1. Open the oven door.
WARNING: Risk of explosion! The oven door must be open during this ope-
ration.
2. Lightly press and turn the thermostat knob clockwise to the position (g.
11).
3. Press the knob right down to prime the electric ignition.
In case of power cut, press the knob and put a lighted match to the right and left
side of the burner (g. 12).
Never continue this operation for more than 15 seconds. If the burner has
still not ignited, wait for about 1 minute prior to repeating the ignition.
4. Wait about 10/15 seconds after the burner lighting before releasing the knob
(time of priming of the valve).
5. Half-close the oven door slowly.
Should the ame of the burner extinguish for any reason, the safety valve will
cut o automatically the gas ow to the tap. To re-start operation, turn the knob
to the “ ” OFF position, wait for at least 1 minute and repeat operations as
explained above.
Do not grill with
oven door closed.
Always t the heat
shield supplied
with the cooker un-
der the front panel
before commen-
cing operations
(Fig. 14).
WARNING. The heat
shield and the oven
door reaches a very
high temperature
whilst in use. Keep
children away and
allow to cool before
removing.
Fig. 11 Fig. 12

15
Use of the grill
Very important: the grill must always be used with the
oven door slightly open and with shield “A” mounted
(Fig. 14).
Mount shield“A”which serves to protect the control panel
from the heat.
Turn on the grill, as explained in the preceding paragraphs
and let the oven preheat for about 5 minutes with the
door ajar.
Introduce the food to be cooked, positioning the rack as
close to the grill as possible.
The dripping pan should be placed under the rack to
catch the cooking juices and fats.
Note: It is recommended that you do not grill for lon-
ger than 30 minutes at any one time.
Attention: the oven door becomes very hot during operation.
Keep children away.
IMPORTANT WARNING
For best results when using the grill, place the shelf on the second level and
when using the grill pan handle avoid contact with the heat shield which will
be HOT during use
Oven light
The cooker is equipped with a light that illuminates the oven to enable visual
checks on the food that is cooking.
This light is controlled by a control knob (Fig. 13 - position).
Notes:
• The grill burner has
only one setting,
which is fully on.
• It is important that
the heat shield is t-
ted the correct way
up, as shown in the
gure 14.
HOT ZONE
A
Fig. 13
Fig. 14

16
How to use the gas oven (right oven)
General features
The oven is furnished completely clean; it is advisable, however, upon rst use, to turn
the oven on to the maximum temperature (position ) to eliminate possible traces
of grease from the oven burner.
The same operation should be followed for grill burner.
The gas oven is provided with two burners:
a. Oven burner, mounted on the lower part of the oven (wattage: 2,20 kW)
b. Grill burner, mounted on the upper part of the oven (wattage: 2,00 kW).
Oven burner
It carries out normal“oven cooking”.
The gas ow to the burner is regulated by a thermostat which allow to maintain the oven temperature con-
stant.
The control of the temperature is assured by a thermostatic probe positioned inside the oven.
The probe must be always kept in its housing, in a clean condition, as an incorrect position or encrustment may
cause an alteration in the control of the temperature.
WARNING:
The door is hot, use the handle.
Oven thermostat
The oven thermostat (g. 15) is marked with numbers, these correspond to the oven temperature, in addition
the “OFF”position is shown by the symbol .
To choose the required oven temperature, turn the control knob until its line mark is level with the temperature
required on the control panel (facia).
Attention: the oven
door becomes very
hot during opera-
tion.
Keep children away.
Fig. 15

17
Lighting the oven gas burner
The thermostat allows the automatic control of the temperature.
The gas delivery to the oven burner is controlled by a two way thermostatic tap (oven and grill burners) with
ame-failure device.
To light the oven burner operate as follows:
1. Open the oven door
WARNING: Risk of explosion! The oven door must be open during this operation.
2. Lightly press and turn the thermostat knob anti-clockwise to max position“ ” (g. 17).
3. Press the knob right down to prime the electric ignition.
In case of power cut, press the knob and immediately approach a lighted match to the opening “F” (g.
16). Never continue this operation for more than 15 seconds. If the burner has still not ignited, wait
for about 1 minute prior to repeating the ignition.
4. Wait about 10/15 seconds after the burner lighting before releasing the knob (time of priming of the
valve).
5. Close the oven door slowly and adjust the burner according to the power required.
Should the ame of the burner extinguish for any reason, the safety valve will cut o automatically the
gas ow to the tap.
To re-start operation, turn the knob to the “ ” OFF position, wait for at least 1 minute and repeat ope-
rations as explained above.
Oven cooking
For ecient oven preheating, we recommend that grill trays and racks are removed from the oven and
replaced after about 15 minutes.
Before introducing the food, preheat the oven to the desired temperature.
For a correct preheating operation, it is advisable to remove the tray from the oven and introduce it together
with the food, when the oven has reached the desired temperature.
Check the cooking time and turn o the oven 5 minutes before the recommended end time to use the residual
heat in the oven.
F
Fig. 16 Fig. 17

18
How to use the gas grill (right oven)
Lighting the grill gas burner
The grill burner generates the infra-red rays for grilling.
To light the grill burner operate as follow:
1. Open the oven door.
WARNING: Risk of explosion! The oven door must be open during this ope-
ration.
2. Lightly press and turn the thermostat knob clockwise to the position (g.
18).
3. Press the knob right down to prime the electric ignition.
In case of power cut, press the knob and put a lighted match to the right and left
side of the burner (g. 19).
Never continue this operation for more than 15 seconds. If the burner has
still not ignited, wait for about 1 minute prior to repeating the ignition.
4. Wait about 10/15 seconds after the burner lighting before releasing the knob
(time of priming of the valve).
5. Half-close the oven door slowly.
Should the ame of the burner extinguish for any reason, the safety valve will
cut o automatically the gas ow to the tap. To re-start operation, turn the knob
to the “ ” OFF position, wait for at least 1 minute and repeat operations as
explained above.
Do not grill with
oven door closed.
Always t the heat
shield supplied
with the cooker un-
der the front panel
before commen-
cing operations
(Fig. 21).
WARNING. The heat
shield and the oven
door reaches a very
high temperature
whilst in use. Keep
children away and
allow to cool before
removing.
Fig. 18 Fig. 19

19
Use of the grill
Very important: the grill must always be used with the
oven door slightly open and with shield “A” mounted
(Fig. 21).
Mount shield “A” which serves to protect the control panel
from the heat.
Turn on the grill, as explained in the preceding paragraphs
and let the oven preheat for about 5 minutes with the door
ajar.
Introduce the food to be cooked, positioning the rack as clo-
se to the grill as possible.
The dripping pan should be placed under the rack to catch
the cooking juices and fats.
Note: It is recommended that you do not grill for longer
than 30 minutes at any one time.
Attention: the oven door becomes very hot during operation.
Keep children away.
IMPORTANT WARNING
For best results when using the grill, place the shelf on the second level and
when using the grill pan handle avoid contact with the heat shield which will
be HOT during use
Oven light
The cooker is equipped with a light that illuminates the oven to enable visually
controlling the food that is cooking.
This light is controlled by a control knob (Fig. 20 - position).
Notes:
• The grill burner has
only one setting, that
is full-on
• It is important that
the heat shield is t-
ted the correct way
up, as shown in the
gure 21.
HOT ZONE
A
Fig. 20
Fig. 21

20
Rotisserie (right oven)
This is used for spit roasting under the grill and compri-
ses:
• an electric motor tted to the rear of the oven
• a stainless steel skewer provided with slide-out
heat-resistant handgrip and two sets of adjustable
forks
• a skewer support to be tted in the middle runner.
The rotisserie motor is operated by a control knob (Fig.
22).
Use of the rotisserie
Very important: the rotisserie must always be used with the oven door ajar and with shield “A” mounted (Fig.
21).
• Insert the tray into the lowest rack holders of the oven and insert the rod support into the intermediate
rack holders.
• Put the meat to be cooked onto the rod, being careful to secure it in the centre with the special forks.
• Insert the rod into the motor opening and rest it onto the support of the spit collar; then remove the grip
by turning it to the left.
Attention: the oven door becomes very hot during operation.
Keep children away.
It is recommended that you do not grill for longer than 30 minutes at any one time.
Fig. 22
Fig. 23
Table of contents
Other CDA Cooker manuals

CDA
CDA RV 1061 Reference manual

CDA
CDA RC 9301 Operation instructions

CDA
CDA PC 15 SS Operation instructions

CDA
CDA RC 9000 Users operating instructions User manual

CDA
CDA RC9321 Reference manual

CDA
CDA RV 1002 Series Reference manual

CDA
CDA CD 9002/1 SS User manual

CDA
CDA PZ 10/2 Operation instructions

CDA
CDA RC 9301 Reference manual

CDA
CDA RV911SS/1 Quick start guide