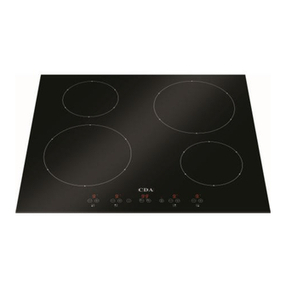
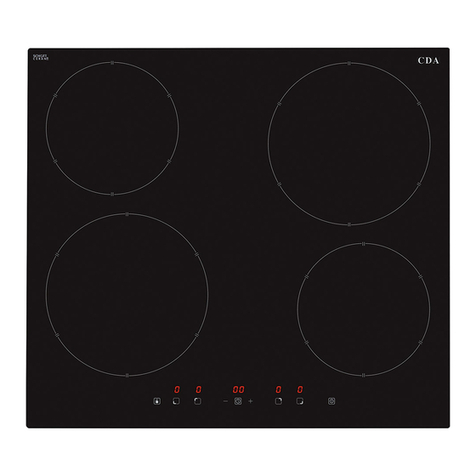
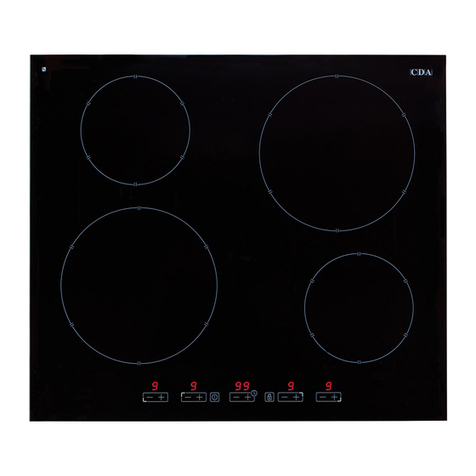
CDA HN6850FR User manual

www.cda.eu
HN6850FR
Induction Hob
Installation, use and maintenance

2
Contents:
3 Important information
4 Important safety warnings
6 Important notes for safety, use and care
6 Saving energy
7 Cooking on induction (and pan compatibility)
8 Hob layout
9 Using your hob
10 Booster function
11 Operating time limiter
12 Auto-heat function
13 Timer/minute minder
15 Pause function
16 Keep warm function
17 Bridge function
19 Safety key lock
19 Residual heat indicators
20 Ecient use of your hob
21 Care and maintenance
23 Troubleshooting
25 Installation - preparation
27 How to install the hob
29 Mains electricity connection
30 Understanding the zone markings
31 Energy eciency information

3
Important
The CDA Group Ltd cannot be held responsible for injuries or losses
caused by incorrect use or installation of this product. Please note
that CDA reserve the right to invalidate the guarantee supplied with
this product following incorrect installation or misuse of the appliance
or use in a commercial environment.
This appliance is not designed to be used by people (including
children) with reduced physical, sensorial or mental capacity, or
who lack experience or knowledge about it, unless they have had
supervision or instructions on how to use the appliance by someone
who is responsible for their safety.
Under no circumstances should any external covers be removed for
servicing or maintenance except by suitably qualified personnel.
Appliance information:
Please enter the details on the appliance rating plate below for
reference, to assist CDA Customer Care in the event of a fault with
your appliance and to register your appliance for guarantee purposes.
Appliance Model
Serial Number
EU Declarations of Conformity
This appliance has been manufactured to the strictest standards and
complies with all applicable legislation, including Electrical safety
(LVD) 2014/35/EU and Electromagnetic interference compatibility

4
(EMC) 2014/30/EU. Parts intended to come into contact with food
conform to 1935/2004/EC.
IMPORTANT INFORMATION FOR CORRECT DISPOSAL OF THE
PRODUCT IN ACCORDANCE WITH EC DIRECTIVE 2012/19/EU.
At the end of its working life, the product must be taken to a special
local authority waste collection centre or to a dealer providing
appliance recycling services.
Disposing of a household appliance separately avoids possible
negative consequences for the environment and health. It also
enables the constituent materials to be recovered, saving both energy
and resources. As a reminder of the need to dispose of household
appliances separately, the product is marked with a crossed-out
wheeled dustbin.
Please note:
•Induction hobs become hot and remain hot during and
immediately after use. Do not touch the hob until it has been
allowed to cool.
•Keep children away from the appliance when in use.
•Never use the hob top for storage.
•Pan handles should never stand out beyond the edge of the
worktop. This will help to avoid children reaching them.
•Do not lean over the hob when it is in use.
•Follow the cleaning instructions carefully.
•Ensure the base of the saucepan is clean and dry before placing it
on the hob.
•Avoid hard shocks from cookware – the vitroceramic glass surface

5
is highly resistant but not unbreakable.
•Do not place hot lids flat on the hob top. A “suction” eect could
cause damage to the hob.
•Do not drag cookware across the hob top: in the long term, this
could cause damage to the hob.
•Do not store cleaning or flammable products in the unit below the
hob.
•Always use appropriate cookware.
•Do not cook unopened tins of food directly on the hob.
•Never put cooking foil or plastic materials on the ceramic surface
when the hob is hot. These materials could melt and cause
damage to the hob.
•This hob (Class 3) has been designed for use only as a cooking
appliance. Any other use should be considered incorrect and
therefore dangerous.
FOR THOSE WITH HEART PACEMAKERS OR ACTIVE IMPLANTS:
The function of this hob conforms to current electromagnetic
interference standards and thus is in total compliance with legal
requirements (2004/108/CE directives).
To avoid interference between your hob and a pacemaker, your
pacemaker must be designed and programmed in compliance with
the regulations that apply to it. As such, CDA guarantee only that our
product is compliant.
With regard to the compliance of the pacemaker or any potential
incompatibility, you should obtain information from the manufacturer
or your attending physician.

6
Important
• Do not use the hob if the glass surface is cracked or damaged to
prevent the risk of electric shock. Disconnect it from the power
supply.
•Ensure that the power cable of a connected electrical appliance
near the hob is not in contact with the cooking zones.
•NEVER run an empty pan on an induction hob (nor any hob).
•Do not switch on the hob until a pan has been placed on it.
•Keep the control panel(s) clean and free from grease, grime or
debris as these can hamper activity or cause unwanted activation.
•Do not lean over pans when they are warming up or cooking.
Saving energy
Using energy in a responsible way not only saves money but also
helps the environment. The following will help you to save energy:
•Use proper pans for cooking. A saucepan should never be smaller
than a zone. Always remember to cover any pans.
•Ensure pans and the hob are kept clean. Soils can prevent heat
transfer and repeatedly burnt-on spillages can often only be
removed by products which cause damage to the environment.
•Do not uncover the pan too often (a watched pot never boils!).
Be sure to recycle all of the packaging. All packaging materials
used are 100% recyclable.

7
Cooking on Induction
The principle of induction cooking is based on magnetic eect.
When you put your cookware on an induction zone and switch it on,
the electronic boards in the hob produce induced currents in the base
of the cookware and instantly raise its temperature. This heat is then
transferred to the food inside the cookware.
The best cookware to use with induction cooking has thick flat bases,
as the heat will be better distributed meaning cooking is more even.
Most cookware is compatible with induction cooking.
There are three ways to check the suitability of your cookware:
1. Using a magnet to see if the base of the pan is magnetic: if the
magnet sticks, then the cookware is compatible.
2. Place the pan on one of the cooking zones and switch the
zone on. If the display continues to show the selected power
level then the cookware is compatible. If the display shows “ ”,
the cookware cannot be used on an induction hob.
3. Check the instructions, base or packaging of the pans for the
symbols indicating suitability for use with induction:

8
Hob layout
Zones:
1. Front left 2.2 - 3.5kW
220 mm x 190 mm
2. Back left 2.2 - 3.5kW
220 mm x 190 mm
3. Back right 2.2 - 3.5kW
220 mm x 190 mm
4. Front right 2.2 - 3.5kW
220 mm x 190 mm
Please note: Zone markings become visible when using the hob and
help in identifying the zone in use. See page 30 for more information.
Control panel:
1. On/o sensor 6. Safety key lock sensor with LED
2. Pause function sensor 7. Cooking zone indicators
3. Keep warm function sensor 8. Timed zone indicator LEDs
4. Booster function sensor 9. Minute minder indicator LED
5. Heat setting slider sensor 10. Timer indicators
fig. 1
1
23
4
fig. 2
1
4
5
2
3
6
787
8
9
10

9
Using your hob
To switch the hob on
•To switch the power on, touch and hold the "On/off sensor" (1) for
approximately one second. The hob will beep and all four cooking
zone indicators, and both timer indicators, will show “0”.
Please note: If a power level is not set within ten seconds, the hob will
switch off automatically.
To activate a zone and set a power level
•Simply touch the desired zone's indicator (7) and then set the desired
power level using the heat setting slider sensor (5). The standard
power levels range from 1 (minimum) to 9 (maximum). The hob will
then begin heating providing that the correct cookware is being used.
Please note: A cooking zone indicator will pulsate when zone control/
adjustment is available and will continue to pulsate for approximately 10
seconds after a power level has been set.
To deactivate a zone
•Ensure the hob is unlocked. Press and hold the active zone's
indicator for approximately 3 seconds to return the heat setting to 0.
The cooking zone indicator will display a "0" to confirm that the zone
is now inactive. Alternatively, you can use the slider.
• If switching off multiple zones, the above steps need to be taken
for each zone. When all the zones are at "0", the hob will switch off
automatically after approximately ten seconds.
•Alternatively, to switch off the hob immediately, touch and hold the
"On/off sensor" (1) for approximately one second.

10
Please note: Any zones that are still hot to the touch will display an
" " or " " provided the mains power supply is not interrupted.
Booster
The hob is equipped with a booster function on all zones, allowing a
higher power level than the maximum for approximately ten minutes.
To activate the booster on a zone
•Touch the desired zone's indicator (7) and then touch the booster
function sensor (4). "P" will show in the cooking zone indicator to show
that the booster is on.
• The booster function automatically deactivates after 10 minutes of
usage. The cooking zone will continue to operate at its nominal
power at this point. The booster can be reactivated after this time
provided the hob's internal components have not overheated.
To deactivate the booster on a zone
• To cancel the booster at any time, touch the desired zone's
indicator (7) and then use the heat setting slider sensor (5) to return
the heat setting to "0". Alternatively, press and hold the zone's
indicator for approximately 3 seconds to deactivate the zone.
Please note: The booster function can be used on a pair of bridged
cooking zones at the same time. However the booster function cannot
be used on more than two zones (or one bridge) at once. This is to
prevent damage to the internal components which may be caused by
overheating.

11
If the appliance's electronic circuits or induction coils overheat
whilst the booster function is in operation then the function will be
automatically deactivated and the zone will continue to operate at its
nominal power. The booster function will be available again once the
internal components have been cooled sufficiently.
It is normal for a high pitched whirring noise to begin whilst the
booster function is in use. This is the cooling fan inside the hob
keeping the internal components as cool as possible.
If a pot is removed from the cooking zone whilst the booster function
is in use, the ten minute countdown continues.
Operating time limiter
In addition to the booster deactivation timer, each zone has an
operating time limiter to increase overall efficiency and to prevent
the hob from being left on indefinitely. If a zone's heat setting is
not changed for a specific duration then the associated zone is
automatically switched off and residual heat indicator activated.
Zones can still be used as normal in accordance with the operating
instructions. The operating time limiter is set according to the last
selected heat setting. The maximum operating times for each setting
can be found below.
8
1
Zone Heat Setting
Maximum
Operating Time
(hours)
234 5 6 7 8 9 P
8 5 5 5 1.5 1.5 1.5 0.168 1.5

12
Auto-heat function
Every zone is equipped with an auto-heat function, which reduces the
warming up time for the zone.
To activate the auto-heat function on a zone
•Simply touch the desired zone's indicator (7) and then set the
desired power level using the heat setting slider sensor (5).
•Touch the relevant zone's indicator once more. The display will
alternate between the set power level and “A” for a preset period
of time, before reducing the power to the originally selected heat
setting. The duration of each auto-heat setting's limiter is shown in
the table below.
To deactivate the auto-heat function
• Simply touch the desired zone's indicator (7) and then either set
the desired power level using the heat setting slider sensor (5) to
"0" or, alternatively, touch the zone's indicator again to deactivate
the auto-heat function and return the zone to the originally set
power level. Alternatively, press and hold the zone's indicator for
approximately 3 seconds to deactivate the zone.
Please note: The auto-heat function is not compatible with heat
settings 9 or P (Boost).
50
1
Zone Heat Setting
Maximum
Operating Time
(seconds)
234 5 6 7 8 9 P
70 135 210 260 430 120 190 - -- -

13
Timer/minute minder
The hob is equipped with a timer that allows a finish time to be set
for the end of cooking on any zone, between a minimum of 1 minute
and a maximum of 99 minutes. This timer can be used separately for
each zone, and an LED will indicate the zone positions for each of the
active timers. Once the timers are set, the timer display will show the
time remaining on the first zone to finish cooking. In normal use, the
timer ending prompts the zone heating to end as well. However the
timer can also be used as a minute minder to count down time without
halting heating.
Please note: At the end of the timer, the selected zone will switch o
and the timer indicators, and relevant timed zone LED, will flash. The
hob will beep for approximately two minutes. To switch o the beep
and the flashing display, touch any key. This beeping also occurs after
the minute minder time has elapsed and the same process to switch
o the beep applies.
To set the timer
•First switch on the hob if necessary and set the desired zone to the
power level required.
•With the cooking zone indicator of the selected zone pulsating,
touch the timer indicators (10). The second 0 of the timer indicators
should pulsate. Use the heat setting slider sensor (5) to set the
individual minutes.
•Next, touch the timer indicators (10) to change adjustment to the
tens of minutes. The first 0 of the timer indicators should pulsate.
Use the heat setting slider sensor (5) to set the tens of minutes.

14
•After approximately 10 seconds the selection will confirm and the
time will begin counting down.
•The timed zone LEDs are oriented in a similar way to the zones;
•If no time is set within ten seconds, the timer indicators (10) will
become inactive and the zone will continue cooking.
Please note: the timer duration can be adjusted at any time during the
countdown. Simply follow the steps for setting the timer and amend
the minutes as necessary.
To cancel the timer
•Touch the relevant cooking zone indicator (7) so that the display
pulsates. Then touch the timer indicators so that the second 0
pulsates. Use the heat setting slider sensor (5) to change the
individual minutes to 0. Touch the timer indicators again so that the
first 0 pulsates and use the heat setting slider sensor (5) to set the
tens of minutes to 0. The selection will confirm after approximately
10 seconds.
•Do this for each zone if necessary.
•Cancelling the timer will not switch o a zone. You should switch
the zone o manually if required.

15
To set the minute minder
• Switch the hob on using the on/o sensor (1) if necessary but do not
set a power level on any zone.
• Touch the timer indicators (10) to activate the minute minder. The
LED immediately above the timer indicators should illuminate. This
is the minute minder LED. The second 0 of the timer indicators
should pulsate. Use the heat setting slider sensor (5) to set the
individual minutes.
•Next, touch the timer indicators (10) to change adjustment to the
tens of minutes. The first 0 of the timer indicators should pulsate.
Use the heat setting slider sensor (5) to set the tens of minutes.
• After approximately 10 seconds the countdown will begin. Heating
zones can now be used as normal
To cancel the minute minder
• Follow the steps for setting the minute minder but set the time to 0.
After approximately 10 seconds the timer display will extinguish.
Please note: the minute minder will not be available if you try to set
it and a zone is already active. All zones must first be inactive/set to
0. Once the minute minder has been set then zones can be used as
normal.
Pause function
The hob is equipped with a pause function that allows the user to
suspend the hob's operation for a brief period of time and to easily
continue cooking when convenient from the previously assigned
settings. This is particularly useful when your attention is drawn from

16
the hob, i.e. answering the door.
To activate the pause function
• At least one hob zone must be active. Press the pause
function sensor (2). All cooking zone indicators will show a pause
symbol and zone operation will halt.
To deactivate the pause function and resume cooking
• Press the pause function sensor (2) again. The zones that were
operating when the pause function was activated should return to
their previously assigned power levels.
Please note: the pause function can only be used for a maximum of
10 minutes. If the hob is not reactivated within this time then the hob
switches itself o.
Keep warm function
Each zone is equipped with a keep warm function that is designed to
keep food at a stable temperature. This allows for the serving of food
to be delayed and also for the melting of butter or chocolate.
• A flat-bottomed pan must be used so that the temperature can be
accurately measured by the detector within the heating zone.
• Due to the potential for the spread of bacteria it is not advisable to
keep food warm for more than two hours.
• There are three temperature levels that can be set: 42°C, 70°C and
94°C.

17
To activate the keep warm function
• Touch the desired zone’s indicator (7). Then touch the keep warm
sensor (3) either once, twice or three times.
• Touching the keep warm sensor (3) once will activate the 42°C
heating level.
• Touching the keep warm sensor (3) twice will activate the 70°C
heating level.
• Touching the keep warm sensor (3) three times will activate the
94°C heating level.
• The selection will confirm after approximately 10 seconds.
Please note: The cooking zone indicator will display the ( ) symbol
when the 42°C heating level is active, the ( ) symbol will be
displayed when the 70°C heating level is active and the ( ) symbol
will be displayed when the 94°C heating level is active.
To deactivate the keep warm function
• Touch the relevant zone’s indicator (7) and use the heat setting
slider sensor (5) to change the power level to 0. The selection will
confirm after approximately 10 seconds.
Please note: Any zones that are still hot to the touch will display an
" " or " " provided the mains power supply is not interrupted.
Bridge function
The hob is equipped with a bridge function which allows you to use
two heating zones with just one zone's controls. This function is

18
intended for use with pans such as fish kettles and is available for the
two zones on the left side and the two zones on the right side.
To bridge the left-hand zones
Touch the cooking zone indicator (7) of the front-left zone and, at the
same time, touch the cooking zone indicator (7) of the rear-left zone.
If the bridge function has been enabled succesfully, the cooking zone
indicator (7) of the rear-left zone will display a ( ) symbol and the red
hob markings will merge. The front left zone controls will now alter
both zones’ heat setting.
To bridge the right-hand zones
Touch the cooking zone indicator (7) of the rear-right zone and, at the
same time, touch the cooking zone indicator (7) of the front-right zone.
If the bridge function has been enabled succesfully, the cooking zone
indicator (7) of the rear-right zone will display a ( ) symbol and the
red hob markings will merge. The front right zone controls will now
alter both zones’ heat setting.
To cancel a bridge
Simply touch and hold the cooking zone indicator displaying the
( ) symbol for approximately three seconds. If the bridge has been
successfully cancelled then the two zone indicators that were bridged
will each display a 0. The zones will now be individually operational.
Please note: Pans placed on bridged zones must always cover both
the vertical markings (II) on the zones.

19
Safety key lock
To prevent accidental use, the hob has a safety key lock which
switches controls o temporarily or completely. The safety key lock
can be activated when the hob is turned on but not when power has
been switched o at, or the appliance disconnected from, the mains.
Disconnecting the appliance from the mains will deactivate the safety
key lock.
To switch on the lock, turn on the hob and touch the safety key lock
sensor (6) for approximately 4 seconds. The hob will beep and the
safety key lock LED should illuminate.
To switch o the lock, switch on the hob if necessary and then touch
the safety key lock sensor (6) for approximately 4 seconds. The hob
will beep and the safety key lock LED should extinguish.
Residual heat indicators
The hob is equipped with residual heat indicators to warn when any
of the zones are still hot to the touch after use. An “ ” will show in a
zone’s indicator if the relevant zone is between 45°c and 60°c. An
“ ” will show if the relevant zone is 60°c or above. You should avoid
touching any zone whilst the hob is in use or whilst either residual
heat indicator is displayed.
In the event of a power cut or failure, the residual heat indicators will
illuminate after the power supply is restored. When there is no power
supply to the hob however the residual heat indicators will not work,
yet the hob zone(s) may still be hot, so extra care must be taken.

20
Ecient use of your hob
The hob is equipped with zones designed to accommodate most
shapes and sizes of pan. For best results, only use pans with flat
bottoms. The most ecient use of the hob is shown below, where the
pan and zone are correctly chosen.
Use pan lids where possible to minimize the energy usage of your
appliance.
Pans placed on the zones must always be within the markings on a
zone. Locating the centre of a pan in the centre of the zone markings
will ensure optimum eciency.
Fig.3
Zone Size Minimum Pan Size (mm) Maximum Pan Size (mm)
220mm x 190mm 120 220
Single zone
Bridged zones
Table of contents
Other CDA Hob manuals

CDA
CDA HG7501 Series Service manual

CDA
CDA HN7242FR User manual

CDA
CDA HN9850FR Installation and operating instructions

CDA
CDA HC9606FR Specification sheet

CDA
CDA HVC70 Reference manual

CDA
CDA hn9610 Reference manual

CDA
CDA hc6620 Reference manual

CDA
CDA HC9621FR Quick start guide

CDA
CDA HG6151 Quick start guide

CDA
CDA MATRIX MHC101FR Reference manual

CDA
CDA HVN91 Reference manual

CDA
CDA GAS HOBS HCG301 Instructions for use

CDA
CDA HC7600 Specification sheet

CDA
CDA HCG602 Reference manual

CDA
CDA HN6411 Quick start guide
CDA
CDA HNE8FR Installation and operating instructions
CDA
CDA hc3620 Reference manual

CDA
CDA CERAMIC HOBS HVC65 Reference manual

CDA
CDA HVG620 Reference manual

CDA
CDA HCG501 Reference manual