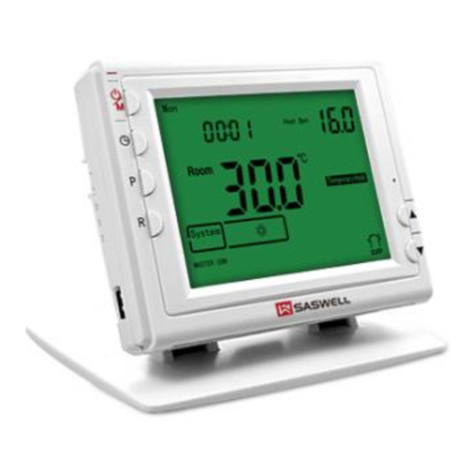
Celect SAS908XWHB-7-DF1 User manual

1
SAS908XWHB-7-DF1 Waterline Master Control Controller
SAS908XWHB-7-DF1 most common residential thermostat and is designed to be used with electric,
gas or oil heating control system.the wireless thermostat application for adjust the room temperature
application.
SPECIFICATION
Power source ………………………………2 AA size 1.5V alkaline battery
Wireless frequency band……………………868MHZ(FSK)
Wireless transmitter range…………………..100m in the open air
Room temperature setting range ………….5℃~50℃or 41℉~123℉
Accuracy………………………………………0.5℃or 1℉
Ambient temperature-operation……………0℃~+50℃(32℉~122℉)
Ambient temperature-transport…………….-10℃~+60℃(14℉~140℉)
Dimensions…………………………………..115×90×32mm
FEATURE:
Can be placed anywhere in the home to detect and control the temperature of an area of the user’s choice.
Not limited by power control wiring locations.
Link with the Receiver via RF. Control distance 100M open site.
Large LCD display
The screen displays the set temperature and the room temperature also time simultaneously
Permanent user setting and program setting retention during power loss
Optional temperature display of Celsius or Fahrenheit scale
Both Vacation mode and hold duration mode available for comfort and energy saving
Optional programming Period: 7 individual day or Separate 5-day (weekday) and 1-day/1-day
(Saturday/Sunday) programming with 4 or 6 separate time/temperature periods per day.
Display temperature recalibrates
Low battery indication
Anti-freezing protection
KEYBOARD, DISPLAY AND SWITCH DESCRIOPTION

2
Button and Functional description:
① Power on/ anti-freezing /off button;
② Time setting button;At starting shortly press ②button enter setting the minute, press add and subtract
key, adjust the minute,press ④button to confirm and exit;then shortly press button②enter setting the
date,press add and subtract key, adjust the week,press button to confirm and exit.④
③ Program Setting button;at starting up and program running state(programming mode) shortly press
button ③enter the program and set the date,then press button enter programming time③,press button
enter programming temperature③;at starting up and program running state long press button more③
than 3 seconds enter keeping running mode forever;at shutdown state long press button ③more than 3
seconds enter implied parameters setting the first item,then press button ③enter implied parameters
setting the next item.
④ Confirm/Exit button;At setting state shortly press button ④is all setting confirmation and exit forever
keeping mode, or at temporarily keeping mode shortly press button ④to exit and return to program
running state;at parameter setting(or program setting),long press button ④more than 3 seconds
parameter setting(or program setting) , return to factory default setting;At power on(anti-freezing mode
OFF)long press button ④more than 3 seconds, launch coding program,when the receiver is under
coding state, so code,or keep original code.
⑤ Reset button;the date return to Sunday 0 o’clock,program running mode,all setting is unaltered.
⑥ Add button
⑦ Shorten button
Display instruction:
INSTALL THE THERMOSTAT
Install Battery
(1) week shows ;(2)time shows ;(3)setting
shows;(4)room shows;(5) mode shows;(6)
communication alarm shows;(7) control mode
shows ;(8)program time shows ;(9)starting
heating shows ;(10)temperature shows ;
(11)operation mode shows;(12) Low battery
indicator shows ;( 13 )Shows setting
temperature;(14)locking key shows(15)floor
temperature shows or alarm shows

3
Wall installation:
Tabletop installation:
Error and Alarm function
1) “ ”warning flashes on the screen for approximately 30 days when your thermostat runs out of
batteries. Replace the batteries when Low battery warning flashes
2) Room Temp (inside room Sensor) broken or short cut, the thermostat will have “room ERR” display
3) Communication alarm: When the thermostat stops or starts the output, the receiver do not start or not
receive some signals that can not return to the thermostat, display will show Er2
OUTPUT REGULATION
Press to shift standby or running mode
Standby mode (OFF mode): The system has no output or Temperature lower than the low limitation (LO)
alarm,
Running mode (heating mode):
1. Room sensor circuit broken or short cut, heating output stop.

4
2. Setting Temp – Room Temp ≥1℃, heating output on (Fast heating or slow heating, see configuration
menu 6 items)
3. Room Temp – Setting Temp ≥1℃, heating output off,
Configuration setting
In standby mode press ③ button under the above three seconds, Through the 、button adjustment, After
adjustment according to the ④buttons preservation.
2.display for implied parameters:
In standby mode, shortly press button to start;Shortly hold enter modify the time;Long press
more than 3seconds, enter implied parameters setting;the first item, setting the temperature coefficient:Press
、change set temperature, short press button enter implied parameters, setting other parameters,
when long press button more than 3 seconds, show that DEF flash 3 times, all parameters setting return to
Step Press buttons Displayed
(factory default)Press▲、▼to select Descriptions
1 Press P Button ( ) - --- +
Select temperature display adjustment higher or
lower
2 Press P Button ( ) ℃( ℉)— ℃(
℉)
Select maximum room temperature limitation
3 Press P Button ( ) ℃( ℉)— ℃( ℉) Select minimum room temperature limitation
4 Press P Button ( ) / Changes the display readout to Centigrade or
Fahrenheit as required
5 Press P Button
( ) / /
Backlight mode
:no backlight
:backlight maintain 5 sec
:backlight maintain 15 sec
6 Press P Button
( ) ~
Start heating conditions: when setting temperature
< room temperature from the heat, when setting
temperature ≥room temperature reduction db
parameters start heating
7 Press P Button ( )
///
Program option
:7 days separately (Refer table 1 and table
2);
:5+1+1(Refer to table 3 and table 4)
:5+2(Refer to table 5 and table 6)
:Non programmable
8 Press P Button ( ) /
Programming period in one day option
6-6 time zones;4-4 time zones;
9 Press P Button ( ) /
Time scale
:24hour system; :12hour system
10 Press P Button ( )
/
Intelligent Recovery Option
:Without intelligent function
:Active intelligent function
11 Press P Button ( ) /
Language
Chinese/English.Factory default: English.

5
factory default setting and return to implied parameters setting the first item,shortly press button exit
implied parameters setting and return to OFF mode;In standby mode implied parameters display:
3.In boot mode display:
A)In program running mode, shortly press button enter off mode;shortly press enter modify the
time;shortly press button enter programming state;Long press button more than 3 seconds enter
forever keeping mode;shortly press 、enter temporarily keeping mode
B)In forever keeping mode, shortly press enter off mode and exit forever keeping mode;shortly press
button enter modify the time;shortly press button enter programming state and exit forever keeping
mode;shortly press button exit forever keeping mode;shortly press 、modify the setting
temperature
C)without programming mode running:shortly press enter off mode;shortly press button enter
modify the time;shortly press 、modify the setting temperature.
D)In temporarily keeping mode, shortly press enter off mode and exit temporarily keeping mode;shortly
press button enter modify the time;shortly press button enter programming state and exit temporarily
keeping mode;shortly press button exit temporarily keeping mode;long press button enter forever
keeping mode;shortly press button 、modify the setting temperature.

6
2. Programming Setting Instruction
In programming setting mode, look at the factory preprogrammed times and temperatures shown in
the sample schedule. If this program will suit your needs, simply press the ③button to begin running the
factory preset program.
If you want to change the preprogrammed time and temperature, follow these steps. Determine the
times period and temperature for your program. You can program six/four periods for each
day/5+2/5+1+1(See configuration menu item 11).You can choose heating temperature and start time
independently. (for example, you may select 5:00 AM and 21℃as the weekday 1st period heating start time
and temperature and also choose 7:00 AM and 16.5℃and the weekday 1st period cooling start time and
temperature)
Short press button ③ during the running status , enter the programming surface . you could shift from
date setting , time setting ,Temp setting by press button ③ one by one, press ▲or ▼to select setting you
want. Press ④quit. . In the programming surface , push ④button in a same time for 3 seconds. Display
will show “DEF” blinking 3 times and return to programming setting 1 indicates all the setting has reverted
to factory default setting. Thermostat controls the heating system by presetting program.
Use the tables to plan your program time periods and the temperatures you want during each period.
Fill in the complete table to have a record of your program.
Table One(7 days 4 Zones Program)
——could revised according to your request
Heating
Mode
Morning Get up
Our for work
Came back
Sleep
Monday
Va l u e s
6:00 21℃8:00 16.5℃18:00 21℃22:00 16.5℃
Tuesday
Va l u e s
6:00 21℃8:00 16.5℃18:00 21℃22:00 16.5℃
Wednesday
Va l u e s
6:00 21℃8:00 16.5℃18:00 21℃22:00 16.5℃
Thursday
Va l u e s
6:00 21℃8:00 16.5℃18:00 21℃22:00 16.5℃
Friday
Va l u e s
6:00 21℃8:00 16.5℃18:00 21℃22:00 16.5℃
Saturday
Va l u e s
6:00 21℃8:00 16.5℃18:00 21℃22:00 16.5℃
Sunday
Va l u e s
6:00 21℃8:00 16.5℃18:00 21℃22:00 16.5℃
Table Two(7 days 6 Zones Program)
——could revised according to your request
Heating
Mode
Morning Get up
Our for work
Lunch
Noon shift
Came back
Sleep

7
Monday
Va l u e s
6:00 21℃8:00 16.5℃12:00 21℃14:00 16.5℃18:00 21℃22:00 16.5℃
Tuesday
Va l u e s
6:00 21℃8:00 16.5℃12:00 21℃14:00 16.5℃18:00 21℃22:00 16.5℃
Wednesday
Va l u e s
6:00 21℃8:00 16.5℃12:00 21℃14:00 16.5℃18:00 21℃22:00 16.5℃
Thursday
Va l u e s
6:00 21℃8:00 16.5℃12:00 21℃14:00 16.5℃18:00 21℃22:00 16.5℃
Friday
Va l u e s
6:00 21℃8:00 16.5℃12:00 21℃14:00 16.5℃18:00 21℃22:00 16.5℃
Saturday
Va l u e s
6:00 21℃8:00 16.5℃12:00 21℃14:00 16.5℃18:00 21℃22:00 16.5℃
Sunday
Va l u e s
6:00 21℃8:00 16.5℃12:00 21℃14:00 16.5℃18:00 21℃22:00 16.5℃
Table Three(5+1+1 4 Zones program)
———could revised according to your request
Heating
Mode
Morning Get up
Our for work
Came back
Sleep
Monday
Va l u e s
6:00 21℃8:00 16.5℃18:00 21℃22:00 16.5℃
Tuesday
Va l u e s
6:00 21℃8:00 16.5℃18:00 21℃22:00 16.5℃
Wednesday
Va l u e s
6:00 21℃8:00 16.5℃18:00 21℃22:00 16.5℃
Thursday
Va l u e s
6:00 21℃8:00 16.5℃18:00 21℃22:00 16.5℃
Friday
Va l u e s
6:00 21℃8:00 16.5℃18:00 21℃22:00 16.5℃
————could revised according to your request
Heating
Mode
Morning Get up
Our for work
Came back
Sleep
Saturday
Va l u e s
6:00 21℃8:00 16.5℃18:00 21℃22:00 16.5℃
———could revised according to your request
Heating
Mode
Morning Get up Our for work
Came back
Sleep
Sunday
Va l u e s
6:00 21℃8:00 16.5℃18:00 21℃22:00 16.5℃

8
Table Four(5+1+1 6 Zones programme).
———could revised according to your request
Heating
Mode
Morning
Get up
Our for work
Lunch
Noon shift
Came back
Sleep
Monday
Va l u e s
6:00 21℃8:00 16.5℃12:00 21℃14:00 16.5℃18:00 21℃22:00 16.5℃
Tuesday
Va l u e s
6:00 21℃8:00 16.5℃12:00 21℃14:00 16.5℃18:00 21℃22:00 16.5℃
Wednesday
Va l u e s
6:00 21℃8:00 16.5℃12:00 21℃14:00 16.5℃18:00 21℃22:00 16.5℃
Thursday
Va l u e s
6:00 21℃8:00 16.5℃12:00 21℃14:00 16.5℃18:00 21℃22:00 16.5℃
Friday
Va l u e s
6:00 21℃8:00 16.5℃12:00 21℃14:00 16.5℃18:00 21℃22:00 16.5℃
——————could revised according to your request
Heating
Mode
Morning Get up Our for work
Lunch
Noon shift
Came back
Sleep
Saturday
Va l u e s
6:00 21℃8:00 16.5℃12:00 21℃14:00 16.5℃18:00 21℃22:00 16.5℃
——————could revised according to your request
Heating
Mode
Morning Get up Our for work
Lunch
Noon shift
Came back
Sleep
Sunday
Va l u e s
6:00 21℃8:00 16.5℃12:00 21℃14:00 16.5℃18:00 21℃22:00 16.5℃
Table Five(5+2 4 Zones program).
———could revised according to your request
Heating
Mode
Morning Get up
Our for work
Came back
Sleep
Monday
Va l u e s
6:00 21℃8:00 16.5℃18:00 21℃22:00 16.5℃
Tuesday
Va l u e s
6:00 21℃8:00 16.5℃18:00 21℃22:00 16.5℃
Wednesday
Va l u e s
6:00 21℃8:00 16.5℃18:00 21℃22:00 16.5℃

9
Thursday
Va l u e s
6:00 21℃8:00 16.5℃18:00 21℃22:00 16.5℃
Friday
Va l u e s
6:00 21℃8:00 16.5℃18:00 21℃22:00 16.5℃
———could revised according to your request
Table Six(5+2 6 Zones programme)
.———could revised according to your request
Heating
Mode
Morning Get up
Our for work
Lunch
Noon shift
Came back
Sleep
Monday
Va l u e s
6:00 21℃8:00 16.5℃12:00 21℃14:00 16.5℃18:00 21℃22:00 16.5℃
Tuesday
Va l u e s
6:00 21℃8:00 16.5℃12:00 21℃14:00 16.5℃18:00 21℃22:00 16.5℃
Wednesday
Va l u e s
6:00 21℃8:00 16.5℃12:00 21℃14:00 16.5℃18:00 21℃22:00 16.5℃
Thursday
Va l u e s
6:00 21℃8:00 16.5℃12:00 21℃14:00 16.5℃18:00 21℃22:00 16.5℃
——could revised according to your request
Heating
Mode
Morning Get up
Our for work
Lunch
Noon shift
Came back
Sleep
Saturday
Va l u e s
6:00 21℃8:00 16.5℃12:00 21℃14:00 16.5℃18:00 21℃22:00 16.5℃
Sunday
Va l u e s
6:00 21℃8:00 16.5℃12:00 21℃14:00 16.5℃18:00 21℃22:00 16.5℃
1. Temporary hold mode
In normal operation, press ▲or ▼,“temporary hold” is flashing indicates thermostat is in temporary
hold mode. Press ▲or ▼to change set temperature, the thermostat will override the current programming
setting and keep the room temperature at the selected temperature until the next program period begins. Then
the thermostat will automatically revert to the program operation. Press ④ quit .If no keys are pressed
within 20 seconds, the thermostat will revert to using schedule.
Heating
Mode
Morning
Get up
Our for work
Came back
Sleep
Saturday
Va l u e s
6:00 21℃8:00 16.5℃18:00 21℃22:00 16.5℃
Sunday
Va l u e s
6:00 21℃8:00 16.5℃18:00 21℃22:00 16.5℃

10
2. Permanent hold temperature setting
When thermostat is in program operation, press button ① over 3 seconds to enter the Permanent hold
mode . Press ▲、▼ change set temperature. The thermostat will permanent hold the room temperature at the
selected setting until you press ④button to restart the program operation.
3. Code match and Wireless Control:
1) According to the system requirements SAS2010DE connected to the power source (L, N 100 ~ 240 vac),
Check and energizing, Press the power button switch machine is normal or not electricity, light is lit.
Otherwise, Please replace the product, Then press the last step action to execute.
2) Open SAS908XWHB-7-DF1 backplane Load two batteries (AA) ,Closed the backplane, And check the
display and button functions, not normal replacement product, Press re-execute the previous step action.
(3) Energized normal SAS2010DE products in shutdown mode (indicator), press and hold the power button
until the indicator A long bright yellow release, this time SAS2010DE in the code state.
(4) The thermostat SAS908XWHB -7- DF1 in standby mode, long according to the thermostat R button
more than 3 seconds, Emission to code command.
(5) The success of the code receiving portion yellow flashing 01 blinks four times, Otherwise the code is
unsuccessful, Return reflector of the original code value.
Note: When in the process for the debug on/off, the interval of time should more than 4 sec,
otherwise the products have not time for react.
4. Reset operation
If the display is abnormal, press the Reset button by using a fine probe such as a straightened paper
clip to gently push the Rest button. This will reset the thermostat.
5. Battery note: 1)The battery power low battery warning sign " " flicker
2) Products when not in use for a long time, please take off, to prevent battery leakage
damage product
CUSTOMER ASSISTANCE
After reading this guide, if you have any question about the operation of your thermostat, please contact your
installer or service provider.
Table of contents
Other Celect Controllers manuals
Popular Controllers manuals by other brands

Emerson
Emerson Bettis Nuclear Series Operation and maintenance manual

Barco
Barco Sedomat 2800 Specifications

Emerson
Emerson Bettis CBB Series Disassembly and Reassembly

Danfoss
Danfoss ERC 101 kit instruction sheet

IAI
IAI EC ELECYLINDER EC-RP4 instruction manual

Light
Light LIGHT-CONTROL 512 quick start guide