Remote Control
5
1 2
3
4
5
67
8
9
10 11
12
13
14 15
16 17
19
18
20
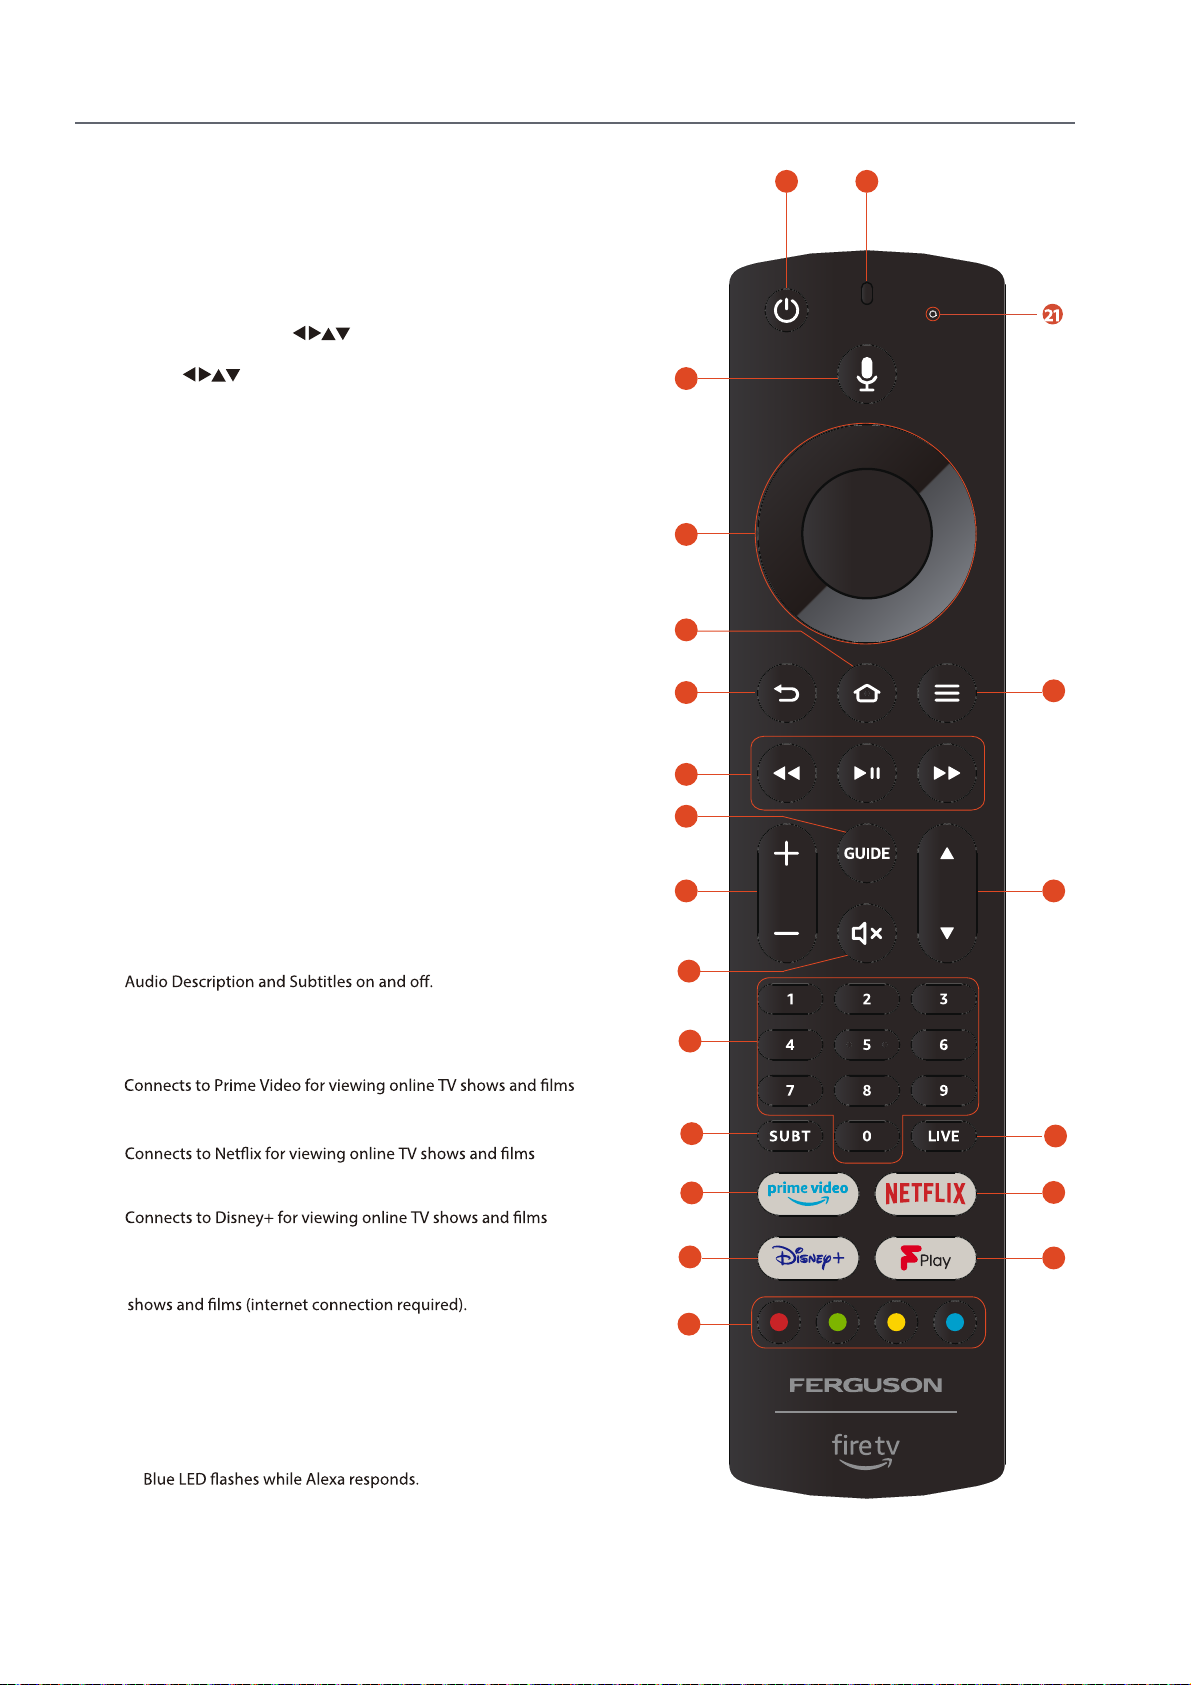
1. STANDBY Button
Press to switch between on and standby.
5.
NUMBER Buttons
Press to select a Live TV channels.
6.
GUIDE Button
Press to view the Live TV Programme Guide.
8.
9.
Disney+ button
10.
NETFLIX Button
(internet connection required).
11.
PRIME VIDEO Button
(internet connection required).
12.
HOME Button
•Press to view the home screen.
13.
14.
OK and NAVIGATION ( )Buttons
•Press OK to select items in menus.
•Press to navigate around menus.
15.
BACK Button
Press to move back through menus.
16.
17.
VOLUME +/- Buttons
Press to increase and decrease the volume level.
18.
CHANNEL +/- Buttons
•Press to scroll up and down the channel list.
19.
Press and hold this button to activate Alexa
voice control.
20.
MUTE Button
Press to mute or un-mute the volume.
FPLAY button
Press to access FreeviewPlay for viewing live and on-demand
REWIND - PAUSE - FAST FORWARD Buttons
•Press to rewind videos.
•Press to Pause videos.
•Press the fast forward videos.
•Press the play videos.
SUBTITLE Button
Press to access the AUDIO menu where you can switch
COLOURED Buttons
•Press the RED button to access Red button services if available.
•Access the TELETEXT items when viewing Live TV.
•Press the coloured buttons to select Freeview Play options.
4.
7. Option Button
Press to view options of the selected item.
LIVE Button
Press to watch live TV.
(internet connection required).
Turquoise LED lights when you press and hold the Alexa
Button.
Red LED will light to show low batteries.
21. Alexa LED
•
•
•
2. Microphone
Speak into the microphone when using Alexa.
3. Alexa Voice Button