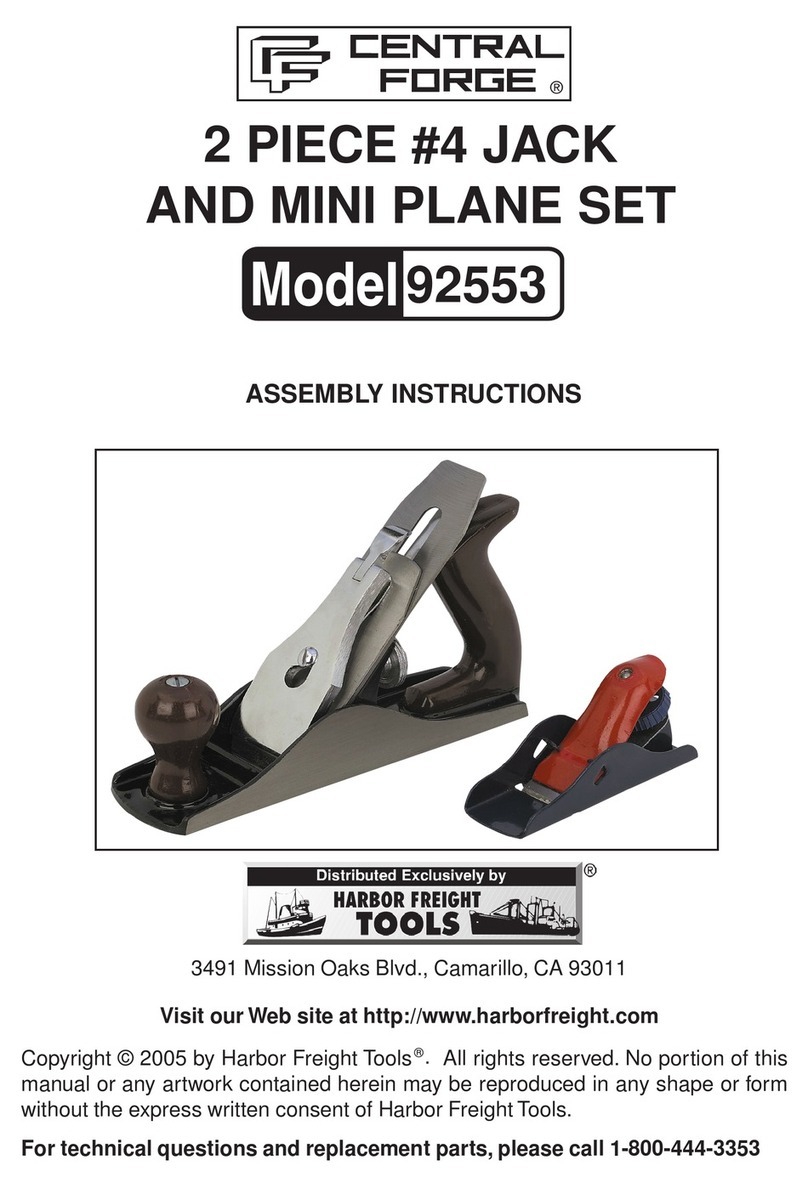
Central Forge 92553 Assembly instructions

Visit our website at: http://www.harborfreight.com
NO. 4 JACK &
MINI PLANE SET
Owner’s Manual & Safety Instructions
Save This Manual Keep this manual for the safety warnings and precautions, assembly,
operating, inspection, maintenance and cleaning procedures. Write the product’s serial number in the
back of the manual near the assembly diagram (or month and year of purchase if product has no number).
Keep this manual and the receipt in a safe and dry place for future reference. 23a
When unpacking, make sure that the product is intact
and undamaged. If any parts are missing or broken,
please call 1-888-866-5797 as soon as possible.
Copyright©2023 by Harbor Freight Tools®. All rights reserved.
No portion of this manual or any artwork contained herein may be reproduced in
any shape or form without the express written consent of Harbor Freight Tools.
Diagrams within this manual may not be drawn proportionally. Due to continuing
improvements, actual product may differ slightly from the product described herein.
Tools required for assembly and service may not be included.
Read this material before using this product.
Failure to do so can result in serious injury.
SAVE THIS MANUAL.

Page 2 For technical questions, please call 1-888-866-5797. Item 92553
Specifications
#4 Jack Plane 2" Wide Blade @ 25°
Mini Block Plane 1.3" Wide Blade @ 25°
IMPORTANT SAFETY INFORMATION
1. Secure workpiece with clamps.
2. Properly assemble plane before use.
3. Sharp blade; avoid contact during set up and use.
4. Wear ANSI-approved safety goggles and heavy
duty work gloves during set up and use.
5. Keep work area clean.
6. Observe work area conditions. Do not use
tools in damp or wet locations. Do not expose
to rain. Keep work area well lighted.
7. Dress properly. Do not wear loose clothing or jewelry.
Protective, electrically nonconductive clothes and
non-skid footwear are recommended when working.
Wear restrictive hair covering to contain long hair.
8. Stay alert. Watch what you are doing, use common
sense. Do not operate any tool when you are tired.
9. Take caution as some woods contain preservatives
such as copper chromium arsenate (CCA)
which can be toxic. When working with this
type of wood, extra care should be taken to
avoid inhalation and minimize skin contact.
10. Do not overreach. Keep proper footing
and balance at all times.
11. This product is not a toy. Do not allow
children to play with or near this item.
12. Use as intended only.
13. Inspect before use; do not use if
parts are loose or damaged.
14. Store idle equipment. When not in use, tools must
be stored in a dry location to inhibit rust. Always
lock up tools and keep out of reach of children.
15. Maintain product labels and nameplates.
These carry important safety information.
If unreadable or missing, contact
Harbor Freight Tools for a replacement.

Page 3For technical questions, please call 1-888-866-5797.Item 92553
Operation
Read the ENTIRE IMPORTANT SAFETY INFORMATION section at the beginning of this document
including all text under subheadings therein before set up or use of this product.
#4 Jack Plane
1. To remove the Blade (1), lift the Lever and remove
the Lever Cap Assembly (3) from the Plane.
2. To remove the Chip Breaker (19) from the
Blade, remove the Screw (2) from the bottom of
the Blade. The Blade can now be sharpened.
Replace the Chip Breaker (curved side towards
the Blade) and tighten the Screw when finished.
3. To install the Blade, position it with the Chip
Breaker secured, over the Lever Cap Screw (4)
and align the Blade with the bottom opening of
the Plane Body (16). Replace the Lever Cap over
the Lever Cap Screw and slide it down until the
Lever Cap Screw is aligned with the narrow part of
the opening, then tighten the Lever Cap Screw.
4. Adjust the Blade left to right by using the Blade
Adjustment Lever (9). Adjust the Blade depth by
tightening or loosening the Adjustment Knob (7).
Note: If the Blade is tilted too far to one side,
scratching and gouges can occur on the workpiece.
5. Use the planer on a scrap piece of
wood after sharpening and adjusting
to ensure it is working properly.
6. Make sure the workpiece is securely fastened down.
7. Do not force the Plane or press down on it. Cut
wood by moving the Plane forward, taking off a
little wood at a time. If the Plane does not move
forward easily, adjust the Blade farther back
into the Plane Body as explained in step 4.
Note: If the Blade isn’t planing properly, adjust
the Blade depth, or adjust Blade left to right. If the
Plane does not cut easily, inspect the Blade edge for
dulling or damage, sharpen the blade if needed.
Lever (5)
Lever Cap
Screw (4)
Blade
Adjustment
Lever (9)
Adjustment
Knob (7)
Blade (1)
Chip Breaker
(19)
Screw (2)
Plane
Body (16)
Mini Block Plane
1. To remove the Blade (1), loosen the Adjustment
Screw (4) and remove the Screw Cap (2).
2. The Blade can now be sharpened.
3. To install and adjust the Blade, position it over the
Plane Body (3) with the Screw Cap on top of it.
4. Turn the Adjustment Screw until the Blade is
held firmly in place in the desired position.
5. Make sure the workpiece is securely fastened down.
6. Do not force the Plane or press down on it. Move
it forward, taking off a little wood at a time. If the
Plane does not move forward easily, adjust the
Blade as explained in step 2 on previous page.
Note: If the Blade isn’t planing properly, loosen the
Adjustment Screw and reposition the Blade up or down.
Screw
Cap (2)
Plane
Body (3)
Adjustment
Screw (4)
Blade (1)

Page 4 For technical questions, please call 1-888-866-5797. Item 92553
Maintenance
General Tool Maintenance
1. During periods of storage, coat the bare
metal surfaces with light oil to inhibit rust.
2. This product should be assembled
and stored in a dry area.
Sharpening The Cutting Blade
1. Use an abrasive stone that is lubricated
with light oil or paraffin.
2. While wearing work gloves, use two hands,
one to grip the cutting blade to maintain the
angle. The other hand should exert an even
pressure just above the cutting edge.
3. Move the cutting blade along the abrasive stone in a
figure-eight motion. Begin on the course side of the
stone and finish sanding on the fine side. Always
keep the blade at the same angle while sharpening.
4. After sharpening the blade there may be a
ragged burr on the cutting edge of the blade.
5. Remove this burr by gently rubbing the flat
side of the blade on a fine abrasive stone.

Page 5For technical questions, please call 1-888-866-5797.Item 92553
Record Serial Number Here:
Note: If product has no serial number, record month and year of purchase instead.
Note: Some parts are listed and shown for illustration purposes only, and are not
available individually as replacement parts. Refer to UPC 193175486868.
PLEASE READ THE FOLLOWING CAREFULLY
THE MANUFACTURER AND/OR DISTRIBUTOR HAS PROVIDED THE PARTS LIST AND ASSEMBLY DIAGRAM
IN THIS DOCUMENT AS A REFERENCE TOOL ONLY. NEITHER THE MANUFACTURER OR DISTRIBUTOR
MAKES ANY REPRESENTATION OR WARRANTY OF ANY KIND TO THE BUYER THAT HE OR SHE IS
QUALIFIED TO MAKE ANY REPAIRS TO THE PRODUCT, OR THAT HE OR SHE IS QUALIFIED TO REPLACE
ANY PARTS OF THE PRODUCT. IN FACT, THE MANUFACTURER AND/OR DISTRIBUTOR EXPRESSLY
STATES THAT ALL REPAIRS AND PARTS REPLACEMENTS SHOULD BE UNDERTAKEN BY CERTIFIED AND
LICENSED TECHNICIANS, AND NOT BY THE BUYER. THE BUYER ASSUMES ALL RISK AND LIABILITY
ARISING OUT OF HIS OR HER REPAIRS TO THE ORIGINAL PRODUCT OR REPLACEMENT PARTS
THERETO, OR ARISING OUT OF HIS OR HER INSTALLATION OF REPLACEMENT PARTS THERETO.

Page 6 For technical questions, please call 1-888-866-5797. Item 92553
Parts List and Diagram
#4 Jack Plane
Part Description Qty
1 Blade 1
2 Screw 1
3Lever Cap Assembly 1
4 Lever Cap Screw 1
5 Lever 1
6Y Adjusting Lever 1
7 Adjustment Knob 1
8 Adjustment Screw 1
9 Adjustment Lever 1
10 Screw & Washer For Frog 1
Part Description Qty
11 Handle 1
12 Knob 1
13 Bolt and Nut for Handle 1
14 Bolt and Nut for Knob 1
15 Screw for Handle Toe 1
16 Plane Body 1
17 Clip & Screw for Frog 1
18 Adjustment Screw for Frog 1
19 Chip Breaker 1

Page 7For technical questions, please call 1-888-866-5797.Item 92553
Parts List and Diagram
Mini Block Plane
Part Description Qty
1 Blade 1
2 Screw Cap 1
Part Description Qty
3 Plane Body 1
4 Adjustment Screw 1

26677 Agoura Road • Calabasas, CA 91302 • 1-888-866-5797
Limited 90 Day Warranty
Harbor Freight Tools Co. makes every effort to assure that its products meet high quality and durability standards,
and warrants to the original purchaser that this product is free from defects in materials and workmanship for the
period of 90 days from the date of purchase. This warranty does not apply to damage due directly or indirectly,
to misuse, abuse, negligence or accidents, repairs or alterations outside our facilities, criminal activity, improper
installation, normal wear and tear, or to lack of maintenance. We shall in no event be liable for death, injuries
to persons or property, or for incidental, contingent, special or consequential damages arising from the use of
our product. Some states do not allow the exclusion or limitation of incidental or consequential damages, so the
above limitation of exclusion may not apply to you. THIS WARRANTY IS EXPRESSLY IN LIEU OF ALL OTHER
WARRANTIES, EXPRESS OR IMPLIED, INCLUDING THE WARRANTIES OF MERCHANTABILITY AND FITNESS.
To take advantage of this warranty, the product or part must be returned to us with transportation charges
prepaid. Proof of purchase date and an explanation of the complaint must accompany the merchandise.
If our inspection verifies the defect, we will either repair or replace the product at our election or we may
elect to refund the purchase price if we cannot readily and quickly provide you with a replacement. We will
return repaired products at our expense, but if we determine there is no defect, or that the defect resulted
from causes not within the scope of our warranty, then you must bear the cost of returning the product.
This warranty gives you specific legal rights and you may also have other rights which vary from state to state.
Table of contents
Other Central Forge Planer manuals
Popular Planer manuals by other brands

Makita
Makita 1911B instruction manual

Axminster
Axminster AWEPT106 user manual

Spartan Equipment
Spartan Equipment COLD PLANER III Series Operator's manual

EINHELL
EINHELL TC-SP 204 Original operating instructions

King Industrial
King Industrial CT-400D Service manual

laguna
laguna Quadtec I PXI12 owner's manual