Central Pneumatic Professional 95028 User manual

3” COMPOSITE AIR CUT-OFF TOOL
ASSEMBLY AND OPERATING
INSTRUCTIONS
3491 Mission Oaks Blvd., Camarillo, CA 93011
Visit our Web site at http://www.harborfreight.com
®
Copyright©2006 by Harbor Freight Tools®. All rights reserved. No portion of this manual or any
artwork contained herein may be reproduced in any shape or form without the express written
consent of Harbor Freight Tools.
For technical questions and replacement parts, please call 1-800-444-3353.
TO PREVENT SERIOUS INJURY,
READ AND UNDERSTAND ALL WARNINGS
AND INSTRUCTIONS BEFORE USE.
Due to continuing improvements, actual product may differ slightly from the product described herein.
95028

Page 2SKU 95028 For technical questions, please call 1-800-444-3353
Specications
Maximum RPM 20,000 RPM at 90 PSI
Maximum Air Pressure 90 PSI
Air Consumption 5 CFM at 90 PSI
Air Inlet Diameter 1/4” - 18 NPT (female inlet)
Spindle Diameter 3/8”
Accessories 3” Diameter Cut-Off Wheel
14 mm Spanner Wrench
5 mm Hex Key
Overall Dimensions 3-3/8” D X 7-3/8” L X 3” H
Weight 1.8 lbs.
Save This Manual
You will need the manual for the safety warnings and precautions, assembly instructions,
operating and maintenance procedures, parts list and diagram. Keep your invoice with this
manual. Write the invoice number on the inside of the front cover. Keep the manual and
invoice in a safe and dry place for future reference.
Safety Warnings and Precautions
WARNING: When using tool, basic safety precautions should always be followed to
reduce the risk of personal injury and damage to equipment.
Read all instructions before using this tool!
1. Keep work area clean. Cluttered areas invite injuries.
2. Do not operate pneumatic tools in explosive atmospheres, such as in the
presence of ammable liquids, gases, or dust. Pneumatic tools create sparks
which may ignite ammables..
3. Keep children away. Children must never be allowed in the work area. Do not let
them handle machines, tools, extension cords, or air hoses.
4. Store idle equipment. When not in use, tools must be stored in a dry location to
inhibit rust. Always lock up tools and keep out of reach of children.
5. Use the right tool for the job. Do not attempt to force a small tool or attachment
to do the work of a larger industrial tool. There are certain applications for which this
tool was designed. It will do the job better and more safely at the rate for which it was
intended. Do not modify this tool and do not use this tool for a purpose for which it
was not intended.

Page 3SKU 95028 For technical questions, please call 1-800-444-3353
6. Stay alert. Watch what you are doing and use common sense when operating a
pneumatic tool. Do not use a pneumatic tool while tired or under the inuence
of drugs, alcohol or medication. Doing so may result in serious personal injury.
7. Dress properly. Do not wear loose clothing or jewelry. Contain long hair.
Keep your hair, clothing, and gloves away from moving parts. Loose clothes,
jewelry, or long hair can be caught in moving parts.
8. Avoid accidental starting. Be sure the Trigger Lever (14) is off before connecting
to the air supply. Carrying pneumatic tools with your nger on the Trigger, or
connecting pneumatic tools to the air supply with the Trigger on, invites accidents.
9. Remove adjusting keys or wrenches before turning on the tool. A wrench or a key
that is left attached to a rotating part of the tool may result in personal injury.
10. Do not overreach. Keep proper footing and balance at all times. Proper footing
and balance enables better control and of the toll in unexpected situations.
11. Use safety equipment. Always wear ANSI-approved safety glasses under-
neath a full face shield, and hearing protection.
12. Replacement parts and accessories. When servicing, use only identical
replacement parts. Use of any other parts will void the warranty. Only use accessories
intended for use with this tool. Approved accessories are available from Harbor
Freight Tools.
13. Do not operate tool if under the inuence of alcohol or drugs. Read warning
labels if taking prescription medicine to determine if your judgement or reexes are
impaired while taking drugs. If there is any doubt, do not operate the Cut-Off Tool.
14. Use proper size and type extension cord. If an extension cord is required, it
must be of the proper size and type to supply the correct current to the compressor
without heating up. Otherwise, the extension cord could melt and catch re, or cause
electrical damage to the compressor. Check your air compressor’s manual for the
appropriate size cord.
15. Maintenance. For your safety, maintenance should be performed regularly by a
qualied technician.
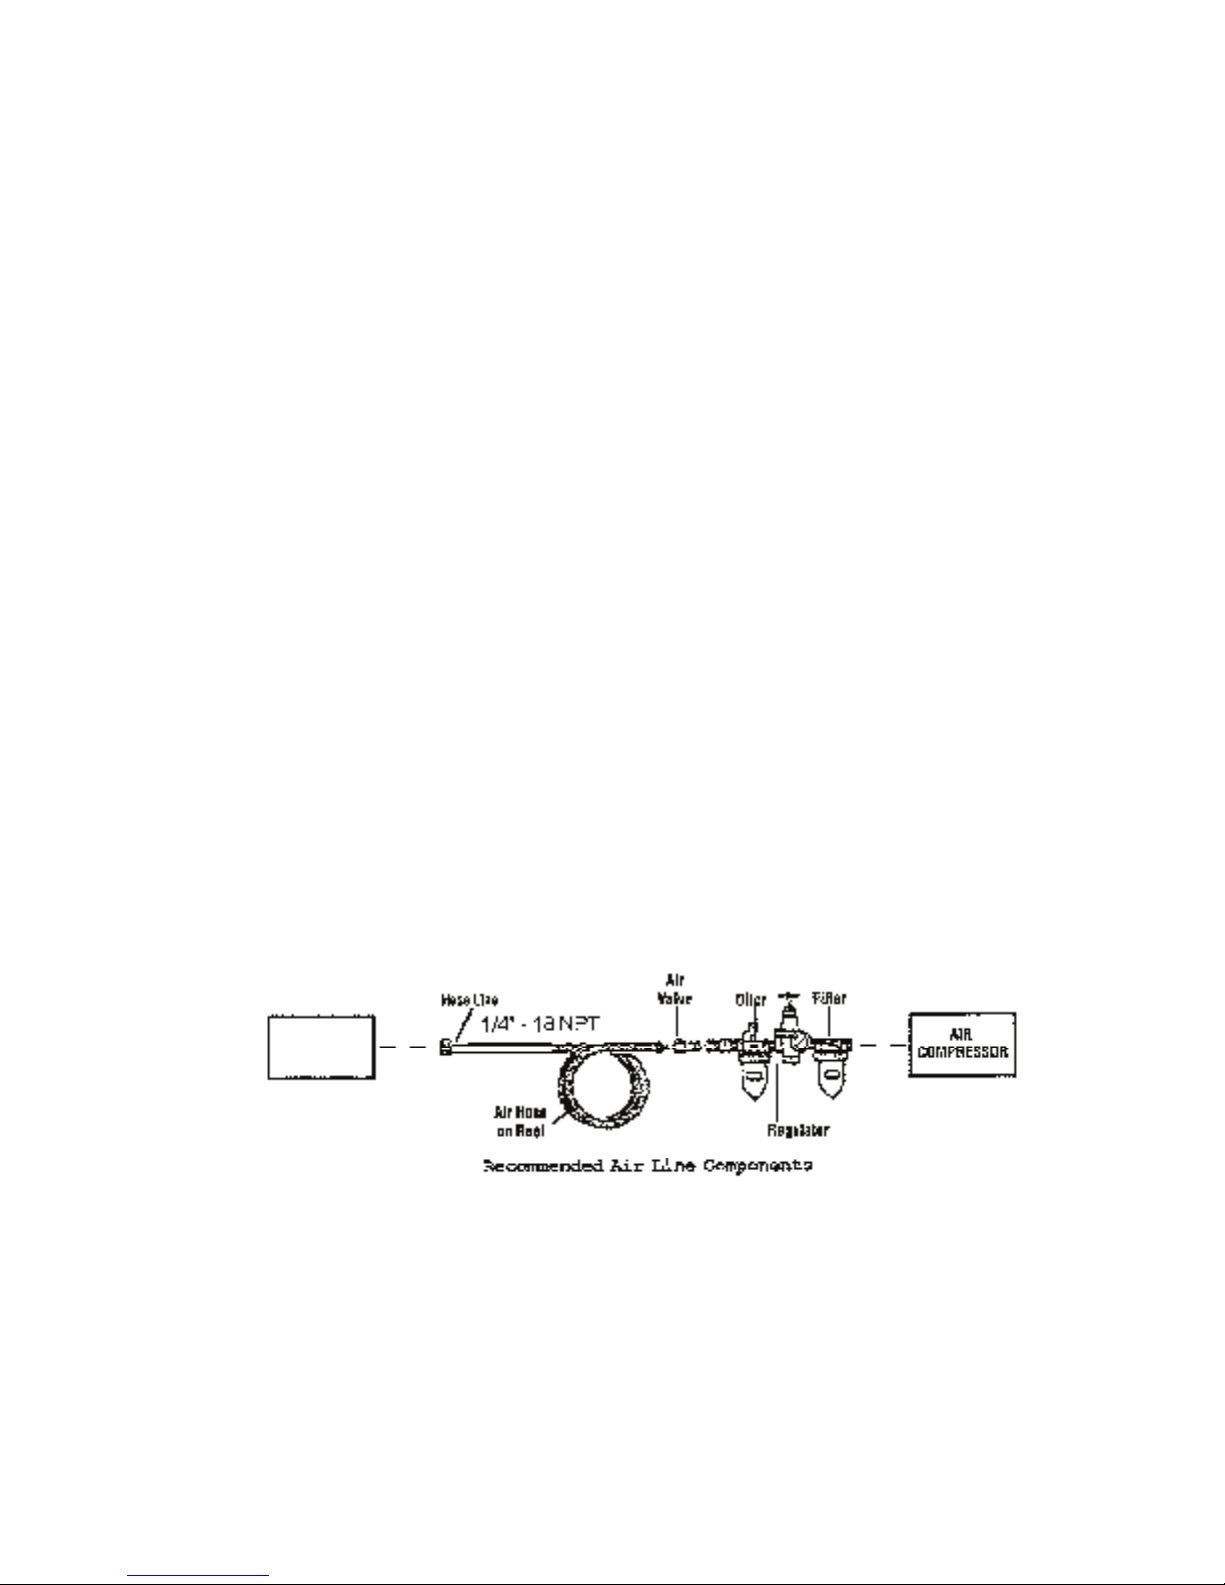
16. Compressed air only. Use clean, dry regulated, compressed air at 90 PSI. Never
use oxygen, carbon dioxide, combustible gases, or any other bottled gas as a power
source for this tool.
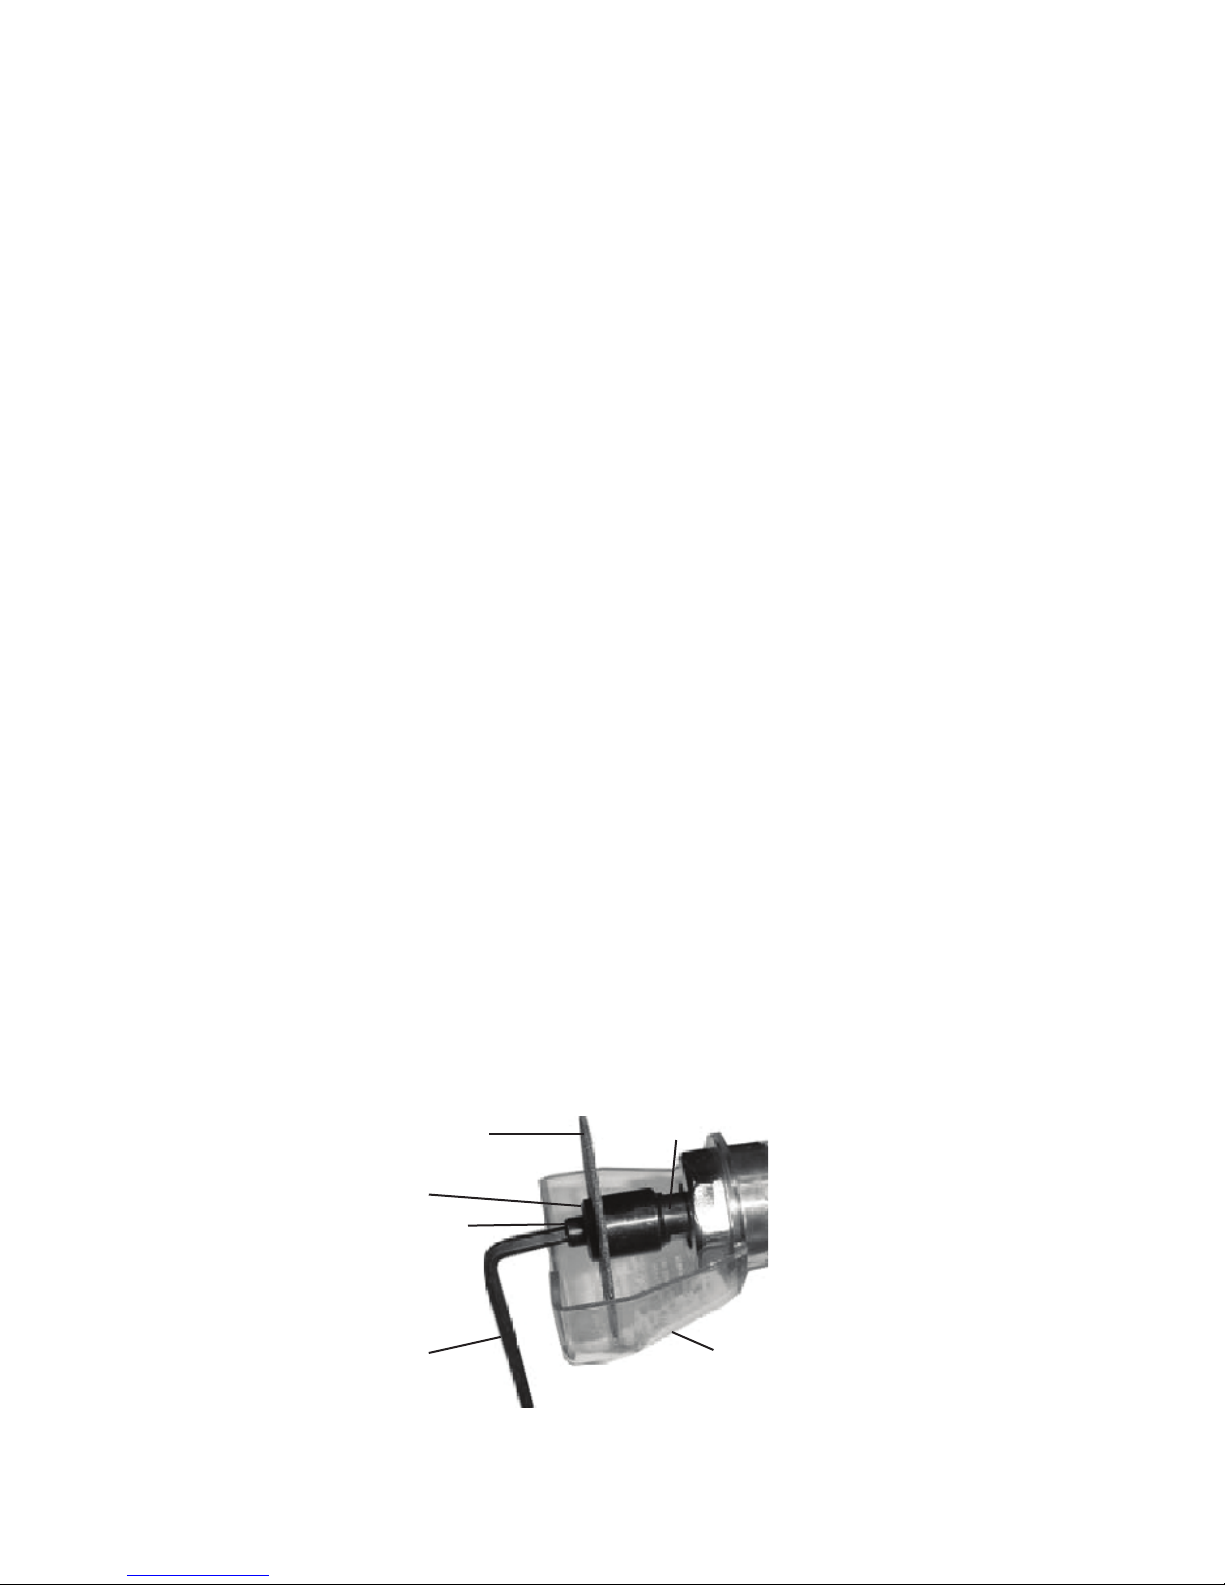
17. When connecting to the air supply: Prior to each use, if an automatic oiler is not
used, add two drops of air tool oil (not included) into the Air Inlet (13) tting of the Cut-
Off Tool.
18. Always disconnect the Cut-Off Tool from its compressed air supply source, and
squeeze the Trigger Lever (14) to release all compressed air in the tool before
performing any maintenance or services.
Note: Performance of the compressor (if powered by line voltage) may vary depending
on variations in local line voltage. Extension cord usage may also affect tool
performance.

Page 4SKU 95028 For technical questions, please call 1-800-444-3353
Unpacking
When unpacking, check to make sure the parts listed on page 7 are included. If any
parts are missing or broken, please call Harbor Freight Tools at the number on the cover of
this manual as soon as possible.
For best service, you should incorporate an oiler, regulator, and inline lter, as shown
in the diagram above. Hoses, couplers, oilers, regulators, and lters are all available
at Harbor Freight Tools.
Assembly and Operating Instructions
19. Industrial applications must follow OSHA requirements.
20. Warning: Use 3” Cutting Disc. Only use a standard 3” cutting disc (rated at
20,000 RPM or greater) with this Cut-Off Tool. Never use any other kind of disc,
blade or cutter. Do not bind the cut-off wheel/disc.
21. Warning: Some dust created by power sanding, sawing, grinding, drilling
and other construction activities contain chemicals known (to the State of
California) to cause cancer, birth defects or other reproductive harm. Some
examples of these chemicals are: lead from lead-based paints, crystalline silica
from bricks and cement or other masonry products, arsenic and chromium
from chemically treated lumber. Your risk from these exposures varies,
depending on how often you do this type of work. To reduce your exposure to
these chemicals: work in a well ventilated area and work with approved safety
equipment, such as those dust masks that are specically designed to lter out
microscopic particles (California Health & Safety Code 25249.5, et seq.)
Cut-Off
Tool

Page 5SKU 95028 For technical questions, please call 1-800-444-3353
Assembly and Operation Instructions (continued)
Note: Performance of the compressor (if powered by line voltage) may vary depend-
ing on variations in local line voltage. Extension cord usage may also affect tool
performance.
1. You will need to prepare a 1/4” air connector (sold separately) to connect to the Air Inlet
(13) on the Air Cut-Off Tool. First, wrap the 1/4” air connector (not included) with pipe
thread seal tape before threading into the Air Inlet (13). Connect a 3/8” I.D. Air Source
Hose to the Cut-Off Tool.
Note: If you are not using an automatic oiler system, before operation add a few drops
of Pneumatic Tool Oil to the airline connection. Add a few more drops after each hour
of continual use.
2. Set the air pressure on your compressor to 90 PSI. Do not exceed the recommended
air pressure of 90 PSI.
3. Check the air connection for leaks.
4. Disconnect the air hose until instructed to reconnect.
5. After disconnecting the air supply, squeeze the Trigger Lever (14) to make sure no air
remains in the unit.
Assembly:
The only assembly required is the mounting of the Cutting Wheel (29).
Warning: the Cut-Off Tool must be disconnected from the air supply when changing
the Cutting Wheel (29). After disconnecting the air supply, squeeze the Trigger Lever
(14) to make sure no air remains in the unit.
1. Place the Wrench (33) on the ats of the Spindle (25) to hold it in place.
2. Using the Allen Wrench (32), loosen and remove Hex Screw (31) and Spacer (30).
3. Remove and replace the Cutting Wheel (29).
4. Replace the Hex Screw (31) and the Spacer (30). Tighten the Hex Screw (31) while
holding the Spindle (25) in place with the Wrench (33). See Figure 1.
Figure 1
WARNING: The Guard (27)
must be in place when using
the Cut-Off Tool.
Allen Wrench (32) Guard (27)
Spacer (30)
Hex Screw (31)
Cutting Wheel (29) Spindle (25)

Page 6SKU 95028 For technical questions, please call 1-800-444-3353
WARNING: Always check the Cutting Wheel (29) for possible wear. Do not use a worn, torn,
or defective cutting wheel.
WARNING: Position the Cut-Off Tool so that the attached guard is in position between you
and the workpiece to protect you from ying debris.
WARNING: The Guard (27) must always be attached to the Cut-Off Tool.
1. Check the Cutting Wheel (29) for wear, Replace if necessary.
2. Set the compressor to 90 PSI. Do not exceed 90 PSI.
3. Connect the Cut-Off Tool to the air hose as explained on Page 5 of this manual.
4. Use both hands to grip the Cut-Off Tool. Gently squeeze down on the Trigger Lever
(14). Allow the Cut-Off Tool to run for a few seconds before approaching the workpiece.
5. Let the Cut-Off Tool do the work. Do not apply force on the workpiece.
6. When nished, release the Trigger Lever (14).
7. Disconnect the Air Hose.
8. Gently squeeze down on the Trigger Lever (14) to release any air that might still remain
in the Cut-Off Tool.
1. Warning: Always release any excess air, make sure the Trigger Lever (14) is in its
“OFF” position, and disconnect the Cut-Off Tool from its compressed air supply
before performing any inspection, adjustments, maintenance, or cleaning.
2. Before each use, inspect the general condition of the Cut-Off Tool. Check for loose
screws, misalignment or binding of moving parts, cracked or broken parts, damaged
air hose, and any other condition that may affect its safe operation. If abnormal noise
or vibration occurs, have the problem corrected before further use. Never use dam-
aged equipment.
3. After each use, wipe down the Cut-Off Tool with a clean cloth, remove all dirt, oil, and
grease from the Cut-Off Tool. If necessary, you may use a mild detergent. Do not use
solvents, as damage to the Cut-Off Tool may occur. Do not immerse the Cut-Off Tool
in any liquids.
Inspection, Maintenance, and Cleaning
Assembly and Operation Instructions (continued)

Page 7SKU 95028 For technical questions, please call 1-800-444-3353
NOTE: Some parts are listed and shown for illustration purposes only and are not available
individually as replacement parts.
Parts List and Diagram
Part Description Q’ty
1 Plug Screw 1
2 O-Ring 1
3 O-Ring 1
4 Air Regulator 1
5 Valve Spring 1
6 O-Ring 1
7 Valve Stem 1
8 O-Ring 1
9 Motor Housing 1
10 Valve Bushing 1
11 O-Ring 2
12 Mufer 1
13 Air Inlet 1
14 Trigger Lever 1
15 Lever Pin 1
16 Bearing 1
17 Bearing Plate 1
18 Ball 2
Part Description Q’ty
19 Rotor Blade 4
20 Rotor 1
21 Cylinder 1
22 Bearing Plate 1
23 Bearing 1
24 Washer 1
25 Spindle 1
26 Lock Ring 1
27 Guard 1
28 Nut 1
29 Cutting Wheel 1
30 Spacer 1
31 Hex Screw 1
32 Allen Wrench 1
33 Wrench 1

Page 8SKU 95028 For technical questions, please call 1-800-444-3353
PLEASE READ THE FOLLOWING CAREFULLY
THE MANUFACTURER AND/OR DISTRIBUTOR HAS PROVIDED THE PARTS DIAGRAM IN
THIS MANUAL AS A REFERENCE TOOL ONLY. NEITHER THE MANUFACTURER NOR DIS-
TRIBUTOR MAKES ANY REPRESENTATION OR WARRANTY OF ANY KIND TO THE BUYER
THAT HE OR SHE IS QUALIFIED TO MAKE ANY REPAIRS TO THE PRODUCT OR THAT HE
OR SHE IS QUALIFIED TO REPLACE ANY PARTS OF THE PRODUCT. IN FACT, THE MANU-
FACTURER AND/OR DISTRIBUTOR EXPRESSLY STATES THAT ALL REPAIRS AND PARTS
REPLACEMENTS SHOULD BE UNDERTAKEN BY CERTIFIED AND LICENSED TECHNICIANS
AND NOT BY THE BUYER. THE BUYER ASSUMES ALL RISK AND LIABILITY ARISING OUT OF
HIS OR HER REPAIRS TO THE ORIGINAL PRODUCT OR REPLACEMENT PARTS THERETO,
OR ARISING OUT OF HIS OR HER INSTALLATION OF REPLACEMENT PARTS THERETO.
90 Day Warranty
Harbor Freight Tools Co. makes every effort to assure that its products meet high quality
and durability standards, and warrants to the original purchaser that this product is free
from defects in materials and workmanship for the period of 90 days from the date of pur-
chase. This warranty does not apply to damage due directly or indirectly, to misuse, abuse,
negligence or accidents, repairs or alterations outside our facilities, criminal activity, im-
proper installation, normal wear and tear, or to lack of maintenance. We shall in no event
be liable for death, injuries to persons or property, or for incidental, contingent, special or
consequential damages arising from the use of our product. Some states do not allow the
exclusion or limitation of incidental or consequential damages, so the above limitation of
exclusion may not apply to you. THIS WARRANTY IS EXPRESSLY IN LIEU OF ALL OTH-
ER WARRANTIES, EXPRESS OR IMPLIED, INCLUDING THE WARRANTIES OF MER-
CHANTABILITY AND FITNESS.
To take advantage of this warranty, the product or part must be returned to us with transpor-
tation charges prepaid. Proof of purchase date and an explanation of the complaint must
accompany the merchandise. If our inspection veries the defect, we will either repair or
replace the product at our election or we may elect to refund the purchase price if we can-
not readily and quickly provide you with a replacement. We will return repaired products at
our expense, but if we determine there is no defect, or that the defect resulted from causes
not within the scope of our warranty, then you must bear the cost of returning the product.
This warranty gives you specic legal rights and you may also have other rights which vary
from state to state.
3491 Mission Oaks Blvd. • PO Box 6009 • Camarillo, CA 93011 • (800) 444-3353
Table of contents
Popular Saw manuals by other brands

EFA
EFA SB 326 E Translation of the original operating instructions

Hilti
Hilti DSW 3018-E operating instructions

Performax
Performax COMPACT PX12 LITHIUM-ION owner's manual

Scotchman
Scotchman CPO-315-RFA-NF manual

Gude
Gude GWS 400 ECO Translation of original operating instructions

DeWalt
DeWalt D28710 Original instructions