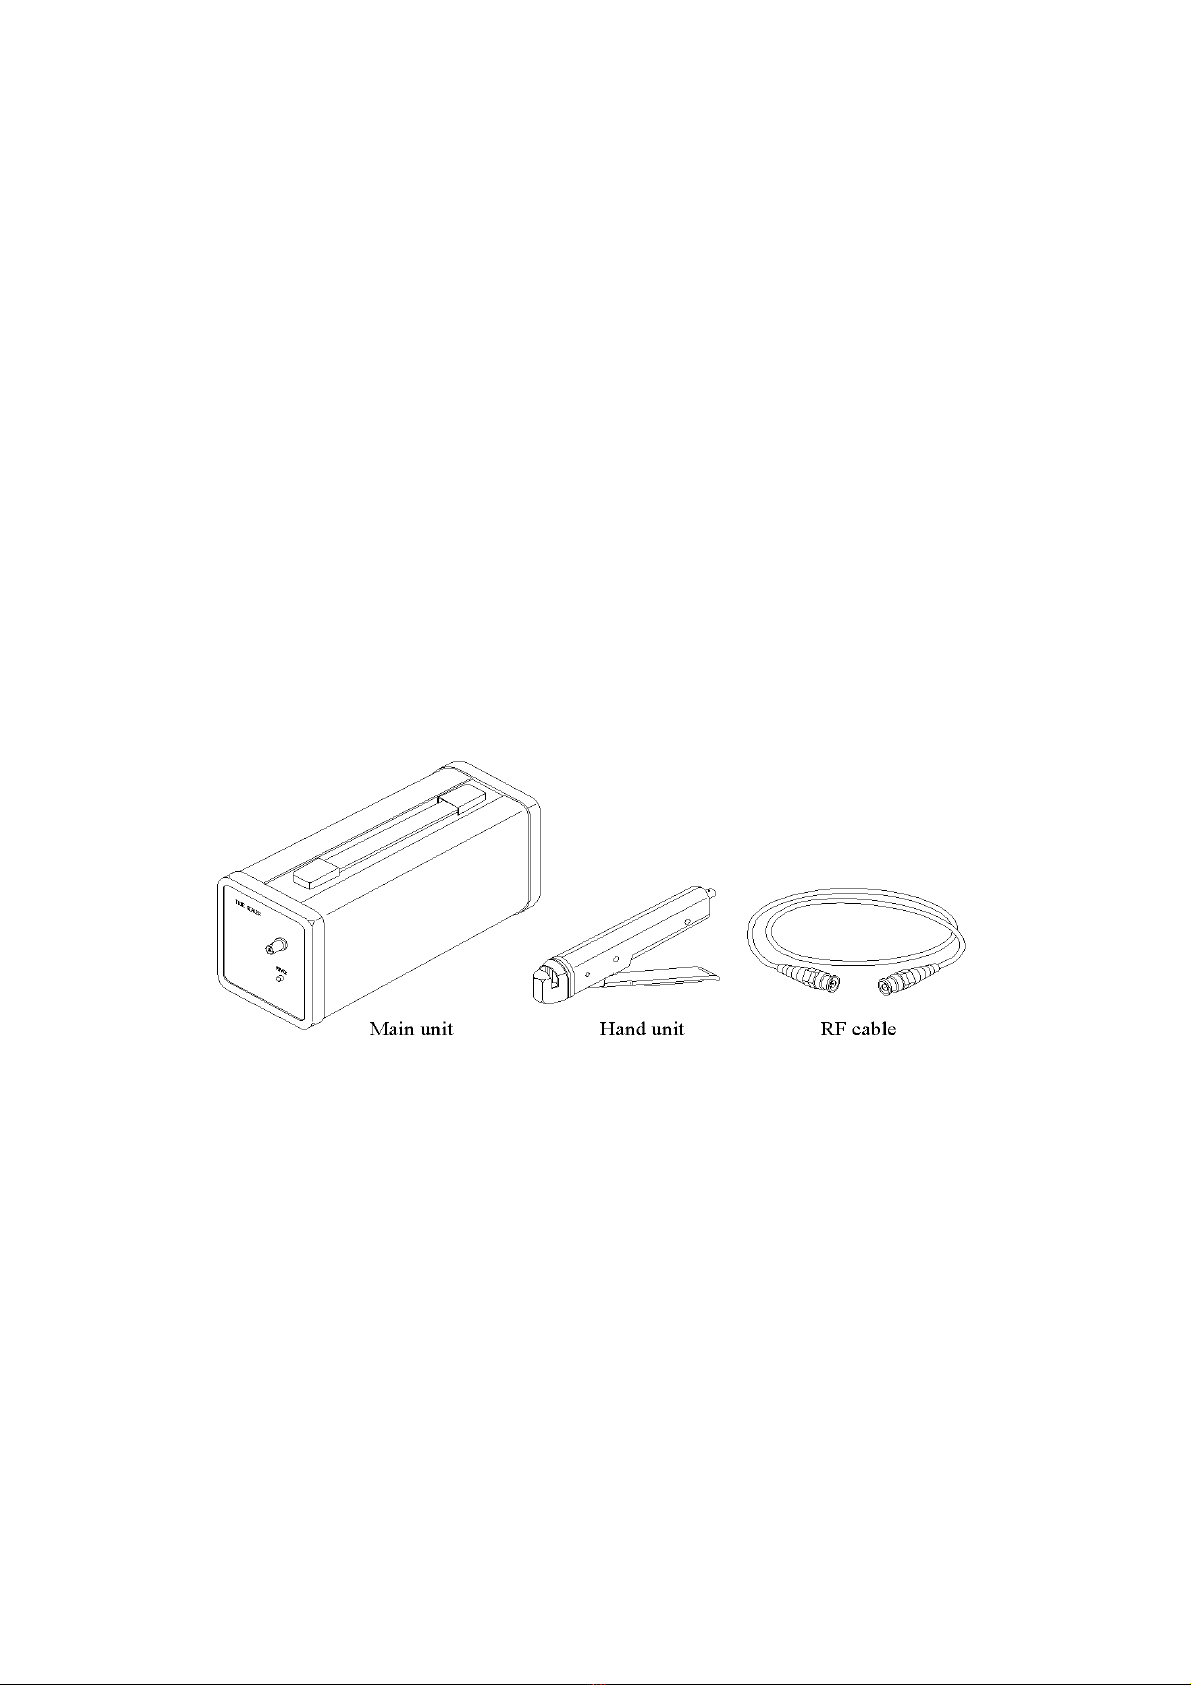
Centron Technologies SE450 User manual

USER’S MANUAL
TUBE SEALER
Model SE450
No. CAT.SE45010Ce
Centron Technologies Corporation
319-25 Sadang-4-dong, Dongjak-ku
Seoul, Korea 156-823
Tel. +82-2.522.7807 Fax +82-2.522.7806

1
SE45010UMC.0306
Important Note
1. Safety Notices:
The machine generates strong high-frequency power when the trigger lever is pulled.
Users should be cautious of potential electric shock during sealing process.
•To avoid potential electric shock, always use the machine with the head protector
mounted on sealing head.
•The machine works even without the head protector mounted on sealing head. If
you should use the machine without the head protector with any reason, never
touch any metal part at sealing head while you are pulling the trigger lever. Finger
may scald instantaneously due to generated high-frequency power if touched at
any metal part in sealing head while the trigger lever is being pulled.
2. Installation and Cautions:
•Primary power requirement for the machine is marked on the rear panel. The
power outlet and the power cord should be grounded ones. Refer to Section 5-2
for proper fuse rating.
•Always keep the sealing head area clean and dry. If the sealing head becomes wet
or dirty, an arc may appear during the sealing process. If an arc appears, clean the
sealing head and let it dry thoroughly. (Refer to Sections 5-1 and 5-3.)
•Use a soft cloth and mild detergent to clean the equipment. After cleaning, wait a
few minutes until the area cleaned is completely dry. DO NO'T USE PAINT
THINNER, BENZENE, SOLVENT OR STRONG DETERGENT.
•Be sure to turn the power switch off before cleaning the machine.
•Only authorized service personnel should remove the covers of the main unit and
the hand unit.
•Avoid pulling the trigger lever without tubing loaded in sealing head as it may mar
the sealing head.
•Never put sharp objects or metal objects in sealing head as damage can occur.
•Avoid using or leaving the machine in a location where the temperature is higher
than 50 °C (122 °F). Keep it away from any heating source or direct sunlight.

2
SE45010UMC.0306
Contents
Page
•Important Notes 1
1. Features 3
2. Specifications 4
3. Appearance 5
4. Operating Procedures 6
5. Maintenance 6
5-1. Troubleshooting 6
5-2. Replacing the Fuse 7
5-3. Cleaning the Sealing Head 7
5-4. Service Call 9

3
SE45010UMC.0306
1. Features
The tube sealer model SE450 is a compact and lightweight tube sealer with a hand
unit. The machine is suitable for use where work space is limited or where one tube
sealer machine will be shared by multiple users. When the trigger lever is pulled, the
machine generates strong high-frequency power to melt thermoplastic tubing. It makes
a seal on tubing in 1-2 seconds.
A set of the machine includes the following items:
Main unit (1)
Hand unit (1)
RF cable (1)
Power cord (1)
User's manual (1)
Spare fuses (2)

4
SE45010UMC.0306
2. Specifications
a. Physical specification:
(1) Main unit: dimension (WxHxD) - 106x150x260 mm (4.2"x5.9"x10.2")
weight - 3500 gram (7.7 lb)
(2) Hand unit: dimension (WxHxD) - 28x44x204 mm (1.1"x1.8"x8.1")
weight - 220 gram (0.5 lb)
(3) RF cable: length - 1.8 m (6 feet), weight - 100 gram (0.2 lb), cord - RG-58
b. Power source:
(1) AC main voltage: 100-120 or 220-240 VAC, 50/60 Hz, 1 phase
(the voltage range only as marked on the rear panel)
(2) Power consumption: Operating - 250 watts, standby - 10 watts
(3) Fuse rating: 3 Amperes when AC main is 100-120 VAC
2 Amperes when AC main is 220-240 VAC
c. Features:
(1) Tubing size to seal: 6 mm (1/4") diameter max.
(2) RF frequency: 40.68 MHz
(3) Output RF power: effective level - 30 watts
(4) Sealing time: 1-2 seconds
(5) Indication lamps: on main unit - POWER (1 green LED)
on hand unit - SEALING (1 amber neon in head)
d. Temperature:
(1) Operating: 0 - 40 °C (32 - 104 °F)
(2) Storage: -20 - 70 °C (-4 - 158 °F)

5
SE45010UMC.0306
3. Appearance
Main unit
(1) RF cable connector: Connect the RF cable between this connector and the same
connector on the hand unit.
(2) Power indication lamp: The green LED lamp lights when the power switch is on.
(3) Power switch: This switch turns the equipment power on and off.
(4) Fuse: The fuse holder houses a fuse.
(5) Power cord inlet: This accepts the power cord plug. A grounded power cord should
be used to avoid potential electric shock.
Hand unit

6
SE45010UMC.0306
4. Operating Procedures
(1) Connect the RF cable between main unit and hand unit.
(2) Turn the power switch on.
(3) Place tubing in sealing head.
(4) Pull the trigger lever. Watch that amber light turns on at sealing head.
(5) After amber light turns off, wait for a while (approximately one second or more),
and then release the lever.
(6) Remove tubing and inspect it.
5. Maintenance
5-1. Troubleshooting
The following table covers common problems and suggested solution. Other problems
should be corrected by authorized service personnel.
Symptom Likely Cause Solution
Power cord connection Check power cord connection and
push it securely into machine and
wall socket.
Blown fuse Check the fuse and replace, if
necessary. Refer to Section 5-2.
Switch is on, but the
POWER lamp doesn’t
illuminate.
Equipment malfunction Ask for repair service.
Sealed shape is bad. Dirty clamp or sealing
head
Clean sealing head and clamp area.
Refer to Section 5-3.
Sealing clamp doesn't
move smooth.
Dirty clamp or sealing
head
Clean sealing head and clamp area.
Refer to Section 5-3.
Arc appears. Wet or dirty sealing head Clean sealing head, dry thoroughly.
Refer to Section 5-3.

7
SE45010UMC.0306
5-2. Replacing the Fuse
A fuse is used. It is contained in the fuse holder on rear panel of the machine.
Type : Fast-acting fuse (20 mm long, 5 mm diameter, circular tube type)
Rating :
Power source voltage Fuse amperage
100-120 VAC 3 Amps
220-240 VAC 2 Amps
Replacement procedure:
(1) Turn the power switch off.
(2) Remove power cord from wall outlet and cord inlet on rear panel.
(3) With a flat-tip screwdriver, pull out the fuse holder cap on rear panel.
(4) Replace the blown fuse with a new one with the same amperage.
(5) Push in the fuse holder cap securely.
(6) Connect power cord.
(7) Turn the power switch on and test sealer.
5-3. Cleaning the Sealing Head
The sealing head and clamp can easily be stained by dust or liquid. Frequent cleaning
will offer you the best long-term results.
For proper cleaning, use a dry cloth or a cloth dampened with water. A mild detergent
may be used. Thoroughly dry the sealing head area before applying power. If the
sealing head is wet when RF energy is applied, an arc may appear.
Follow the decontamination procedure of your facility as necessary.
Avoid spraying liquids in the sealing clamp or sealing head area.
How to take off and put on the head protector
To take off, push both sides. To put on, just push in.

8
SE45010UMC.0306
How to disassemble and reassemble the clamp
To remove the clamp; To install the clamp;
(1) Push in. (1) Pull down.
(2) Pull down. (2) Push in.
(3) Release it. (3) Push up.
(4) Release it.
Cleaning procedure
(1) Turn the power switch off.
(2) Remove the RF cable from the units.
(3) Remove the head protector.
(4) Remove the clamp.
(5) Clean the clamp, the head protector and sealing head area thoroughly. If you have
used water, detergent or decontamination liquid, wait a few minutes to allow for
thorough drying.
(6) Assemble the clamp and the head protector.
(7) Connect the RF cable between units.
(8) Turn the power switch on and test the machine.

9
SE45010UMC.0306
5-4. Service Call
If the machine doesn't operate properly, or if you need any assistance or spare parts,
contact your distributor:
Table of contents
Other Centron Technologies Food Saver manuals