CenturionPro The Gladiator User manual

OWNERS MANUAL
THE GLADIATOR

2cprosolutions.com1 855 535 0558
LIABILITIES
LEGALITIES
CenturionPro Solutions (the manufacturer) will repair or replace, without charge, any parts
proven defective in material or workmanship for a period of 10 years on the Trimming
Machine and 3 years on the Leaf Collector.
Thewarrantyperiodwillbeginonthedatethemachine(s)ispurchasedbytheinitialpurchaser.
Product or component warranty defects can be remedied at any authorized service dealer, or
directlyat the manufacturer.Anyservice work performed,anddeemedvalid due toadefective
part, will be free of charge. CenturionPro Solutions reserves the right to use any manufacturer-
approved replacement part for the warranty repair.
The machine or defective part then must be returned to the manufacturer for analysis or
replacement at the cost of the owner. Parts deemed to be covered under the warranty will be
provided for free excluding shipping costs.
Do not return the machine to the place of purchase for repair or warranty claims, unless you
have been authorized by CenturionPro Solutions to do so. The place of purchase can only sell
replacement parts and will not repair any warranty issues, unless it is noted as an authorized
repair dealer and has been authorized to work on your machine.
CenturionPro trimming machines are intended for use on legal aromatic herbs and hops. Please check all municipal, provincial/state and
federal laws and regulations before using these machines. CenturionPro Solutions does not promote or condone the use of these products in
any way that may be deemed illegal. Allow only persons who understand this disclaimer to operate the machines.
The manufacturer assumes no risk and shall be subject to no liability for damages or loss resulting from the specic use or application made
of the product. In no event will the manufacturer be liable for any special, incidental or consequential damages (including loss of use, loss
of prot and claims of third parties) however caused - whether by negligence of the manufacturer or otherwise. If you have any questions
regarding your warranty rights and responsibilities, please contact the manufacturer.
WARRANTY TERMS AND CONDITIONS
OWNERS MANUAL
THE TABLETOP
YOU MUST REGISTER YOUR TRIMMER WITHIN 30 DAYS OF YOUR PURCHASE
WARRANTY
YOU HAVE JUST MADE A SMART DECISION BY PURCHASING THE BEST TRIMMER IN THE WORLD. FAILURE TO REGISTER YOUR MACHINE WITHIN 30
DAYS OF PURCHASE WILL VOID YOUR 10 YEAR WARRANTY. PROTECT YOUR INVESTMENT. THIS PROCESS WILL ONLY TAKE 3 MINUTES TO COMPLETE.
!! IMPORTANT !!
IF WARRANTY REPAIR IS REQUIRED, PLEASE CONTACT THE MANUFACTURER AT 1-855-535-0558 OR
1. Model and serial number - Located on outside of motor
2. Proof of purchase date
3. A copy of the original Warranty Registration Card or Online Submission
4. Details of the defect or problem (include photos and videos)
YOU MAY BE DENIED WARRANTY COVERAGE IF YOUR MACHINE HAS FAILED
DUE TO ANY OF THE FOLLOWING:
Product abuse Normal wear
Product neglect Accidental damage
Improper maintenance Unapproved modications
Improper electrical connection
cprosolutions.com/warranty
REGISTER NOW!

3
OWNERS MANUAL
GLADIATOR
For more information or to watch our DIY video tutorials visit cprosolutions.com
GENERAL
• Do not move, disassemble, clean or inspect the trimmer while the power is still
connected to the machine.
• Replacement parts are specic to The Gladiator and must be purchased from
an authorized dealer only. Substituting factory parts with non-approved third-
party replacements may result in damage to the machine or bodily harm.
• Keep all individuals a safe distance from the work area. Do not operate the
machine around children.
• Do not remove safety labels. Replace any and all labels if they become
damaged or obscured.
CONNECTION
• As with home appliances, The Gladiator must be used in connection with a
properly grounded receptacle.
• Never plug in or power up your trimming machine if the protective shrouds
are removed.
• Do not use extension cords over 8m (25ft) in length to power the Gladiator.
The Gladiator is a high-speed trimming system, requiring that specic safety precautions are practiced during operation to reduce the risk of personal injury.
Improper use of The Gladiator, or any CenturionPro product, may cause serious or fatal injury. Please ensure you read the operations manual and warning notes
before using the Gladiator.
IMPORTANT SAFETY INFORMATION
CENTURIONPRO SOLUTIONS:
GLADIATOR AUTOMATED TRIMMING SYSTEM
OPERATION
• The initial set up will show assembly instructions to unpack and set-up your machine.
• Your bed bar blade has been factory set to cut perfectly. Please do not adjust your
blade until it is time to clean the machine. Also, please watch the video tutorial
located on our website on how to adjust your blade before attempting.
• Safety glasses should be worn at all times while operating The Gladiator.
• Do not operate any trimming machine while tired or under the inuence of
medication, drugs or alcohol.
• Do not put anything other than plant material into the tumbler. Doing so may cause
damage to the tumbler, the machine or result in bodily harm.
• Operate the trimmer in a well ventilated area in order to prevent overheating.
MAINTENANCE
• Never leave The Gladiator system running unattended.
• Never conduct maintenance or cleaning while the machine is plugged in.
• Do not modify or adapt any part of the trimmer or its accessories. Doing so may
cause irreversible damage to the machine or result in bodily harm.
DO NOT LEND OUT OR RENT YOUR GLADIATOR WITHOUT THIS
OPERATING MANUAL. A FIRST TIME USER SHOULD OBTAIN
PROPER INSTRUCTION PRIOR TO USE.
A PAPER-CUT-TEST IS HIGHLY
RECOMMENDED PRIOR TO EV-
ERY MACHINE USE.

4cprosolutions.com1 855 535 0558 4
NOTES

5
OWNERS MANUAL
GLADIATOR
For more information or to watch our DIY video tutorials visit cprosolutions.com
TOOL REQUIREMENTS
AMOUNT SIZE TOOL ITEM
1 x #2 PHILLIPS SCREWDRIVER
1 x 3/32" T-Handle Allen Wrench
1 x 5/32" T-Handle Allen Wrench
1 x 1/8" T-Handle Allen Wrench
1 x 3/16" T-Handle Allen Wrench
1 x 3/8" Wrench
TABLE OF CONTENTS
WARRANTY
IMPORTANT SAFETY INFORMATION
NOTES SHEET
TABLE OF CONTENTS
COMPONENT OVERVIEW
MACHINE ASSEMBLY
COVER ASSEMBLY
KIEF & TRIM COLLECTION
LEAF COLLECTOR ASSEMBLY
HOPPER ASSEMBLY
CLEANING & MAINTENANCE - BLADE REMOVAL, TRIMMER CLEANING
CLEANING & MAINTENANCE - LEAF COLLECTOR CLEANING
MACHINE MAINTENANCE
TRIM BOTH WET & DRY
QUANTANIUM COATED TUMBLERS
TROUBLESHOOTING
FREQUENTLY ASKED QUESTIONS
RETURN/REFUND POLICY
ADDITIONAL ASSISTANCE
SPECIFICATIONS
2
3
4
5
6
7
8
9
10
11
12
13
14
14
15
16
18
18
18
19

CAM FOLLOWERS
6cprosolutions.com1 855 535 0558
COMPONENT OVERVIEW
BRUSH
TUMBLER O-RING
TUMBLER
UPPER FRAME
COVER
EXHAUST
BLADE ADJUSTMENT
ASSEMBLY
BED BAR BLADE
& MAGNET BAR
BELT COVER
CUTTING REEL
MOTOR
LOWER FRAME
Requires Cleaning
See Pg. 10
Requires Cleaning
See Pg. 10
Requires Cleaning
See Pg. 10
Requires Cleaning
See Pg. 10
Electrical Con guration
- The 220 volt machine plugs come
stripped/unterminated.
- Please have a Certi ed Electrician
con gure a plug to the electrical wires.

7
OWNERS MANUAL
GLADIATOR
For more information or to watch our DIY video tutorials visit cprosolutions.com
MACHINE ASSEMBLY
STEP 1:
PLACE TUMBLER
IN GROOVES
STEP 4:
INSTALL EXHAUST
STEP 2:
INSTALL UPPER
FRAME
STEP 3:
INSTALL
COVER
- Exhaust in a separate box when shipped.
- Short bolts ONLY!
Tighten eight sealing
bolts & washers.
Place cover
over Upper
Frame.
SHORT
BOLTS
ONLY

8cprosolutions.com1 855 535 0558
BEARING
COVER BELT
COVER
BEARING
COVER BELT
COVER
5 x WASHERS &
3/8" BOLTS
2 x WASHERS &
3/8" BOLTS
2 x WASHERS &
3/8" BOLTS
STEP 1:
ATTACH THE BEARING COVERS TO THE GLADIATOR STEP 2:
ATTACH THE BELT COVER TO THE GLADIATOR
IT IS UNSAFE TO OPERATE
THE GLADIATOR TRIMMER
WITHOUT COVERS.
COVER ASSEMBLY

OUTER POLYESTER BAG
WHITE FILTER BAG
INNER BLACK MESH BAG
9
OWNERS MANUAL
GLADIATOR
For more information or to watch our DIY video tutorials visit cprosolutions.com
KIEF & TRIM COLLECTION
Kief is becoming wildly popular due to the rise of extractions. Unfortunately, machines that require
sprays can contaminate and destroy your Kief, making it virtually useless. Thankfully, CenturionPro
o ers an optional non-stick Quantanium coating on the tumblers. This means no spray is needed, so
your Kief remains 100% pure and usable. To further bene t growers, we developed a new triple-bag
ltration system. This system will assist with Kief collection and separating it from your trim. This allows
you to safely and easily collect the precious trichomes for further processing and pro ts. With your
machine, you will see that you have a Black Mesh Bag, a White Filter Bag, and an Outer Polyester Bag.
The Black Mesh Bag goes inside the White Filter Bag, which then goes inside the Outer Polyester Bag.
STEP
1
STEP
2
STEP
3
STEP
4
TRIPLE-BAG KIEF COLLECTION SYSTEM
HOW IT WORKS
THE BAGS ARE EASY TO WASH WITH A
PRESSURE WASHER USING COLD WATER.
THE BAGS CAN ALSO BE PUT THROUGH
THE WASHING MACHINE, BUT IT IS
RECOMMENDED TO BE RUN THROUGH
ON A COLD DELICATE CYCLE ONLY.
HOSE
CLAMP
LEAF COLLECTOR
STEP 1:
ATTACH BAG SYSTEM
TO LEAF COLLECTOR
- Secure with hose clamp
- Requires cleaning (pg. 11)
HOSE
CLAMP
ZIPPERS
THE GREEN LEAFY TRIM WILL COLLECT IN
THE INNER BLACK MESH BAG.
ONLY THE KIEF MAKES IT THROUGH THE BLACK MESH BAG
AND COLLECTS IN THE WHITE FILTER BAG.
OUTER POLYESTER BAG CATCHES ANY KIEF THAT
MAY PASS THROUGH THE WHITE FILTER BAG.
TURN OFF THE MACHINE AND REMOVE THE INNER BLACK MESH BAG
AND THEN EXTRACT KIEF. ENJOY!

10 cprosolutions.com1 855 535 0558
STEP 1:
ATTACH BAG SYSTEM TO
LEAF COLLECTOR
Electrical Con guration
STEP 2:
ATTACH DIVERTER TO
LEAF COLLECTOR
STEP 3:
ATTACH DIVERTER TO
EXHAUST
- Please disregard hole on top of
diverter, the suction will hold the
diverter in place and no screw is
needed to secure.
- Attach the bag system to the
Leaf Collector using the hose
clamp provided
- Kief Collection System
Requires Cleaning
See Pg. 11
- No bolts required
- Requires cleaning (pg. 11)
- The 220 volt blower plugs come stripped/unterminated.
- Please have a Certi ed Electrician con gure a plug to the
electrical wires.
LEAF COLLECTOR ASSEMBLY
LEAF COLLECTOR GLADIATOR
DIVERTER
HOSE CLAMP

11
OWNERS MANUAL
GLADIATOR
For more information or to watch our DIY video tutorials visit cprosolutions.com
HOPPER ASSEMBLY
STEP 1:
ASSEMBLE FRAME
STEP 2:
SECURE HOPPER BAG
TO FRAME
STEP 3:
CONNECT THE
HOPPER TO
THE MACHINE
A) Ensure the RODS are facing
inward. Secure with:
8 - 1/4" bolts
8 - 1/4" washers
8 - 1/4" locking nuts INWARD
A) Ensure the FRAME
& OPENING match
the Gladiator
machine exactly.
A) Ensure the FRAME
& OPENING match.
12 cprosolutions.com1 855 535 0558
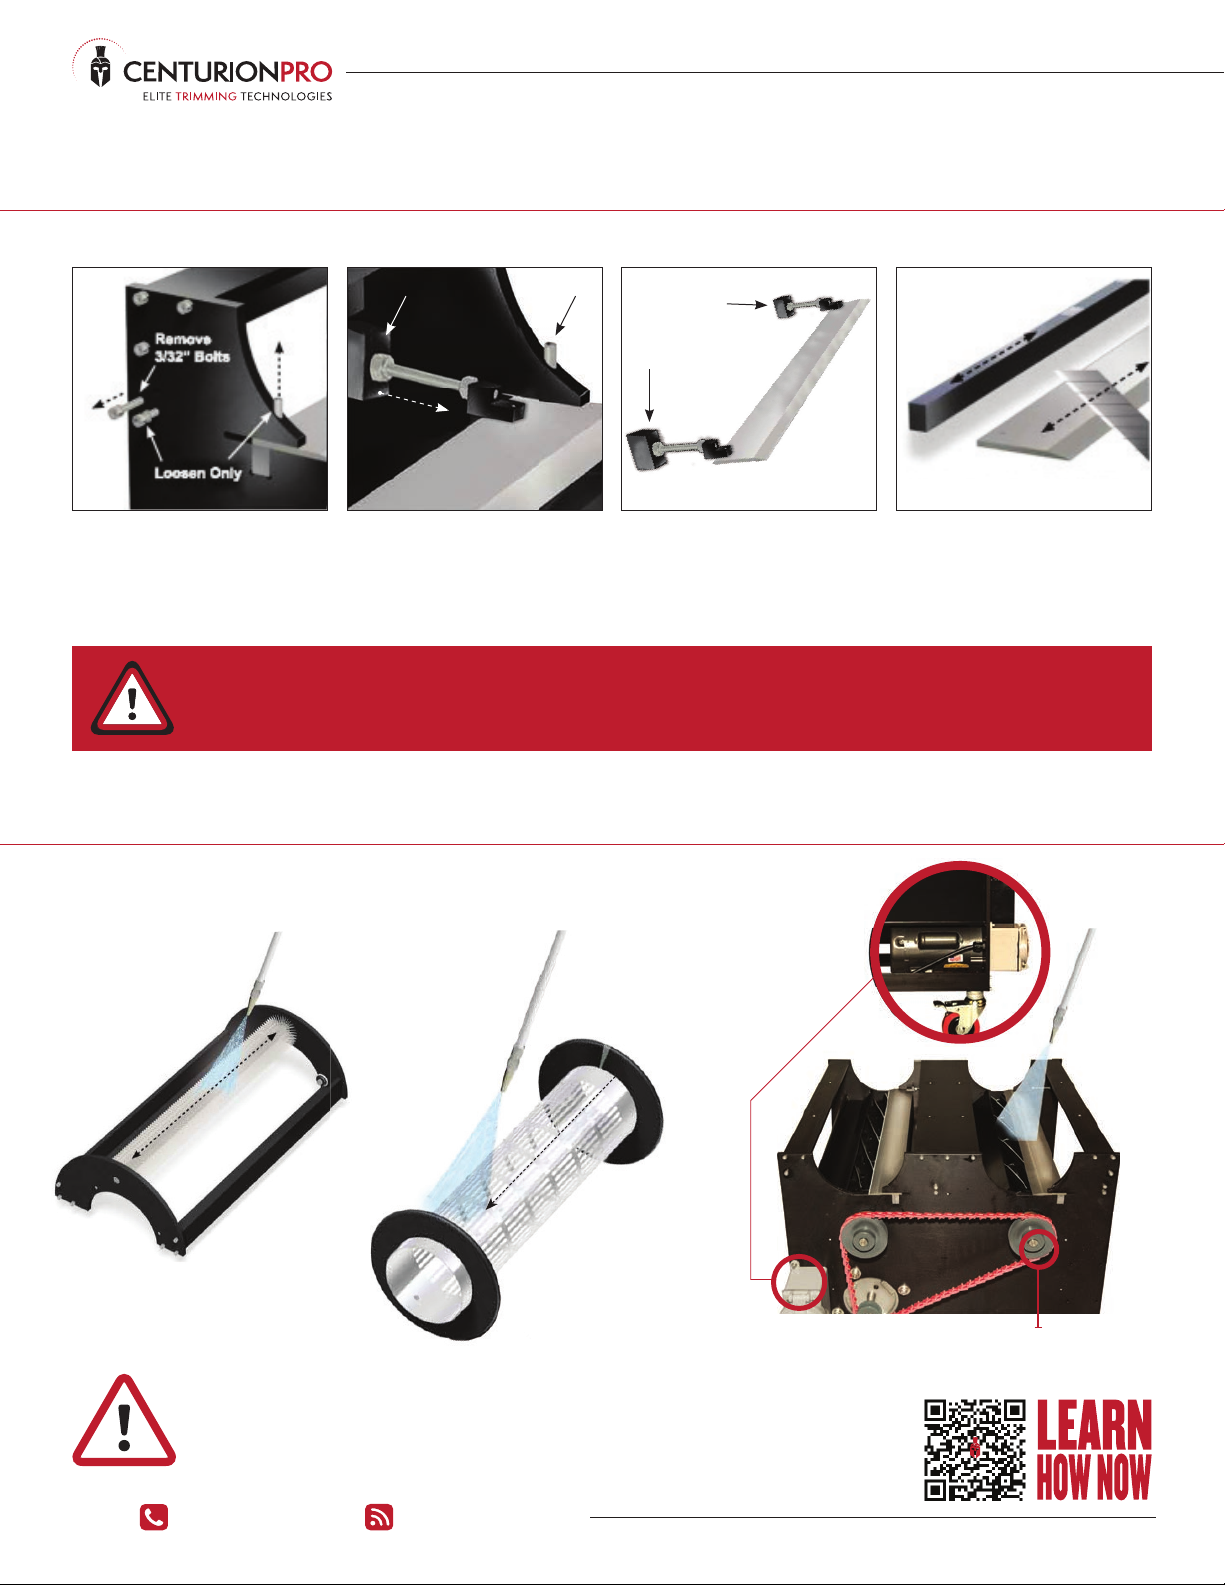
CLEANING & MAINTENANCE
BLADE REMOVAL
CLEANING THE GLADIATOR
AVOID
WATER
ON THE
MOTOR
STEP 1:
CLEAN
BRUSH
STEP 3:
CLEAN CUTTING
REEL & SHROUD
STEP 2:
CLEAN
ELECTROPLISH
TUMBLER Clean the length of the
cutting reel and shroud
of all debris using hot
pressurized water.
Clean the length of
the tumbler of all
debris using hot
pressurized water.
Clean the length
of the brush of all
debris using hot
pressurized water.
IMPORTANT NOTE:
YOUR BED BAR BLADE HAS BEEN FACTORY SET TO CUT PERFECTLY. PLEASE DO NOT ALTER THE SETTINGS OF YOUR MACHINE. YOU
MIGHT NOTICE SLIGHT CONTACT BETWEEN YOUR ROTATING CUTTING REEL AND THE FLAT BED BAR BLADE - THIS IS NORMAL.
For optimal performance and life, the components must be cleaned after every day of operation.
IMPORTANT NOTE:
- Clean with pressure-washer at up to 1500 psi.
- Hot water, fan spray setting
- Run TableTop for 15 mins after washing to allow components to dry
- DO NOT pressure-wash Quantanium Coated tumblers (see page. 15)
AVOID
WATER IN
BEARINGS
INSTALLATION IS REVERSE ORDER OF REMOVAL
STEP 1:
UNLOCK BLADE STEP 2:
UNLOCK BLADE STEP 3:
BLADE & MAGNET REMOVAL STEP 4:
BLADE & MAGNET CLEANING
- Remove 3/32" bolt
- Loosen the surrounding set screws ONLY
- Push adjuster block out with attached blade
- Push forward until blade slides onto reel, and lift.
- Carefully slide blade o magnet
- Carefully Remove bed bar blade
- Clean blade and magnet bar with a utility knife.
For optimal performance and life, the BLADE and the MAGNET BAR must be removed and cleaned every 3-4 hours of operation. It is important to remove the blade with the adjustors in.
Set ScrewAduster Block Blade Adjusters
act as handles
to safely handle
and position
your blade.

13
OWNERS MANUAL
GLADIATOR
For more information or to watch our DIY video tutorials visit cprosolutions.com
LEAF COLLECTOR CLEANING
INSTRUCTIONS:
Clean with pressure-washer at up to 1500 PSI, Hot
Water, Fan Spray Setting. Run LEAF COLLECTOR for 15
minutes after washing, allowing components to dry.
FOR OPTIMAL PERFORMANCE AND LIFE, THE
LEAF COLLECTOR COMPONENTS MUST BE
CLEANED EVERY 30 DAYS OR 100 HRS OF USE.
AVOID WATER CONTACT ON BEARINGS
AND MOTOR.
CLEANING & MAINTENANCE
STEP 1:
REMOVE COVER & IMPELLER
FROM LEAF COLLECTOR
STEP 3:
CLEAN LEAF
COLLECTOR BAGS
STEP 2:
PRESSURE WASH IMPELLER &
INTERIOR OF LEAF COLLECTOR
• Remove 8 screws from the side panel to
uncover the leaf collector
• Remove the 13mm bolt & washer
located in the middle of the fan blades
• When removing the blower impeller,
use a pulling tool only.
• Spray the impeller blades with your
pressure washer using hot water
• Tip the leaf collector up so that the
opening is in a drain position
• Spray the entire inside of the leaf
collector. Avoid spraying directly onto
the bearing
• To clean the outside of the unit, wipe the
leaf collector down with some isopropyl
alcohol to remove dirt and residue
AVOID SPRAYING
DIRECTLY ONTO
THE BEARING
ONLY USE A 6" 3-JAW PULLING
TOOL (NOT INCLUDED) WHEN
REMOVING THE BLOWER IMPELLER
FOR CLEANING. CLEAN BLOWER
EVERY 30-40 DAYS OF USE.
• Unzip all three bags to
empty contents
• Turn leaf collector bags
inside-out seperately and
pressure wash each bag
• Allow bags to dry
13mm
bolt & washer
Tilt the leaf
collector to drain
from the opening
Remove
8 screws
Turn inside-out
to pressure wash
and let dry.
**INSTALLATION IS REVERSE ORDER OF REMOVAL
Black Mesh Bag White Filter Bag Outer Polyester Bag
14 cprosolutions.com1 855 535 0558
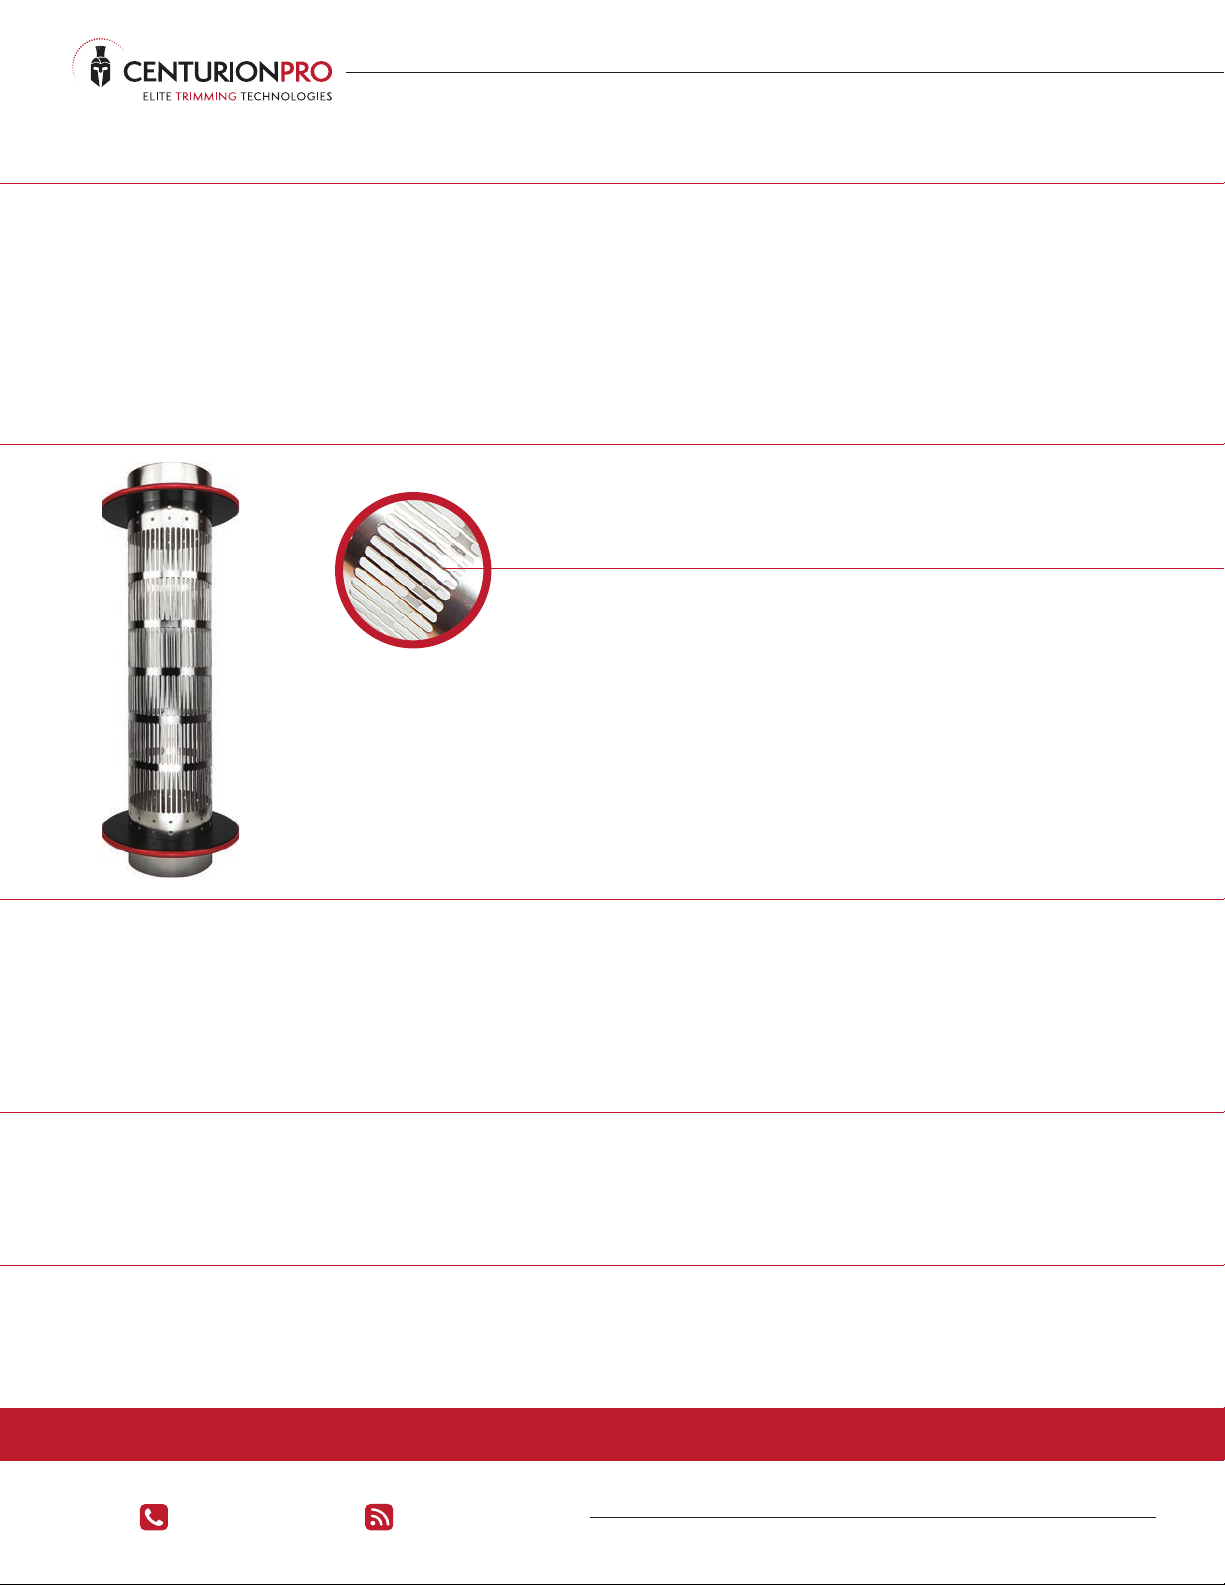
MACHINE MAINTENANCE
ELECTROPOLISHED
DUAL-PURPOSE
HYBRID TUMBLER
The Gladiator's are precision machines. It is essential that they be operated and maintained with this in mind. The machine has been adjusted and tested by the manufacturer prior to shipping to ensure
optimal performance. However, it is important to inspect the machine at initial start-up and after each use to ensure that no damage or plant material build-up has occurred and that the blades spin freely.
In addition, it is highly recommended to clean the machine after every day of use. This ensures that the blades are kept lubricated and that resin does not build-up and a ect performance. This is
especially important if the machine has been stored for an extended period of time.
Cold water is recommended to spray on blades during harvest. If optional Quantanium coating is chosen, the machine will not require any lubricants or sprays. The application of which will only damage
or alter the nal product and will not assist with the cutting process. In fact, it may hinder it.
• Begin by hanging the entire plant, leaving the leaf on. Starting with 30% humidity at 60-65 degrees Fahrenheit for 24 hours, raising the humidity to 50-60% for another ve to six days.
• Next, carefully cut all your owers o the main stocks of the plant, leaving only owers and leaves in tact. Then, depending on the density of the owers, it should be ready to run through the machine.
• The buds should be about 80-90% dry, which allow the fan leaf and sugar leaf to remain somewhat PLIABLE/BENDY, in a soft and exible state. If the larger leaf is too dry and brittle (which makes
it more di cult for the machine to pull this sti er leaf through the slots of the drum, preventing a clean, sharp cut) raise the humidity up to 75% for about half a day to a full day. This, remarkably,
softens up the unwanted leaf while returning almost no additional moisture to the main body of the buds.
THIS METHOD WILL ALLOW VIRTUALLY NO ADDITIONAL
MOISTURE BACK TO THE INNER BUD/FLOWER. THE
MOISTURE WILL ONLY SOFTEN UP THE OUTER LEAVES.
THE LEAVES MUST BE SOFT AND
PLIABLE FOR THE DRY TRIMMER TO
BE EFFECTIVE.
NOTE 1:CRITICAL: NOTE 2:
IT IS CRITICAL FOR THE UNWANTED LEAVES TO BE SOFT AND BENDY FOR THIS MACHINE TO
PREFORM A CLEAN PERFECT CUT. WE ALSO RECOMMEND USING A HUMIDIFIER OR A WATER
BOTTLE WITH A MISTING NOZZLE TO RE-INTRODUCE A SMALL AMOUNT OF MOISTURE TO THE
UNWANTED LEAVES BEFORE RUNNING THE FLOWERS THROUGH THE MACHINE.
TRIM BOTH WET + DRY
All CenturionPro trimming machines are specially designed to trim both wet and
dry material better than any other machine on the market. Our Dual-Purpose
Hybrid Tumbler has been extensively tested to outperform both the traditional wet
tumbler when trimming wet and the traditional dry tumbler when trimming dry.
This CenturionPro innovation allows you to switch between wet and dry material.
This is a major bene t because you can purchase one machine and still have the
capability to trim wet or dry owers.
See our dry trimming tips below for more details.
TRIMMING DRY? HERE ARE SOME IMPORTANT TIPS!
CENTURIONPRO
DUAL-PURPOSE HYBRID TUMBLER
After running the buds through the machine the chances are they are ready to bag up! All that might be necessary is a quick test after the bag has been sealed by opening it back up to air them out a
bit to achieve the perfect moisture content (curing process). You may prefer to run the machine with the plastic cover o , and diverter almost open (this varies depending on the density of the strain).
Please note the machine operates best when the tumbler is 40-60% full. A huge bonus to the DRY trimming method is that the machine will require almost no periodic cleaning, as the tumblers and
blades will not gum up and therefore not reduce performance. The main advantage of DRY trimming is said to be better preservation of all the strong natural aromas and avours after the harvesting
process is complete.
MONTHS OF WORK CAN BE RUINED IN A FEW HOURS AT THE END SO PLEASE BE PATIENT AND TAKE YOUR TIME WITH THE HARVESTING AND CURING PROCESS.
DESIGNED FOR BOTH WET + DRY TRIMMING
15
OWNERS MANUAL
GLADIATOR
For more information or to watch our DIY video tutorials visit cprosolutions.com
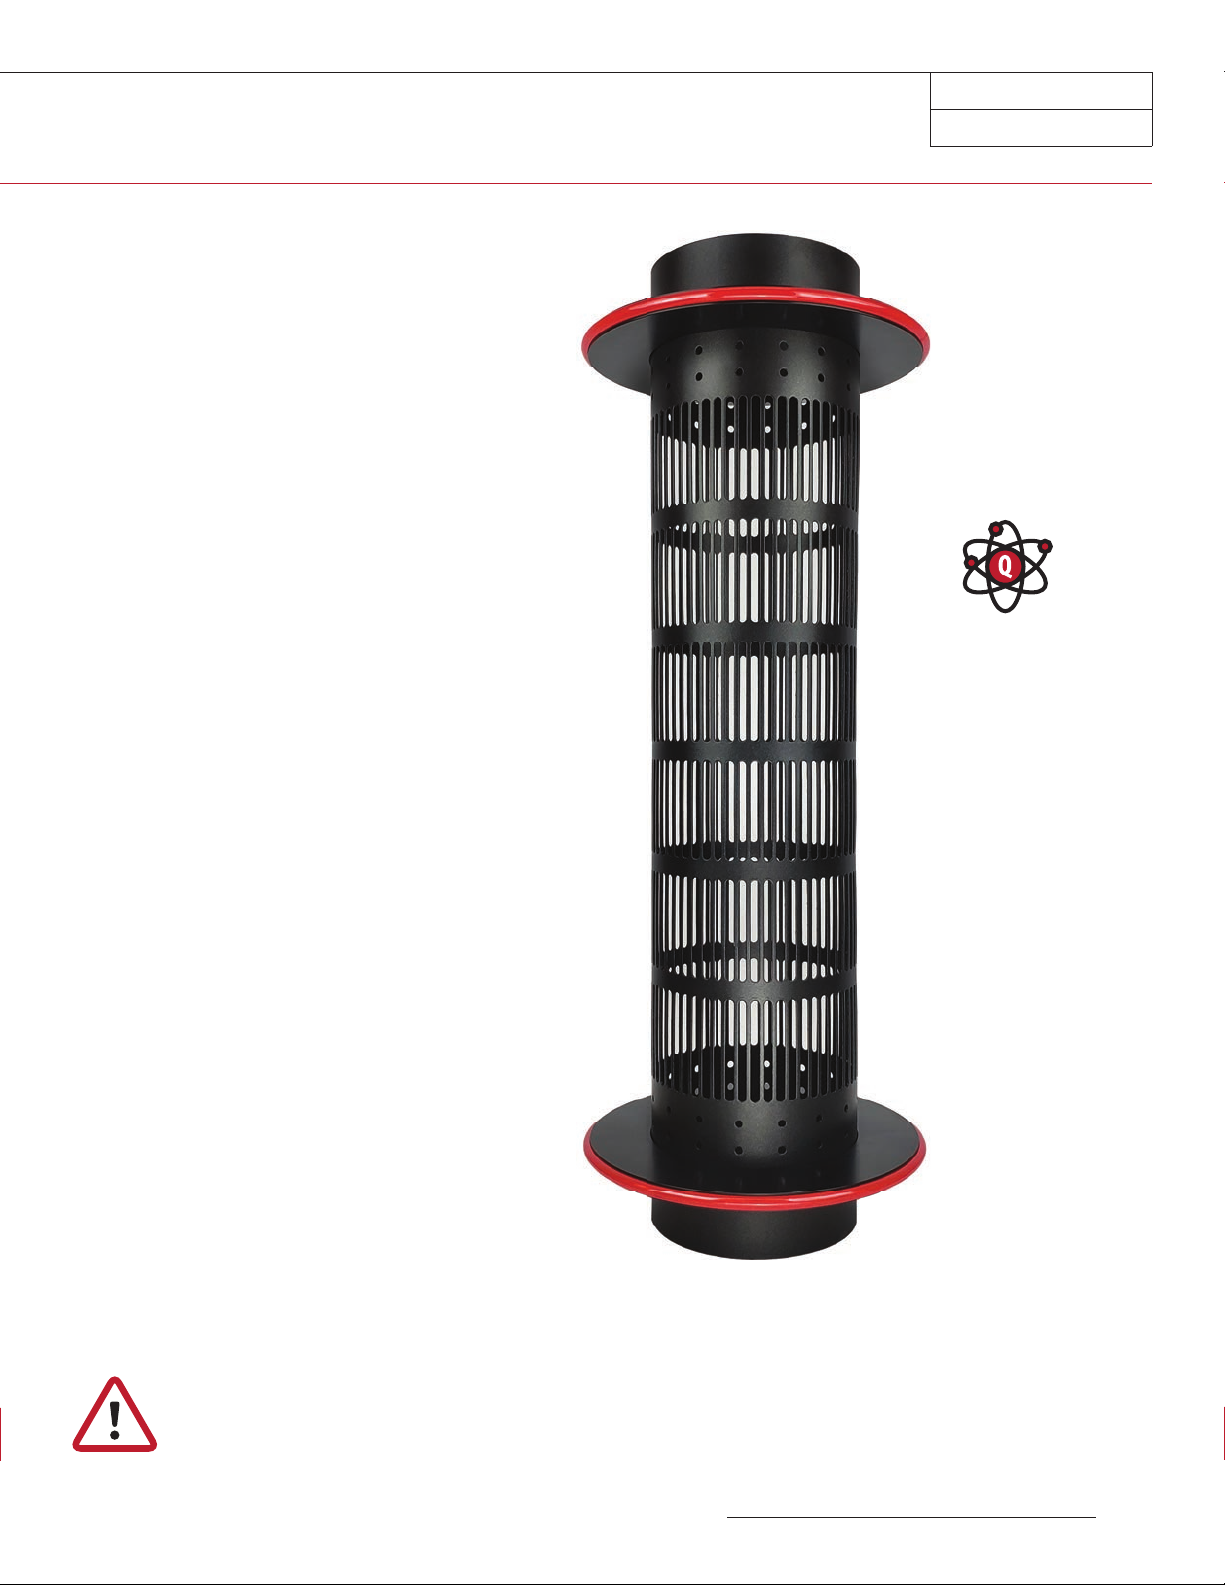
WHAT IS QUANTANIUM?
Quantanium is a multi-coat non-stick coating that incorporates a unique mix of
titanium particles. These particles are blended into the coating that stands up to
almost anything and makes the tumbler resistant to scratching. The outstanding
release is provided by silicone, not PTFE. All of our Quantanium coated tumblers
are made without PTFE/PFOA.
WHY DO WE USE QUANTANIUM?
HIGHER POTENCY HARVEST
The non-stick properties of the Quantanium tumbler prevents precious trichomes
from adhering the tumbler surface without the need for sprays. This results in the
end product having a better visual appearance while maintaining its strong natural
aroma and avors. Overall, this results in a better-quality end product as the
natural properties are preserved during the harvesting and trimming processes.
SAVE TIME = SAVE MONEY
Another bene t of the Quantanium tumbler is that it speeds up the harvesting
process since no downtime is required to stop and clean the tumblers throughout
the day. A simple wipe down with a cloth and warm water will remove the small
amount of residue that may be present.
HOW TO CLEAN THE QUANTANIUM TUMBLER
When cleaning the Quantanium tumbler, we recommend that you DO NOT
pressure wash it. This will cause the coating to ake and come o . Treat the
tumbler the same way you would treat a non-stick pan at home by letting it soak
in warm, soapy water. After letting it soak, rinse the tumbler and then wipe it with
a soft, clean cloth.
In extreme cases, residue can be removed by a thorough cleaning with 3 TBSP of
vinegar, 1 TBSP liquid dish detergent and 1 cup of water. Apply with sponge or
plastic scrubbing pad, then completely rinse with warm water.
DO NOT USE AUTOMOTIVE DEGREASERS.
While the Quantanium surface is designed to stand up to rough treatment, non-
stick surfaces last longer if you are careful not to rub or touch them with metal
surfaces or sharp objects. Remember that sensible care of your Quantanium
tumbler will ensure it lasts for many years.
IMPORTANT NOTE:
- DO NOT PRESSURE WASH
- SOAK IN WARM SOAPY WATER, RINSE & WIPE
QUANTANIUM COATED
DUAL-PURPOSE
HYBRID TUMBLER
QUANTANIUM COATED NON-STICK TUMBLER
16 cprosolutions.com1 855 535 0558
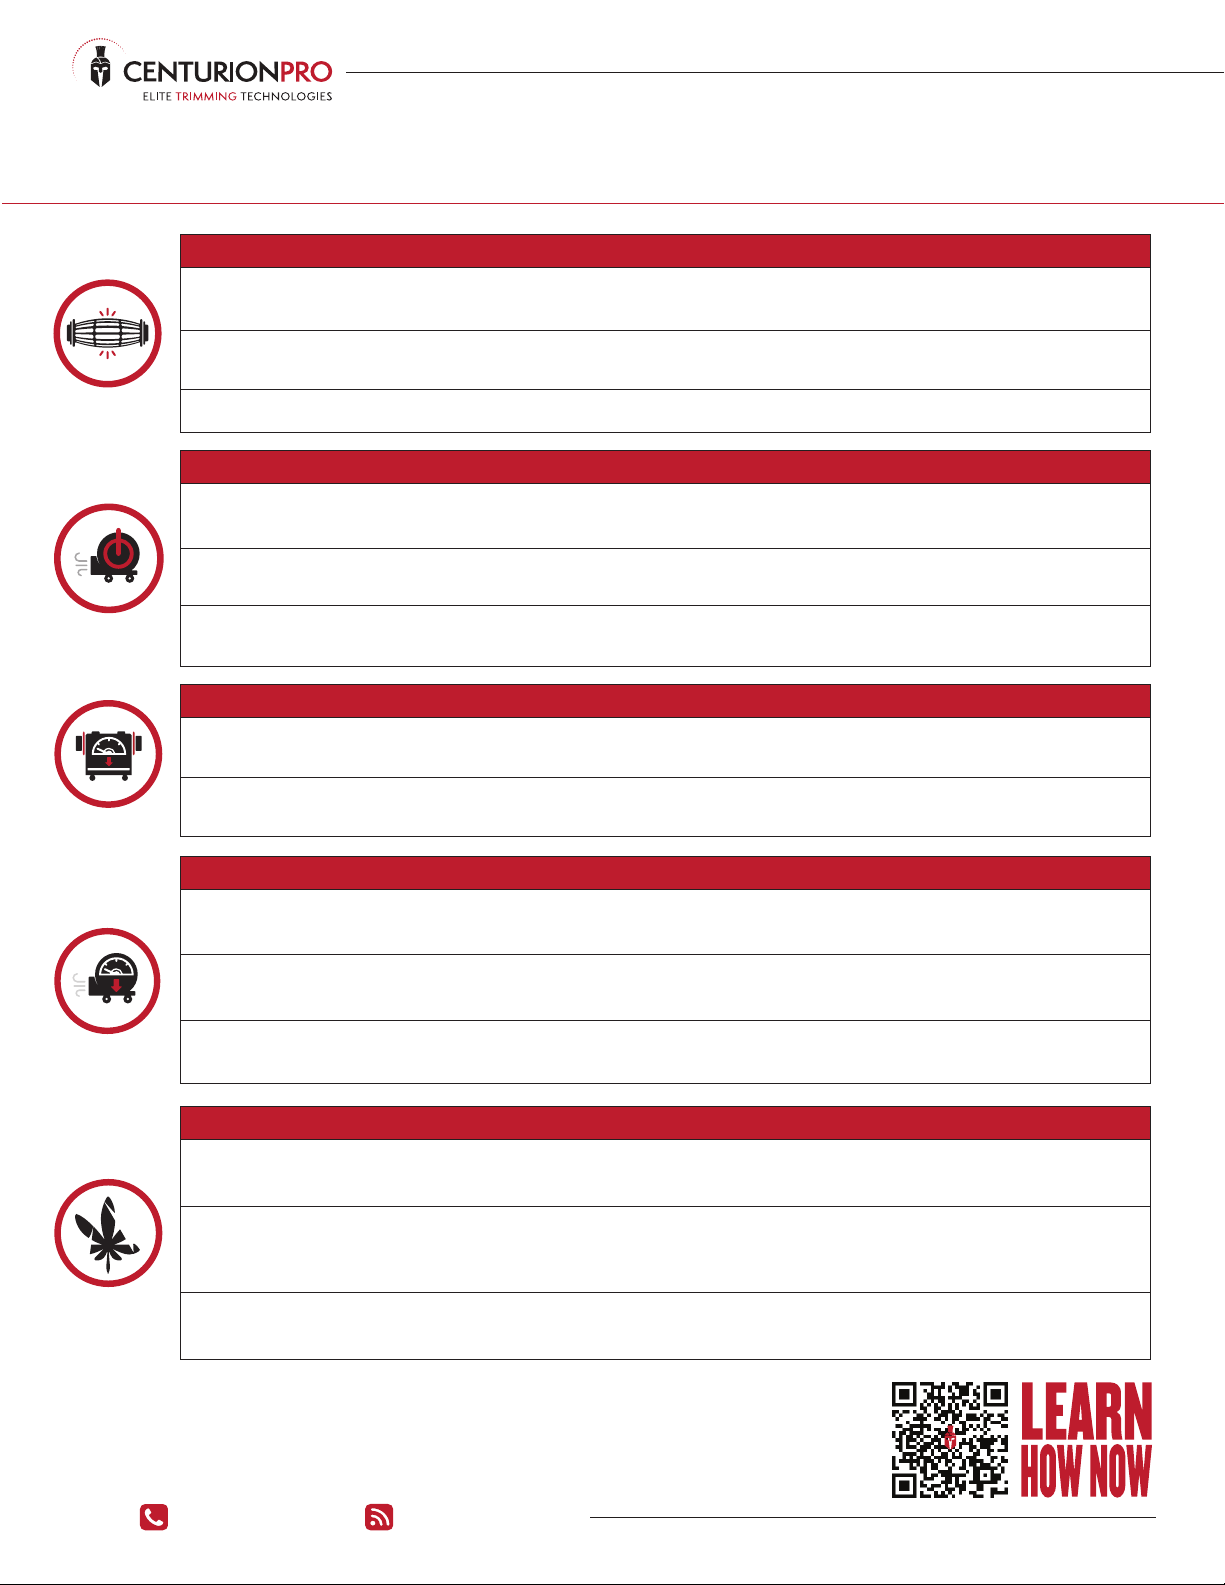
TROUBLESHOOTING
MY PRODUCT IS STUCK IN THE MIDDLE OF MY TUMBLER AND WILL NOT COME OUT THE OTHER END.
1) The tumbler should always be 40%-60% full. You should be feeding the tumbler every 30-60 seconds; this will ensure that new product entering the machine will help
push out product that is trimmed. This constant ow of product will also help with your processing capacity.
2) You can also increase the downward slope of the machine. To do this place a piece of cardboard or wood underneath the input side wheels/legs. Before turning the
machine ensure that the machine is level and sturdy.
3) Try opening the Diverter fully and/or removing the plastic top cover. This will increase the air ow and decrease the suction, allowing product to pass through quicker.
MY LEAF COLLECTOR IS NOT TURNING ON.
1) Ensure the correct voltage is being supplied as per your manual and never use an extension cord longer than 25 ft. Using an extension longer than 25 ft long will cause a
drop in power being supplied to the leaf collector. This can cause the motor to compensate for the lost power, therefore over heat and eventually burn out.
2) Test your electrical current to make sure it is producing power. We recommend having a certi ed electrician set up the proper power supply as noted on pg. 15. This will
ensure your power source is supplying the correct electricity. If you have not done this, have a certi ed electrician come and test your electrical current.
3) If you have tried all of the above, then your leaf collector’s capacitors or electrical box may need to be replaced. Ensure that you have a certi ed electrician install the parts
correctly. Also have them double check your power supply. If your power supply is inconsistent, the same problems will occur in the future.
MY TUMBLER IS SPINNING SLOWER THAN USUAL OR IS NOT SPINNING AT ALL.
1) Ensure that the tumbler is placed correctly in the grooves and there is no lubricant on the Tumbler O Rings (red o-rings on both sides of the tumbler). This will
cause the tumbler to slip in one spot rather than make a full rotation.
2) Ensure your Cam Follower's O Rings are in tact. You should NEVER run your machine without these. Cam Followers help guide the tumbler, without these your
tumbler and/or machine can incur damage.
THE LEAF COLLECTOR SUCTION SEEMS WEAK.
1) Ensure the correct voltage is being supplied as per your manual and never use an extension cord longer than 25 ft. Using an extension cord longer than 25 ft long will
cause a drop in power being supplied to the leaf collector. This can cause the motor to compensate for the lost power, therefore over heat and eventually burn out.
2) Test your electrical current to make sure it is producing power. We recommend having a certi ed electrician set up the proper power supply as noted on pg. 15. This will
ensure your power source is supplying the correct electricity. If you have not done this, have a certi ed electrician come and test your electrical current.
3) Ensure the leaf collector and surrounding parts are clean. Also ensure nothing is blocking the inlet or the outlet of the leaf collector. Often buildup of product around the
openings of the blower can cause weak suction. Be sure to clean the Kief Collection System, Impeller and the inside of the blower. Refer to pg. 9 for cleaning instructions.
THE PRODUCT IS NOT COMING OUT TRIMMED.
1) First, ensure that your machine is clean. Clean the Bed Bar Blade ( at blade), top and underneath every 3-4 hours of use. The Reel Blade (rotary blade) should be
cleaned every day of use. Think of the blades as a pair of scissors, if the blades are not clean the machine will not be able to do its job.
2) Secondly, ensure that the Bed Bar Blade is set close to the Reel Blade. The space between the two blades should be the same thickness as a single sheet of newspaper –
essentially, they should be skimming. Please refer to the video tutorial “Adjusting the Blade” on our website on how to set the Bed Bar Blade accurately. Again, think of the
blades as a pair of scissors, if the blades are too far away from each other they will not trim your product.
3) Lastly, ensure the suction from the Leaf Collector is working correctly. Make sure there are no air-leaks. Keep in mind that long extension cords result in a decrease in
performance of the machine and its components. If your machine has a hose or hoses, extend it as far as it will go and ensure it's as straight as possible.

17
OWNERS MANUAL
GLADIATOR
For more information or to watch our DIY video tutorials visit cprosolutions.com
MY MACHINE MOTOR IS HOT
1) Your machine may be overworking due to a voltage drop in your power supply. This can happen if you’re using an extension cord that is too long or undersized. You can
only use an extension cord with a maximum length of 25ft.
2) Use a voltage tester to test your electrical current to ensure you have the correct voltage. We recommend having a certied electrician come in and make sure
your power supply is consistent.
3) Having a motor on for an extended period can be the reason for overheating. Allow the motor to cool down by turning the machine o for an hour, every 5 hours of use.
MY LEAF COLLECTOR IS MAKING A LOUD BANGING NOISE
1) Ensure your blower is clean of debris and build up. Build up inside the blower and on the impeller can cause contact with the housing of the blower.
2) If cleaning the build up in your blower does not stop the noise, there may be a bend in your impeller. As such, you will need to purchase a new impeller to
replace the one in your leaf collector. To remove the impeller use ONLY a pulling tool. Refer to pg. 9 for instructions on how to properly remove the impeller.
THE CIRCUIT BREAKER KEEPS TRIPPING.
1) This is caused by a cord that is too long or undersized. Your cord must be no more than 25ft long and the same gauge of thickness as the main cord.
2) Also, ensure the machine is not sharing a circuit with other devices and the correct size breaker is present. Circuit sharing can signicantly decrease the power
being supplied to the devices therefore causing the breaker to trip.
3) Test your electrical current to make sure it is producing consistent power. We recommend having a certied electrician set up the proper power supply as
noted on pg. 15. This will ensure your power source is supplying the correct electricity. If you have not done this, have a certied electrician come and test your
electrical current to ensure it complies with the electrical requirements on pg. 15.
THERE IS A HIGH PITCH SCREECHING NOISE COMING FROM MY MACHINE.
1) Determine if the noise is coming from your reel bearings or brush assembly. Check your reel bearings to ensure they are greased suciently, Take a look at the video
tutorial “Packing the Bearings” on our website to help you with this. If the noise persists after you grease your bearings you will need to purchase and replace them. If the
noise is coming from your brush assembly, you will need to purchase and replace the brush bearings.
2) If the noise is coming from your leaf collector, you will need to replace the bearings in your leaf collector. Please contact our tech support for more details on this.
3) It is very important to ensure that after cleaning your machine, you run it for 10-15 mins to ensure there is no residual water around the bearings.
THERE IS A HIGH-SPEED TICKING SOUND COMING FROM THE BLADES.
1) The ticking sounds might be the bed bar blade and reel blade making slight contact. If the machine is producing a louder than usual ticking/banging sound, then turn o
the machine and inspect the blades. Ensure your blades are properly adjusted by following the video tutorial “Adjusting the Bed Bar Blade” on our website.
2) A n on the tumbler might be slightly protruding therefore causing slight contact with the bed bar blade. This will cause a ticking sound for every rotation the
tumbler does. Watch the video tutorial on our website called “Straightening the Drum”. Also ensure the blade is adjusted properly.
MY TUMBLER IS HOPPING AND/OR WOBBLING.
1) All tumbles are hand rolled and welded. None of our tumblers are cut from a perfectly cylindrical pipe, therefore the tumbler might appear as it is slightly
wobbling while the machine is on.
2) You might notice a slight hop to your tumbler every rotation. This is from the Red Tumbler O Ring. This should not aect the functioning of your machine.
However, if you notice the hop getting worse, you will need to replace this part.

18 cprosolutions.com1 855 535 0558
FREQUENTLY ASKED QUESTIONS
You are about to enjoy the experience of CenturionPro Solution’s automated trimming machine. For critical information on assembly, cleaning, care, maintenance and
how to operate your machine correctly, please review this manual and check out our video tutorials, which are posted on our website for your ease and convenience.
Go to www.cprosolutions.com/video-tutorials for our video tutorials.
These tutorials provide how-to assistance on the following aspects of machine maintenance:
• Straightening the Tumbler/Drum • Complete Unit Assembly • Sharpening The Blade
• Skirt Assembly • Replacing the Bearings • Cleaning The Blower
• Removing and Replacing The Belt • Manually Bucking Your Product • Adjusting The Blade
• Replacing The Motor • Trimmer Cleaning and Maintenance • Packing The Bearings
• Blade Removal and Cleaning • Replacing The Tumbler/Drum Ring • Replacing The Pulleys
**If for some reason you can’t fi nd an answer to your question online or in your manual, please do not hesitate to contact us.
ADDITIONAL ASSISTANCE
HOW EASY IS IT TO CLEAN?
Our machines can be taken apart and cleaned within 15 minutes. Please see the detailed cleaning
instructions throughout this manual. Our Quantanium coating is similar to a Te on pan you would have
at home which is even easier to clean. Just submerge in warm water, let soak and then wipe with a soft
cloth. We recommend to clean every day of use, but it depends on your strain. We know the importance
of down time during a harvest so we wanted to make this process extremely quick and easy
WHAT IS THE MAINTENANCE LIKE?
We have several video tutorials on our website with how to fully service your machine. These step by
step DIY videos make it very easy to do everything necessary to maintain your machine. All parts can be
ordered through any hydroponic store nationwide.
DO YOUR MACHINES TRIM WET OR DRY?
AllCenturionProtrimmingmachinesarespeciallydesignedtotrimbothwetanddrymaterialbetterthanany
othermachineonthemarket.OurDual-PurposeHybridTumblerhasbeenextensivelytestedtooutperform
both the traditional wet tumbler when trimming wet and the traditional dry tumbler when trimming dry.
This CenturionPro innovation allows you to switch between wet and dry material with just a few small
adjustments to your trimming system. This is a major bene t because you can purchase one machine
and still have the capability to trim wet or dry owers.
ARE YOUR MACHINES BUILT TO AN INDUSTRIAL STANDARD?
We do not compromise quality for cost savings. All CenturionPro Solutions machines are composed
of the highest quality materials available in North America and each machine is put through a
comprehensive quality control inspection. We only use brand name components in the build out of our
machines which enables us to have the comfort in giving you a 10 year trimmer warranty. With proper
maintenance these machines will last you well over a decade.
WHAT IS THE OPTIMAL ROOM TEMPERATURE TO TRIM?
Use your CenturtionPro machine in 50-60 °F (10- 15 °C) room to get the best performance. Cooler
temperatures prevent excessive sticking to machine components.
MY MACHINE IS NOT WORKING LIKE IT DID WHEN IT WAS NEW, WHY?
Make sure to fully clean the machine and blades. If the machine is clean, the blade is adjusted properly
and the leaf collector has full suction, then your machine should trim exactly like it was new.
WHY IS MY PRODUCT STICKING TO THE INSIDE OF THE TUMBLER?
If you nd that product is sticking to the inside of the tumbler, rst clean the tumbler. When you
reassemble it, make sure the top brush bristles are poking through 1/4" into the tumbler.
HOW MUCH PRODUCT SHOULD BE IN THE TUMBLER AT ONE TIME?
The tumbler should be 40-60% full when trimming.
RETURN/REFUND POLICY
Once the machinery/parts are opened and/or used they are no longer eligible for refund or exchange. Customers can only return if written notice of return has been provided to CenturionPro Solutions within 7 days of
receiving their machine and the machine or any component of which have not been used. There will be a 20% restocking fee and the customer will be responsible for all shipping costs. Returns must be packaged same
as it arrived and CenturionPro is not liable for any shipping damage incurred on return. If damage occurs in transit on return, CenturionPro will refuse the return and customer will need to process a claim with their
shipping provider. Any missing or damaged items must be reported to CenturionPro within 14 business days of receiving the shipment.

19
OWNERS MANUAL
GLADIATOR
For more information or to watch our DIY video tutorials visit cprosolutions.com
THE GLADIATOR & LEAF COLLECTOR SPECIFICATIONS
THE GLADIATOR BULLET TRIMMER
Input Voltage
7 Amp - 110V NA
3.5 Amp - 220V EU/AUS
Dimensions 30" L x 25" W x 28" H
Weight 150 lbs
Reels 2
Blades Per Reel 11
Tumbler Diameter 2 x 6.5”
Tumbler Length 30"
Number of Tumblers 4
Human Trimmer Replacement 100 people
Processing Capacity
Dry: 25 lbs/hr
Wet: 125 lbs/hr
Cuts Per Minute 75,000
Warranty 10 year
THE GLADIATOR LEAF COLLECTOR
Input Voltage
22 Amp - 220V NA
22 Amp - 220V EU/AUS
Dimensions 19.5" L x 22" W x 23" H
Weight 105lbs
Horsepower 4 hp
Airow Capacity 3500 CFM
Warranty 3 year
ELECTRICAL POWER SUPPLY SET-UP
TEST YOUR ELECTRICAL CURRENT TO MAKE SURE IT
IS PRODUCING POWER. WE RECOMMEND HAVING A
CERTIFIED ELECTRICIAN SET UP THE PROPER POWER
SUPPLY. THIS WILL ENSURE YOUR POWER SOURCE IS
SUPPLYING THE CORRECT ELECTRICITY. IF YOU HAVE NOT
DONE THIS, HAVE A CERTIFIED ELECTRICIAN COME AND
TEST YOUR ELECTRICAL CURRENT.

Other CenturionPro Trimmer manuals

CenturionPro
CenturionPro 3.0 User manual

CenturionPro
CenturionPro THE MINI User manual

CenturionPro
CenturionPro Original User manual

CenturionPro
CenturionPro GC1 User manual

CenturionPro
CenturionPro DBT 4 User manual

CenturionPro
CenturionPro XL Series User manual

CenturionPro
CenturionPro Original User manual


