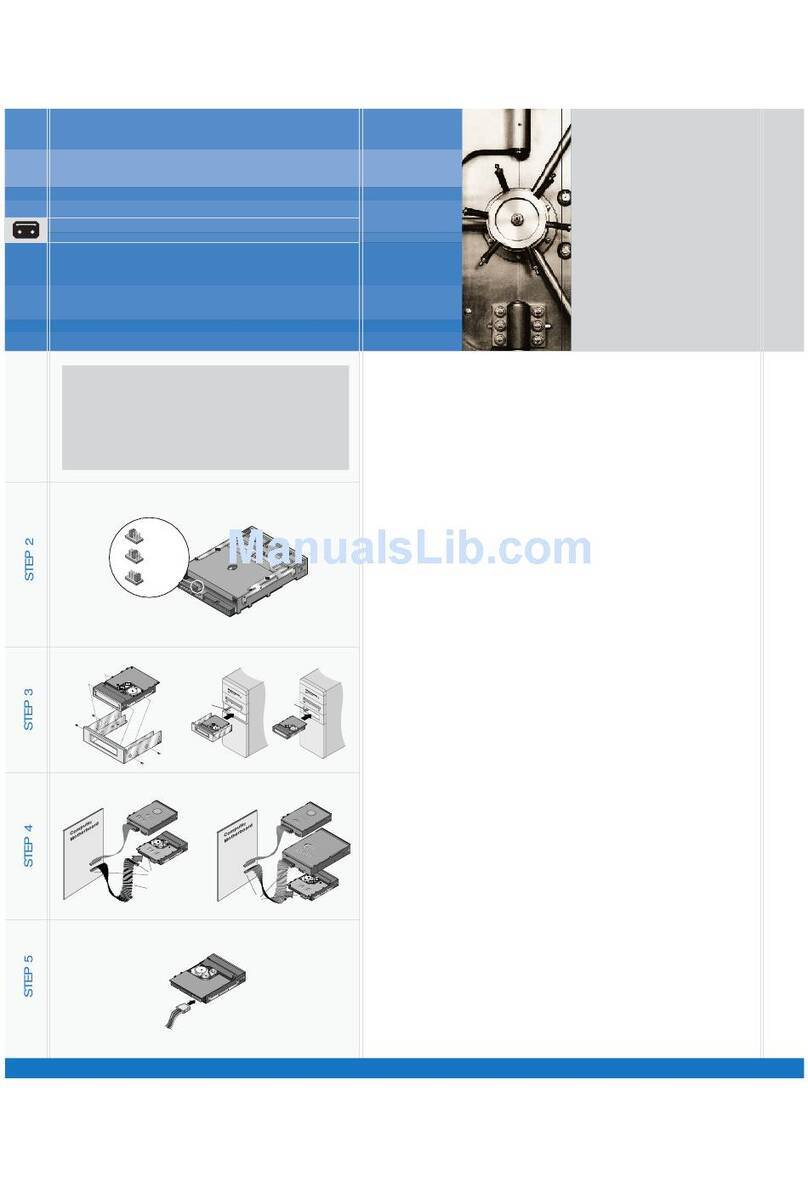
Certance LTO 2 Technical manual

i
Online User's Guide
LTO-2 Half-Height Tape Drive
CERTANCE

Copyright and Trademarks
Copyright © 2004 by Certance LLC. All Rights Reserved.
Part Number 50001736
May 2004
Certance and the Certance logo are trademarks of Certance LLC. Other product names are trademarks or reg-
istered trademarks of their respective owners.
Certance reserves the right to change, without notice, product offerings or specifications. No part of this publi-
cation may be reproduced in any form without written permission from Certance LLC.
Certance provides this manual “as is,” without warranty of any kind, either expressed or implied, including, but
not limited to, the implied warranties of merchantability and fitness for a particular purpose. Certance reserves
the right to change, without notification, the specifications contained in this manual.
Certance assumes no responsibility for the accuracy, completeness, sufficiency, or usefulness of this manual, nor
for any problem that might arise from the use of the information in this manual.

Warnings
All safety and operating instructions should be read before this product is operated, and should be retained for
future reference. This unit has been engineered and manufactured to assure your personal safety. Improper use
can result in potential electrical shock or fire hazards. In order not to defeat the safeguards, observe the follow-
ing basic rules for installation, use and servicing.
•Heed warnings — All warnings on the product and in the operating instructions should be adhered to.
•Follow instructions — All operating and use instructions should be followed.
•Ventilation — The product should be situated so that its location or position does not interfere with proper
ventilation.
•Heat — The product should be situated away from heat sources such as radiators, heat registers, fur-
naces, or other heat producing appliances.
•Power sources — The product should be connected to a power source only of the type directed in this
document or as marked on the product.
•Power cord protection — The power cord should be routed so that it is not likely to be walked on or
pinched by items placed upon or against it, paying particular attention to the cord at the wall receptacle,
and the point where the cord exits from the product.
•To complete the disconnection of the electricity, please remove the power (electric) cord and the SCSI
cable from their connections in the back of the product. The plugs should be placed near the product for
easy access.
•Object and liquid entry — Care should be taken to insure that objects do not fall and liquids are not
spilled into the product's enclosure through openings.
•Servicing — The user should not attempt to service the product beyond that described in the operating
instructions. All other servicing should be referred to qualified service personnel.
CAUTION: This symbol should alert the user to the presence of “dangerous voltage” inside the
product that might cause harm or electric shock.
Caution! Risk of electric shock! Do not open!
To reduce the risk of electric shock, do not remove the cover (or back). No user-serviceable parts
are inside. Refer servicing to qualified service personnel.

Precautions
•Do not use oil, solvents, gasoline, paint thinners, or insecticides on the unit.
•Do not expose the unit to moisture or to temperatures higher than 151 °F (66 °C) or lower than
-40 °F (-40°C).
•Keep the unit away from direct sunlight, strong magnetic fields, excessive dust, humidity, and
electronic/electrical equipment, which generate electrical noise.
•Hold the power cord by the head when removing it from the AC outlet; pulling the cord can damage the
internal wires.
•Use the unit on a firm level surface free from vibration, and do not place anything on top of the unit.

FCC Notice
This equipment generates and uses radio frequency energy and, if not installed and used properly — that is, in
strict accordance with the manufacturer's instructions — may cause interference to radio communications or
radio and television reception. It has been tested and found to comply with the limits for a Class B computing
device in accordance with the specifications in Part 15 of FCC Rules, which are designed to provide reason-
able protection against such interference in a residential installation. However, there is no guarantee that inter-
ference will not occur in a particular installation. If this equipment does cause interference to radio or television
reception, which can be determined by turning the equipment on and off, you are encouraged to try to correct
the interference by one or more of the following measures:
•Reorient the receiving antenna.
•Relocate the computer with respect to the receiver.
•Move the computer into a different outlet so that the computer and receiver are on different branch cir-
cuits.
Further, this equipment complies with the limits for a Class B digital apparatus in accordance with Canadian
Radio Interference Regulations.
Cet appareil numérique de la classe B est conforme au Règlement sur brouillage radioélectrique, C. R. C., ch.
1374.
The desktop device drive described in this manual requires shielded interface cables to comply with FCC emis-
sion limits.
WARNING: Changes or modifications made to this equipment, which have not been expressly
approved by Certance, may cause radio and television interference problems that could void
the user's authority to operate the equipment.
WARNING: To prevent fire or electrical shock hazard, do not expose the unit to rain or mois-
ture.
To avoid electrical shock, do not open the cabinet.
Refer servicing to qualified personnel.

vi
Contents
Chapter 1 – Introduction ................................................ 10
Features ............................................................................................11
Using This Guide ................................................................................12
Chapter 2 – Installation (and Quick Start) ...................... 13
Introduction ........................................................................................13
Quick Start Guide ...............................................................................13
Unpacking and Inspection ...................................................................15
Internal Tape Drive Guidelines and Cautions ..........................................15
Drive Installation Instructions ................................................................15
Installing an Internal LTO-2 Half-Height Drive ..........................................16
Installing a Desktop LTO-2 Half-Height Drive ...........................................22
Chapter 3 – Operation................................................... 25
Understanding the Front Panel Display ..................................................25
Blink Codes .......................................................................................26
Using LTO Cartridges ..........................................................................27
Drive Maintenance .............................................................................29
Chapter 4 – Theory........................................................ 30
Track Layout .......................................................................................30
Recording Method ..............................................................................31
Data Buffer ........................................................................................31
Data Integrity .....................................................................................31
Data Compression ..............................................................................33
Chapter 5 – Specifications.............................................. 35
Physical Specifications ........................................................................35
Power Specifications ...........................................................................37
Drive Performance Specifications ..........................................................38
Environmental Requirements .................................................................39
Reliability ..........................................................................................39
Mean Time Between Failures ................................................................40
LTO Cartridge Specifications ................................................................41
Regulatory Compliance .......................................................................42

vii
Chapter 6 – Unix Settings .............................................. 44
A Word About SCSI Controllers ............................................................44
Configuring for the DEC/Compaq Unix Environment ..............................45
Configuring for the Sun Environment
(Solaris 2.4, 2.5, 2.6, 7, 8, and 9) ......................................................46
Configuring for the IBM AIX Environment (AIX Version 4.1.x and later) ......47
Configuring for SCO Open Server 5.0.x ..............................................49
Configuring for Linux ..........................................................................51
Configuring for SGI Irix .......................................................................52
Configuring for HP-UX 11.0 .................................................................53
Chapter 7 – Troubleshooting Guide ................................ 54
Installation Best Practices .....................................................................54
Troubleshooting Suggestions ................................................................55
Emergency Reset and Emergency Cartridge Eject ...................................59
Problems During Backup/Restore Operations .........................................60

viii
List of Figures
Figure 1. Drive Covered in this User’s Guide (typical) ............................................. 10
Figure 2. Internal LTO-2 Half-Height Drive Jumper Settings....................................... 17
Figure 3. Acceptable Mounting Orientations.......................................................... 18
Figure 4. Internal LTO-2 Half-Height Drive Mounting Dimensions .............................. 19
Figure 5. Rear View of the Internal LTO-2 Half-Height Drive ..................................... 20
Figure 6. Two SCSI Termination Examples for the Internal LTO-2 Half-Height Drive ..... 21
Figure 7. SCSI Termination Examples for the Desktop LTO-2 Half-Height Tape Drive ... 23
Figure 8. Generic Front Panel Display................................................................... 25
Figure 9. Ultrium Cartridge Showing Write-protect Switch ....................................... 28
Figure 10. Layout of Tracks on LTO Ultrium Tape.................................................... 31
Figure 11. Internal LTO-2 Half-Height Drive Dimensions........................................... 36

ix
List of Tables
Table 1. SCSI IDs and Jumper Settings for LTO-2 Half-Height Drive ........................... 17
Table 2. Serial Interface Connector Pin Assignments ............................................... 21
Table 3. LTO-2 Tape Drive Blink Codes ................................................................. 26
Table 4. Physical Specifications............................................................................ 35
Table 5. Voltage and Current............................................................................... 37
Table 6. Power Dissipation .................................................................................. 37
Table 7. Drive Performance Specifications............................................................. 38
Table 8. Environmental Requirements.................................................................... 39
Table 9. Reliability.............................................................................................. 39
Table 10. Environmental Tolerances...................................................................... 41
Table 11. Safety Compliance............................................................................... 42
Table 12. Electromagnetic Compatibility ............................................................... 43
Table 13. SCSI Controllers .................................................................................. 44

10
1 Introduction
The LTO--2 half-height drive is a high-performance 8-channel tape drive that complies with the LTO
interchange specifications. It is suited for mid-range to high-end servers, mainframe systems, and
tape library automation systems.
The LTO-2 half-height drive uses Ultrium data cartridges. Its capacity is maximized using intelligent
data compression. The drive has a native capacity of 200 Gbytes (400 Gbytes assuming 2:1 data
compression).
The LTO-2 half-height drive, as shown in Figure 1 below, has a 5¼ inch half-height form factor with
automatic electromechanical cartridge soft load. It is available as an internal and a desktop drive.
•The internal LTO--2 half-height drive is designed to fit in a 5¼-inch half-height drive bay.
•The desktop LTO--2 half-height drive is a stand-alone unit with a built-in power supply.
Figure 1. Drive Covered in this User’s Guide (typical)

Introduction Features
11
Features
The following list summarizes the key features of the LTO-2 half-height drives.
•Performance
•Up to 20 Mbytes-per-second native transfer.
•13-Speed Transfer matches tape drive speed to that of the host and optimizes data transfers,
resulting in shorter backup times and increased reliability.
•Two convenient form-factors:
•5¼-inch internal form-factor for installation in a 5¼-inch half-height space.
•External desktop form-factor.
•Intelligent data compression maximizes performance and capacity by analyzing
compressibility prior to recording.
•Cartridge memory enables fast loading of cartridges and stores pertinent information about
the media.
•32-Mbyte data buffer for extra fast backups on high-performance systems.
•Tape Alert drive performance monitoring and reporting.
•3rd generation read channel for increased maturity and data integrity.
•Patented head positioner for increased data integrity.
•Shock dampened isolated chassis.
•Two levels of ECC for extra data safety and protection from errors.
•Reliable tape picking implementation for increased reliability.
•Custom-designed LSI circuitry for fast, efficient data processing.
•RISC processors for fast, efficient data processing.
•Supports a wide variety of UNIX platforms.

Introduction Using This Guide
12
Using This Guide
This User’s Guide describes how to install, configure, and care for the LTO-2 half-height desktop and
internal tape drives. Please read the appropriate chapters and appendixes carefully, and keep this
Guide handy for future reference.
•Chapter 1, Introduction provides an overview of LTO and Ultrium technologies, and sum-
marizes the drive’s key features.
•Chapter 2, Installation describes handling precautions, unpacking tips, and installation
instructions for the internal and desktop drives, as well as a summary of cabling and connec-
tor specifications. It also provides quick-start instructions for getting the drives up and running
in the shortest possible time.
•Chapter 3, Operation explains the use and operation of the drive and describes mainte-
nance procedures.
•Chapter 4, Theory describes the theory of operation behind the drives, including the tech-
nology used in various drive components.
•Chapter 5, Specifications contains detailed drive and cartridge specifications, as well as
a summary of regulatory approvals.
•Chapter 6, Unix Settings describes the settings for Unix systems.
•Chapter 7, Troubleshooting Guide provides troubleshooting procedures you can follow
in the unlikely event you encounter a problem with your drive.

13
2 Installation (and Quick Start)
Introduction
This chapter explains how to install the internal and desktop LTO-2 half-height drives.
Topics covered in this chapter are:
•“Quick Start Guide” on page 13
•“Unpacking and Inspection” on page 15
•“Internal Tape Drive Guidelines and Cautions” on page 15
•“Installing an Internal LTO-2 Half-Height Drive” on page 16
•“Installing a Desktop LTO-2 Half-Height Drive” on page 22
Quick Start Guide
Use the following quick-start instructions to get your tape drive up and running as quickly as
possible.
Internal LTO-2 Half-Height Tape Drive Quick Start
Use the following procedure to install internal LTO-2 half-height tape drive. Print this page and check
each step as you complete it. If you need more information about a step, turn to the section refer-
enced in the step.
❑1. Unpack the contents of your drive package, and check for damaged items.
See “Unpacking and Inspection” on page 15.
❑2. Review the drive’s default settings and change them if necessary:
• SCSI ID: 6
• Terminator Power: Disabled
See“Configuring the Internal Tape Drive” on page 16.
❑3. Turn off your computer, remove its covers and power cable, and select a mounting bay for
the drive.
See “Mounting the Internal Tape Drive” on page 18.
❑4. Connect a SCSI interface cable to the drive.
See “Connecting a SCSI Cable” on page 20.
❑5. Terminate the SCSI bus if the internal tape drive is the last device on the SCSI bus.
See “Checking the SCSI Termination” on page 20.
❑6. Connect a serial cable, if connecting the tape drive to a tape library.
See “Connecting a Serial Cable for Tape Libraries” on page 21.

Installation (and Quick Start) Quick Start Guide
14
Desktop LTO-2 Half-Height Tape Drive Quick Start
Use the following procedure to install desktop LTO-2 half-height tape drive. Print this page and check
each step as you complete it. If you need more information about a step, turn to the section refer-
enced in the step.
❑7. Connect a power cable to the drive.
See “Connecting a Power Cable” on page 21.
❑8. Replace the computer covers and power cable, turn on the computer, and verify that the
internal tape drive is operating properly.
❑9. Register your tape drive.
See “Registering Your Tape Drive” on page 22.
❑1. Unpack the contents of your drive package, and check for damaged items.
See “Unpacking and Inspection” on page 15.
❑2. Review the drive’s default settings and change them if necessary:
• SCSI ID: 6
See“Setting the SCSI ID” on page 22.
❑3. Connect a SCSI interface cable to the drive.
See “Connecting a SCSI Cable” on page 22.
❑4. Check the SCSI termination.
See “Checking the SCSI Termination” on page 23.
❑5. Connect a power cable to the drive.
See “Connecting a Power Cord” on page 23.
❑6. Turn on the computer, turn on the desktop tape drive, and verify that the desktop tape
drive is operating properly.
❑7. Register your tape drive.
See “Registering Your Tape Drive” on page 24.

Installation (and Quick Start) Unpacking and Inspection
15
Unpacking and Inspection
Although drives are inspected and carefully packaged at the factory, damage may occur during
shipping. Follow these steps for unpacking the drive.
1. Visually inspect the shipping containers and notify your carrier immediately of any damage.
2. Place shipping containers on a flat, clean, stable surface; then carefully remove the contents. If
the equipment is damaged, notify your Certance representative.
3. Always save the containers and packing materials for any future reshipment.
Internal Tape Drive Guidelines and Cautions
The following guidelines and cautions apply to handling and installing internal tape drives. Keep
them in mind as you install the drive.
•Handle the drive by the sides rather than by the top cover to reduce the risk of dropping the
drive or damaging it during installation.
•Internal drives contain some exposed components that are sensitive to static electricity. To
reduce the possibility of damage from static discharge, the drives are shipped in a protective
antistatic bag. Do not remove the drive from the antistatic bag until you are ready to install it.
•Before you remove the drive from the antistatic bag, touch a metal or grounded surface to dis-
charge any static electricity buildup from your body.
•Always lay the drive either on top of the antistatic bag or place it inside of the bag to reduce
the chance of damage from static discharge.
•Install LVD drives only in an LVD environment. Do not mix LVD and HVD devices on the same
SCSI bus.
•Due to the speed of the LTO-2 half-height drive, it is recommended that a maximum of one LTO-
2 drive be connected to one host SCSI adapter.
Drive Installation Instructions
After unpacking and inspecting your shipping containers and reviewing the installation guidelines
and cautions, proceed to the appropriate section in this chapter for instructions on installing your
LTO-2 half-height tape drive.
•If you have an internal LTO-2 half-height tape drive, go to “Installing an Internal LTO-2 Half-
Height Drive” on page 16.
•If you have a desktop LTO-2 half-height tape drive, go to “Installing a Desktop LTO-2 Half-
Height Drive” on page 22.

Installation (and Quick Start) Installing an Internal LTO-2 Half-Height Drive
16
Installing an Internal LTO-2 Half-Height Drive
Installing an internal LTO-2 half-height tape drive involves the following steps:
1. “Configuring the Internal Tape Drive” on page 16
2. “Mounting the Internal Tape Drive” on page 18
3. “Connecting a SCSI Cable” on page 20
4. “Checking the SCSI Termination” on page 20
5. “Connecting a Serial Cable for Tape Libraries” on page 21
6. “Connecting a Power Cable” on page 21
7. “Registering Your Tape Drive” on page 22
Configuring the Internal Tape Drive
Before you install the LTO-2 half-height tape drive in your computer, you may need to configure the
drive’s SCSI ID and terminator power features. The default configuration settings for the LTO-2 half-
height drive are:
•SCSI ID: 6
•Terminator power: disabled
If you need to change these settings, refer to the following sections. Otherwise, skip to “Mounting
the Internal Tape Drive” on page 18.
SCSI ID
Each SCSI device on the bus must have its own unique SCSI ID. The internal tape drive is shipped
with a default SCSI ID of 6. If another SCSI device in the SCSI chain is using this ID, use jumper pins
1–2, 3–4, 5–6, and 7–8 to change the SCSI ID of the LTO-2 half-height drive (see Figure 2 on
page 17 and Table 1 on page 17), or assign a unique SCSI ID to the other SCSI device.
Jumper Pins: 1–2, 3–4, 5–6, 7–8
Default Setting: SCSI ID 6
NOTE: The SCSI controller or host adapter generally uses ID 7. In some systems, the boot drive
uses ID 0 or ID 1. Avoid setting your drive’s SCSI ID to these settings.

Installation (and Quick Start) Installing an Internal LTO-2 Half-Height Drive
17
Figure 2. Internal LTO-2 Half-Height Drive Jumper Settings
Table 1. SCSI IDs and Jumper Settings for LTO-2 Half-Height Drive
SCSI ID
Jumpers
1–2 3–4 5–6 7–8
0 Open Open Open Open
1Shunted Open Open Open
2 Open Shunted Open Open
3Shunted Shunted Open Open
4 OpenOpenShuntedOpen
5Shunted Open Shunted Open
6 (default) Open Shunted Shunted Open
7Shunted Shunted Shunted Open
8 OpenOpenOpenShunted
9Shunted Open Open Shunted
10 Open Shunted Open Shunted
Drive Configuration Jumper Pins Jumper Settings:
Default
settings:
SCSI ID=0
SCSI ID=1
SCSI ID=2
SCSI ID=3
SCSI ID=4
SCSI ID=5
SCSI ID=6
SCSI ID=7
SCSI ID=8
SCSI ID=9
SCSI ID=10
SCSI ID=11
SCSI ID=12
SCSI ID=13
SCSI ID=14
SCSI ID=15
Term. power
Pins: Function:
1-2 SCSI ID bit 0
3-4 SCSI ID bit 1
5-6 SCSI ID bit 2
7-8 SCSI ID bit 3
9-10 Reserved
11-12 Termination Power
Drive Configuration
Jumper Pins

Installation (and Quick Start) Installing an Internal LTO-2 Half-Height Drive
18
Terminator Power
By default, terminator power is disabled on the internal LTO-2 half-height tape drive. To enable termi-
nator power, place a jumper across pins 11 and 12.
Mounting the Internal Tape Drive
You can mount the internal LTO-2 half-height drive either horizontally or vertically (see Figure 3
below).
•If you mount the drive vertically, the side of the drive should be within 5 degrees of horizontal.
•If you mount the drive horizontally, the base of the drive must be within 15 degrees of horizon-
tal and the drive must be right-side up.
Figure 3. Acceptable Mounting Orientations
Mount the drive in a 5.25-inch, half-height drive bay and secure it using two M3.0 X 3 metric screws
on each side of the drive. Do not use screws longer than 3 mm or you may damage the drive.
Figure 4 on page 19 shows the locations of the mounting-screw holes on the side and bottom of the
drive, respectively.
11 Shunted Shunted Open Shunted
12 Open Open Shunted Shunted
13 Shunted Open Shunted Shunted
14 Open Shunted Shunted Shunted
15 Shunted Shunted Shunted Shunted
NOTE: The internal LTO-2 half-height drive does not provide SCSI termination. Thus, a termina-
tor must be installed on the drive if it is the last device in a SCSI chain.
Table 1. SCSI IDs and Jumper Settings for LTO-2 Half-Height Drive (Continued)
SCSI ID
Jumpers
1–2 3–4 5–6 7–8
YES NOYES YES

Installation (and Quick Start) Installing an Internal LTO-2 Half-Height Drive
19
Figure 4. Internal LTO-2 Half-Height Drive Mounting Dimensions
226.5
O’ALL LENGTH INCL.
CONECTORS
THIS HOLE 3.0
10.0
40.75
4X M3.0 X 5.0
0.5
47.4
52.9
79.2
2X M3.0 NEARSIDE
2X M3.0 FARSIDE
3X 5.0
5.0
BEZEL
THICKNESS
2.4
146.0140.0
144.8
221.0

Installation (and Quick Start) Installing an Internal LTO-2 Half-Height Drive
20
Connecting a SCSI Cable
The internal LTO-2 half-height drive has an Ultra2 SCSI interface, terminated by an LVD SCSI connec-
tor. Use the following procedure to connect a SCSI cable to this connector.
1. Turn off all power to the drive and the computer.
2. Attach the SCSI interface cable to the 68-pin SCSI interface connector on the back of the drive
(see Figure 5 below).
Figure 5. Rear View of the Internal LTO-2 Half-Height Drive
Checking the SCSI Termination
By default, the internal LTO-2 half-height drive does not provide SCSI termination. If you use this
default setting, you must place a SCSI bus terminator or a SCSI device with termination enabled at
the end of the SCSI chain. Two examples of SCSI termination are shown in Figure 6 below.
The internal LTO-2 half-height drive provides terminator power if a jumper is placed on the termina-
tion power jumper pins (see “Terminator Power” on page 18).
CAUTION: Install an LVD drive only in an LVD environment. Plugging an LVD drive into an HVD
bus makes the entire bus non-functional and may permanently damage the drive or other SCSI
devices on the bus.
Library Interface Connector
Pin 1
SCSI Connector
SCSI Jumper Block
Power Connector
Other manuals for LTO 2
1
Table of contents
Other Certance Storage manuals
Certance
Certance DAT 24 User manual

Certance
Certance Travan 20GB User manual

Certance
Certance CP3100 D2D2T Owner's manual
Certance
Certance CP3100 D2D2T User manual

Certance
Certance LTO 1 User manual
Certance
Certance DAT 432 Supplement
Certance
Certance LTO 2 User manual
Certance
Certance LTO 1 User manual

Certance
Certance CP3100 D2D2T User manual
Certance
Certance Travan 40GB User manual
