Chad Valley Nursery Swing Owner's manual
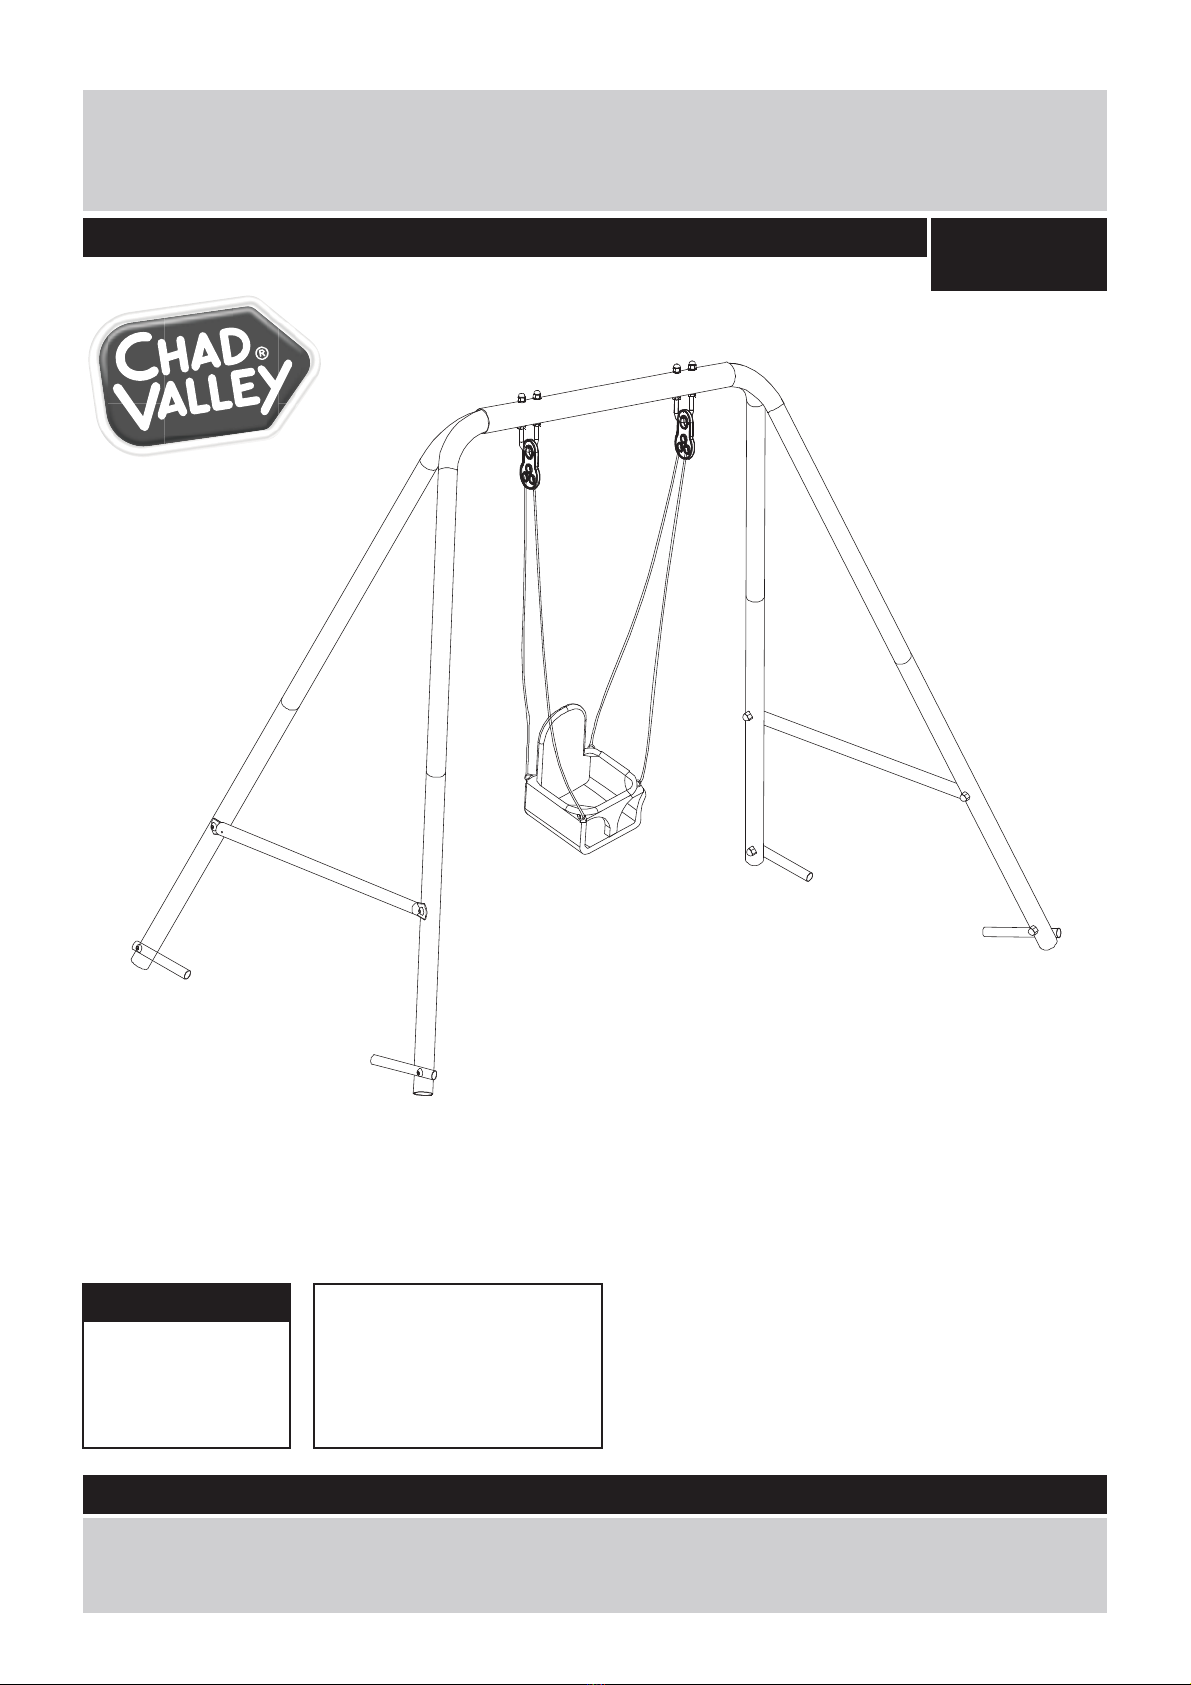
Nursery Swing
Assembly & User Instructions - Please keep for future reference 367/3537
134728347
Important- Please read these instructions fully before assembly or use.
Important
Maximum user
weight: 25kg
Age: 12 – 36
months.
Tips: It will take around 30
2 Adults required
minutes to assemble.
These instructions contain important information which will help you get the best from your product and
ensure safe and correct assembly, use and maintenance.
If you need help or have damaged or missing parts, call the Customer Helpline: (+44) 0330 0904 420
Assembly
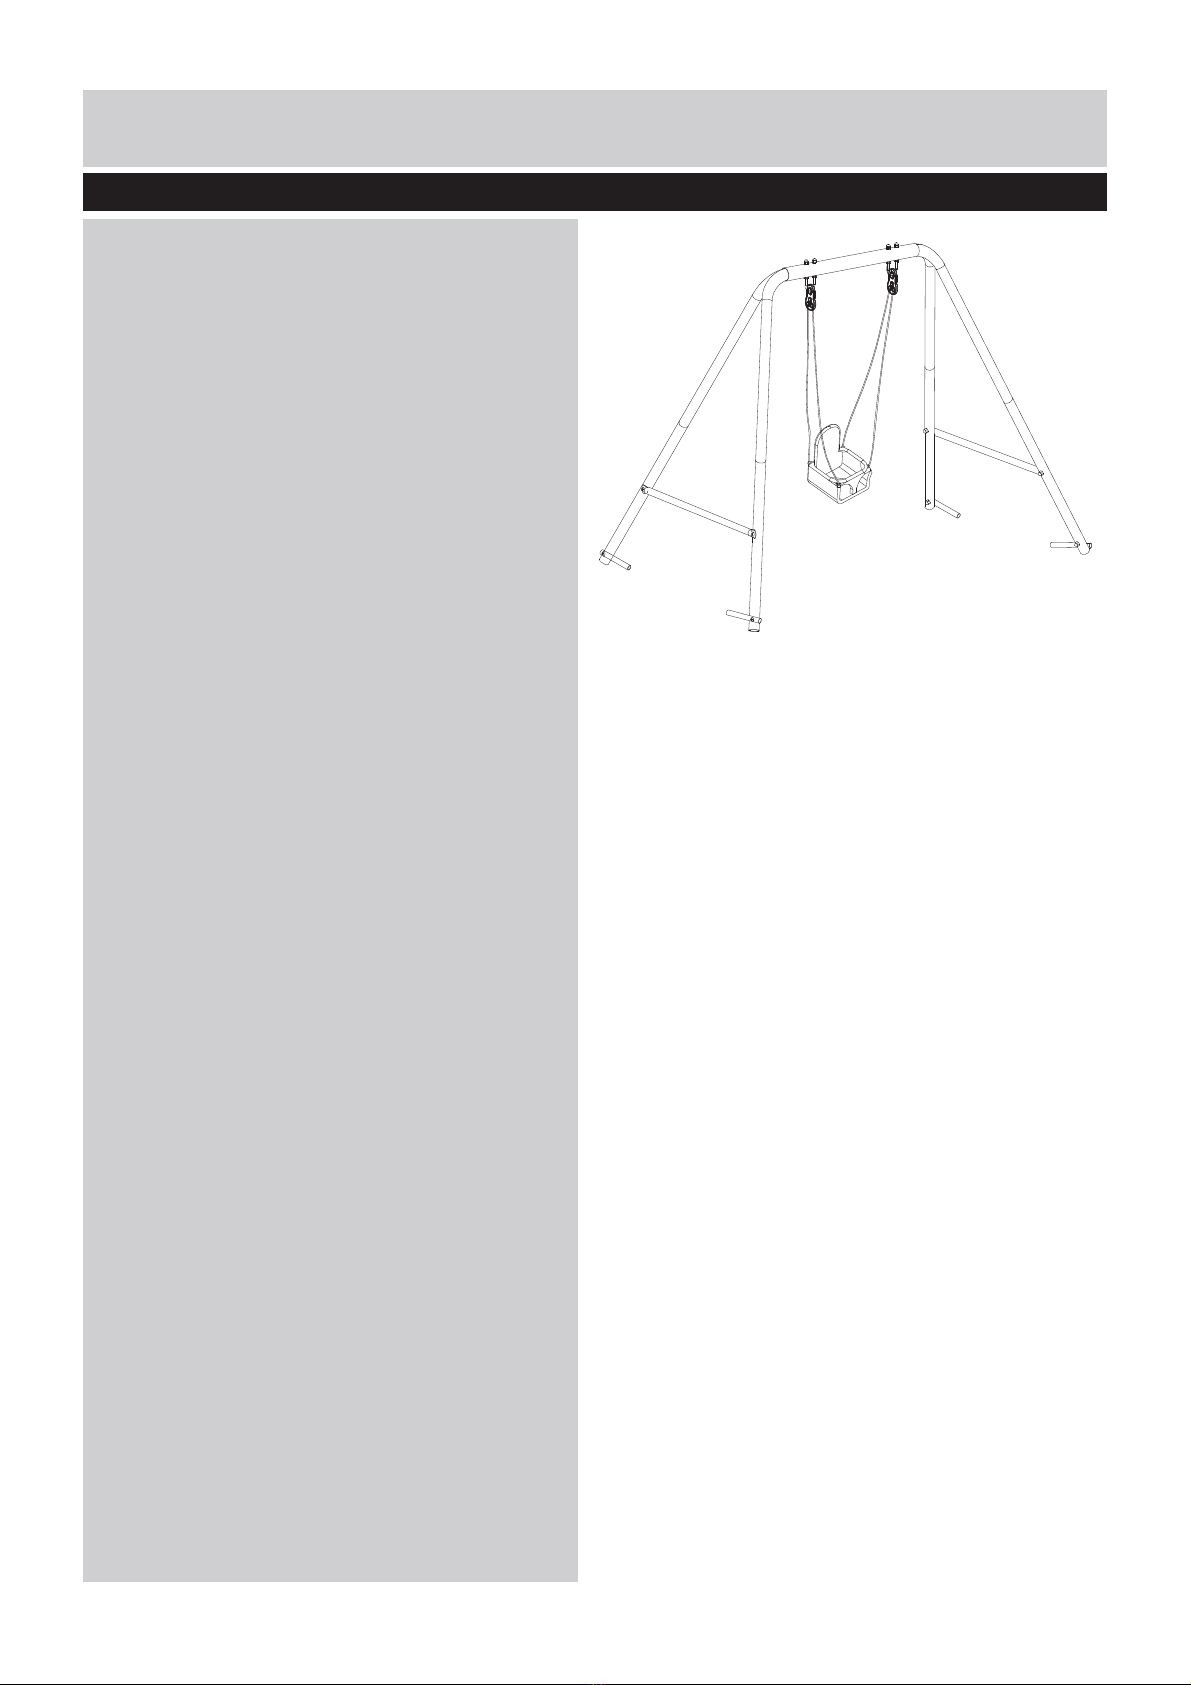
Contents
Safety Information
Parts
Assembly Instructions
Care and Maintenance
2
3
4-8
9
1

Safety Information
Important –Please read these instructions fully before assembly or use.
WARNING
1. This swing is for domestic family use only and is intended
for outdoor use.
2. This swing is designed for children between the ages of 12
– 36 months.
3. Max weight of user shall not exceed 25kg.
4. For use under adult supervision.
5. Do not orientate the swing directly towards the sun this may
lead to a child becoming dizzy/disorientated through
extended use.
6. Do not install the product on concrete, asphalt or hard
surfaces.
7. Do not allow children to stand on the swing seat.
8. Do not allow children to get off of the swing whilst it is still
moving.
9. Do not twist swing ropes or wrap them over the top cross
beam.
10. Do not allow children to use the item if they are wearing
loose, hooded or baggy clothing. Clothing can get
caught leading to user injury.
11. Do not allow children to climb on the swing. The swing
should be sat upon with the child’s body weight centrally
in the seat.
12. Do not allow children to wander into the play area when
the swing is in use.
13. Place the swing on a level surface at least 2 metres
from any structures or obstructions such as a fence,
garage, house, overhanging branches, laundry lines or
electrical wires etc.
14. Children should be instructed by a parent or an
accompanying adult NOT to attach items to the swing
that are not specifically designed for use with it, such as,
but not limited to, jump ropes, clothes lines, pet leashes,
chains and cables. This all could cause a strangulation
hazard.
15. Packing materials are not toys. Please remove and all
packaging and packing materials before letting children
use this swing.
16. Required at least 2 adults for assembly.
17. Only one child per seat at any one time.
18. Check all nuts, bolts and fittings for tightness and tighten
if required.
19. Check all coverings for bolts and sharp edges and replace
when required.
20. Oil all metallic moving parts.
21.Check swing seats, ropes and other means of attachments
for evidence of deterioration. Replace when required
in accordance with the manufacture’s instructions.
22. Please take note: As an extra precaution, check this toy
regularly for signs of wear and damage.
23. For safety reasons, this swing MUST be anchored into the
ground.
24. Anchors shall be placed level with or under the ground in
order to reduce the risk of tripping.
25. Leave all fittings finger-tight until assembly is complete,
for ease of construction. Then tighten firmly.
26. Swing must not exceed an angle of 60 degrees from the
ground.
27. Failure to assemble and maintain this item as per these
instructions may cause injury to the user.
28. Maintenance to be carried outunder the direct supervision
of a responsible adult.
29. Check and maintenance of the main parts(crossbeams,
suspensions, anchors, ETC) at regular intervals. If
these checks are not carried out, the toy could overturn
or otherwise become a hazard.
30. Changes to the original toy (for example the adding of an
accessory) shall be carried out according to the instructions
of the original toy.
31. Once assembly is complete, carefully check the equipment
before use. If you find any problems, do not allow children
to use the equipment until it is fit for use.
32. Please retain these instructions for future reference.
2
33. Warning! only for domestic use.
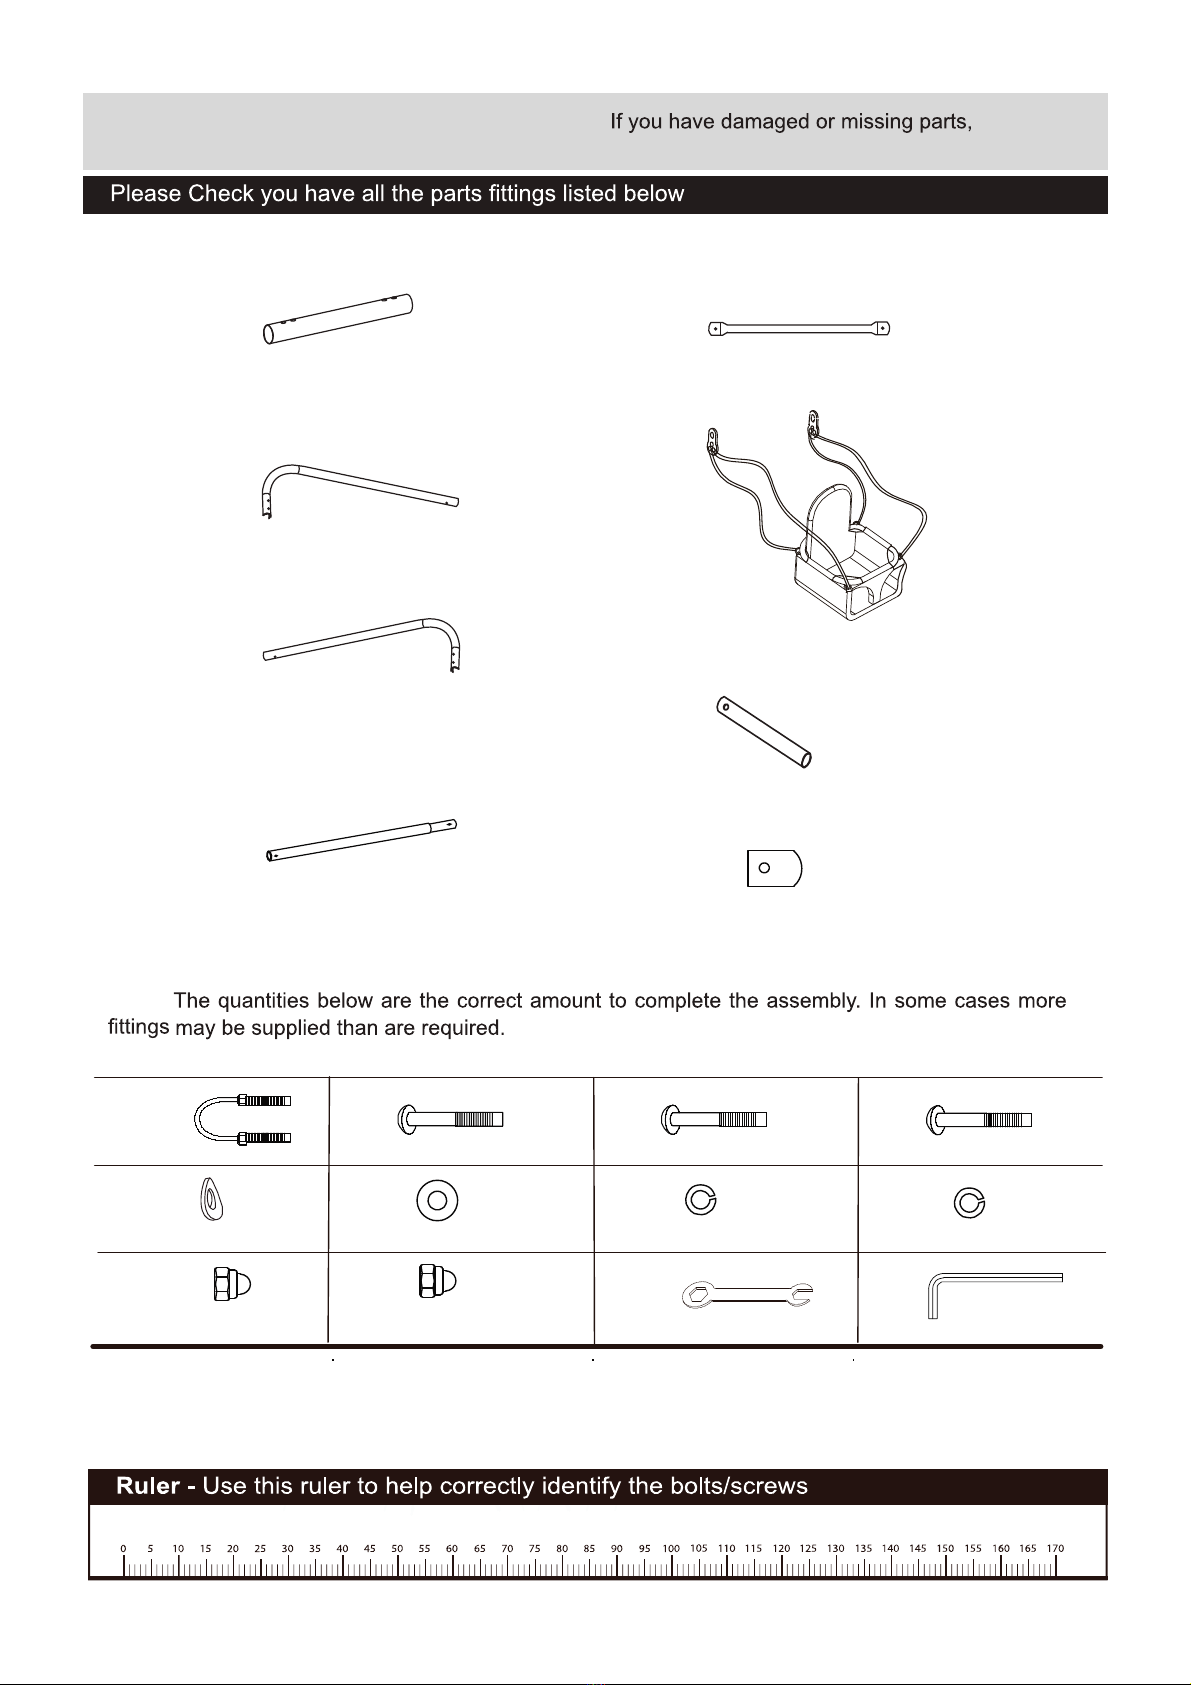
1Beam x 1pcs
2Leg x 2pcs
3Leg x 2pcs
4Leg x 4pcs
5Rail x 2pcs
6Nursery seat x 1pcs
7 Anchor x4pcs
8Plastic Cap x4pcs
(M8)
×2x4(M6x38mm) x4(M6x53mm) x4(M6x42mm)
( Ø19×Ø8.5mm)
×8(Ø14×Ø6.5mm)
×24 (Ø13.5 ×Ø8.5 mm)
×4(Ø10×Ø6.5 mm)
×12
(M8)
×4(M6)
×12 ×1×1
ACB D
E F GH
ILKJ
3
(10 &13mm) (4mm)
Parts
Note:
call the Customer Helpline: (+44) 0330 0904 420

Assembly Instructions
Step 1
Insert Legs (2) and (3) into Beam
(1) as shown.
Please note the order of Legs (2)
and (3) need to be inverse on the
two sides of the beam.
4
1
3
2
X 2
2
3
2
3
1

5
B
scp4x
F
scp8x
H
scp4x
J
scp4x
D
scp4x
F
scp8x
H
scp4x
J
scp4x
2
3
2
4
4
4
4
3
4
J
F
BFH
X 4
2
3
2
4
4
4
4
5
5
3
1
4
8
5HJ
F
D
F
X 4
Assembly Instructions
Step 2
Insert leg(4) into leg(2) and
leg(3)on both sides. Secure
using bolt(B), flat spring(F),
spring washer(H) and nuts(J).
Step 3
Attach rail(5) to leg(4) on both
sides using bolt(D), flat
washer(F), spring washer(H)
and nuts(J).
TIPS:
#1 Make sure you insert
plastic cap (8) into rail (5) first.
#2 The rail (5) need to be
attached to the outer side of
the swing frame.
6
I
E
G
A
E
1
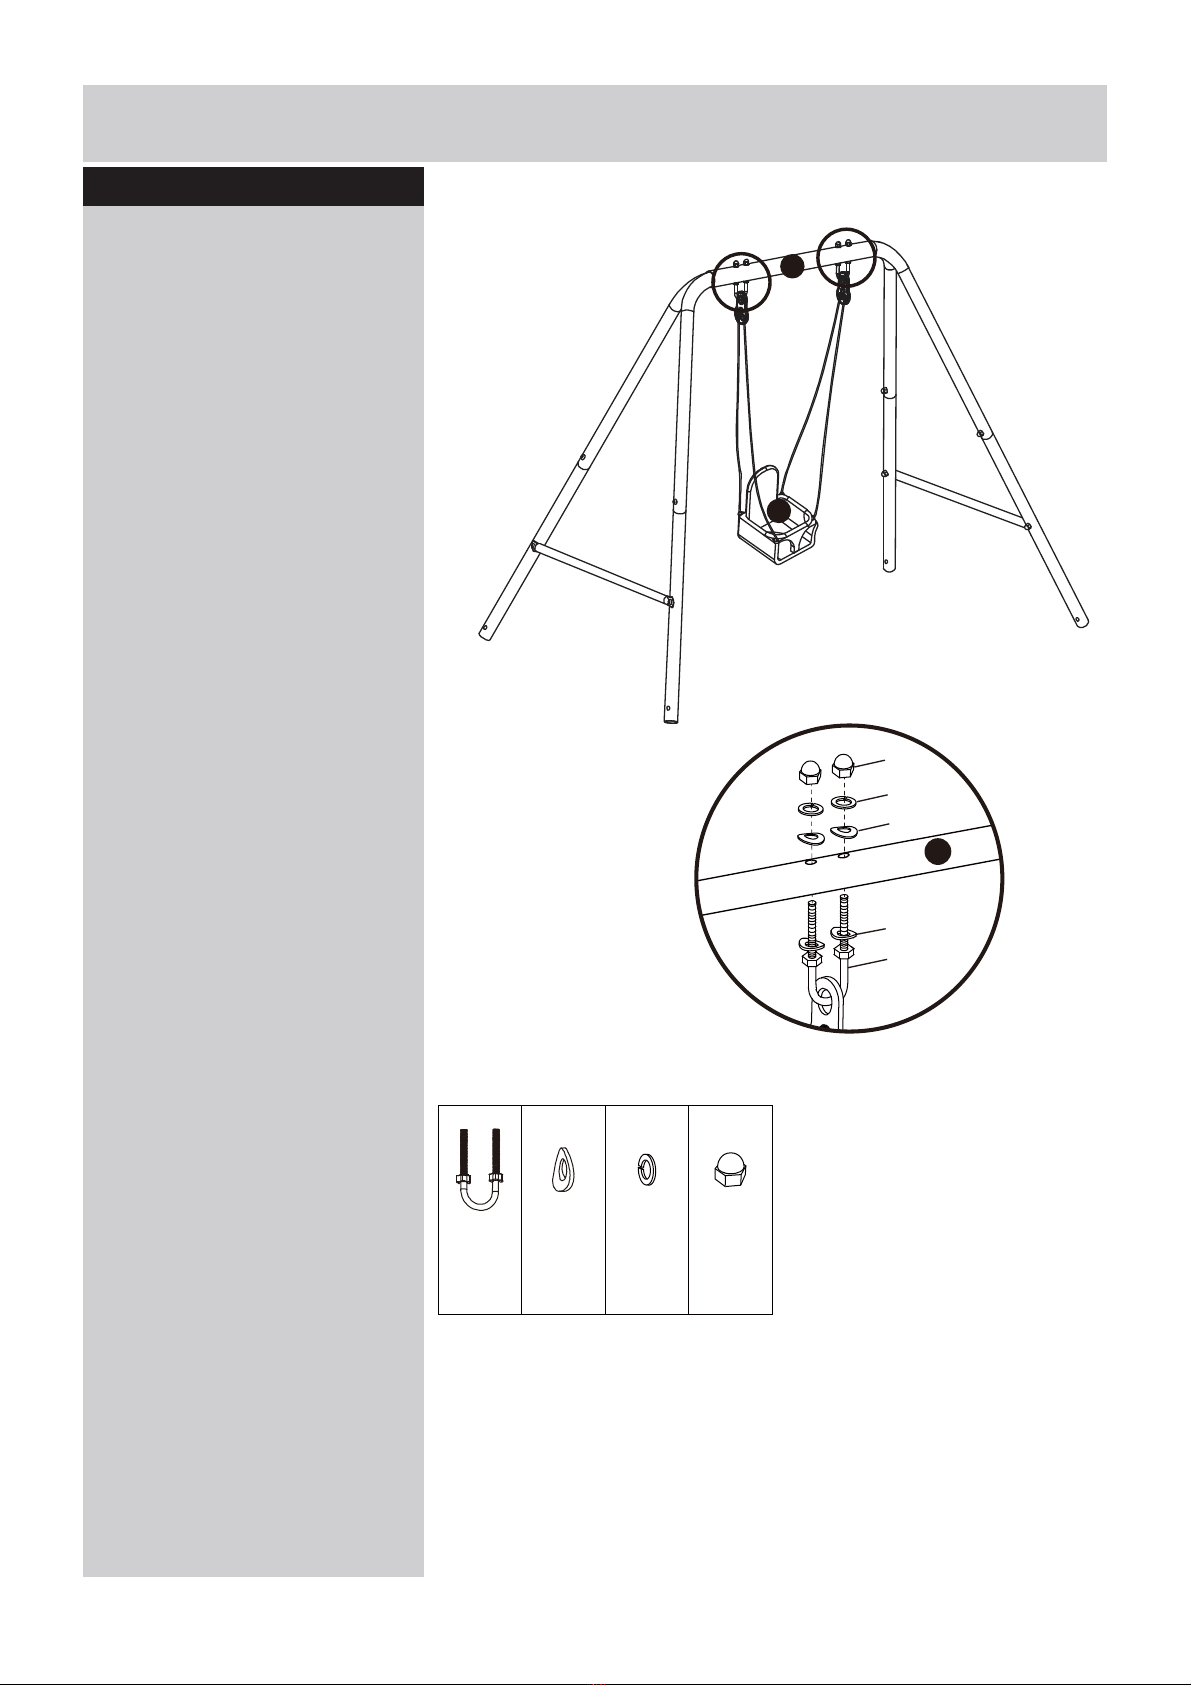
Assembly Instructions
Step 4
Loop U-bolt (A) through the
plate at the top of the swing
and secure it to Beam (1)
using E, G and I in the
sequence as shown.
G
A E I
x4x4
x8
x2
6
1

7
Step 5
Step 6
Assembly Instructions
x 8pcs
H
x 4pcs
J
x 4pcs
C
x 4pcs
F
Attach anchor(7) to the bottom
of leg(4), using bolt(C),
flat spring(F),spring washer(H) and
nuts(J).
IMPORTANT:
AFTER COMPLETING ALL
THE STEPS, GO OVER THE
ENTIRE UNIT AND TIGHTEN
ALL BOLTS BEFORE
ALLOWING CHILDREN TO
USE.
Ensure the anchor is pointing
inwards at a 45 degree angle to
the ground.
Use a hummer(not included) to
hit the anchor until fully in the
ground.
Repeat this step for the
remaining anchors.
4
4
4
4
7
7
7
7
J
F
C
FH
4
7
X 4
7
4
X 4

Assembly Instructions
To secure the child in the nursery swing
Note : Lock the seat belt tightly over the child.
ADULT SUPERVISION REQUIRED AT ALL TIMES.
WARNING!
8

9
Care and Maintenance
General
This Nursery Swing was designed and
manufactured with quality materials and
craftsmanship.
If correct care and maintenance is provided, it
will provide users with years of exercise, fun
and enjoyment.
Inspect regularly for:
CHECK ALL NUTS AND BOLTS TWICE
MONTHLY DURING THE USAGE SEASON FOR
TIGHTNESS AND TIGHTEN AS REQUIRED.
IT IS PARTICULARLY IMPORTANT THAT THIS
PROCEDURE BE FOLLOWED AT THE BEGINNING
OF EACH SEASON.
Never use pliers to tighten up screws –these can
cause damage to both the paintwork and the special
anti-corrosion plating.
Tighten all nuts and bolts securely. Replace as
needed. If not
checked regularly, bolts can be loose or missed and
components can become detached and cause
injuries.
Check the unit at the beginning of the usage season
and monthly thereafter for evidence of deterioration.
Immediately remove and replace any items that
appear to be weak or broken. Contact Customer
Support for replacement parts.
Check all covers designed for bolts and sharp edges
regularly to be certain they are present and in good
condition. Replace as needed. It is particularly
use each season.
Inspect handle bar, hardware, and etc., for proper
closure and for signs of wear, deterioration, rust and/
or damage. Replace as needed.
Lubricate all metallic moving parts monthly
during the usage season. Applying a light coat of
automobile wax to all metal tubing surfaces will help
protect your unit and add to its longevity. Sand any
rusted areas of the metal tubing and repaint using a
non-lead based paint.
Remove plastic seats and store indoors, or do not
use when the temperature drops below 32°F/0°C.
Check unit for scuffs, burrs, sharp edges and any
other defects that may occur from assembly, abuse,
shipping or everyday use. Burrs and sharp edges
may be filed down until smooth and covered with
duct tape if necessary.
•
•
•
•
•
•
•
•
•
•
•
•
•
•
To help maintain the products appearance,
occasionally clean the seats and metal framework
with a damp cloth lightly – but DO NOT use
abrasive chemical cleaners.
When the time comes to disassemble and dispose
of this product, please completely disassemble the
unit and discard of it in a safe place and manner
so as not to present any hazard to any individual. It
is important to check and maintain the main parts
at regular intervals.If these checks are not carried
out,the toy could overturn or otherwise become a
hazard.Whenever practical,the instructions shall
IMPORTANT!KEEP FOR FUTURE REFERENCE.
WARNING!
This swing is for Domestic Family use
only and is intended for outdoor use.
This swing is designed for children
between the ages of 12 – 36 months.
Max weight of user shall not exceed
25kg. Do not allow children to stand
on the swing seat. Do not allow children
to get off of the swing whilst it is still
moving. Do not twist swing ropes or
wrap them over the top cross beam.
Packaging materials are not toys. Please
remove al packaging and packing tags/
wires before giving this toy to your
child.
SP-31-NS001-ARGOS-20001
If you need help or have damaged or missing parts,call the Customer Helpline: (+44) 0330 0904 420
Address: 489 - 499 Avebury Boulevard, Central Milton Keynes, MK9 2NW. www.argos.co.uk
Produced for Chad Valley Toys. Argos Ltd. Country of origin: China
This manual suits for next models
2
Other Chad Valley Baby Swing manuals


