Chai Open qPCR User manual

Open qPCR User Manual
Revision A
Open qPCR User Manual
Research use only

2
Copyright ã2018 Chai Biotechnologies Inc. All rights reserved.
THE INFORMATION CONTAINED IN THIS DOCUMENT IS SUBJECT TO CHANGE WITHOUT NOTICE. CHAI
DISCLAIMS ALL WARRANTIES, EITHER EXPRESS OR IMPLIED, REGARDING THIS MANUAL AND ANY
INFORMATION CONTAINED HEREIN, INCLUDING BUT NOT LIMITED TO THOSE OF MERCHANTABILITY
OR FITNESS FOR ASPECIFIC PURPOSE. IN NO EVENT SHALL CHAI BE LIABLE FOR ERRORS OR FOR
INCIDENTAL OR CONSEQUENTIAL DAMAGES RELATING TO THE FURNISHING, USE, OR PERFORMANCE
OF THIS DOCUMENT OR OF ANY INFORMATION CONTAINED HEREIN.
For product warranty information, please refer to the documentation that came with the Open qPCR
instrument.
Research use only. Not for use in diagnostic procedures.
DISCLAIMER
All examples in this document are for information and illustration purposes only.
TRADEMARKS
Products that are referred to in this document may be either trademarks and/or registered trademarks of
the respective owners. Chai makes no claim to these trademarks.
ChaiTM is a trademark ofChai Biotechnologies Inc. SYBRâis a registered trademark ofMolecular Probes,
Inc. PrimerQuest is atrademark of Integrated DNA Technologies. FAMTM, HEXTM, JOETM, and VICâare
trademarks of Applied Biosystems. TaqManâis a registered trademark ofRoche Molecular Systems, Inc.
Scorpionsâis a registered trademark ofSerological Royalties Company. MGB Eclipseâis a registered
trademark of Epoch Biosciences, Inc. All other trademarks are the sole property of their respective
owners.

3
TABLE OF CONTENTS
PREFACE
o Intended Use
o Safety Conventions
o Safety Warnings and Precautions
o Marks of Conformity
o Technical Support
CHAPTER 1: The Open qPCR System
1.1 Introduction
1.2 Instrument Technical Specifications
1.3 General Features
1.4 Heating & Cooling
1.5 Optics
1.6 Supported Consumables
CHAPTER 2: Installation
2.1 Getting Started
2.2 Connectivity Options: USB, Ethernet, Wi-Fi
2.3 Setting a Static IP Address
2.4 Logging in and Creating an Account
CHAPTER 3: Calibration
3.1 When to Calibrate the Open qPCR
3.2 Adjusting the Open qPCR Lid Height
3.3 Open qPCR Single Channel Calibration
3.4 Open qPCR Dual Channel Calibration
CHAPTER 4: Assay Setup
4.1 General PCR Considerations
4.2 Create A New Experiment
4.3 Starting & Cancelling Runs
CHAPTER 5: Result Analysis
5.1 Amplification Curve
5.2 Melt Curve
5.3 Thermal Profile
5.4 Navigation Icon on Results Screen
5.5 Data Export
5.6 Changing an Experiment Name
5.7 Deleting Experiments

4
CHAPTER 6: System Settings
6.1 Manage Users
6.2 Software Update
6.3 Network Settings
6.4 Diagnostics
CHAPTER 7: Maintenance
7.1 Cleaning and Disinfecting
7.2 Open qPCR Return and Repair
CHAPTER 8: Troubleshooting
8.1 Amplification Curves
8.2 Melt Curves
8.3 Factory reset
Appendix A - Glossary
5
PREFACE
Intended Use
The Open qPCR User Manual serves to provide a comprehensive understanding of the setup,
operation and maintenance of the Open qPCR system.
The Open qPCR instrument is intended for Research Use Only (RUO). Results produced from the
instrument are not for use in diagnostic procedures.
The Open qPCR instrument is intended for indoor use.
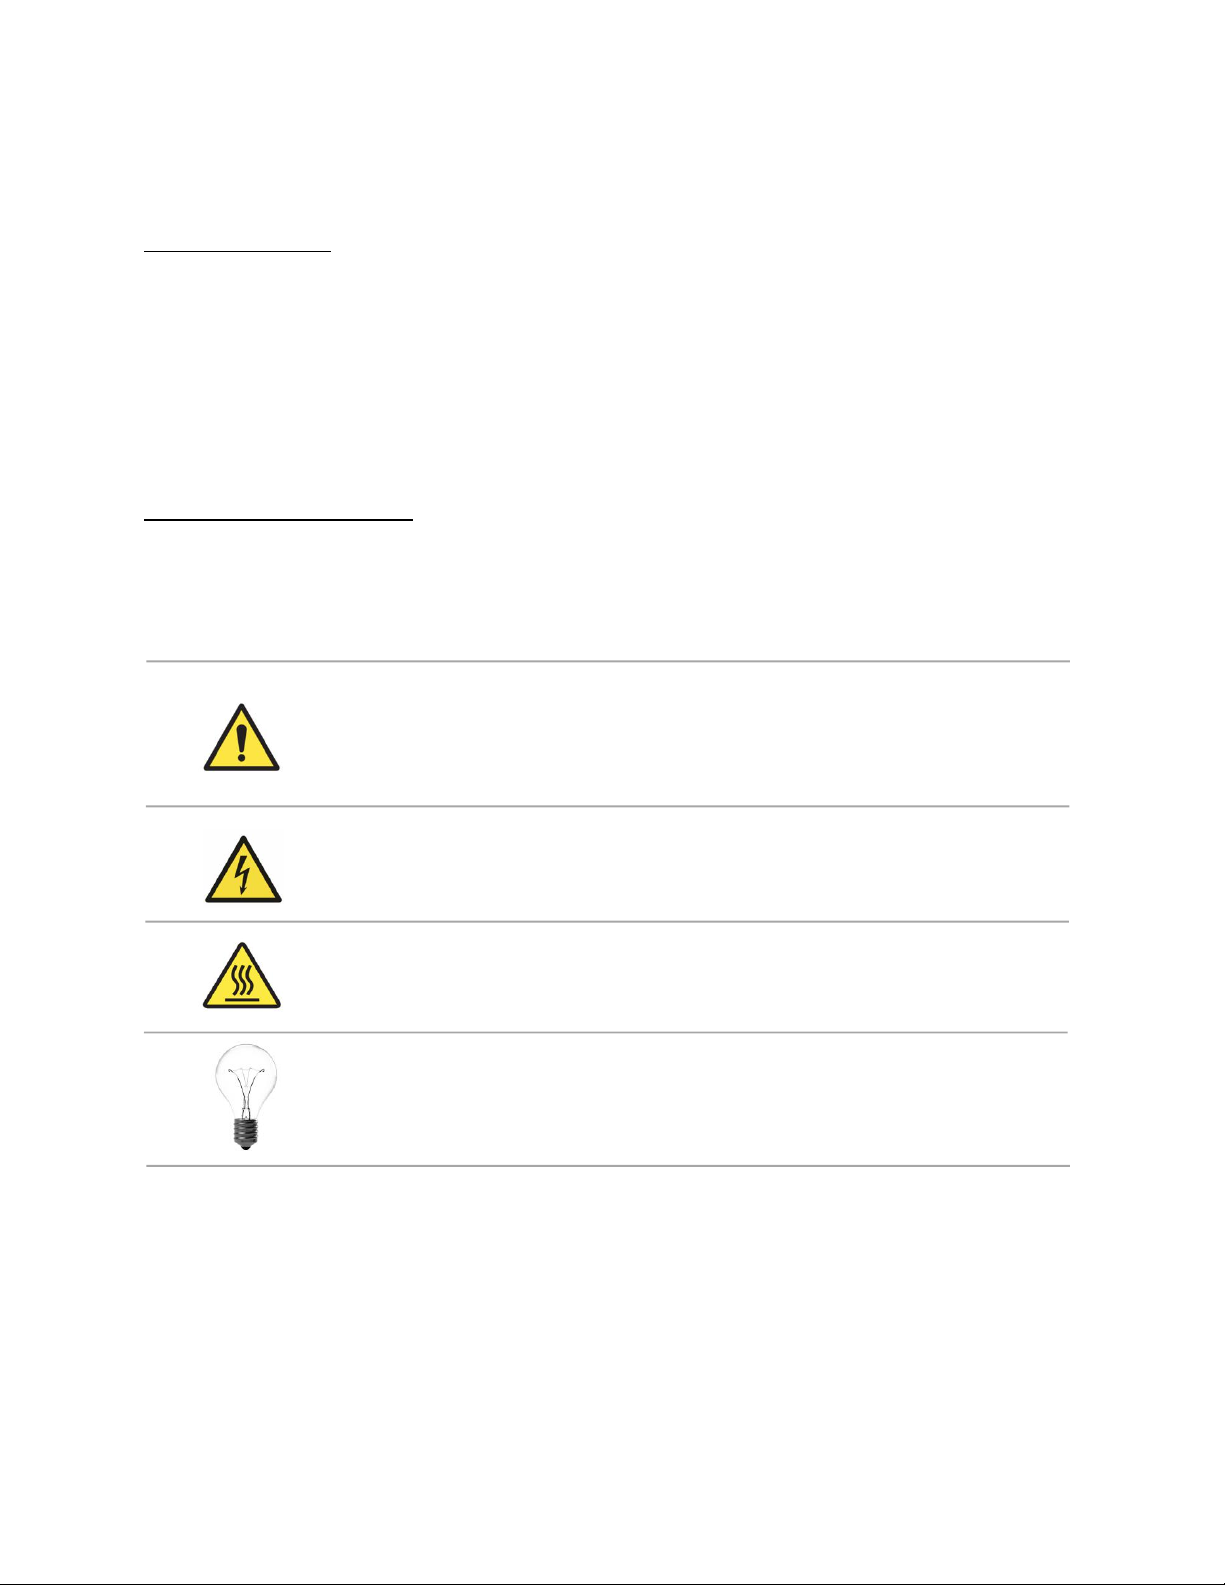
Safety Conventions
The following alert icons appear in this user manual at points where you need to be aware of
relevant hazards and/or important information regarding operation of the instrument.
Icon Definition
CAUTION. Indicates that you should consult the manual for further
information and proceed with appropriate caution. Failure to do so may
lead to physical injury or could cause damage to the instrument.
ELECTRIC SHOCK HAZARD. Indicates the presence of an electric shock
hazard and to proceed with appropriate caution.
HOT SURFACE. Indicates the presence of a hot surface or other high-
temperature hazard and to proceed with appropriate caution
TECHNICAL NOTE. Important information regarding procedures relating
to the current section of the manual or the use of the Open qPCR system.

6
Safety Warnings and Precautions
Warnings and precautions must always be adhered to avoid risk of personal injury and/or
damage to the instrument. If the instrument is used in a manner not specified by the
manufacturer, the protection provided by the instrument may be compromised. The information
in this manual is intended to supplement the normal safety requirements established in the
user’s country.
The Open qPCR instrument complies with safety standards IEC 61010-1, level of pollution 2, and
overvoltage category II.
General Safety
The Open qPCR Instrument must be connected to a 3-wire grounded
outlet with the correct voltage rating. A break in the electrical ground
path may create a hazardous condition.
Do not touch the power switches or power cord with wet hands.
Always power down the instrument and disconnect the power cord before
performing cleaning or maintenance procedures.
The heat block and lid temperature rises above 95 °C. To avoid injury, do
not touch the heat block, lid, or tubes immediately after a run. Let the
surface cool for a few minutes before removing the tubes. If samples
must be removed immediately, avoid contact with surfaces by extracting
tubes with tweezers.
Do not deliberately modify safety features of the instrument.
Do not block ventilation at the front and back of the instrument. Leave at
least six inches of space on all sides of the instrument when powered on.
Wear protective eyewear, clothing, and gloves when handling reagents or
operating the instrument.
7
Follow all local, state/provincial, and/or national regulations for proper
disposal of the instrument calibrators.
Marks of Conformity
Icon Definition
This device complies with Part 15 of the FCC Rules. Operation is subject
to the following two conditions: (1) this device may not cause harmful
interference, and (2) this device must accept any interference received,
including interference that may cause undesired operation.
This equipment has been tested and found to comply with the limits for a
Class A digital device, pursuant to part 15 of the FCC Rules. These limits
are designed to provide reasonable protection against harmful
interference when the equipment is operated in a commercial
environment. This equipment generates, uses, and can radiate radio
frequency energy and, if not installed and used in accordance with the
instruction manual, may cause harmful interference to radio
communications. Operation of this equipment in a residential area is
likely to cause harmful interference in which case the user will be
required to correct the interference at his own expense.
This device complies with the Electromagnetic Compatibility Directive
(2014/30/EU) and Low Voltage Directive (2014/35/EU) of the European
Union.
Waste Electrical and Electronic Equipment Directive 2012/19/EU. Do not
dispose of the instrument with general waste.

8
Technical Support
Customer support is provided for all technical and service issues related to the Open qPCR
instrument.
Support Site
Please visit https://support.chaibio.com for support-related inquiries. You will find resources
and tips for getting started as well as troubleshooting help on this site.
Community Forum Site
Please visit https://community.chaibio.com to connect with the global community regarding
Chai products, application uses, and general tips on PCR.
For instrument purchases made through a distributor, please contact your local support service
representative for assistance.
For instrument purchases made directly through Chai, please contact the Chai support staff for
assistance.
Phone: +1 (800) 642-4002
+1 (650) 779-5577
Website: www.chaibio.com

9
Welcome! Please read through this manual to become acquainted with your new real-time PCR
thermocycler.
CHAPTER 1 – The Open qPCR System
1.1 Introduction
The Open qPCR is a portable, real-time PCR instrument for amplifying and detecting DNA and
RNA targets of interest. Real-time PCR provides fast and sensitive quantification of nucleic
acids in various sample types. Diverse applications include, but are not limited to, cancer
phenotyping, bacteria and pathogen detection, genetically modified organism detection in food,
and gene expression analysis.
Based on a photodiode detection and dual-Peltier thermal system, the instrument contains 16
wells and supports sample volumes between 10 – 50 µL per reaction. With a maximum ramp
rate of 5 °C/s, the system’s heating and cooling efficacy results in rapid cycling and leads to
assay completion in as little as 20 minutes. Multiple Open qPCR units may be connected to one
computer via Wi-Fi or Ethernet, allowing simultaneous analysis for as many samples as
desired.
Chai offers two models of the Open qPCR system: single channel and dual channel. The two
instruments differ primarily in the number of fluorophores each can detect. The single channel
detects either SYBR Green, Chai Green, or FAM fluorophores through channel 1 whereas the
dual channel allows for additional detection of HEX, VIC, or JOE fluorophores through channel 2.
Multiplexing by optical channel is available only on the dual-channel instrument.
The system supports high resolution melt (HRM), touchdown PCR, controlled ramp rates, and
unlimited cycling stages. Analysis features include baseline subtraction, color compensation,
and melt curve analysis. Open qPCR software is browser-based and is compatible with Mac, PC,
Linux, and tablets. The instrument may be run via Ethernet, Wi-Fi or a connected USB cable.
1.2 Instrument Technical Specifications
Connectivity
Networking: Ethernet, 802.11n Wi-Fi, USB
Touchscreen: 5.0 inch, capacitive
Software: HTML5/JavaScript web app
Device supported: PC, Mac, iPad, Android Tablet
Integration: REST API
Operating Environment
Operating temperature: 10 – 35 °C

10
Relative humidity: 20 – 80% non-condensing
Max altitude: 2,000 m
Power
Voltage: 100 – 240 V*
Frequency: 50 – 60 Hz
Average Power: 75 W**
Peak Power: 350 W
System Specifications
Samples: 16 wells, 100 µL tubes
Sample volume: 10 – 50 µL
Sensitivity: 1 copy
Dynamic range: 109
Dimensions: 11 x 9.5 x 7.5 inches (28 x 24 x 19 cm)
Weight: 10 lbs. (5 kg)
Thermal Performance
Temperature range: 4 – 100 °C
Max ramp rate: 5.0 °C/s
Min ramp rate: 0.00001 °C/s
Design: dual Peltiers
Temperature accuracy: ±0.2 °C at 65 °C/s
Temperature uniformity: ±0.4 °C at 65 °C/s
Lid temperature: Ambient to 120 °C
Additional Notes:
*Allowed supply voltage fluctuations up to +/-10% of the nominal voltage
**Average power rating tested at room temperature with default protocol
1.3 General Features
1 Adjustable lid knob
2 Lid lever
3 Lid latch
4 LCD touchscreen
5 Front air inlet
6 Ethernet connection port
7 USB cable inlet for connection to a PC or Mac
8 Reset button
9 Wi-Fi adapter port
10 Power inlet
11 Power switch
12 Vent

11
Figure 1.1 Figure 1.2
1.4 Heating & Cooling
The Open qPCR’s dual-Peltier design and heated lid provide for precise temperature control of
the individual reactions. With one side of the Peltier modules attached to a heat sink, the
opposite side can then be cooled and heated with respect to the heat sink (Figure 1.3).
Figure 1.3
A copper heat spreader beneath the Peltiers ensures temperature uniformity and rapid heat
transfer during cycling. Two thermistors, attached directly to the heat block, monitors well
temperature. Cooling is achieved with a high-efficiency fan that dissipates air across the heat
sink.
Reaction wells
Fan
Heat sink
Thermistor
Peltier
Module 1

12
Open qPCR’s fast ramp rate of up to 5 °C/s allows for rapid thermal cycling, resulting in quick
turnaround times from start to finish. The instrument’s firmware controls the thermal cycling
temperature by using a control loop to ensure rapid heating and to control temperature
overshoot around the desired point. A heated lid minimizes tube condensation throughout the
cycling process.
1.5 Optics
The optical system of the Open qPCR detects one spectral band for the single channel model
and two spectral bands for the dual channel model. Each of the 16 wells has its own LED and
photodiode detector(s). Figure 1.4 depicts all components involved in the optical detection.
Figure 1.4
During a run, the LED emits light through an excitation filter embedded within the heating block
on the instrument lid. The incident light strikes the top of each reaction tube and excites the
fluorophores in the sample. The emerging light then passes through the emission filters before
being detected by the photodiode board.
Detection wavelengths for the dual channel and single channel models are illustrated in Table
1.5 below:
Table 1.5
Model
Channel
Fluorophores/Dyes
Detection
Wavelength
Single Channel
1
FAM, Chai Green, SYBR Green
513 - 555 nm
Dual Channel
1
FAM, Chai Green, SYBR Green
508 - 532 nm
2
HEX, VIC, JOE
573 - 597 nm
Photodiode board
Excitation filter
LED
Lid Heater
Emission filter
Photodiode board
Emission filter

13
Fluorophores supported by the Open qPCR instrument are indicated in Table 1.6:
Table 1.6
Fluorophore/Dye
Absorption
wavelength (max)
Emission
wavelength (max)
Chai Green
488 nm
510 nm
SYBR Green
497 nm
520 nm
FAM
494 nm
518 nm
HEX
535 nm
556 nm
JOE
520 nm
548 nm
VIC
538 nm
554 nm
1.6 Supported Consumables
The instrument utilizes 100 µL low-profile PCR tube strips. Due to Open qPCR’s unique
architecture, both cap and tube sides must be optically clear and they must not auto-fluoresce.
For optimal results, please use Chai’s validated DNAse and RNAse-free tubes.
Table 1.7
Product
Catalog #
PCR 8-Cap Strips, Optically Clear Flat Caps, 100 µL, qty 250
S02112
PCR Tube & Cap Strips, 8-Well Strips, Optically Clear, 100 µL, qty 125
S02132
PCR 8-Cap Strips, Optically Clear Flat Caps, 100 µL, qty 250
S02122

14
CHAPTER 2 – Installation
2.1 Getting Started
The following items are packaged within the Open qPCR shipping box:
o Open qPCR user manual
o Open qPCR instrument
o Wi-Fi adapter
o Power cord
o USB cable (USB Type A to Mini B)
o Calibrators:
- FAM/HEX calibrators, 3 cals (dual channel instruments) OR
- Fluorescein calibrator, 3 cals (single channel instruments)
Setting up the instrument: Once the instrument is unpacked, set it on a stable, flat, and non-
vibrating surface near an appropriate power source. Make sure to leave at least 6 inches of
space on all sides of the instrument when powered on and operating.
Do not block ventilation in front of or behind the instrument. Route cables in an appropriate
manner to prevent mechanical force from breaking connectors. Remove plastic covering from
the LCD screen before use.
Powering the instrument: Connect the power cable from the power source to the back of the
instrument before turning on the power switch. After the switch is turned on, the LCD screen
will display “Booting” on the bottom right corner during initialization. Give the instrument
approximately five minutes to boot up. Ensure that the instrument’s software version and serial
number are displayed on the LCD screen before accessing the Open qPCR software.
The instrument must be connected to a 3-wire grounded outlet with the correct voltage
rating. Do not touch the power switch or power cord with wet hands.
When the Open qPCR system is not in use, ensure that the instrument lid is closed and
secured in place. This avoids any dust or debris, which may interfere with the system
performance.
2.2 Connectivity Options: USB, Ethernet, Wi-Fi
You can connect to the instrument from any computer using USB, Ethernet or Wi-Fi. Tablets are
limited to either Ethernet or Wi-Fi connection. Please follow the instructions below for each
option.

15
If you are connecting by Ethernet or Wi-Fi, please note the following:
Some networks require the Media Access Control (MAC) address to be registered with the
network administrator first. If you see No Network Connection displayed on the LCD screen after
Ethernet or Wi-Fi adapter connection, use the USB to connect to the device first. Go to Settings
> Network Settings. The MAC address is displayed for Ethernet and/or Wi-Fi (if adapter is
connected). Relay the appropriate MAC address to your network administrator to grant access
permission.
Ethernet and Wi-Fi options: You are connecting directly to your Open qPCR via the local
network and generally will not be able to access this IP address over the Internet.
Option A - Connecting to Open qPCR via USB
On the computer being used to connect to the Open qPCR, open a browser and navigate to the
following link: http://beagleboard.org/getting-started#step2
1) Install the correct drivers for your operating system from the link above. Please note
that your computer may require a systems administrator to grant access permission
prior to install.
2) Once the appropriate drivers are installed, make sure the instrument is already powered
on, and then connect the USB cable from your computer to the USB port on the back of
the instrument.
3) After the system has been turned on and running for approximately 2-3 minutes, open
an internet browser and type into the address bar 192.168.7.2.
Option B - Connecting to Open qPCR via Ethernet
1) Connect an Ethernet cable to the Ethernet port on the back of the Open qPCR.
2) Once the Ethernet connection is established, the instrument will take a few minutes
before displaying the IP address on the LCD screen.
3) Open an internet browser on a computer connected to the same network, and type in the
instrument IP in the address bar.
Option C - Connecting to Open qPCR via Wi-Fi
1) Make sure the Open qPCR is powered off before plugging the Wi-Fi adapter into the Wi-
Fi port on the back of the instrument.
2) Power on the instrument and let the system initialize. Once the “booting” message
disappears on the LCD screen, follow the procedures previously indicated in section
Option A - Connecting to Open qPCR via USB.

16
3) Follow steps in the next section Logging in and Creating an Account to set up your
account through IP 192.168.7.2.
4) Once your account is created, go to the Open qPCR instrument home page. Select
Settings > Network Settings.
5) Ensure that the Wi-Fi toggle is green before selecting the appropriate network to
connect the instrument.
6) Type in the password for the network and note the IP address stated under Current
Settings (Figure 2.1). Make sure this IP address is also displayed on the bottom left of
the instrument’s LCD screen.
Figure 2.1
7) Unplug the USB cable and close out of the 192.168.7.2 browser. Open a new browser and
type in the instrument IP address to access the software.
2.3 Setting a Static IP Address
The Open qPCR system must be connected by Ethernet in order to set a static IP address. If
applicable, consult with your IT department before proceeding.
1) On the home page, navigate to Settings > Network Settings.
2) Select Ethernet. Ensure that the toggle next to Set Automatically is in the off position
(Figure 2.2).

17
Figure 2.2
3) Proceed to set the appropriate static IP address and select Save Changes once
complete.
4) Once the changes are saved, the screen will automatically refresh to the home page. The
new IP address will display on both the current web browser and the instrument’s LCD
screen.
2.4 Logging in and Creating an Account
Navigate to the appropriate address in your web browser to view the following screen.
Figure 2.3
Proceed to create a new user account for logging into the software.
If the instrument is connected by Ethernet or Wi-Fi, different users may log into the
software simultaneously to view previous test results and export data.
18
CHAPTER 3 – Calibration
!
3.1 When to Calibrate the Open qPCR
The Open qPCR needs to be calibrated before its initial use. Calibration must also be run each
time any of the following events occur:
o The lid height is adjusted
o The tube type is changed
o The machine is transported
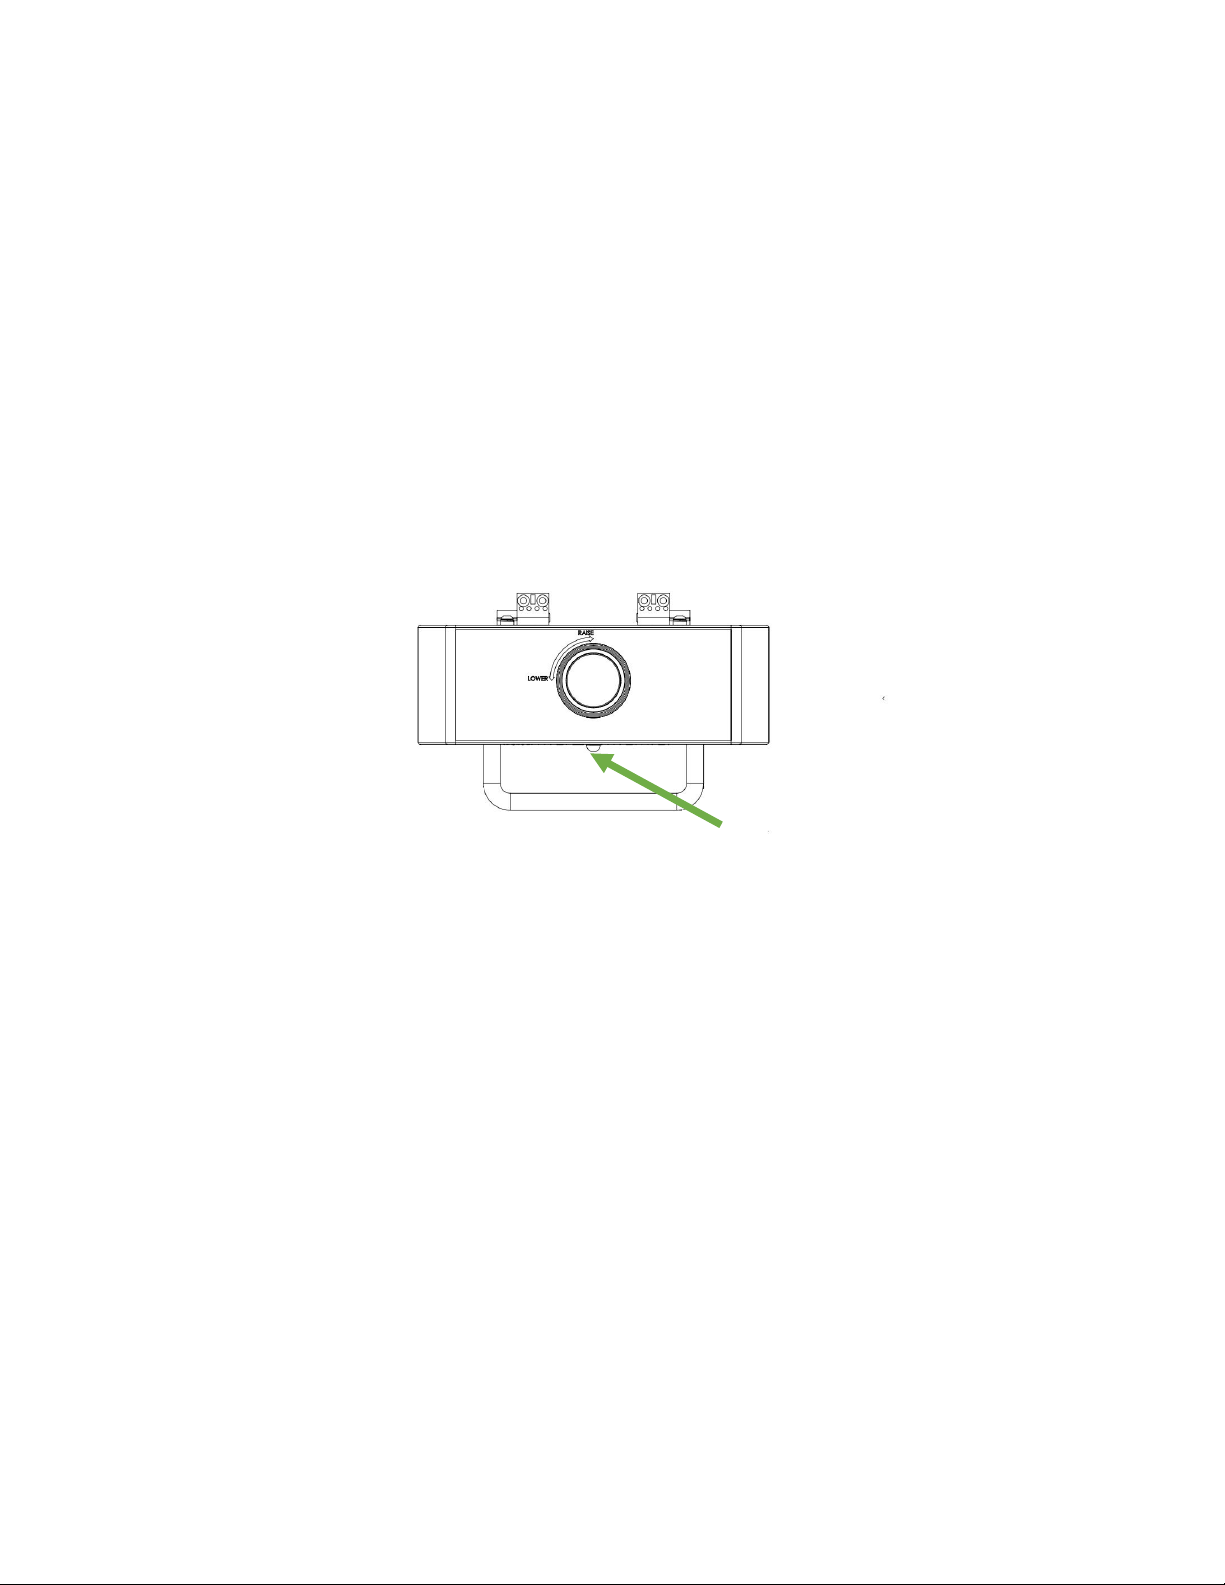
3.2 Adjusting the Open qPCR Lid Height
When using the instrument for the first time, set the lid height for the 100 µL PCR tubes that will
be used in your qPCR runs. Calibrate the instrument for that specific lid height.
Figure 3.1
Open the lid by pressing the small silver button near the lid bottom. You should feel the latch
mechanism release.
There are 2 rows of 8 wells, accommodating either 8-strip 100 µL PCR tubes or individual 100
µL PCR tubes. Use gloves while handling the tubes as prints on the tubes may affect the
fluorescence measurements. Ensure there are 16 capped tubes in the heat block during the lid
calibration process.
Raise the lid height by turning the knob on the lid clockwise. Place the PCR tubes in the
instrument and then close the lid until it latches. Proceed to turn the knob counter-clockwise to
lower the lid. Set the knob so that it just touches the top of the tubes and you feel a light
resistance.
Test the lid height by opening the lid and making sure you can close it again easily with the
tubes in place. If it does not close easily and you need to adjust the height for the next set of
tubes, a recalibration of the instrument will be required.
Calibrate using the built-in procedure. If calibration fails, re-adjust the lid height and repeat the
calibration process.
19
Always make sure that your tubes are dry externally and capped tightly before
inserting them into the Open qPCR. Failure to do so may cause liquids to vaporize and
create deposits on the internal components of the instrument.
3.3 Open qPCR Single Channel System Calibration
The Open qPCR single channel system requires calibration with the Fluorescein Calibrator kit.
The calibration process, including solution preparation, will take approximately 20 minutes to
complete.
Please note that the instrument lid height must not be adjusted at any point during calibration.
If the lid height is adjusted, a re-calibration is required.
PCR tubes used for the calibration process must be the same tubes that will be used for
subsequent test runs.
Fluorescein Calibrator Kit
Table 3.2
Fluorescein Calibrator
# of Calibrations
Quantity
Catalog #
Shipped with instrument
3
1 x 1.3 mL/vial
-
Available for order
6
2 x 1.3 mL/vial
S0110M
Storage Temperature
Store at 4 °C or -20 °C (long term), protected from light. The product is stable for two years
from date of receipt when stored at the recommended temperature.
Materials Required for Calibration
o Fluorescein calibrator solution
o Distilled or deionized water
o 200 µL pipette
o 200 µL pipette filter tips
o Chai PCR Tube & Cap Strips, 8-Well Strips, Optically Clear, 100 µL
o PCR tube rack
o Mini centrifuge

20
Preparing for Calibration
The Fluorescein solution is light sensitive. Keep aliquoted solution protected from light.
If you are using calibrators that have previously been stored at 4 °C, you do not need to
equilibrate the solution to room temperature before running the calibration process. You
may use the calibrator solution directly from the fridge.
1. Obtain 4 new 8-well 100 µL PCR tube strips. Check that there are no cracks on the
tubes.
2. Vortex for 10 seconds or invert the fluorescein vial 10 times to ensure homogenous
mixing of the solution.
3. Spin down the vial before aliquoting 25 µL/tube of the solution into 2 new 8-well PCR
tube strips. Cap tubes tightly and spin down.
4. Prepare the water strips by aliquoting 25 µL/tube of water into 2 new PCR strip tubes.
Cap strip tubes tightly and spin down.
Calibration Procedures
Please note that the calibration process must be completed in one sitting.
The heat block and lid temperature rises above 95
°
C. To avoid injury, do not make
direct contact with the heat block, lid, or tubes immediately after a run. Let the surface
cool for a few minutes before removing the tubes. If samples must be removed
immediately, avoid contact with surfaces by extracting tubes with tweezers.
Always wear gloves and protective eye wear when handling reagents or operating the
instrument.
1. Log into your account through a web browser. On the software home screen, navigate to
Settings →Calibration.
2. Under Optical Calibration, select Run Now.
3. The calibration time and materials required will be shown on the next screen (Figure
3.3). Select Begin.
Table of contents
Popular Industrial Equipment manuals by other brands

Pfannenberg
Pfannenberg PWS 6502 T 230V operating manual

PPI
PPI SMART ROLL operation & maintenance

Siemens
Siemens SIPLUS CMS4000 IFN VIB-A operating instructions

Wise
Wise F750 manual

Avlite
Avlite AV-OL-75 Installation & service manual

Reich Kupplungen
Reich Kupplungen ARCUSAFLEX AC F2 Series English translation of the original German Operating Manual


