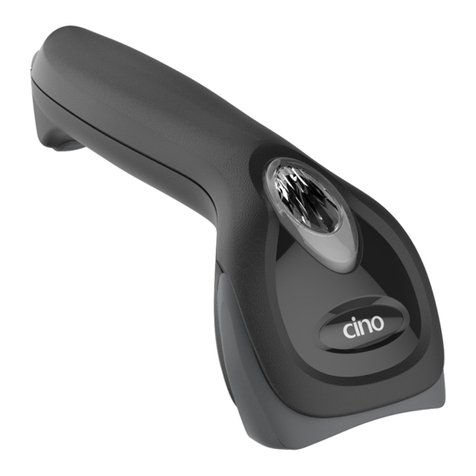
Champ Dolphin SD500 User manual

Dolphin SD500
CCD Barcode Scanner
User Manual Ver.00

2

3
We Value Your ID’s
HQ
CHAMPTEK INCORPORATED
5/F, No.2 Alley 2, Shin-Wei Lane,
Chung Cheng Rd., Hsin Tien City 231,
Taipei, Taiwan
Tel:+886-2-2219-2385
Fax:+886-2-2219-2387
E-mail:[email protected]
www.champtek.com
CHINA
CHAMPTEK INCORPORATED
#901, No. 39, Wuzhong Rd., Shanghai 200235, China
Tel: +86-21-5489-0021
Fax: +86-21-5489-1833
EMEA
SCANTECH-ID BV
Amersfoortsestraat 124
3769 AN Soesterberg
The Netherlands
Tel:+31-33-4698400
Fax:+31-33-4650615
E-mail:[email protected]
www.scantech-id.com
Notice
The manufacturer shall not be liable for technical or editorial
errors or omissions contained herein; nor for incidental or
consequential damages in connection with the furnishing,
performance or use of the publication.

4
Table of Contents
1. PREFACE.....................................................1
Introduction....................................................1
Features ........................................................2
Safety Instructions.........................................2
Trademarks ...................................................2
2. GETTING STARTED ....................................3
Package Contents .........................................3
A Quick View of SD500 .................................3
Installation .....................................................4
Changing the cable .......................................5
Output Interface.............................................6
3. USING THE SCANNER................................7
LED INDICATOR...........................................7
SCANNER BEEP ..........................................7
SCAN MAP....................................................7
4. APPENDIX....................................................8
Product Specification.....................................8
Readable Symbology ....................................9

1
1. PREFACE
Introduction
Thank you for purchasing SD500 CCD Barcode
Scanner. SD500 is a cutting edge handheld
extra-slim CCD scanner which is coupled with
ergonomic design to ensure high quality, high
performance.
SD500 supports contact mode and also middle
range mode. For specification of SD500 which
supports the reading depth from contact to 8cm,
reading width up to 5cm on window and swift scan
rate is up to 300 scans /per second. In addition to
that, the guarantee of approximately
1,000,000-life-time trigger switch test is our
promise to fulfill your satisfaction.
In short, SD500 is absolutely a performance CCD
handheld scanner, which provides the customer
with the most cost-effective solution in the market.
It is perfectly suitable for any point of sale
environment. Because of the scanner’s compact
design, it is ideal to be used in the following
applications:
•Receiving in retail
•Product labeling and tracking
•Point of sale systems ( POS )
•Order picking and staging
•Work flow tracking
•Material flow control
•Transportation and distribution
•Warehousing
•Inventory management

2
Features
•Plug & Play for user-friendly design
•CCD Sensor adopted
•Multiple interface design: USB, PS/2, RS232
•Able to read a wide range of linear barcodes
•Scan speed: 300 scans per second
•Scanning distance: 0 - 80 mm ± 10%
•Extremely Low Power Consumption
•Most popular barcode symbologies are
supported.
Safety Instructions
•Please read the following safety statement
carefully.
•Please preserve this user manual for reference
sometime.
•Please handle the scanner with care. Do not
drop it.
•DO NOT expose the scanner to any flammable
sources.
•Keep the scanner away from excessive heat
and heaters.
•Keep the scanner away from water or moisture.
•Do not storage SD500 at the temperature lower
then -20°C (-4°F) or over 70°C (158°F).
•Please do not target the scanning light at
people's eyes.
•Do not attempt to self-service the scanner.
Trademarks
All names and product trademarks mentioned in
this document are the property of their respective
companies.

3
2. GETTING STARTED
Package Contents
Please check if your package comes with the
following items. If any of them is missing, please
contact your retailer.
•Scanner
•Interface cable (PS/2, RS232, USB)
•Programming Menu
•User Manual
A Quick View of SD500
Front View Back View
cSensor: Use to aim at the target barcode.
dTrigger: Use to activate scan.
eLid: Use to cover the cable socket.
fLED Indicator: Indicates the mode of scanner.
gCable: Use to connect to PC.
e
g
f
c
d

4
Installation
•Turn off the host system.
•Connect the power
if needed.
•Plug the connector
of the cable to the
host system.
•Turn on the host
system.
•For RS232 scanner,
there are 3 ways to
supplying the power,
use external +5V
power supply, use
optional power
cable (KBDC) which taking the power from KB
wedge, or if the host supports +5V power from
pin 9.
•When connected, the scanner will emit three
short beeps twice and the indicator flash green
light.
•If the defaults value is not fit your demand,
please configure the selection depended by
programming menu.

5
Changing the cable
The interface cable will be connected up the
scanner before packing. In case you need to
change the Interface cable, please refer to the
instructions as below.
1. Inject a needle into the hole and remove the
Lid.
2. Remove the cable.
3. Plug in the cable you need and push the string
relieve into the slot.
4. Place the Lid back and you will hear a “click”
when the Lip connect strictly.

6
Output Interface
Keyboard wedge interface
P1
Mini DIN 6M
P2
Mini DIN 6F Function Cable
Color
3 3 GND Brown
4 4 VCC Red
1 HOST DATA Green
5 HOST CLK Blue
1 KB DATA Yellow
5 KB CLK Orange
Iron Case Iron case Shielding Spiral
RS232 interface
DB9F Function Cable Color DC Jack
5 GND Brown
Case
9 POWER Red Core
2 TXD Orange
3 RXD Yellow
8 RTS Green
7 CTS Blue
Iron case Shielding Spiral
USB interface
P1
USB Type A Function Cable Color
4 GND GND Brown
3 D+ HC Blue
2 D1 HD Green
1 VCC VCC Red
Iron case Shielding Spiral

7
3. USING THE SCANNER
1. Connect the scanner to the host system by the
Interface cable.
2. Aim the sensor on the target barcode to read.
3. The scanner gives feedback to users in
two ways: the Green color LED
Indicator and the Scanner Beep.
LED INDICATOR:The LED indicator on top of
the scanner is used to provide user with
feedback.
Condition Green color LED
Connect to the host
successfully
Three short flashes,
twice.
Scanned successfully One flash
Power off Off
SCANNER BEEP:The scanner buzzes to
provide user with feedback while using the
scanner. Condition Buzzer
Connect to the host
successfully
Three short beeps,
twice
Scanned successfully One short beep
high tone
No barcode detected No beep
4. Scan barcode at a distance not beyond 80mm.
SCAN MAP:

8
4. APPENDIX
Product Specification
Physical Specification
Dimension 70mm x 160mm x22mm
Weight Scanner: Approx. 858g
Cable: Approx. 75g
Material ABS
Connector Molex 11 pins
Interface PS/2, RS232, USB
Light Source 635 nm
Sensor Linear CCD Sensor
Operating Freq. 16 MHz
Performance
Scan Rate 300 scans/sec ± 10%
Reading
Distance
80mm ± 10%
Width of Field 50mm @Window
Print Contrast
Ratio
PCS 0.45 @ 0.127mm
Resolution 0.1mm @ PCS 0.9
Environmental
Operating Temp. 0°C to 50°C (32°F to 122°F)
Storage Temp. -20°C to 70°C(-4°F to 158°F)
Relative
Humidity
20% to 95%
(Non-condensing)
Ambient Light 100,000 Lux Max
@ Direct sunlight
Life Time
Light Source 40,000 hours
Trigger Switch 1,000,000 times
MTBF(Calculated) 24,000 hours
Operating
Temperature
0°C to 50°C (32°F to 122°F)
Thermal Shock
High Temp. 60 oC (140 oF)
Low Temp. -20 oC (-4 oF)
Cycle time 20 minutes for high temp.
20 minutes for low temp.
Cycles 5 cycles

9
Readable Symbology
Items Readable Default
Enable
All UPC/EAN/JAN ●●
EAN128 Code ●●
Code 39 ●●
Code 39 Full ASCII ●
Code 32/Italian
Pharmacy ●
Code 128 ●●
CODABAR/NW7 ●●
Interleave 25 ●●
Industrial 25 ●
Matrix 25 ●
MSI/PLESSEY ●
Telepen ●
Code 93 ●
Code 11 ●
China Postage ●
RSS ●
Note: The symbologies marked by an asterisk are
enabled by default. Each can be enabled or
disabled the user.

10
Table of contents
Other Champ Barcode Reader manuals
