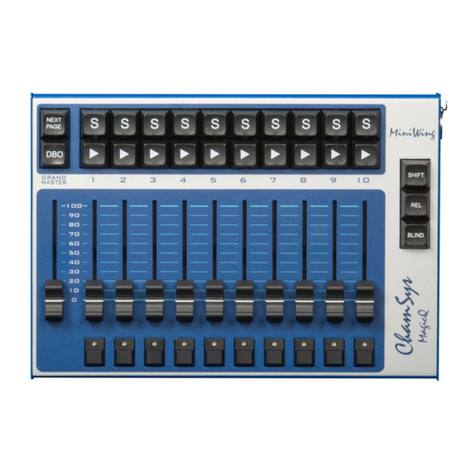
ChamSys QuickQ User manual

QuickQ Manual
Installation, Operation Manual and Warranty
Certificate
Software Version v6, 2021-03-12

Contents
Edition Notes. . . . . . . . . . . . . . . . . . . . . . . . . . . . . . . . . . . . . . . . . . . . . . . . . . . . . . . . . . . . . . . . . . . . . . . . . . Ê1
Trademarks. . . . . . . . . . . . . . . . . . . . . . . . . . . . . . . . . . . . . . . . . . . . . . . . . . . . . . . . . . . . . . . . . . . . . . . . . Ê1
Copyright Notice . . . . . . . . . . . . . . . . . . . . . . . . . . . . . . . . . . . . . . . . . . . . . . . . . . . . . . . . . . . . . . . . . . . . Ê1
Manual Use . . . . . . . . . . . . . . . . . . . . . . . . . . . . . . . . . . . . . . . . . . . . . . . . . . . . . . . . . . . . . . . . . . . . . . . . . Ê1
Intended Audience . . . . . . . . . . . . . . . . . . . . . . . . . . . . . . . . . . . . . . . . . . . . . . . . . . . . . . . . . . . . . . . . . . Ê1
Disclaimer . . . . . . . . . . . . . . . . . . . . . . . . . . . . . . . . . . . . . . . . . . . . . . . . . . . . . . . . . . . . . . . . . . . . . . . . . . Ê1
Care of Your Console. . . . . . . . . . . . . . . . . . . . . . . . . . . . . . . . . . . . . . . . . . . . . . . . . . . . . . . . . . . . . . . . . Ê2
Safety Notes . . . . . . . . . . . . . . . . . . . . . . . . . . . . . . . . . . . . . . . . . . . . . . . . . . . . . . . . . . . . . . . . . . . . . . . . Ê2
Using This Manual. . . . . . . . . . . . . . . . . . . . . . . . . . . . . . . . . . . . . . . . . . . . . . . . . . . . . . . . . . . . . . . . . . . Ê3
1. QuickQ Range . . . . . . . . . . . . . . . . . . . . . . . . . . . . . . . . . . . . . . . . . . . . . . . . . . . . . . . . . . . . . . . . . . . . . . . Ê4
QuickQ Consoles . . . . . . . . . . . . . . . . . . . . . . . . . . . . . . . . . . . . . . . . . . . . . . . . . . . . . . . . . . . . . . . . . . . . Ê4
QuickQ Rack . . . . . . . . . . . . . . . . . . . . . . . . . . . . . . . . . . . . . . . . . . . . . . . . . . . . . . . . . . . . . . . . . . . . . . . . Ê5
QuickQ Designer Application . . . . . . . . . . . . . . . . . . . . . . . . . . . . . . . . . . . . . . . . . . . . . . . . . . . . . . . . . Ê6
QuickQ Remote App . . . . . . . . . . . . . . . . . . . . . . . . . . . . . . . . . . . . . . . . . . . . . . . . . . . . . . . . . . . . . . . . . Ê7
SnakeSys 10Scene Wall Plates . . . . . . . . . . . . . . . . . . . . . . . . . . . . . . . . . . . . . . . . . . . . . . . . . . . . . . . . Ê7
SnakeSys 10Scene Gateway Box. . . . . . . . . . . . . . . . . . . . . . . . . . . . . . . . . . . . . . . . . . . . . . . . . . . . . . . Ê7
Other External Control. . . . . . . . . . . . . . . . . . . . . . . . . . . . . . . . . . . . . . . . . . . . . . . . . . . . . . . . . . . . . . . Ê7
2. QuickQ Screen User Interface. . . . . . . . . . . . . . . . . . . . . . . . . . . . . . . . . . . . . . . . . . . . . . . . . . . . . . . . . Ê8
3. Setting Up and Connecting . . . . . . . . . . . . . . . . . . . . . . . . . . . . . . . . . . . . . . . . . . . . . . . . . . . . . . . . . . Ê10
Assemble the QuickQ Console . . . . . . . . . . . . . . . . . . . . . . . . . . . . . . . . . . . . . . . . . . . . . . . . . . . . . . . Ê10
Connecting the Remote App to a QuickQ Console . . . . . . . . . . . . . . . . . . . . . . . . . . . . . . . . . . . . . . Ê10
Assemble the QuickQ Rack . . . . . . . . . . . . . . . . . . . . . . . . . . . . . . . . . . . . . . . . . . . . . . . . . . . . . . . . . . Ê10
Connecting the Remote App to a QuickQ Rack. . . . . . . . . . . . . . . . . . . . . . . . . . . . . . . . . . . . . . . . . Ê10
Powering On and Off . . . . . . . . . . . . . . . . . . . . . . . . . . . . . . . . . . . . . . . . . . . . . . . . . . . . . . . . . . . . . . . Ê11
4. Setting Up Your Show . . . . . . . . . . . . . . . . . . . . . . . . . . . . . . . . . . . . . . . . . . . . . . . . . . . . . . . . . . . . . . . Ê12
Start a New Show File . . . . . . . . . . . . . . . . . . . . . . . . . . . . . . . . . . . . . . . . . . . . . . . . . . . . . . . . . . . . . . Ê12
Patch the Fixtures . . . . . . . . . . . . . . . . . . . . . . . . . . . . . . . . . . . . . . . . . . . . . . . . . . . . . . . . . . . . . . . . . . Ê12
Patching Step by Step . . . . . . . . . . . . . . . . . . . . . . . . . . . . . . . . . . . . . . . . . . . . . . . . . . . . . . . . . . . . . . . Ê13
Advanced Patching Features . . . . . . . . . . . . . . . . . . . . . . . . . . . . . . . . . . . . . . . . . . . . . . . . . . . . . . . . Ê16
Create the Layout . . . . . . . . . . . . . . . . . . . . . . . . . . . . . . . . . . . . . . . . . . . . . . . . . . . . . . . . . . . . . . . . . . Ê19
5. Control Fixtures . . . . . . . . . . . . . . . . . . . . . . . . . . . . . . . . . . . . . . . . . . . . . . . . . . . . . . . . . . . . . . . . . . . . Ê20
Control Fixtures Live . . . . . . . . . . . . . . . . . . . . . . . . . . . . . . . . . . . . . . . . . . . . . . . . . . . . . . . . . . . . . . . Ê20
Clear Fixtures . . . . . . . . . . . . . . . . . . . . . . . . . . . . . . . . . . . . . . . . . . . . . . . . . . . . . . . . . . . . . . . . . . . . . . Ê21
Select Fixtures . . . . . . . . . . . . . . . . . . . . . . . . . . . . . . . . . . . . . . . . . . . . . . . . . . . . . . . . . . . . . . . . . . . . . Ê21
Control Fixtures with Recorded Cues. . . . . . . . . . . . . . . . . . . . . . . . . . . . . . . . . . . . . . . . . . . . . . . . . Ê22
Controlling Intensity. . . . . . . . . . . . . . . . . . . . . . . . . . . . . . . . . . . . . . . . . . . . . . . . . . . . . . . . . . . . . . . . Ê22
Controlling Position . . . . . . . . . . . . . . . . . . . . . . . . . . . . . . . . . . . . . . . . . . . . . . . . . . . . . . . . . . . . . . . . Ê23
Controlling Colour. . . . . . . . . . . . . . . . . . . . . . . . . . . . . . . . . . . . . . . . . . . . . . . . . . . . . . . . . . . . . . . . . . Ê24

Controlling Beam Functions - Gobos, Focus, Zoom and Other Beam Options . . . . . . . . . . . . . Ê26
6. Recording Items with QuickQ. . . . . . . . . . . . . . . . . . . . . . . . . . . . . . . . . . . . . . . . . . . . . . . . . . . . . . . . Ê29
Recording a Group . . . . . . . . . . . . . . . . . . . . . . . . . . . . . . . . . . . . . . . . . . . . . . . . . . . . . . . . . . . . . . . . . Ê29
Recording a Palette . . . . . . . . . . . . . . . . . . . . . . . . . . . . . . . . . . . . . . . . . . . . . . . . . . . . . . . . . . . . . . . . . Ê29
Recording a Cue. . . . . . . . . . . . . . . . . . . . . . . . . . . . . . . . . . . . . . . . . . . . . . . . . . . . . . . . . . . . . . . . . . . . Ê30
Recording a Theatre style Cue Stack. . . . . . . . . . . . . . . . . . . . . . . . . . . . . . . . . . . . . . . . . . . . . . . . . . Ê32
7. Editing Cues . . . . . . . . . . . . . . . . . . . . . . . . . . . . . . . . . . . . . . . . . . . . . . . . . . . . . . . . . . . . . . . . . . . . . . . Ê38
Moving Cues in a Cue Stack . . . . . . . . . . . . . . . . . . . . . . . . . . . . . . . . . . . . . . . . . . . . . . . . . . . . . . . . . Ê38
Inserting A Cue . . . . . . . . . . . . . . . . . . . . . . . . . . . . . . . . . . . . . . . . . . . . . . . . . . . . . . . . . . . . . . . . . . . . Ê38
Deleting Cues . . . . . . . . . . . . . . . . . . . . . . . . . . . . . . . . . . . . . . . . . . . . . . . . . . . . . . . . . . . . . . . . . . . . . . Ê38
Record Merge . . . . . . . . . . . . . . . . . . . . . . . . . . . . . . . . . . . . . . . . . . . . . . . . . . . . . . . . . . . . . . . . . . . . . . Ê38
Recording a New Cue from Current Levels on Stage . . . . . . . . . . . . . . . . . . . . . . . . . . . . . . . . . . . Ê38
8. Effects . . . . . . . . . . . . . . . . . . . . . . . . . . . . . . . . . . . . . . . . . . . . . . . . . . . . . . . . . . . . . . . . . . . . . . . . . . . . . Ê39
Introduction to Effects on QuickQ. . . . . . . . . . . . . . . . . . . . . . . . . . . . . . . . . . . . . . . . . . . . . . . . . . . . Ê39
Adding Effects to Fixtures . . . . . . . . . . . . . . . . . . . . . . . . . . . . . . . . . . . . . . . . . . . . . . . . . . . . . . . . . . . Ê39
Recording Effects to Cues . . . . . . . . . . . . . . . . . . . . . . . . . . . . . . . . . . . . . . . . . . . . . . . . . . . . . . . . . . . Ê41
Effects on Dimmer Channels . . . . . . . . . . . . . . . . . . . . . . . . . . . . . . . . . . . . . . . . . . . . . . . . . . . . . . . . Ê41
9. Execute Window . . . . . . . . . . . . . . . . . . . . . . . . . . . . . . . . . . . . . . . . . . . . . . . . . . . . . . . . . . . . . . . . . . . Ê42
10. Settings Window . . . . . . . . . . . . . . . . . . . . . . . . . . . . . . . . . . . . . . . . . . . . . . . . . . . . . . . . . . . . . . . . . . Ê44
Access Levels . . . . . . . . . . . . . . . . . . . . . . . . . . . . . . . . . . . . . . . . . . . . . . . . . . . . . . . . . . . . . . . . . . . . . . Ê45
DMX Settings . . . . . . . . . . . . . . . . . . . . . . . . . . . . . . . . . . . . . . . . . . . . . . . . . . . . . . . . . . . . . . . . . . . . . . Ê46
Setting Up a QuickQ Console to Output Art-Net. . . . . . . . . . . . . . . . . . . . . . . . . . . . . . . . . . . . . . . . Ê46
Network. . . . . . . . . . . . . . . . . . . . . . . . . . . . . . . . . . . . . . . . . . . . . . . . . . . . . . . . . . . . . . . . . . . . . . . . . . . Ê47
Wired . . . . . . . . . . . . . . . . . . . . . . . . . . . . . . . . . . . . . . . . . . . . . . . . . . . . . . . . . . . . . . . . . . . . . . . . . . . . . Ê48
Wireless . . . . . . . . . . . . . . . . . . . . . . . . . . . . . . . . . . . . . . . . . . . . . . . . . . . . . . . . . . . . . . . . . . . . . . . . . . . Ê48
User Interface Options . . . . . . . . . . . . . . . . . . . . . . . . . . . . . . . . . . . . . . . . . . . . . . . . . . . . . . . . . . . . . . Ê48
Update Options . . . . . . . . . . . . . . . . . . . . . . . . . . . . . . . . . . . . . . . . . . . . . . . . . . . . . . . . . . . . . . . . . . . . Ê49
11. MIDI Notes and Timecode . . . . . . . . . . . . . . . . . . . . . . . . . . . . . . . . . . . . . . . . . . . . . . . . . . . . . . . . . . Ê50
MIDI Timecode. . . . . . . . . . . . . . . . . . . . . . . . . . . . . . . . . . . . . . . . . . . . . . . . . . . . . . . . . . . . . . . . . . . . . Ê50
MIDI Notes . . . . . . . . . . . . . . . . . . . . . . . . . . . . . . . . . . . . . . . . . . . . . . . . . . . . . . . . . . . . . . . . . . . . . . . . Ê50
12. Audio Input. . . . . . . . . . . . . . . . . . . . . . . . . . . . . . . . . . . . . . . . . . . . . . . . . . . . . . . . . . . . . . . . . . . . . . . Ê52
13. 10Scene Window and 10Scene Wall Plates . . . . . . . . . . . . . . . . . . . . . . . . . . . . . . . . . . . . . . . . . . . Ê53
Settings. . . . . . . . . . . . . . . . . . . . . . . . . . . . . . . . . . . . . . . . . . . . . . . . . . . . . . . . . . . . . . . . . . . . . . . . . . . . Ê54
Panel. . . . . . . . . . . . . . . . . . . . . . . . . . . . . . . . . . . . . . . . . . . . . . . . . . . . . . . . . . . . . . . . . . . . . . . . . . . . . . Ê54
Contact Events . . . . . . . . . . . . . . . . . . . . . . . . . . . . . . . . . . . . . . . . . . . . . . . . . . . . . . . . . . . . . . . . . . . . . Ê55
Gateways . . . . . . . . . . . . . . . . . . . . . . . . . . . . . . . . . . . . . . . . . . . . . . . . . . . . . . . . . . . . . . . . . . . . . . . . . . Ê55
14. Events Window . . . . . . . . . . . . . . . . . . . . . . . . . . . . . . . . . . . . . . . . . . . . . . . . . . . . . . . . . . . . . . . . . . . Ê56
15. Open Sound Control (OSC) . . . . . . . . . . . . . . . . . . . . . . . . . . . . . . . . . . . . . . . . . . . . . . . . . . . . . . . . . Ê57
16. Ethernet Remote Control. . . . . . . . . . . . . . . . . . . . . . . . . . . . . . . . . . . . . . . . . . . . . . . . . . . . . . . . . . . Ê58
17. Upgrading Console Software . . . . . . . . . . . . . . . . . . . . . . . . . . . . . . . . . . . . . . . . . . . . . . . . . . . . . . . Ê59
18. Factory Reset . . . . . . . . . . . . . . . . . . . . . . . . . . . . . . . . . . . . . . . . . . . . . . . . . . . . . . . . . . . . . . . . . . . . . Ê60

QuickQ Rack System Factory Reset . . . . . . . . . . . . . . . . . . . . . . . . . . . . . . . . . . . . . . . . . . . . . . . . . . . Ê60
Glossary . . . . . . . . . . . . . . . . . . . . . . . . . . . . . . . . . . . . . . . . . . . . . . . . . . . . . . . . . . . . . . . . . . . . . . . . . . . . . Ê61
Appendix A: DMX, Ethernet and Art-Net . . . . . . . . . . . . . . . . . . . . . . . . . . . . . . . . . . . . . . . . . . . . . . . . Ê64
DMX . . . . . . . . . . . . . . . . . . . . . . . . . . . . . . . . . . . . . . . . . . . . . . . . . . . . . . . . . . . . . . . . . . . . . . . . . . . . . . Ê64
Ethernet. . . . . . . . . . . . . . . . . . . . . . . . . . . . . . . . . . . . . . . . . . . . . . . . . . . . . . . . . . . . . . . . . . . . . . . . . . . Ê64
Art-Net . . . . . . . . . . . . . . . . . . . . . . . . . . . . . . . . . . . . . . . . . . . . . . . . . . . . . . . . . . . . . . . . . . . . . . . . . . . . Ê64
Appendix B: FCC Part 15 Notice . . . . . . . . . . . . . . . . . . . . . . . . . . . . . . . . . . . . . . . . . . . . . . . . . . . . . . . . Ê66
Appendix C: Technical Specifications . . . . . . . . . . . . . . . . . . . . . . . . . . . . . . . . . . . . . . . . . . . . . . . . . . . Ê67
Appendix D: Disposal and Recycling of Unwanted Consoles . . . . . . . . . . . . . . . . . . . . . . . . . . . . . . Ê69
Appendix E: QuickQ Warranty Certificate. . . . . . . . . . . . . . . . . . . . . . . . . . . . . . . . . . . . . . . . . . . . . . . Ê70

Edition Notes
This QuickQ User Manual includes a description, safety precautions, installation,
programming, operation, and maintenance instructions for the QuickQ series consoles and
Rack Mount products as of the release date of this edition.
ChamSys continually strives to provide the most powerful and stable software for all of our
lighting consoles. As such, we are making continual improvements to the software available
to all of our users. To unlock your console’s full potential and ensure that you have the most
current fixture library, we suggest downloading and installing the latest Console software and
the separate fixture library from the ChamSys website.
Detailed installation instructions can be found in the upgrading console software section.
Trademarks
ChamSys, the ChamSys logo and QuickQ are registered trademarks or trademarks of ChamSys
Ltd in the United Kingdom and other countries. Other company and product names and logos
referred to herein may be trademarks of their respective companies.
Copyright Notice
The works of authorship contained in this manual, including, but not limited to, all design,
text and images are owned by ChamSys Ltd. All rights reserved.
Manual Use
ChamSys authorises its customers to download and print this manual for professional
information purposes only. ChamSys expressly prohibits the usage, copy, storage, distribution,
modification, or printing of this manual or its content for any other purpose without written
consent from ChamSys
Intended Audience
Any person installing, operating, and/or maintaining this product should completely read
through the guide that shipped with the product, as well as this manual, before installing,
operating, or maintaining this product.
Disclaimer
ChamSys believes that the information contained in this manual is accurate in all respects.
However, ChamSys assumes no responsibility and specifically disclaims any and all liability to
any party for any loss, damage or disruption caused by any errors or omissions in this
document, whether such errors or omissions result from negligence, accident or any other
cause. ChamSys reserves the right to revise the content of this document without any
obligation to notify any person or company of such revision, however, ChamSys has no
2021-03-12 QuickQ v6 1

obligation to make, and does not commit to make, any such revisions. Download the latest
version from https://secure.chamsys.co.uk.
Care of Your Console
To keep your console in best condition please observe the following recommendations:
•Keep liquids away from the console. Drinks spilled over a console may cause irreparable
damage.
•Keep the console out of direct sunlight – place the console in the shade. Excess heat from
the sun may cause damage to the touchscreens and to overlays.
•Do not use sharp objects on the touchscreen. If you wish to use an object other than your
finger, use a blunt object that will not damage the surface.
•Do not block the ventilation grills on the rear panel, side, and underneath the console.
•Do not use the console outside its operating temperature range.
•Handle the console with care when moving or transporting it. The console contains
components that may be damaged by shock, such as a hard drive. Always use a padded
flight case wherever possible.
•Do not use solvents or cleaners to clean the console. Do not rub firmly on the metal or
plastic surfaces – this may cause the paint or lettering to be removed. Gently use a damp
cloth to clean the panels. Do not put water on the touchscreen as this may get inside it and
make it unusable.
Safety Notes
•Do not open the console unless you are a skilled person authorised and trained by
ChamSys in console maintenance and repair. The console contains components with
voltages that may shock.
•QuickQ consoles incorporate a replaceable CR2032 processor battery. These batteries
can cause a serious burn hazard if ingested. Do not place battery into the mouth. Keep out
of reach of small children. If accidentally ingested the battery it is imperative to seek
immediate medical help.
•Do not use the console if the power cables are damaged in any way.
•Repairs should only be undertaken by authorised service representatives. There are no
user serviceable parts inside the console.
•If liquids are spilt over the console then remove power immediately, and seek advice from
your authorised service representative.
•When transporting the console ensure that there are sufficient people to carry the
console.
•Ensure safe installation of the QuickQ Rack and Consoles, so that the unit cannot slip off
or fall from it operated position.
2QuickQ v6 2021-03-12

Using This Manual
The following naming and text conventions are used in this manual:
•Menus and commands are indicated [ Home ]or may be indicated by an icon such as
•Physical buttons and features on the console are indicated Power .
•References to other parts of the manual are indicated such as Using This Manual
Indicates some useful information to add to your knowledge and experience.
Indicates some additional information that may be relevant.
A Warning statement indicates situations where damage may occur, people
may be harmed, or there are serious or dangerous consequences of an
action.
A Caution statement indicates there may be unwanted or undefined
consequences of an action, or potential for programmed data loss or an
equipment problem.
2021-03-12 QuickQ v6 3

Chapter 1. QuickQ Range
This manual covers QuickQ software version v6 and onwards.
The QuickQ range comprises:
•QuickQ Consoles: QuickQ 10, QuickQ 20 and QuickQ 30
•QuickQ Rack
•QuickQ Designer Application for macOS or Windows
•QuickQ Remote App for iOS, Android, Windows and macOS
•SnakeSys 10Scene Wall Plates
•SnakeSys 10Scene Gateway Box
The range allows simple, intuitive programming and control of stage shows and single or
multiroom venues. The consoles can also be integrated with 3rd party control systems.
QuickQ Consoles
The consoles all feature a large multitouch touchscreen. Consoles run the same software but
differ in the number of multifunction faders, playbacks, encoders and DMX universes.
Consoles have built in WiFi to allow connection to the free QuickQ Remote App. An external
monitor can be used (but is not required) to display a selection of other windows. The
consoles include a USB work lamp and an external power supply.
To the left of the display are multifunction faders. The faders can control individual fixtures,
groups of fixtures or cues. Below the display are the playback faders.
The grandmaster fader is to the right of the playback faders, allowing control of all intensities.
Make you sure you keep this at full!
4QuickQ v6 2021-03-12

QuickQ Rack
The QuickQ Rack provides "always on" control for installation projects. The QuickQ Rack is
designed to act as a hub for the installation with physical control via the Rack’s 10 buttons,
SnakeSys 10Scene Wall Plates or other networked consoles. When other consoles are detected
on the network the QuickQ Rack can automatically hand off control to the lighting console
and resume control once the console is turned off.
10 buttons on the front of the unit allow for control of 10 individual scenes or 10 playbacks of
single scenes or automated chases. These 10 buttons can be extended to remote stations via
the SnakeSys 10Scene Wall Plates.
Ten SnakeSys 10Scene Wall Plates can be connected (daisy chained) to each of the 4 Phoenix
Connectors on the QuickQ Rack for a total of 40 wall stations. SnakeSys 10Scene Wall Plates
2021-03-12 QuickQ v6 5

duplicate the control of the 10 buttons on the QuickQ Rack. Each connector also provides one
connection for one each additional switch input. The switch input enables simple zoning for
airwall systems for multiroom venues.
The QuickQ Rack has built in WiFi to allow connection to the free QuickQ Remote App. Scan
the included QR code printout with your tablet or phone to connect. The QuickQ Rack is
programmed using the QuickQ Remote App or by attaching a mouse and a monitor.
QuickQ Designer Application
The free QuickQ Designer Application allows pre-programming or editing of shows on a
Windows or macOS computer. It features a built-in 3D visualiser to show the lighting if you
are not in the venue. Shows programmed using the Designer Application can be saved to a
6QuickQ v6 2021-03-12

USB memory stick and loaded on the QuickQ consoles. The Designer application does not
output DMX and can not be used to control lights or test remote control.
QuickQ Remote App
The free QuickQ Remote App controls QuickQ consoles and QuickQ Rack from a smartphone
or tablet via the QuickQ’s built-in WiFi. All console windows are available on the app and can
be operated independently of those on the console. The app and a 9.7 inch or larger tablet are
ideal remote interfaces and a second touchscreen monitor set up for the consoles.
SnakeSys 10Scene Wall Plates
SnakeSys 10Scene Wall Plates have 10 backlit buttons to extend 10Scene control. They are
supplied in pairs with both Black & White faceplates with blank labels. These plates fit in a
standard in-wall single gang wall box. Easy to daisy chain, with up to ten 10Scene Wall Plates
per chain, these can cover long distances using solid core Cat5e or Cat6 cable. 10Scene uses its
own 10Scene protocol for communication between wall mounts and the controller. 10Scene
wall plates are powered over the 10Scene protocol, no external power supply is required.
•U.S. fit version (300-054) fit into a standard U.S. Single Gang Box.
•The EU fit version (300-055) fit a EU Single Gang electrical back box.
Further documentation for SnakeSys 10Scene products can be found on
https://secure.chamsys.co.uk/.
SnakeSys 10Scene Gateway Box
The SnakeSys 10Scene Gateway provides an interface to connect QuickQ consoles to 10Scene
wall plates via an Ethernet connection. 10Scene wall plates are connected to each of 2
Phoenix Connectors on the Gateway for a total of 20 wall stations. Each connector on the
Gateway also provides one connection for one each additional switch input. The switch input
enables simple zoning for airwall systems for multiroom venues. The Gateway has 2 total
zone switches.
Other External Control
The QuickQ Rack and Consoles can receive control from other external control systems.
Further details are provided in the following sections of this manual:
•MIDI Notes
•MIDI Timecode
•Open Sound Control
•Ethernet remote control protocol
2021-03-12 QuickQ v6 7

Chapter 2. QuickQ Screen User Interface
The QuickQ user interface is based around a smartphone-style interface, with buttons similar
to phones and tablets.
Above the console touchscreen are the 3 permanent navigation icons:
• — Back
• — Home
• — Main Menu
The top blue shaded section of the console touchscreen duplicates these icons and adds 3
more programming functions. This section is always visible on programming windows.
•[ Clear ] — Clear captured "Live" fixtures
•[ Record ] — Record captured "Live" fixtures and record options
•[ Action ] — Action menu
Beneath to top blue shaded section is a navigation area to open different windows to enable
you to:
•Control Intensity
•Control Position
•Control Colour
•Control Beam
The right of this section has functions that change for each window. The Home Window has
an on at [ 100% ]or off at [ 0% ]. Use the unlock or lock tool to create the home layout.
The next section, when in the home window, is banded by 2 thin orange lines. This is a
8QuickQ v6 2021-03-12

holding area for patched instruments prior to dragging them out to the layout. There are two
selectable views: [ Fixtures ]and [ Groups ].
While in the Position, Colour or Beam Windows this area of the screen contains default
palettes that allow for faster editing of your show.
The bottom section of the touchscreen, bounded by 2 thick orange lines, shows the playback
preview windows; one per playback fader. Up to 3 cues from the cue stack are shown in the
preview window, and the cue stack title is shown at the top.
Holding or double-tapping the playback preview will open the full cue stack
for the selected playback.
2021-03-12 QuickQ v6 9

Chapter 3. Setting Up and Connecting
Assemble the QuickQ Console
•Connect the Tablet Holder to the back of the console using the two captive screws.
•Install the aerial on to the connector labelled antenna and extend it vertically.
•Connect the Desk Lamp to the lower USB on the rear of the console.
•Connect the DMX outputs to the fixtures that are to be controlled.
•Connect a Network Cable to the Network port if using.
•Connect an HDMI Monitor if you decide to use one.
•Connect the power supply into the 12V DC input on the back, then connect it into a mains
AC power.
Connecting the Remote App to a QuickQ Console
QuickQ Consoles are shipped with the WiFi interface disabled. You must
enable the interface the first time before attempting to connect.
1. Turn on WiFi: Press the icon on the top bar and turn the [ Status ]switch on.
2. Download the App: The QuickQ Remote App is available for free download from the
Google Play and Apple App Stores.
3. Scan the QR Code: Use the Remote App to scan the QR Code displayed on the Console
touchscreen.
Assemble the QuickQ Rack
•Connect the Rack Ears to the front of the unit with the small screws supplied.
•Install the aerial on to the connector labelled antenna and extend it vertically.
•Connect the DMX outputs to the fixtures.
•Connect a Network Cable to the Network port, if using.
•If not using QuickQ App for programming, connect an HDMI Monitor and USB Mouse.
•Connect the PowerCON TRUE1 connector on the rear of the QuickQ Rack, then connect it
into a mains AC power
Connecting the Remote App to a QuickQ Rack
QuickQ racks are shipped with the WiFi interface disabled. You must enable
the interface the first time before attempting to connect.
1. Enable the WiFi Press and hold the WiFi button on the rear of the unit for 2 seconds. The
10 QuickQ v6 2021-03-12

LEDs on the front of the Rack will flash blue to indicate that it has been turned on or red
to show it has been turned off.
2. Scan the QR Code Use the Remote App to scan the QR Code supplied on a printed sheet
with the Rack.
Powering On and Off
The QuickQ consoles and QuickQ Rack will power on when they are connected to the mains
AC power.
To turn off, press and hold the Power button. Once off, turn on again by pressing the Power
again.
2021-03-12 QuickQ v6 11

Chapter 4. Setting Up Your Show
To set up a new show in 3 steps:
•Start a New Show File.
•Patch the Fixtures.
•Create the Layout.
Start a New Show File
Open the Files Window ›Files.
Save your old show first! Use the [ Save Show ]or, to save to a different
name use [ Save Show As ]. We also recommend backing up to a USB Drive.
Insert a USB drive and use [ Backup Show to USB ].
In the Files Window, Press [ New Show ]. This clears the current show file from active
memory – saved shows still remain stored on the console storage drive if you have saved
them and can be reloaded using [ Load Show ]. Confirm by selecting [ Yes ].
Once a new show has been started the console will automatically open the Patch Window.
Patch the Fixtures
"Patching" is the process to tell QuickQ consoles what fixtures you want connected to which
faders and to tell the console to use a particular file ("fixture file") to translate our commands
on the console into levels understood by the fixture. We also have to tell the console which
DMX channels the fixture expects communication on.
We do this by assigning a DMX start address on the physical fixture, picking a fixture
operating mode, and matching this during patching. This is typically done when we first set
the fixtures up, by using their onboard menu systems described in the fixture’s manual. We
also need to know which "Universe" of DMX the fixture is plugged into so we can match this
with the DMX universe ports on the console.
12 QuickQ v6 2021-03-12

Most instruments have multiple modes. When choosing to set a mode for the
physical fixture for the first time, take the time to read the fixture’s manual
and pick one that is not too complex nor too simple. One that gives you
access to the fixture features you expect to be able to control without many
that you don’t and may complicate or slow your programming.
QuickQ console software contains over 32,000 different fixture files. Product development is
so fast in the lighting industry that we update this library every day at: on the QuickQ support
page.
If your fixture is not found on the console first check the list of all available fixture files.
If a fixtures file is not yet created, please post a request on our Bugtracker System and we will
build it for you.
The console software contains the library that was current at the time the
software has created. Even if you have just updated your console software,
you should download and install today’s fixture library using the [ Update
Fixture Library ]option from the [ Files ]Window, option [ Update ].
Patching Step by Step
QuickQ guides you through steps to patch fixtures. Just follow along the steps in the Patch
Window.
First, address and assign modes on your fixtures in your lighting rig, gather the information
together, then open the Patch Window from the main menu: ›Patch.
1. Press the [ + ]button on the lower right-hand side of the Patch Window.
If you have just installed new console software or a new fixture library, the
'+' key may be showing a spinning icon. This indicates that the Fixture
Library is being unpacked. It may take as long as 15 minutes to complete,
there are a lot of files to process!
2. Find your the fixtures you want to control by using the "Find" view.
2021-03-12 QuickQ v6 13

There are two views ‘Quick’ and ‘Find Fixtures’. ‘Quick’ will list previously
patched fixtures previous shows and simple fixtures like dimmers or RGB
LED fixtures.
Entering ‘Chauvet Mav’ would filter the library to show all fixtures
manufactured by Chauvet and in the Maverick range. Entering ‘sharpy’ for
example would show all fixtures in the library called Sharpy, for example
Clay Paky, Sharpy.
3. Select the Manufacturer, Fixture and Mode from the 3 boxes below the search box.
14 QuickQ v6 2021-03-12

4. Enter the console universe that the fixtures are connected to.
QuickQ will automatically assign the fixtures into the lowest available DMX
address. If you would like to enter a different DMX address, enter it in the
“Start Address” field.
2021-03-12 QuickQ v6 15

5. Finally, enter the quantity of this type of fixture to be patched and press the [ Patch ]
button on the lower right of the window.
If you have addressed your lighting rig sequentially, then this will save you
time as you can patch several fixtures of the same type at once. QuickQ will
automatically calculate the incremental DMX address offsets based on the
number of channels for the fixtures mode. If not, it is still possible to patch
one at a time.
RDM Auto Patch
Manual patching as above can be automated if your fixtures have RDM built in. To use RDM
Auto patch in the Patch Window select ›RDM Auto Patch.
RDM on QuickQ consoles is primarily used to detect the current lighting rig
set up (It will detect universe, address and mode of fixtures). However, when
using the RDM auto patch function QuickQ consoles will automatically
readdress any fixtures with conflicting DMX addresses. QuickQ consoles will
not change the fixtures mode. QuickQ consoles do not allow custom setting of
fixture addresses and modes via RDM.
Advanced Patching Features
16 QuickQ v6 2021-03-12
Table of contents
Other ChamSys Controllers manuals
Popular Controllers manuals by other brands
RenewAire
RenewAire HE Series Installation, operation and maintenance manual
Greenheck
Greenheck 331-2976 Installation, operation and maintenance
Mi-Light
Mi-Light MiBOXER RGB-MZ manual
SMSC
SMSC USB464 datasheet
VS LIGHTING SOLUTIONS
VS LIGHTING SOLUTIONS Blu2Light MultiSensor XXL quick start guide
TSI Instruments
TSI Instruments PRESSURA 8631-CRM Operation and service manual
