Channel Master 1007IFD User manual

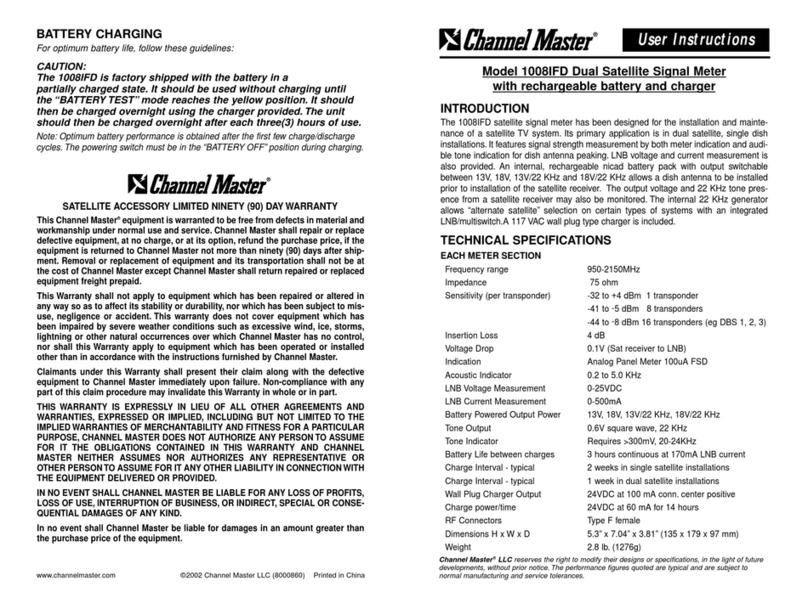
Model 1007IFD Satellite Signal Meter
with rechargeable battery and charger
INTRODUCTION
The 1007IFD satellite signal meter has been designed for the installation and
maintenance of a satellite TV system. It features signal strength measurement by
both meter indication and audible tone indication for dish antenna peaking.
LNB
voltage and current measurement is also provided. An internal,
rechargeable
nicad battery pack with output switchable between 13V, 18V, 13V/22KHz and
18V/22KHz allows a dish antenna to be installed prior to installation of the
satellite receiver. The output voltage and 22KHz tone presence from a satellite
receiver may also be monitored. The internal 22KHz generator allows “alternate
satellite”selection on certain types of systems with an integrated LNB/multiswitch.
A 117 VAC wall plug type charger is included.
TECHNICAL SPECIFICATIONS
Frequency range 950-2150MHz
Impedance 75 ohm
Sensitivity (per transponder) -32 to +4 dBm 1 transponder
-41 to -5 dBm 8 transponders
-44 to -8 dBm 16 transponders
Insertion Loss 4dB
Indication Analog Panel Meter 100uA FSD
Acoustic Indicator 0.2 to 5.0KHz
LNB Voltage Measurement 0-25VDC
LNB Current Measurement 0-500mA
Nicad Battery Pack Output 13V, 18V, 13V/22KHz, 18V/22KHz
Tone Output 0.6V square wave, 22KHz
Tone Indicator Requires >300mV, 18-24KHz
Battery Life 3 hours between charges at 170 mA LNB current
Wall Plug Charger Output 24VDC at 100 mA conn. center positive
Charge power/time 24VDC at 60 mA for 12 hours
RF Connectors Type F female
Dimensions H x W x D 3.5” x 6.0” x 4.5” (89 x 152 x 114 mm)
Weight 36 oz. (1032g)
This Channel Master equipment is warranted to be free from defects in
material and workmanship under normal use and service.Channel Master
shall repair or replace defective equipment, at no charge, or at its option,
refund the purchase price, if the equipment is returned to Channel Master
not more than ninety (90) days after shipment.Removal or replacement of
equipment and its transportation shall not be at the cost of Channel
Master except Channel Master shall return repaired or replaced
equipment freight prepaid.
This Warranty shall not apply to equipment which has been repaired or
altered in any way so as to affect its stability or durability, nor which has
been subject to misuse, negligence or accident. This warranty does not
cover equipment which has been impaired by severe weather conditions
such as excessive wind, ice, storms, lightning or other natural occurrences
over which Channel Master has no control, nor shall this Warranty apply
to equipment which has been operated or installed other than in accor-
dance with the instructions furnished by Channel Master.
Claimants under this Warranty shall present their claim along with the
defective equipment to Channel Master immediately upon failure. Non-
compliance with any part of this claim procedure may invalidate this
Warranty in whole or in part.
This warranty is expressly in lieu of all other agreements and
warranties, expressed or implied, including but not limited to the
implied warranties of merchantability and fitness for a particular
purpose, Channel Master does not authorize any person to assume
for it the obligations contained in this warranty and Channel Master
neither assumes nor authorizes any representative or other person
to assume for it any other liability in connection with the equipment
delivered or provided.
In no event shall Channel Master be liable for any loss of profits, loss
of use, interruption of business, or indirect, special or consequential
damages of any kind.
In no event shall Channel Master be liable for damages in an amount
greater than the purchase price of the equipment.
SATELLITE ACCESSORY
LIMITED NINETY (90) DAY WARRANTY
Channel Master®LLC reserves the right to modify their designs or specifications, in the light of future
developments, without prior notice.The performance figures quoted are typical and are subject to
normal manufacturing and service tolerances.
User Instructions
©2002 Channel Master LLC (8000865) Printed in China
www.channelmaster.com

GAIN SAT Rx
LNB 30 FEET MAX
SAT RECEIVER
IF INPUT
GAIN SAT Rx
LNB 30 FEET MAX
OPERATION
1) Powering by Satellite Receiver or Internal Battery
This switch selects between powering the meter from the satellite receiver and
simultaneously monitoring its LNB voltage and tone presence; or, powering
the meter from the internal nicad battery with the ability to generate a 22KHz
tone when required.
Note: Leave in the “BATTERY OFF” position so as not to drain the
battery when:
a.The meter is not in use.
b.The battery is being charged.
2) Battery Check
Verify the condition of the battery by pressing: “BATTERY POWERED”plus
“18V”plus “V”. If the indication is “recharge” or in the yellow position, it will
be necessary to recharge the unit before use with the internal battery is
possible.A further battery test should be made under load (with the LNB
connected). It is recommended that the unit is charged overnight after
approximately three (3) hours use. Charging with the 24VDC source as
supplied is recommended. Note the DC power input jack is center positive.
3) Wiring Diagram
A short cable should be used between the LNB and meter. Ensure the wiring
is completed before the satellite meter or receiver are switched on. Be careful
to avoid short circuits when the coaxial cables are connected or disconnected.
a. LNB powered from satellite receiver.
CAUTION! To prevent reverse powering the satellite receiver, never
connect the satellite receiver to the meter’s LNB connector or
damage to the satellite receiver may result.
b. LNB powered from built-in battery.
4) 13/18V Selection
This button only functions in the battery powered mode. Press the13/18V
switch to select the desired LNB voltage.
Note: Avoid using the 13V position for extended periods.The 18V position
provides cooler operation.
5) 0/22KHz Selection
This button only functions in the battery powered mode.The 22KHz mode must
only be used with certain kinds of integrated LNB/multiswitch to select the
“alternate satellite” where direct access to the LNB is not possible.
Note:The instantaneous voltage at the “trough” of the 22KHz waveform will be
0.3V lower than the indicated voltage.
The presence of a 22KHz tone from either the satellite receiver or internal
generator is indicated by the 22KHz LED.
6) LNB Voltage Measurement
Press the “V” switch. It indicates the DC voltage supplied to the LNB.
Note:The 13V and 18V LEDs provide a further indication of LNB voltage.
The LNB voltage is greater than 15V when the 18V LED glows and less than
15V when the 13V LED glows.
7) LNB Current Measurement
Press the “mA” switch. It indicates the DC current supplied to the LNB.
8) Antenna Peaking
Coarse align the antenna using instructions supplied with your system. After
switching on, press the “level” (and tone switch if required).Adjust the dish
azimuth and elevation for maximum meter indication or highest pitch tone.
Use the gain control to maintain 80-100% of full scale deflection where meter
resolution is optimum.
CAUTION! Note the LNB volts, LNB current and signal level switches
are interlocked. Never attempt to press more than one of these
switches in at the same time or damage to the meter may result.
BATTERY CHARGING
For optimum battery life, follow these guidelines:
CAUTION! The 1007IFD is factory shipped with the battery in a
partially charged state. It should be used without charging until the
“BATTERY TEST”mode reaches the yellow position. It should then
be charged overnight using the charger provided.The unit should
then be charged overnight after each three(3) hours of use.
Note: Optimum battery performance is obtained after the first few
charge/discharge cycles.The powering switch must be in the “BATTERY OFF”
position during charging.
Other Channel Master Measuring Instrument manuals


