24”
WARNING
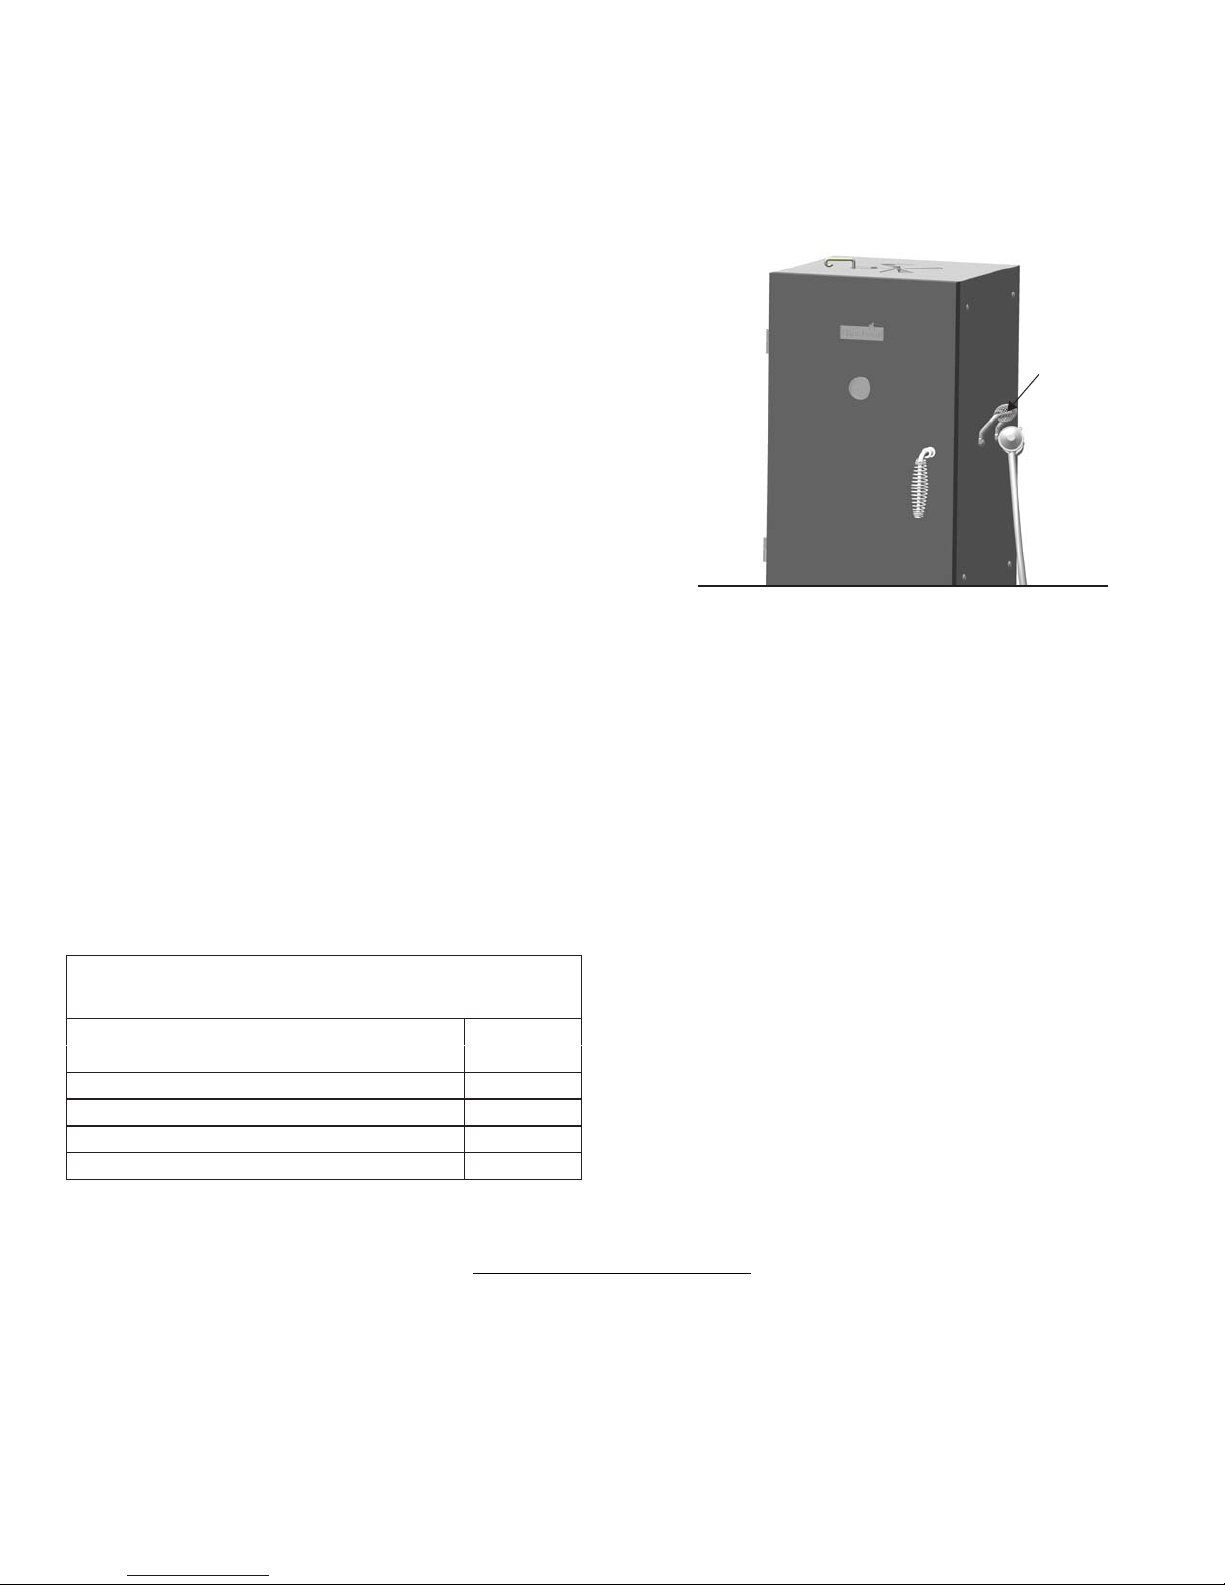
3 ft.
For Safe Use of Your smoker and to Avoid Serious
Injury:
• The use of alcohol, prescription or non-prescription
drugs may impair the consumer's ability to properly
assemble or safely operate the appliance.
• When cooking, the appliance must be on a level, stable
noncombustible surface in an area clear of combustible
material. An asphalt surface (blacktop) may not be
acceptable for this purpose.
• Do not leave appliance unattended. Keep children and
pets away from the appliance at all times.
• Do not place empty cooking vessel on the appliance
while in operation. Use caution when placing anything in
cooking vessel while the appliance is in operation.
• Do not move the appliance when in use. Allow the
cooking vessel to cool to 115°F (45°C) before moving or
storing.
• This appliance is not intended for and should never be
used as a heater.
• This appliance will be hot during and after use. Use
insulated oven mitts or gloves and long-handled
barbecue utensils for protection from hot surfaces or
splatter from cooking liquids.
• Keep appliance area clear and free from materials that
burn.
• Keep appliance area clear and free from combustible
materials, gasoline and other flammable vapors and
liquids.
• Keep fuel supply hose away from any heated surfaces.
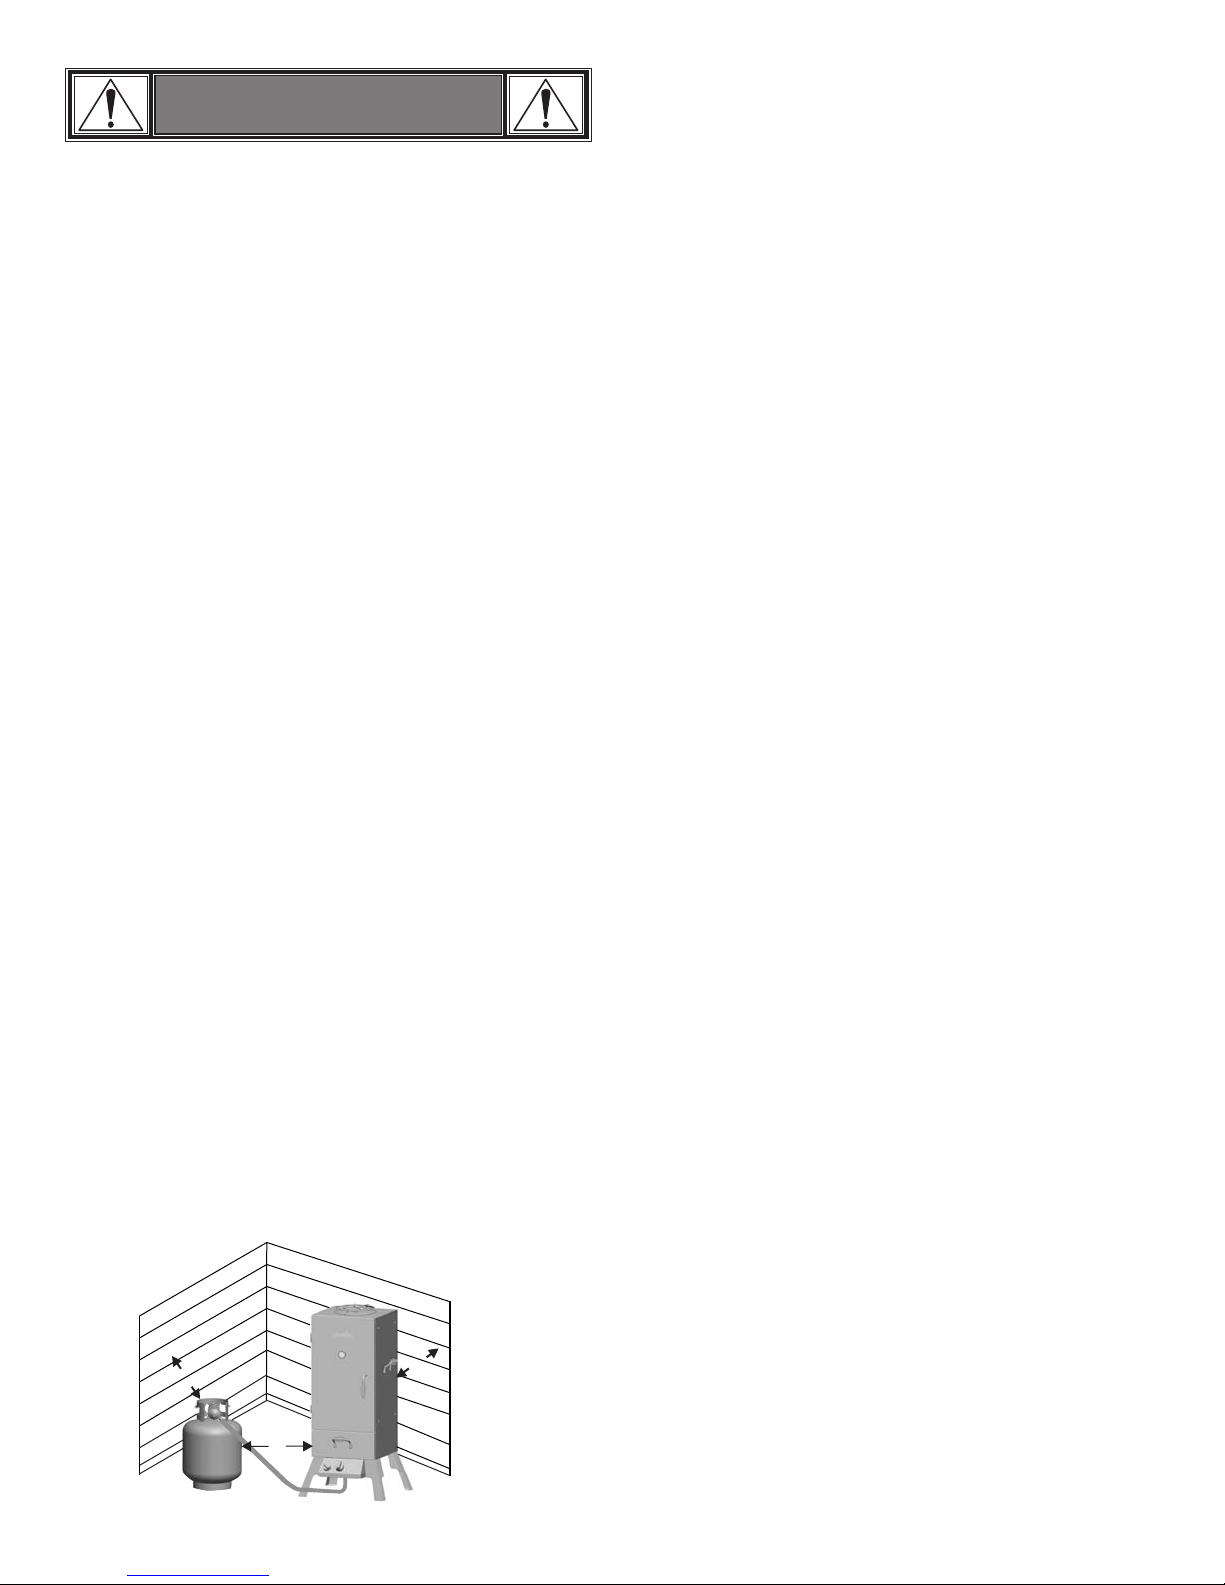
• Use only in well-ventilated space. NEVER use appliance
in enclosed space such as carport, garage, porch,
covered patio, or under an overhead structure of any
kind.
• Use appliance at least 3 ft. from any wall or surface.
Maintain 10 ft. clearance to objects that can catch fire or
sources of ignition such as pilot lights on water heaters,
live electrical appliances, etc.
• Apartment Dwellers:
Check with management to learn the requirements and
fire codes for using an LP gas appliance in your
apartment complex. If allowed, use outside on the ground
floor with a three (3) foot clearance from walls or rails. Do
not use on or under balconies.
• NEVER attempt to light burner with any type of
closed cover . A buildup of non-ignited gas inside a
closed appliance is hazardous.
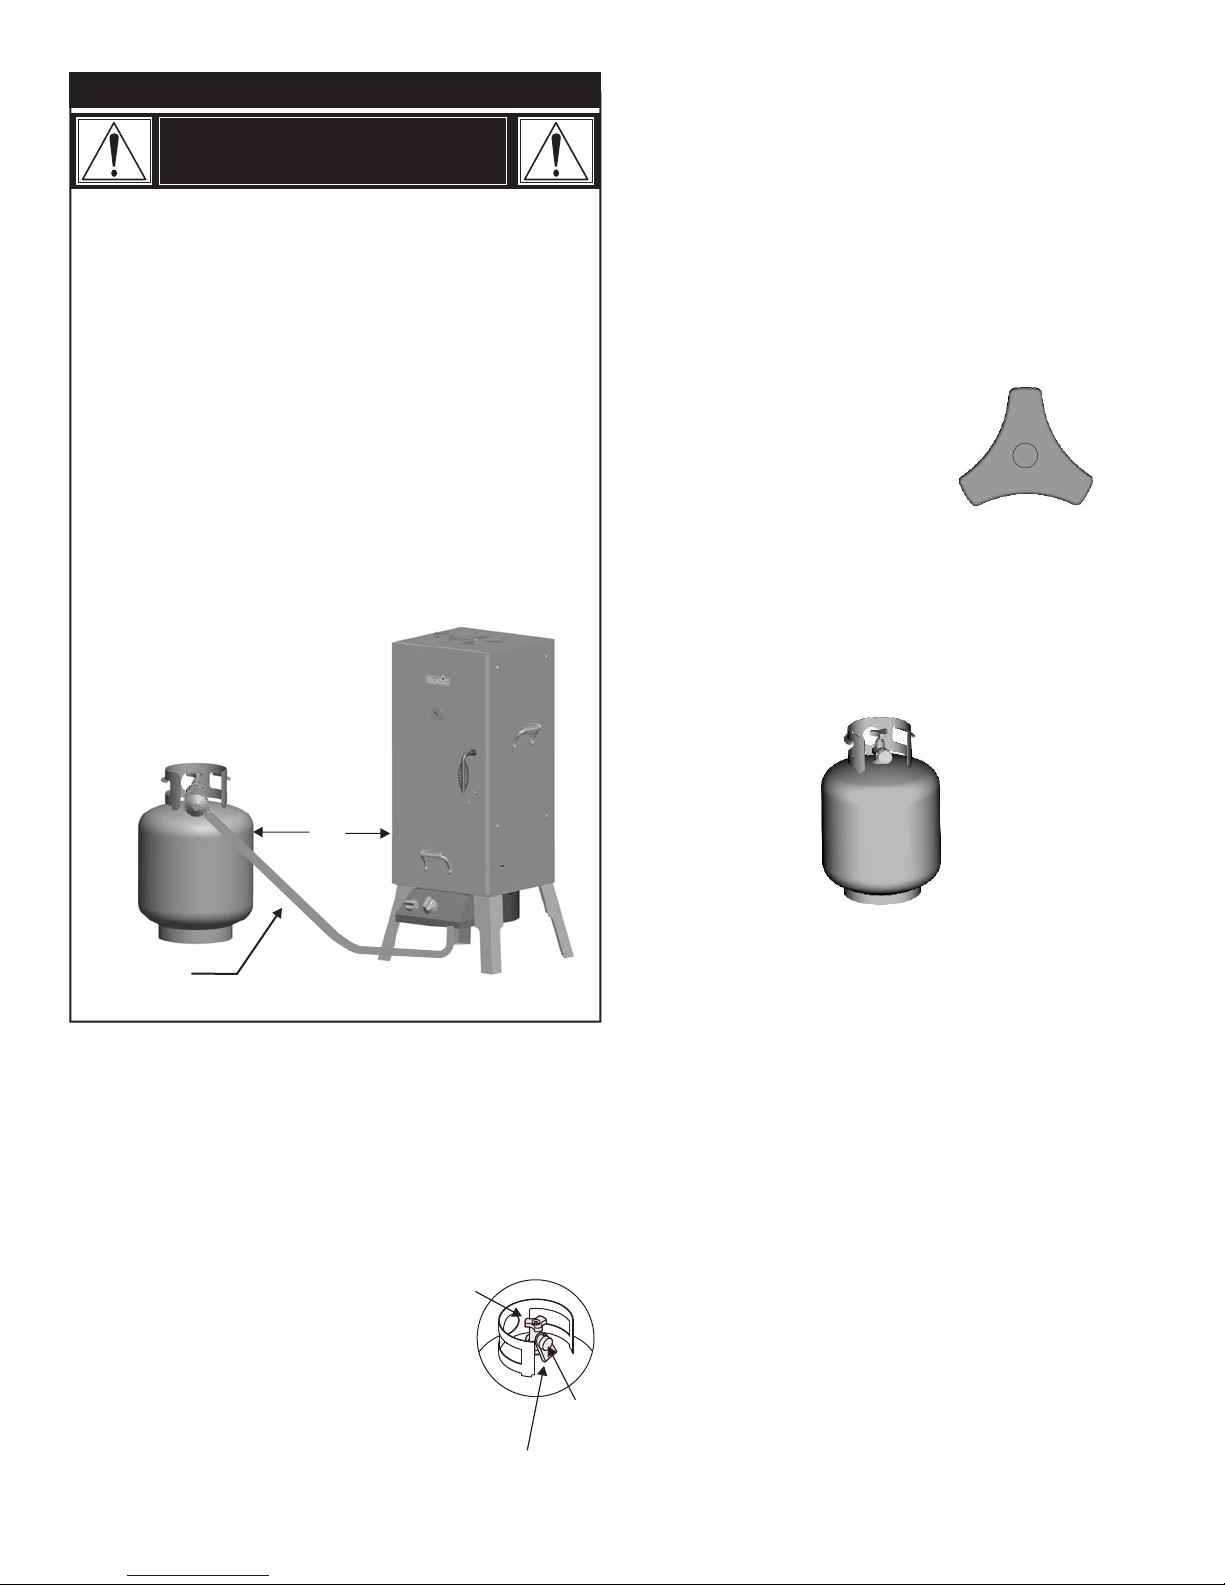
• Never operate appliance with LP cylinder out of
correct position specified in assembly instructions.
• Always close LP cylinder valve and remove coupling
nut before moving LP cylinder from specified
operation position.
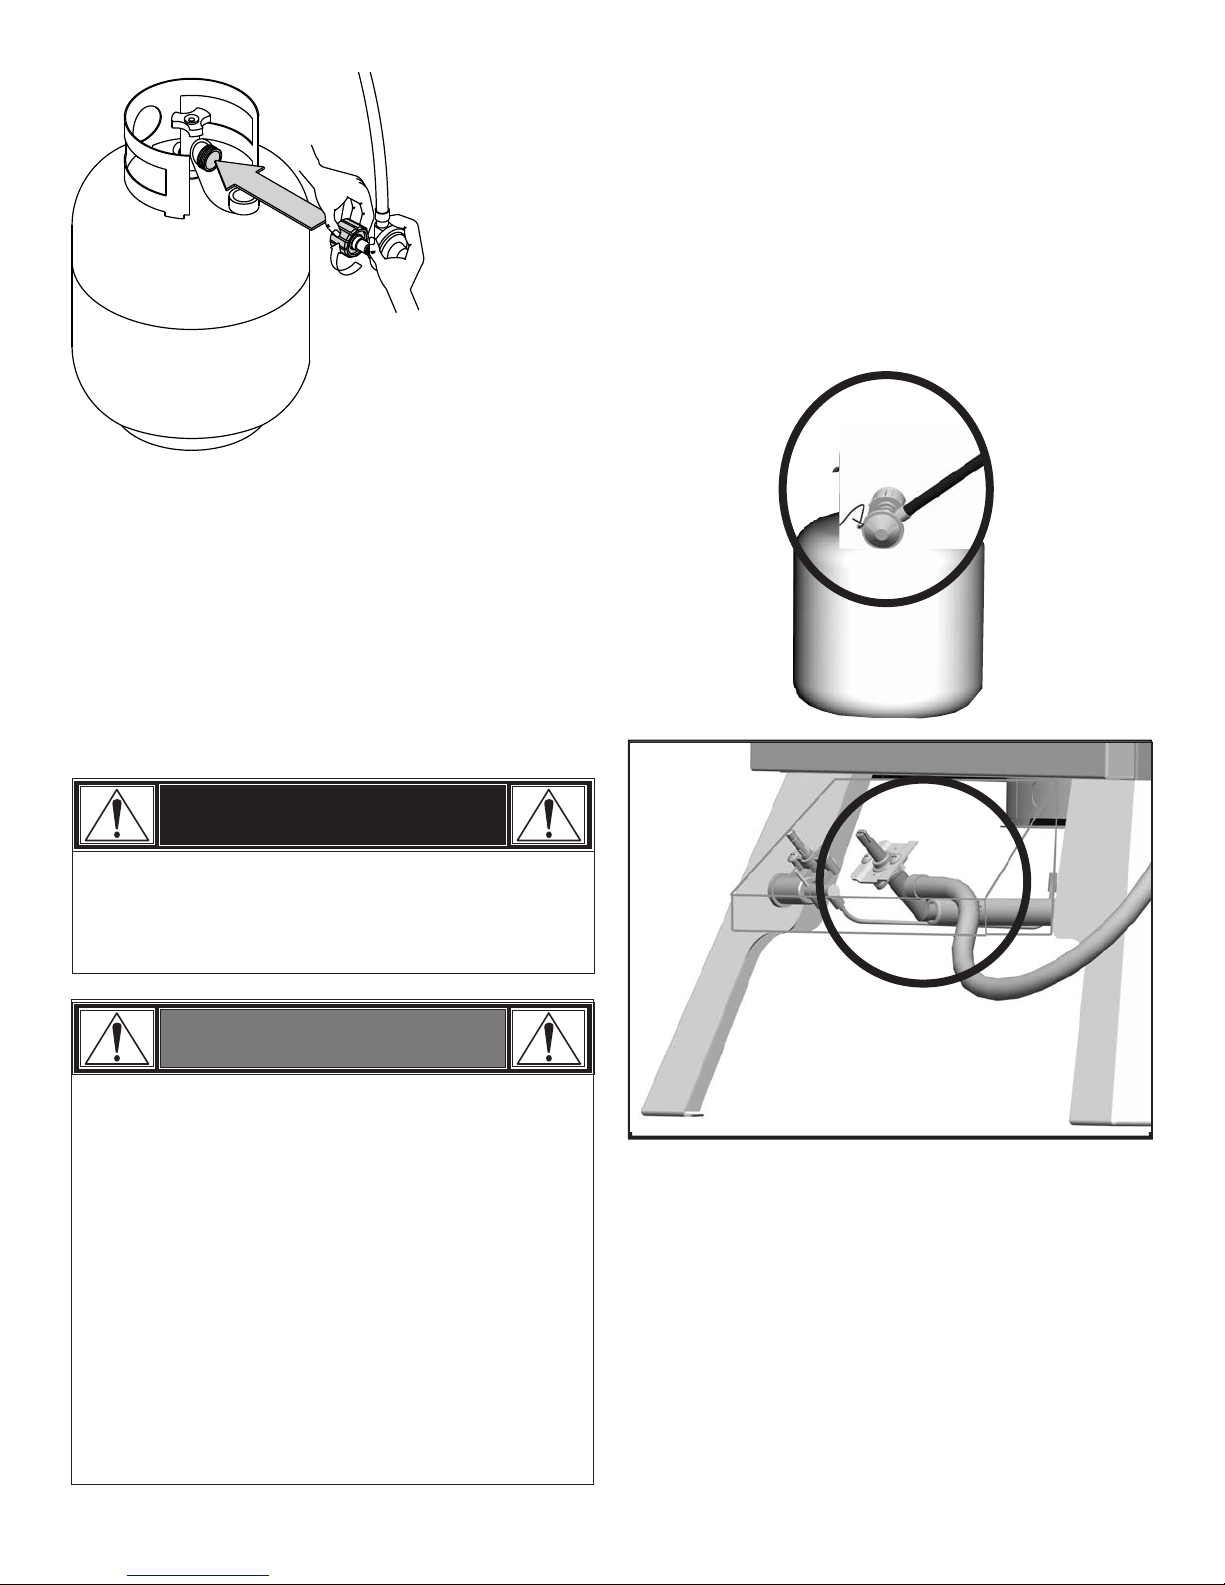
Safety Tips
• Before opening LP cylinder valve, check the coupling nut for
tightness.
• When appliance is not in use, turn off control knob and LP
cylinder valve.
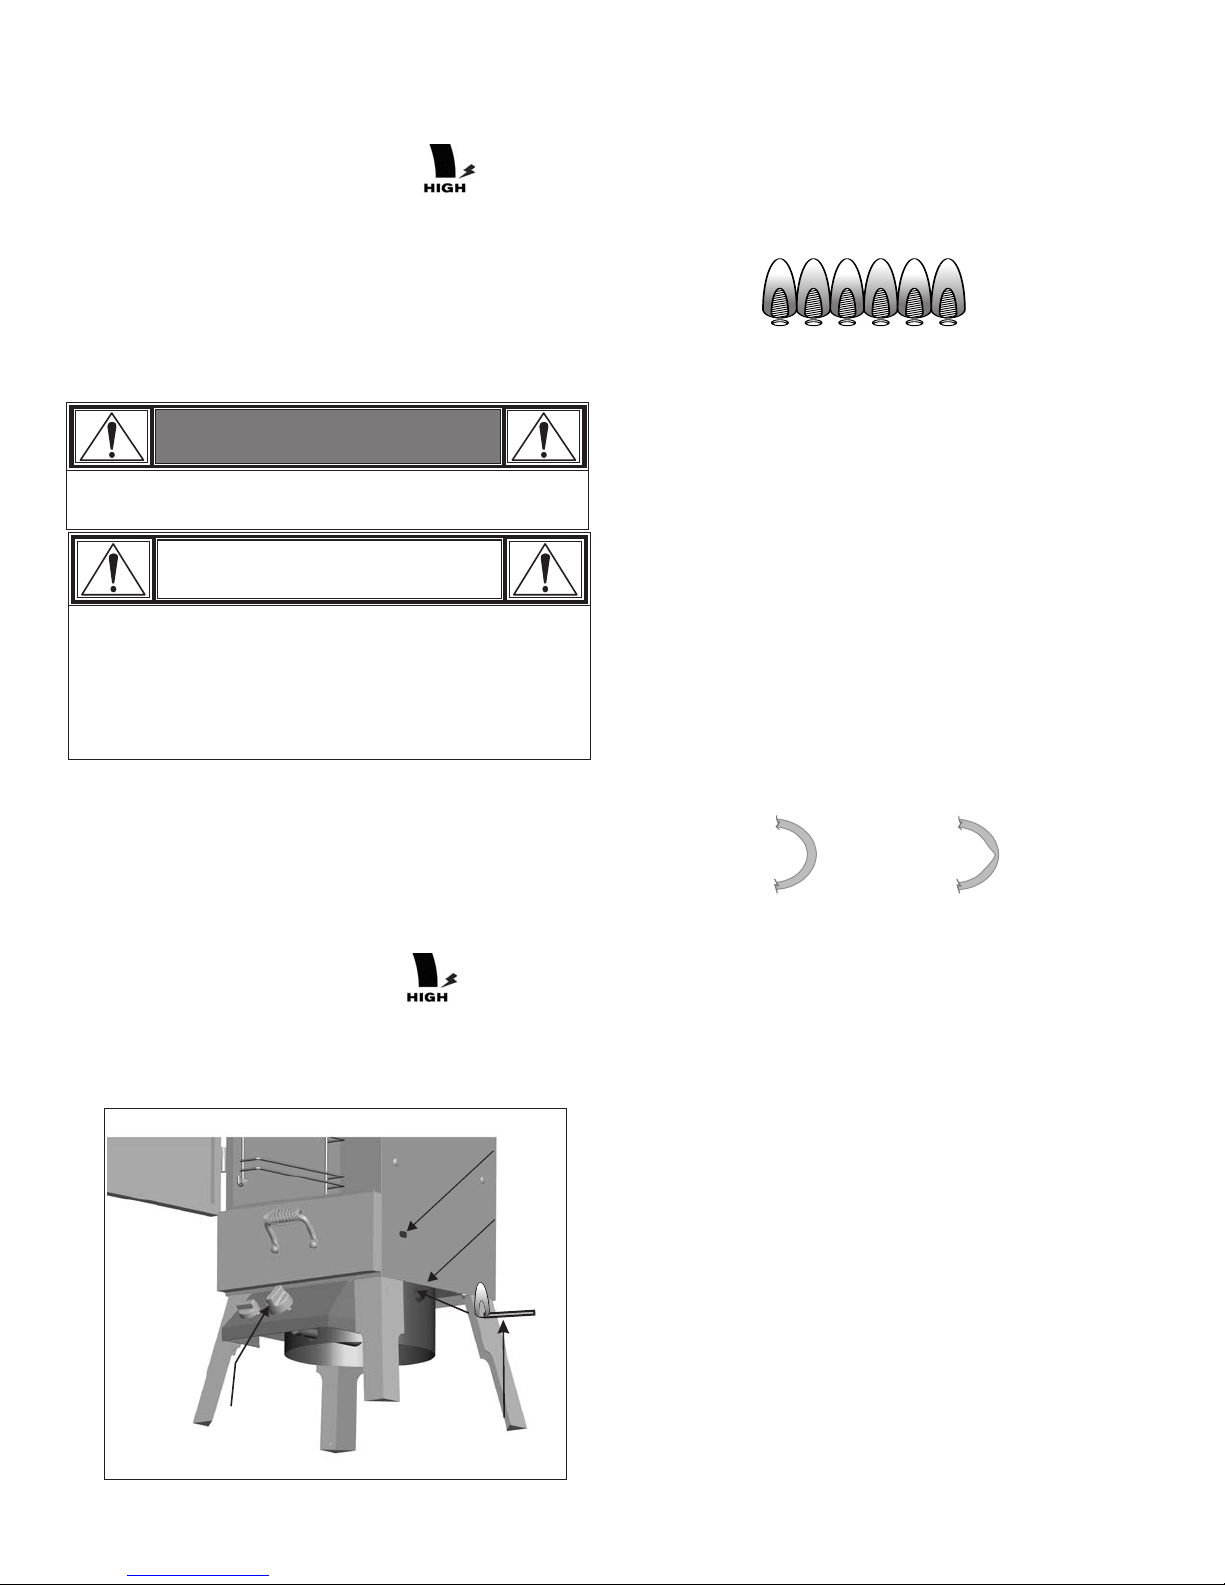
• Smoker Chamber door should be open while attempting
to light the burner.
• The grease tray must be inserted into appliance and
emptied after each use. Do not remove grease tray until
appliance has completely cooled.
• If you notice grease or other hot material dripping from
appliance onto valve, hose or regulator, turn off gas
supply at once. Determine the cause, correct it, then
clean and inspect valve, hose and regulator before
continuing. Perform a leak test.
• Do not store objects or materials under the appliance
enclosure that would block the flow of combustion air to
the underside of either the control panel or the firebox
bowl.
• The regulator may make a humming or whistling noise
during operation. This will not affect safety or use of grill.
• If you have an appliance problem see the
"Troubleshooting Section".
• If the regulator frosts, turn off appliance and LP cylinder
valve immediately. This indicates a problem with the
cylinder and it should not be used on any product. Return
to supplier!
• Clean grill often, preferably after each cookout. If a bristle
brush is used to clean any of the grill cooking surfaces,
ensure no loose bristles remain on cooking surfaces prior
to grilling. It is not recommended to clean cooking
surfaces while grill is hot.
3 ft.