Charles CMPH-8500 Series User manual

LT-CMPH-85
2nd Printing, February 27, 2017
©Copyright 2017 Charles Industries, Ltd. All Rights reserved. Printed in the United States of America.
Availability of features and technical specifications herein are subject to change without notice.
Charles is a registered trademark of Charles Industries.
Page 1 of 4
CMPH-8500 Series Enclosures
General Description and Installation
1. GENERALINTRODUCTION.............................................................................................1
1.1 Document Purpose..............................................................................1
1.2 Product Purpose .................................................................................1
1.3 Product Mounting and Location........................................................1
2. PRODUCTDESCRIPTION...................................................................................................1
3. INSTALLATION.........................................................................................................................2
3.1 Inspecting the Product........................................................................2
3.2Following and Using Safety Precautions..........................................2
3.3 Obtaining Tools and Equipment........................................................2
3.4 Preparing the Installation Site...........................................................3
3.5 Lifting the Enclosure...........................................................................3
3.6 Installing the Enclosure In-Ground...................................................3
3.7 Install the Appropriate Customer Equipment...................................4
4. CABLING........................................................................................................................................4
5. TECHNICALASSISTANCEANDREPAIRSERVICE.........................................4
6. WARRANTY&CUSTOMERSERVICE......................................................................4
7. ACCESSORIES............................................................................................................................4
1. GENERAL INTRODUCTION
1.1 Document Purpose
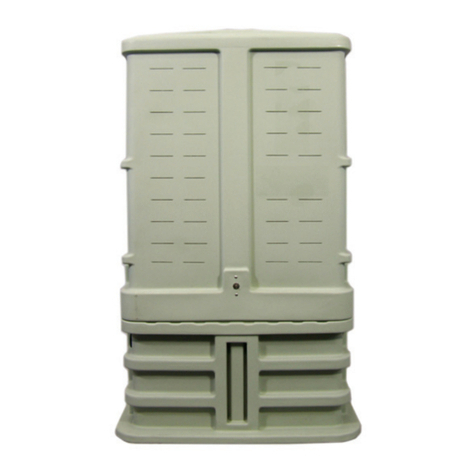
This document provides general information for the CMPH-8500 Series of multi-purpose enclosures. Refer to Table 1 for base model
specific configurations and Figure 1 for a closed front view of the enclosure.
-NOTE-
Hereafter, the CMPH-8500 enclosures will be referred to as the “enclosures.”
1.2 Product Purpose
These enclosures consist of a protective high density polyethylene (HDPE) housing and are intended for in-ground mounting (with
optional mounting stakes) applications to house copper splices, fiber closure and fiber cable slack or storage of other bulk equipment.
1.3 Product Mounting and Location
These enclosures are suitable for outside plant-type (OSP) locations. These outdoor, HDPE housings are U/V stabilized for long life. The
installer routes the copper or fiber cabling into the enclosure, dressing and connectorizing per company practice. Detailed mounting and
installation information is covered in Section 3.
2. PRODUCT DESCRIPTION
This practice covers the base models of the large copper splice and fiber storage enclosures:
CMPH-8500N
Copper splice storage application
CMPH-850FN
Fiber closure and fiber cable storage application
Physical dimensions of the enclosures are shown in Figure 2 and Table 1. The following items are common to all units:
High-density polyethylene construction
Two-piece dome system with two captive threaded locking bolts, via CAN wrench / 216-style tool
Corrugated one-piece in-ground base with molded-in ground line
Six position bond plate with ground lug
Smooth label placement area
Accepts two universal mounting stakes (mounting stakes sold separately)
Figure 1 Closed Front View of a
CMPH-8500 Enclosure

LT-CMPH-85
Page 2 of 4
Figure 2 Dimensions (in inches)
Part Number
Width
(W)
Depth
(D)
Height Overall
(H1)
Height Ground Line
(H2)
Weight
CMPH-8500 Series
39”
28”
56”
46”
96 lbs.
Table 1 Exterior Dimensions (in inches)
3. INSTALLATION
3.1 Inspecting the Product
The enclosure is typically shipped upright on a skid. Unpack the unit, remove and dispose of the packaging material.
-INSPECTION NOTE-
Visually inspect the unit for damages prior to installation. If the enclosure was damaged in transit, immediately report the extent of the
damage to the transportation company.
3.2 Following and Using Safety Precautions
Read the following site and safety tips, cautions and warnings, then proceed with the paragraphs that follow.
For installation, follow all National Electrical Codes (NEC) ANSI/NFPA 70, local, environmental, workplace, and company
codes, safety procedures, and practices.
Read all instructions, warnings and cautions on the equipment and in the documentation shipped with the product.
Always connect ground connections first.
In windy conditions, be sure to cautiously remove the domes as they may be caught by the wind, causing physical injury to user
or adjacent equipment.
3.3 Obtaining Tools and Equipment
Obtain the following recommended or needed items for installing the enclosure for in-ground mounting.
Sufficient length of cables
Cable preparation tools
Wire strippers and connector installation tools
Protective and/or insulated work gloves
Safety glasses
Tape measure

LT-CMPH-85
Page 3 of 4
Marking utensil
#6 ground wire or rod and earth ground materials
Bond straps
Any exterior cable strain relief, per company practice
Socket wrenches, slotted and Phillips screwdrivers
Assorted cable ties
Can wrench (216 tool)
Level
3.4 Preparing the Installation Site
Observe the following site preparation recommendations:
Leave adequate horizontal and vertical space between multiple installationsto allow for proper cable access, as well as enough
room to remove dome.
The site must meet minimal personnel and equipment safety requirements.
The distance from the cable entry point should be consistent with local installation practices.
Run all cable facilities to the site.
3.5 Lifting the Enclosure
The enclosure is manufactured from HPDE with aluminum internal brackets. It is designed with a 2-section dome for reduced lifting
weight. In most instances, one individual should be able to lift and move the individual enclosure components at the job site.
3.6 Installing the Enclosure In-Ground
-NOTE-
When installed in-ground, confirm appropriate locate service has been completed before digging.
The enclosure is designed to be direct buried using two mounting stakes (Figure 3).
1. Review installation site map and be aware of any locate flags or markers before beginning excavation.
2. Mark the location of the enclosure, approximately 4” larger than the overall base. Remove the top layer of the soil.
3. Being careful not to damage the cables or conduits, using the ground line located on the enclosure base with the expected finished
grade, dig straight down to the proper depth +1”. Dig additional depth at location of mounting stakes.
4. Install pea rock (user supplied) to the depth of ~1” in the excavated hole and tamp level. Be careful not be fill the stake holes with
rock. Temporarily place the enclosure into position, checking to ensure the enclosure is level in two directions (front to back and
side to side). Add additional pea rock until level.
5. Install two enclosure stakes (part number detailed in Table 2) using the mounting hardware provided with the stake or enclosure.
The stake should be positioned against the inside of the u-support uprights of the enclosure with the bolt’s threads facing the
inside.
6. Lift the enclosure into position, over installed cables. Using a level, confirm the enclosure is level in both directions. If the
enclosure is not level, remove the enclosure and add backfill to the hole, tamping down to prevent settling. Repeat until level and
plumb.
7. Ensure the cable conduits are sealed/plugged. Alternate backfilling the outside of the excavated area and the inside of the area
with soil, tamping at 2” increments.
8. Backfill the inside of the base with soil to between the 2nd are 3rd
base rib. Spread the RED plastic moisture barrier sheet (included with
enclosure) on top of the soil, slitting the sheet to allow access for
cables and conduits. Make sure the plastic sheet covers the entire
area. This sheet prevents additional moisture from building up in the
enclosure.
9. Finish by adding ~3” to 4” of pea rock (gravel).
Figure 3 Interior Base Backfill

LT-CMPH-85
Page 4 of 4
3.7 Install the Appropriate Customer Equipment
Figures 4 and 5 display the internal components of the standard enclosure configurations. Follow company practices for the type of
installation to be performed.
4. CABLING
Follow company-approved procedures for all copper cable preparation and splicing.
5. TECHNICAL ASSISTANCE AND REPAIR SERVICE
For questions on product repair or if technical assistance is required, contact Charles Technical Support at:
847-806-8500
800−607−8500
847−806−8556 (FAX)
techserv@charlesindustries.com (email)
http://www.charlesindustries.com/main/tech_support.htm
6. WARRANTY & CUSTOMER SERVICE
Charles Industries, Ltd. offers a one-year warranty on the CUBE product. The Charles warranty is limited to the operation of the CUBE
hardware as described in this documentation and does not cover equipment which may be integrated by a third party. The terms and
conditions applicable to any specific sale of product shall be defined in the resulting sales contract. For questions on warranty or other
customer service assistance, contact your Charles Customer Service Representative at:
847-806-6300
847−806−6653 (FAX)
mktserv@charlesindustries.com (email)
http://www.charlesindustries.com/main/telecom_sales_support.htm
7. ACCESSORIES
Category
Charles Part Number
Direct Bury Installation:
Mounting Stake, includes mounting hardware
UMS42-STD (Order 2 pieces per enclosure)
Table 2 Accessories
Figure 4 CMPH-8500N Copper Splice
Internal Components
Figure 5 CMPH-850FN Fiber Closure
and Fiber Cable Slack Storage Internal
Components
Other Charles Enclosure manuals
