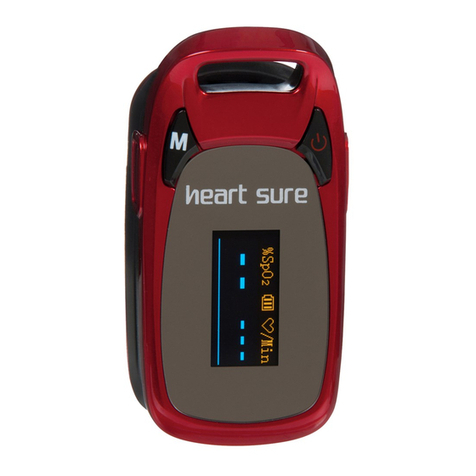
Charmcare ACCURO User manual

Pulse Oximeter
ACCURO
User Guide
Charmcare Co., Ltd.
Pulse Oximeter ACCURO www.charmcare.com
-2- OP-EN-06

Pulse Oximeter ACCURO www.charmcare.com
-3- OP-EN-06
Table of Contents
Indications for use statement 6
Warranty Period 6
Battery Replacement 7
Contact Us 7
Definition of Terms 8
Proper En ironments for the Product 9
Electrical Safety 10
Maintenance and Cleaning 11
Post-Use Storage and Management
12
Classifications 12
Part 1 Product Summary 13
Parts 13
Nomenclature of the Parts 14
Symbols 15
Part 2 Product Installation 16
Caution When Installing 16
Connecting the Power and Grounding the Product 16
Installing the Stand 17
Part 3 Using the Product 19
Preparations Before Use 19
Pulse Oximeter ACCURO www.charmcare.com
-4- OP-EN-06
Operations 20
The Screen 21
SpO2/PR Data Area 22
System Status Area 24
Using the Buttons and Alarm Lamp 25
Using Power 27
Part 4 Measuring the Sp 2 28
Attaching the SpO2 Probe 28
Measuring the SpO2 30
Part 5 Swich Screen Mode 31
Swich Screen Mode 31
Part 6 Using the SETUP Menu 33
Enter the SETUP Menu 33
Setup CONFIG 34
Setup LANGUAGE 35
Setup ALARM 36
Setup ALARM Limits 37
Setup PATIENT 39
Setup Current Time 40
Part 7 Save and Confirm TREND Data 41
Sa e Measured Data 41
Check TREND Screen 41

Pulse Oximeter ACCURO www.charmcare.com
-5- OP-EN-06
Part 8 Alarm 45
Alarm Categories 45
Alarm Le els 45
Alarm Indication 46
Pause Alarm Sur eillance and Sound 47
Verifying Visual and Audible Alarm Indication 50
Part 9 Using the Printer 51
Connecting the Printer 51
Printing 52
Adding Printer Paper 53
Part 10 Basic Troubleshooting 54
Part 11 Product Specifications 55
Attachment 1 Default Value 58
Attachment 2 Alarm Message 60
Pulse Oximeter ACCURO www.charmcare.com
-6- OP-EN-06
Part 0 Before You Begin
Thank you for purchasing the ACCURO pulse oximeter. For the safe operation of this de ice, it
is recommended that you read this user’s manual thoroughly before using.
Charmcare Tabletop Pulse Oximeter is portable de ice indicated for use in non-in asi ely
measuring and displaying functional oxygen saturation of arterial hemoglobin (SpO2) and
pulse rate of adult and pediatric patients ia finger in hospitals, medical facilities, and subacute
en ironments. Charmcare Tabletop Pulse Oximeter is intended for spot-checking and / or
continuous monitoring of patients, the sensor of de ice is reusable or disposable.
To obtain information about a warranty, if any, for this product, contact your local Charm-care
representati es.
This product has been manufactured and inspected following the strict quality assurance guidelines
of charmcare.
Refer to the Economic Planning Board’s “Regulations Regarding Consumer Compensation” for
more information on conditions for product repairs and exchanges.
Product malfunctions occurring from regular use shall be repaired for free at the charmcare ser ice
center during the term of the warranty period.
During the term of the warranty period, report all problems with the product to charmcare by
including the model no., the de ice no., date of purchase and a detailed description of the error.
Manufacturer and/or the store where the product was purchased do not assume any responsibility
Warranty
Indications for use statement

Pulse Oximeter ACCURO www.charmcare.com
- - OP-EN-06
for any and/or all problems resulting from improper use or improper storage of the product.
If the monitor has not been used for a long period of time, the batter will need charging. To charge
the battery, contact your local Charmcare representati es.
Charmcare recommends that the li-ion battery be replaced at 1-year inter als. Refer to the monitor
ser ice manual for batter replacement and general ser ice instruction. Follow local go erning
ordinances and recycling plans regarding disposal or recycling of ther battery and other de ice
components.
Please contact us for better ser ice and products.
Charmcare ser ice is always open.
Need to purchase
products or parts?
charmcare Co., Ltd.
Tel : +82-2-862-5052 Fax : +82-2-862-5065
Need service or repairs? Charmcare Co., Ltd.
Tel : +82-2-862-5052, Fax : +82-2-862-5065
Need technical advice? Charmcare Co., Ltd.
Tel : +82-2-862-5052, Fax : +82-2-862-5065
Website HTTP://www.charmcare.com
Contact Us
Battery Replacement
Pulse Oximeter ACCURO www.charmcare.com
-8- OP-EN-06
Certain parts of this manual ha e been highlighted. Users are ad ised to pay close
attention to warnings and cautions.
Manufacturer and/or the store where the product was purchased do not assume any
responsibility for any and/or all problems resulting from improper use or improper storage
of the product.
Warning
“Warning” is used to refer to factors, which, when ignored, may result in se ere
and/or fatal injuries and property damage.
Caution
“Caution” is used to refer to factors, which, when ignored, may result in moderate,
but non-life-threatening, injuries.
Note
“Note” is used to highlight factors that are not dangerous, but should be paid close
attention to during installation, use, and maintenance.
Definition of Terms

Pulse Oximeter ACCURO www.charmcare.com
-9- OP-EN-06
Do not use or store the product in the following conditions:
Exposure to
Humidity and/or
Moisture
Do not use the
product with wet
hands.
Do not store or
place the product in
direct sunlight.
Do not store or
place the product in
areas where
temperature
changes are
drastic.
Do not place the
product near heat
sources.
Do not store or
place the product in
ery humid areas or
areas where air
circulation is a
problem.
Do not subject
product to se ere
shock and or
ibrations.
Do not store or
place the product in
places where
product is exposed
to chemicals or
flammable gas.
Keep product free
of dust and debris,
particularly metallic
objects.
Do not attempt to
disassemble the
product yourself.
CharmCare is not
liable for any
problems that may
occur should you
attempt to do so.
Do not connect the
power during
installation. This
may damage the
product.
Grip the plug when
unplugging the
product from a
power source.
Proper En ironments for the Product
Pulse Oximeter ACCURO www.charmcare.com
-10- OP-EN-06
Warning
Do not use the product in high ambient light conditions(direct sunlight ).
Please check the following conditions before attempting to use the product.
Are you using the proper power source line? (100-240VAC)
Are you using the power source supplied by the manufacturer? (DC 12V)
Are all parts (power cord and optional parts) connected properly to the product?
Is the product properly grounded? (An improperly grounded product may result in
noise.)
Warning
Read and check the conditions under “Electrical Safety” before using the product.
Failure to do so may result in se ere injuries and damage to the product.
Warning
The ACCURO pulse oximeter is a prescription de ice and is to be operated by
qualified personnel only.
Caution
To pre ent noise, install the product away from generators, X-ray machines,
speakers and power cords. Proximity of the product to such equipment may result
in improper functioning of the product and lead to undesirable results. A separate
power circuit and secure grounding of the product are ery important. Sharing of a
power source with other equipment(s) may lead to undesirable results.
Electrical Safety

Pulse Oximeter ACCURO www.charmcare.com
-11- OP-EN-06
Using arious methods can clean pulse oximeter and its accessories. Please follow the
methods mentioned below to a oid unnecessary damage or contamination to the Equipment.
In the e ent that harmful (unauthorized) materials are used for cleaning, the damaged or
contaminated Equipment shall not be ser iced without charges regardless of warranty period.
Caution
Please check carefully both frame and sensor, after cleaning the Equipment, Do not
use the Equipment that is worn out or damaged.
At least once a month, clean and wipe off the frame by using the soft cloth after wetting it
with lukewarm water and alcohol. Do not use lacquer, thinner, ethylene, or oxides, which
could be harmful to the Equipment.
Make sure both cables and accessories are free of dust or contaminants, and wipe them off
with soft cloth wetted with lukewarm water(40 / 104 ), and at least once a week, clean
℃ ℃
them by using the clinical alcohol.
Do not submerge the accessories under any liquid or detergent. Also, make sure any liquid
not to penetrate into the Equipment or probe.
Caution
Do not dispose single use probe to any hazard place, Always think about
en ironmental contamination
Maintenance and Cleaning
Pulse Oximeter ACCURO www.charmcare.com
-12- OP-EN-06
After use, store the product in an area that does not exceed 85% humidity, and maintain
the temperature in the range of 0°C~ 40°C.
Do not store the product together with chemical products and/or in an area subject to gas
exposure.
A oid exposing the product directly or indirectly to heat.
Make sure to re iew the product usage instructions prior to use.
Store the product in an area where it will not come in contact with water.
Store the product in an area free of dust and/or other foreign substances.
Store the product away from direct sunlight.
Maintain the product in a safe and stable condition away from ibration and/or other
sources of shock.
If the product and/or sensor area becomes dirty, wipe it clean with rubbing alcohol and
cotton swabs, and then allow it to dry at room temperature for 30 minutes.
The ACCURO patient monitor is classified, according to IEC 60601-1 as:
Type of protection against electric shock : Class I
Degree of protection against electric shock : BF-Type
applied part
Degree of protection against harmful ingress of water :
Ordinary equipment
Post-Use Storage and Management
Classifications

Pulse Oximeter ACCURO www.charmcare.com
-13- OP-EN-06
Part 1 Product Summary
ACCURO is a pulse oximeter that measures blood oxygen saturation. Batteries may be
inserted to make the product portable for monitoring patient status on the go.
The buttons on the front panel of the product allow you to configure the de ice to suit your
needs and patient status results may be printed out on a printer.
▣
Basic Accessories
Type Quantity
SpO2 Sensor(ACCY-0A0PRB) 1
DC Power Unit 0
Power Cord 1
User’s Manual 1
▣
Optional Parts
- Battery(BTLI503465L9022S1P)
- Printer
- Printer Paper
-Pole Bracket
Parts
Pulse Oximeter ACCURO www.charmcare.com
-14- OP-EN-06
▣
Front iew
1. Probe Port 2. Display Screen
3. Buttons 4. Alarm Lamp
5. Using AC power 6. Using Battery power
▣
Rear iew
1. AC Port 2. Serial Port 3. Speaker
Nomenclature the Parts
1
2
4
5
6

Pulse Oximeter ACCURO www.charmcare.com
-15- OP-EN-06
Warning
To pre ent electric shock, keep the top co er closed and do not attempt to
disassemble the product on your own. Product should only be disabled by
authorized ser ice personnel.
Type BF
Caution
RS-232 RS-232 Port
Grounded
-
--
- +
++
+
Connect DC power
%SP 2 Oxygen saturation
DC Operated
Battery Operated
Symbols
Pulse Oximeter ACCURO www.charmcare.com
-16- OP-EN-06
Part 2 Product Installation
First-time users: Read the installation instructions thoroughly and install the product in a safe
place to ensure product longe ity.
Use the product in a place where the temperature is between 0~40
℃
and the humidity is
85%.
Make sure that the power cord is plugged in properly.
Do not plug in more than one de ice into one outlet.
Ground the product if noise de elops.
Do not use a power cord that causes noise.
The product is ery sensiti e to shock. Caution is ad ised.
Keep the product dust-free and install away from flammable materials.
Connecting the Power – Connect the power to the power port in the back of the product.
Grounding the Product – Connect the grounding line to the grounding port in the back of
the product if needed.
Warning
Use the power supply de ice supplied by the manufacturer. Failure to do so may
result in electric shock and damage to the product.
Warning
edge or points of the Product can hurt to patient and user.
Connecting the Power and Grounding the Product
Caution When Installing

Pulse Oximeter ACCURO www.charmcare.com
-1 - OP-EN-06
The product may also be mounted on a stand, which can then be attached to an IV stand.
This makes the product more portable. (*Stand is optional.)
Step 1) The product may be used horizontally or ertically. First, decide how you want the
product to be mounted. Then, insert two bolts into the holes on the stand and
tighten.
▣
REAR
Fig. Attaching the stand
Installing the Stand
Pulse Oximeter ACCURO www.charmcare.com
-18- OP-EN-06
Step 2) Mount the stand to the pole by sliding the stand onto the pole and then, turn the handle
to tighten.
Caution
The pole on which the stand is mounted should be less than 30mm
in diameter.
Do not use poles that are any thicker than this.

Pulse Oximeter ACCURO www.charmcare.com
-19- OP-EN-06
Part 3 Using the Product
This section contains information on the basic nomenclature and directions for using the
product.
Check for defects on the exterior of the SpO2 sensor(Oxygen sensor).
Check for defects on the exterior of the AC power cord, oximetry use cable.
Connect the power, oximetry use cable to the SpO2 sensor and product. (If the oximetry
use cable is not utilized, SpO2 sensor is directly connected to the product.)
Check the connection status of the cable and status of SpO2 sensor before turning the
product on and connecting the product to the patient.
Since this product uses the principle of a spectrophotometer, check if a surgery light is
located where the product is placed, and if the ray blocks the usability co er the SpO2
sensor with a opaque cloth.
Check the attachment region of the SpO2 sensor and the compatibility, and a oid certain
locations according to the status and use a SpO2 sensor that can be attached on to the
bridge of the nose or forehead.
When attaching the SpO2 sensor on to the finger, no manicure should be on the finger
nails.
For sterilization or antiseptic.cleaning is necessary for the SpO2, select the methods
shown below according to the en ironment conditions of the medical institution
equipment, and use the usage and application of the professional prefers
Preparations Before Use
Pulse Oximeter ACCURO www.charmcare.com
-20- OP-EN-06
*How to use antiseptic
․
cleaning solution
Chemical Product Method
Alcohol isopropyl alcohol Use soaked gauze.
Liquid Soap Benzalkonium Chloride 0.05 W/V%(x200 diluted)
Use soaked gauze.
Iodine po idone-iodine 0.02 W/V%(x50 diluted)
Use soaked gauze.
Glutaral C5H8O2 2 W/V%(test solution)
Use soaked gauze.
Step 1) Connect the DC power de ice on the DC power connection socket located in the back
of the product.
Step 2) Connect the SpO2 sensor to the probe connection socket located in the front of the
product.
Step 3) Press the power button.
Step 4) When all status are displayed, it is ready for measurement.
Step 5) Attach the SpO2 sensor to the finger.
Step 6) Stabilized oxygen saturation is displayed after around 10 seconds ha e past.
Operations

Pulse Oximeter ACCURO www.charmcare.com
-21- OP-EN-06
NO NAME Description
1 SpO2/PR data area Displays the measured SpO2, PR and related alues.
2 Wa eform area Displays SpO2 wa eform.
3 System status area Displays status setting data.
4 Patient Alarm area Displays the alarm message from the measured alue.
When multiple alarms occur, it shows according to
higher priority.
5 Technical Alarm area Displays the alarm message related to the system.
6 PI data area Displays measured perfusion Index.
7 Short Trend area
Displays the SpO2, PR alue sa ed during the pre ious
30 minutes on a graph.
The Screen
1
2
3
7
4 5 6
Pulse Oximeter ACCURO www.charmcare.com
-22- OP-EN-06
NO Name Description
1 Oxygen Saturation
(SpO2) reading
Displays the measured alue of SpO2. When SpO2
exceeds the alarm limit, the alue will start blinking.
2 Spo2 low alarm limit Displays the setup low alarm limit. When the SpO2 is
less than this alue, the alue will turn red.
3 Spo2 High alarm limit Displays the current set SpO2 High alarm limit alue.
When the SpO2 alue is larger or the same, the alue
will turn red.
4 Spo2 alarm status Displays the alarm watch state of SpO2.
(refer to
alarm status)
5 Pulse rate (PR) reading
Displays the measured PR alue. When the alue
exceeds the PR alarm limit, the alue will start blinking.
6 PR low alarm limit Displays the setup low alarm limit. When the measured
PR is less than this alue, the alue will turn red.
7 PR high alarm limit Displays the set PR High alarm limit. When the
SpO2/PR Data Area
8
9
4
2
3
1
10
6
7
5

Pulse Oximeter ACCURO www.charmcare.com
-23- OP-EN-06
measured PR alue is larger or the same, the alue will
turn red.
8 PR alarm status Displays the alarm watch state of PR.
(refer to alarm
status)
9 Heart beat icon Blinks when a heart beat occurs
10 Pleth bar Displays the SpO2 wa e in le el.
‘
▣
alarm status
Alarm watch state is on alarm sound is paused
alarm sound is turned off Alarm watch state is off
Note
When patient mo ing detected, SPO2/PR alues disappear and replaced by ‘---‘.
Pulse Oximeter ACCURO www.charmcare.com
-24- OP-EN-06
N Name Description
1 Battery Status Displays the battery status.
Uses AC power and battery is in charge
Uses a battery and capacity is FULL
Uses a battery and capacity is 3/4
Uses a battery and capacity is 1/2
Uses a battery and capacity is 1/4
Uses a battery and capacity is low
2 Alarm sound Status Displays the alarm souund off state.
Displays the alarm sound paused state and left
time
Displays the Alarm sound off state
3 Print Status Displays status when printing.
4 Pulse sound le el Displays the pulse souund le el setting state
5 Screen Brightness Displays the screen brightness state
6 Patient type Displays the patient mode state.
ADULT
PEDIATRIC
NEONATE
7 Real-time clock Displays the current time(hour: minute)
System Status Area
1:27
0
1
2
3
4
5
6
7

Pulse Oximeter ACCURO www.charmcare.com
-25- OP-EN-06
No.
Name Description
1 Alarm sound pause
The alarm sound pauses for the setup duration when
the alarm occurs.
2 SCREEN Changes the SCREEN mode (Refer to screen
composition)
(OrderSCREEN1->SCREEN2->SCREEN3->SCREEN4)
3 button Mo es the selected item up.
4 button Mo es the selected item down.
5 ⊳ button Decreases the selected alue in the menu screen.
Changes the heart beat sound setup in the general
screen.
6 button Increases the selected alue in the menu screen.
Using the Buttons and Alarm Lamp
1
2
3
5
9
7
6
4
8
Pulse Oximeter ACCURO www.charmcare.com
-26- OP-EN-06
Changes the screen brightness in the general screen.
7 MENU button Mo es to the SETUP menu when pressed in the
general screen.
8 Power Used when turning on/off the power of the product.
Press the power for more than 2 seconds to turn the
power off, when the power is on.
9 Alarm Lamp Display
When alarm occurs, the light displays as below.
High Le el Alarm: Red lamp blinks
Medium Le el Alarm: Yellow lamp blinks.
Low Le el Alarm: Yellow lamp stays on.

Pulse Oximeter ACCURO www.charmcare.com
-2 - OP-EN-06
Attach the supplied AC power de ice to the AC power port in the rear of the product. The
green “Power Operated” light will come on. If the AC power de ice is not connected, the
product will operate on the internal battery. In this case, the red “Battery Operated” light will
come on.
1. Using AC power 2. Using Battery power
Note
When the battery gets low, the battery status display on the screen will start blinking and
the alarm will sound. Depending on the parameters, the power may become
disconnected right away. Therefore, it is ad ised that the DC power be connected
immediately.
Note
When the coin battery image ( ) shows in the lower part of the screen, sa ed data can
be damaged. Ser ice request is necessary.
Using Power
1
2
Pulse Oximeter ACCURO www.charmcare.com
-28- OP-EN-06
Part 4 Measuring the SpO2
Step 1) Wipe down the area where you wish to place the probe with alcohol.
Step 2) Attach the probe to the patient’s finger.
Step 3) To get an accurate reading, make sure the patient minimizes all mo ement and Please
attach the probe wire to patient's finger firmly. Attach the bandage loosely so as to not
cut of circulation to the finger.
Step 4) Check the patient’s finger and the probe e ery two to three hours to make sure that the
sensor is properly placed o er the finger. If there is a change in the appearance of
the patient’s finger due to the prolonged exposure to the probe, switch the probe to
another finger.
SpO2 Sensor
Patient’s
Finger Bandage
Attaching the SpO2 Probe

Pulse Oximeter ACCURO www.charmcare.com
-29- OP-EN-06
Warning
- Measuring SpO2 on a patient undergoing an MRI may result in se ere burns for the
patient. To minimize risk for burns, use a non-inducti e wire. In the e ent that this does
occur, immediately remo e the probe from the patient.
- The area around the Sp02 sensor shall not exceed 37
℃
. The sensor will not work in
temperatures abo e 37
℃
.
- Do not attach the probe near arterial or enous catheters.
- Make sure that the sensor emits a light and that the sensor is properly placed o er the
patient’s finger.
Caution
- Handle the probe sensor and wire with caution. Careless handling may damage the
sensiti e sensor. Protect the wire from sharp objects.
- The skin of patients who ha e high fe ers or ha e problems with distal circulation will be
2-3 degrees higher than normal.
- Patients with abnormally high oxyhemoglobin or methemoglobin le els will not gi e a
proper SpO2 reading.
Caution
-Taking the NIBP can affect the SpO2 reading. When taking NIBP, place the
SpO2 probe on the other arm.
-Avoid using the probe with other medical equipment that affects blood flow.
Avoid placing the probe near an area that requires medical attention.
Pulse Oximeter ACCURO www.charmcare.com
-30- OP-EN-06
Step 1) Attach the probe to the patient’s finger
Step 2) When the display reads “LEARNING”, this means that SpO2 measurement has begun.
Minimize patient mo ement until the screen no longer reads “Learning” to ensure a
proper SpO2 reading.
Step 3) When the screen no longer reads “LEARNING”, numbers will appear in each of the
parameter windows. And the display update period is 1sec.
Measuring the SpO2

Pulse Oximeter ACCURO www.charmcare.com
-31- OP-EN-06
Part 5 Switch Screen Mode
ACCURO II consists of 4 types of screens and the can be switch to the screen the user
designates. Press the button once to switch the screen in the order of SCREEN1
SCREEN2 SCREEN3SCREEN4.
<SCREEN 1>
<SCREEN 2>
Switch Screen Mode
Pulse Oximeter ACCURO www.charmcare.com
-32- OP-EN-06
<SCREEN 3>
<SCREEN 4>

Pulse Oximeter ACCURO www.charmcare.com
-33- OP-EN-06
Part 6 Using the SETUP Menu
Step 1) Press the MENU button to enter the SETUP screen. Switch to SCREEN4 so the
parameter data is displayed in the right portion of the menu.
Step 2) Select the icon using the ⊳ button or button to enter the lower menu after pressing
the ‘MENU’ button.
Step 3) Press the
‘
MENU
menu button from
‘
EXIT
to mo e to the SETUP menu.
Enter the SETUP Menu
Pulse Oximeter ACCURO www.charmcare.com
-34- OP-EN-06
Step 1) Mo e to the designated menu using the button and button.
Step 2) Setup the alue by using the ⊳ button and button in the designated menu.
Step 3) Press the
‘
MENU
menu button from
‘
EXIT
to mo e to the SETUP menu.
The contents of each item are as shown as below..
Item Description Range
PULSE VOLUME Set the degree of pulse olume. 0~7
BRIGHTNESS Set the brightness of the screen. 1~5
SCREEN TYPE Set the main screen mode.
(Part 6. Transfer screen of SCREEN display)
1(SCREEN1)~
4(SCREEN4)
SPO2 AVERAGE Set the calculation time for SpO2
measurement.
4,8,12,2,
(NEONATE: 8,12)
WAVE FILL Set whether to fill in the wa e at display. OFF, ON
PLETH BAR Set the display status of the le el bar. OFF, ON
LANGUAGE Mo es to the LANGUAGE Menu Screen.
Setup CONFIG

Pulse Oximeter ACCURO www.charmcare.com
-35- OP-EN-06
Step 1) Press the button and button in the CONFIG menu after mo ing to the
‘LANGUAGE’, and mo es to the LANGUAGE menu when pressing the ‘MENU’ button
as shown in the image abo e.
Step 2) Mo e to the ‘LANGUAGE’ by using the button and button.
Step 3) Setup the language by using the ⊳ button and button.
Step 4) Press the ‘MENU’ menu button from ‘EXIT’ to mo e to the CONFIG menu.
Setup LANGUAGE
Pulse Oximeter ACCURO www.charmcare.com
-36- OP-EN-06
Step 1) Mo e to the designated menu using the button and button.
Step 2) Adjust the setting alue using the buttons according to the selected menu.
Step 3) Press the
‘
MENU
menu button from
‘
EXIT
to mo e to the SETUP menu.
The contents of each item are as shown as below..
Item Description Range
ALARM VOLUME Set the degree of the alarm olume. 0~7
ALARM DURATION
Set the duration (second) when in alarm sound
pause and alarm sound off.
30, 60, 90, 120
ALARM 0 REMIND When the alarm sound is 0 and the alarm
occurs, sets if the alarm should beep in 3
minutes duration.
OFF, ON
ALARM LIMIT Mo es to the ALARM Limit Menu Screen.
Caution
Cautiously setup alue when the user cannot recognize the patient status when the
alarm occurs and alarm sound is OFF. Frequently check the patient status when OFF.
Setup ALARM

Pulse Oximeter ACCURO www.charmcare.com
-3 - OP-EN-06
Step 1) Press the button and button in the ALARM menu after mo ing to the ‘ALARM
LIMIT’, and mo es to the ALARM Limit menu when pressing the ‘MENU’ button as
shown in the image abo e.
Step 2) Mo e to the designated menu using the button and button.
Step 3) Use the ⊳ button or button to adjust the alue in the selected menu.
Step 4) Press the
‘
MENU
menu button from
‘
EXIT
to mo e to the SETUP menu.
The contents of each item are as shown as below..
Item Description Range
SPO2 ALARM Checks if the SPO2 measurement alue is out of
the range of the setup range during alarm watch.
SpO2 alarm watch status displays
when
setting is ‘OFF’.
OFF, ON
PR ALARM Checks if the PR measurement alue is out of the
range of the setup range during alarm watch. PR
alarm watch status displays when setting is
‘OFF’.
OFF, ON
Setup ALARM Limit
Pulse Oximeter ACCURO www.charmcare.com
-38- OP-EN-06
SPO2 ALARM
LEV
Set the le el of the SPO2 ALARM LOW, MEDIUM,
HIGH
PR ALARM LEV Set the le el of the PR ALARM LOW,
MEDIUM,HIGH
FINGER OFF LEV
Set the alarm le el when ‘FINGER OFF’ occurs LOW, MEDIUM,
HIGH
SpO2 HIGH Sets the alarm upper limit for the SPO2 alue.
When the alue is larger or the same, the alarm
beeps.
20~100, OFF
SpO2 LOW Sets the alarm lower limit for the SPO2 alue.
When the alue is smaller or the same, the alarm
beeps.
OFF, 20~100
PR HIGH Sets the alarm upper limit for the PR alue. When
the alue is larger or the same, the alarm beeps.
15~300, OFF
PR LOW Sets the alarm upper limit for the PR alue. When
the alue is smaller or the same, the alarm beeps.
OFF, 15~300

Pulse Oximeter ACCURO www.charmcare.com
-39- OP-EN-06
Step 1) Mo e to the ‘PATIENT TYPE’ by using the button and button.
Step 2) Setup the patient mode by using the ⊳ button and button.
Step 3) Press the ‘MENU’ menu button from ‘EXIT’ to mo e to the SETUP menu.
The contents of each item are as shown as below.
Item Description Range
PATIENT TYPE Sets up the patient mode. ADULT, PEDIATRIC, NEONATE
When the Patient Mode changes, the alarm limit alue and SPO2 a erage switches to the
default alue specified in Attachment.1.
Setup PATIENT
Pulse Oximeter ACCURO www.charmcare.com
-40- OP-EN-06
Step 1) Mo e to the designated menu using the button and button.
Step 2) Adjust the setting alue using the buttons according to the selected menu.
Step 3) Press the ‘MENU’ menu button from ‘EXIT’ to mo e to the SETUP menu.
The contents of each item are as shown as below.
Set Year Month Day Hour Minute
Range 2000~2099 1~12 1~31 0~23 0~59
Setup Current Time
Table of contents
