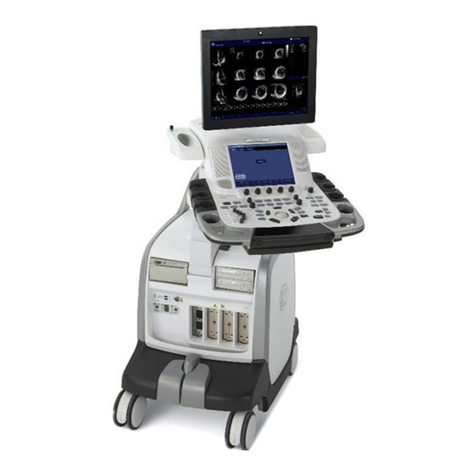
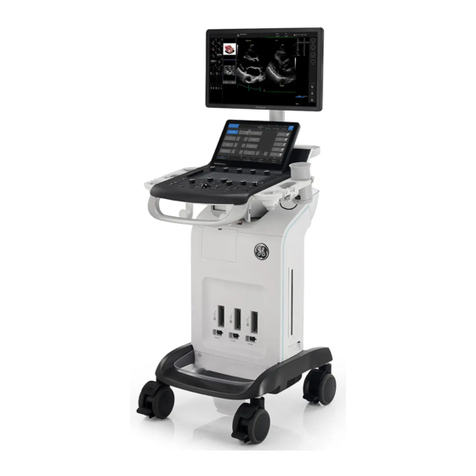
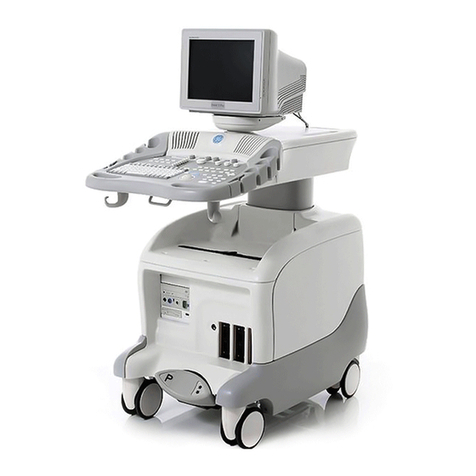
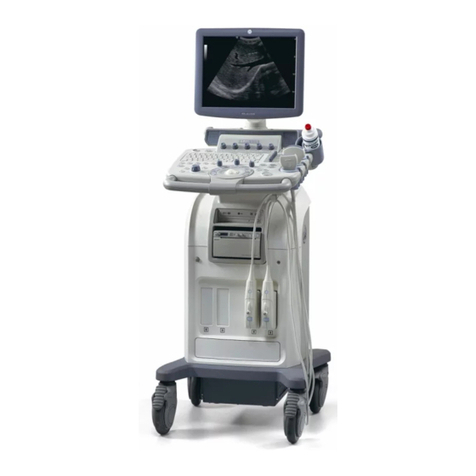
GE Vivid S70 User manual

Technical Publications
Vivid™ S70 / Vivid S60
Version 203
User Manual
BC092760-1EN — English
Rev. 01
Operating Documentation
Copyright 2019 By General Electric Co.
0459

Regulatory requirement
This product complies with regulatory requirements of the following European
Directive 93/42/EEC concerning medical devices.
This manual is a reference for the Vivid S70 and Vivid S60 ultrasound systems and
covers the following models: Vivid S70 v203 and Vivid S60 v203. It applies to all
revisions of the 203 software for the Vivid S70 and Vivid S60 ultrasound systems,
which will hereafter be listed as Vivid S70 / S60. All information in this manual is
relevant for the two systems unless otherwise specified.
0459
© GE Medical Systems. All rights reserved. No part of this manual may
be reproduced, stored in a retrieval system, or transmitted, in any form
or by any means, electronic, mechanical, photocopying, recording, or
otherwise, without the prior written permission of GE Medical Systems.
COMPANY DATA GE Medical Systems, Israel Ltd.
Nativ Ha’or Street no.1
3508510, Haifa
ISRAEL
Tel: (+972) 4 8519 555 Fax: (+972) 4 8519 500
GE Medical Systems SCS
283 rue de la Minière, 78530 BUC, France

Vivid S70 / S60 – User Manual i-1
BC092760-1EN 01
Revision History
Reason for change
List of Effective Pages
Please verify that you are using the latest revision of this document. Information
pertaining to this document is maintained on ePDM (GE electronic Product Data
Management). If you need to know the latest revision, contact your distributor, local GE
Sales Representative or in the USA call the GE Ultrasound Clinical Answer Center at
1 800 682 5327 or 1 262 524 5698.
REV
DATE
(YYYY-MM-DD) REASON FOR CHANGE
Rev. 01 2019-01-30 Initial release
PAGE NUMBER REV
All pages Rev. 01

i-2 Vivid S70 / S60 – User Manual
BC092760-1EN 01
Regulatory Requirements
Conformance Standards
The GE Healthcare product families are tested to meet all
applicable requirements and relevant standards per the
countries in which the product will be sold. Any changes to
accessories, peripheral units, or any other part of the system
must be approved by the manufacturer: GE Vingmed Ultrasound
AS. Ignoring this advice may compromise the regulatory
approvals obtained for the product.
This product complies with the regulatory requirements of the
following:
Standard/Directive Scope
93/42/EEC Medical Devices Directive (MDD)
2012/19/EU Waste Electrical and Electronic Equipment (WEEE)
2011/65/EU Directive on the restriction of the use of certain hazardous substances in
electrical and electronic equipment (ROHS)
IEC/EN 60601-1
ANSI/AAMI ES60601-1
CAN/CSA-C22.2 No. 60601-1
Medical Electrical Equipment - Part 1. General requirements for basic
Safety and essential performance
IEC/EN 60601-2-37 Medical electrical equipment - Part 2-37. Particular requirements for the
basic safety and essential performance of ultrasonic medical diagnostic
and monitoring equipment
IEC/EN 60601-1-2 Medical Electrical Equipment - Part 1-2. General requirements for basic
safety and essential performance - Collateral standard: Electromagnetic
disturbances - Requirements and tests
IEC/EN 60601-1-6 Medical Electrical Equipment - Part 1-6. General requirements for basic
safety and essential performance - Collateral standard: Usability
NEMA/AIUM UD-3 Standard for real-time display of thermal and mechanical acoustic output
indices on diagnostic ultrasound equipment.
IEC/EN 62304 Medical Device Software - Software life-cycle processes
IEC/EN 62366 Medical Devices - Application of usability engineering to medical devices
ISO 10993-1 Biological evaluation of medical devices

Vivid S70 / S60 – User Manual i-3
BC092760-1EN 01
Certifications
• Quality management standards for medical devices: GE
Medical Systems, Israel Ltd. and GE Medical Systems,
China Co. Ltd. are ISO13485 certified.
Importer Information
• TURKEY
• BRAZIL
Directives
The GE ultrasound product families are tested to meet all
applicable requirements in relevant EU Directives and
European/International standards.
• Council Directive 93/42/EEC concerning MDD (Medical
Devices Directive): the CE label affixed to the product
testifies compliance to this Directive.
The location of the CE marking is specified in ‘Device labels’
on page 2-26.
• Year of first CE mark: 2015
Classifications
According to 93/42/EEC Medical Device Directive, this is a
Class IIa Medical Device.
The following classifications are in accordance with the IEC/
EN 60601-1:
• According to IEC/EN 60601-1, Equipment is Class I, with BF
or CF Applied Parts.
GE Medical Systems Türkiye Ltd. Şti.
Esentepe Mah. Harman Sok. No: 8
34394 Şişli İstanbul Türkiye
Türkiye
İthalatçısı /
Turkish
Importer
GE Healthcare do Brasil Comércio e Serviços
para Equipamentos Médico- Hospitalares Ltda
Av. Magalhães de Castro, 4800
Andar 11 Conj. 111 e 112, Andar 12 Conj. 121 e
122, Torre 3 - Cidade Jardim
São Paulo SP – CEP: 05676-120
C.N.P.J.: 00.029.372/0001-40
Número de Registro ANVISA: 80071260360
Brazilian
Importer

i-4 Vivid S70 / S60 – User Manual
BC092760-1EN 01
Type of protection against electric shock:
• Class I Equipment
Degree of protection against electric shock:
• Type BF Applied part (for Probes marked with BF symbol)
• Type CF Applied part (for ECG, and probes marked with CF
symbol)
• The ECG applied part is protected against defibrillation.
Continuous Operation
System is IPX0.
Footswitch is IPX8.
Transducers are IPX7.
ICE catheters are IPX8.
Class I Equipment
EQUIPMENT in which protection against electric shock does not
rely on BASIC INSULATION only, but also includes an earth
ground. This additional safety precaution prevents exposed
metal parts from becoming LIVE in the event of an insulation
failure.
Type BF Applied part
TYPE BF APPLIED PART providing a specified degree of
protection against electric shock with particular regard to
allowable LEAKAGE CURRENT.
Patient leakage current
Normal condition Single fault condition
d.c. <10 microA <50 microA
a.c. <100 microA <500 microA

Vivid S70 / S60 – User Manual i-5
BC092760-1EN 01
Type CF Applied part
TYPE CF APPLIED PART providing a degree of protection
higher than that for Type BF Applied Part against electric shock
particularly regarding allowable LEAKAGE CURRENT.
Original Documentation
The original document was written in English.
Software License Acknowledgements
WindowBlinds™ OCX © Stardock ®
Patient leakage current
Normal condition Single fault condition
d.c. <10 microA <50 microA
a.c. <10 microA <50 microA

i-6 Vivid S70 / S60 – User Manual
BC092760-1EN 01

Vivid S70 / S60 – User Manual i-7
BC092760-1EN 01
Table of Contents
Conformance Standards - - - - - - - - - - - - - - - - - - - - - - - - - - - - - - - - - - - i-2
Certifications - - - - - - - - - - - - - - - - - - - - - - - - - - - - - - - - - - - - - - - - - - - i-3
Importer Information - - - - - - - - - - - - - - - - - - - - - - - - - - - - - - - - - - - - - - i-3
Directives- - - - - - - - - - - - - - - - - - - - - - - - - - - - - - - - - - - - - - - - - - - - - - i-3
Classifications - - - - - - - - - - - - - - - - - - - - - - - - - - - - - - - - - - - - - - - - - - i-3
Class I Equipment- - - - - - - - - - - - - - - - - - - - - - - - - - - - - - - - - - - - - - - - i-4
Type BF Applied part - - - - - - - - - - - - - - - - - - - - - - - - - - - - - - - - - - - - - i-4
Type CF Applied part - - - - - - - - - - - - - - - - - - - - - - - - - - - - - - - - - - - - - i-5
Original Documentation- - - - - - - - - - - - - - - - - - - - - - - - - - - - - - - - - - - - i-5
Software License Acknowledgements- - - - - - - - - - - - - - - - - - - - - - - - - - i-5
Table of Contents
Chapter 1 — Introduction
Overview
Attention - - - - - - - - - - - - - - - - - - - - - - - - - - - - - - - - - - - - - - - - - - - - - 1-2
Documentation - - - - - - - - - - - - - - - - - - - - - - - - - - - - - - - - - - - - - - - - - 1-3
Conventions used in this manual - - - - - - - - - - - - - - - - - - - - - - - - - - - - 1-3
Indications for use - - - - - - - - - - - - - - - - - - - - - - - - - - - - - - - - - - - - - - 1-4
Contraindications - - - - - - - - - - - - - - - - - - - - - - - - - - - - - - - - - - - - - - - 1-7
Prescription device - - - - - - - - - - - - - - - - - - - - - - - - - - - - - - - - - - - - - - 1-7
Safety - - - - - - - - - - - - - - - - - - - - - - - - - - - - - - - - - - - - - - - - - - - - - - - 1-7
Contact Information
Contacting GE Ultrasound - - - - - - - - - - - - - - - - - - - - - - - - - - - - - - - - - 1-8
Manufacturer - - - - - - - - - - - - - - - - - - - - - - - - - - - - - - - - - - - - - - - - - 1-14
Chapter 2 — Safety
Safety Precautions
Precaution Levels - - - - - - - - - - - - - - - - - - - - - - - - - - - - - - - - - - - - - - - 2-2
Owner responsibility
Notice against user modification- - - - - - - - - - - - - - - - - - - - - - - - - - - - - 2-3
Acoustic output
Definition of the acoustic output parameters - - - - - - - - - - - - - - - - - - - - 2-4
Acoustic output and display on the Vivid S70 / S60 - - - - - - - - - - - - - - - 2-5
ALARA - - - - - - - - - - - - - - - - - - - - - - - - - - - - - - - - - - - - - - - - - - - - - - 2-7
Safety statement- - - - - - - - - - - - - - - - - - - - - - - - - - - - - - - - - - - - - - - - 2-7
System controls affecting acoustic output - - - - - - - - - - - - - - - - - - - - - - 2-8
OB Exam - - - - - - - - - - - - - - - - - - - - - - - - - - - - - - - - - - - - - - - - - - - - 2-10
Important safety considerations
Patient safety - - - - - - - - - - - - - - - - - - - - - - - - - - - - - - - - - - - - - - - - - 2-11
Personnel and equipment safety - - - - - - - - - - - - - - - - - - - - - - - - - - - 2-15
Electromagnetic Compatibility (EMC) - - - - - - - - - - - - - - - - - - - - - - - - 2-19

i-8 Vivid S70 / S60 – User Manual
BC092760-1EN 01
Environmental protection- - - - - - - - - - - - - - - - - - - - - - - - - - - - - - - - - 2-25
Device labels
Symbols- - - - - - - - - - - - - - - - - - - - - - - - - - - - - - - - - - - - - - - - - - - - - 2-26
For China only - - - - - - - - - - - - - - - - - - - - - - - - - - - - - - - - - - - - - - - - 2-30
Chapter 3 — Prepare the System for Use
Site requirements
Power requirements - - - - - - - - - - - - - - - - - - - - - - - - - - - - - - - - - - - - - 3-2
Operating Environment - - - - - - - - - - - - - - - - - - - - - - - - - - - - - - - - - - - 3-3
Environmental requirements - - - - - - - - - - - - - - - - - - - - - - - - - - - - - - - 3-3
Electromagnetic interferences - - - - - - - - - - - - - - - - - - - - - - - - - - - - - - 3-3
Connecting the system - - - - - - - - - - - - - - - - - - - - - - - - - - - - - - - - - - - 3-4
System Overview
Getting to know the system - - - - - - - - - - - - - - - - - - - - - - - - - - - - - - - - 3-9
Removable media- - - - - - - - - - - - - - - - - - - - - - - - - - - - - - - - - - - - - - 3-11
Physiological traces - - - - - - - - - - - - - - - - - - - - - - - - - - - - - - - - - - - - 3-14
Peripheral/accessory connector panel - - - - - - - - - - - - - - - - - - - - - - - 3-19
Wired Footswitch (Option) - - - - - - - - - - - - - - - - - - - - - - - - - - - - - - - - 3-21
Switching On/Off
Switch on the system - - - - - - - - - - - - - - - - - - - - - - - - - - - - - - - - - - - 3-23
Log In - - - - - - - - - - - - - - - - - - - - - - - - - - - - - - - - - - - - - - - - - - - - - - 3-23
Switch off the system - - - - - - - - - - - - - - - - - - - - - - - - - - - - - - - - - - - 3-24
Connect and disconnect probes
Connect the probe - - - - - - - - - - - - - - - - - - - - - - - - - - - - - - - - - - - - - 3-26
Activate the probe- - - - - - - - - - - - - - - - - - - - - - - - - - - - - - - - - - - - - - 3-28
Deactivate the probe - - - - - - - - - - - - - - - - - - - - - - - - - - - - - - - - - - - - 3-30
Disconnect the probe - - - - - - - - - - - - - - - - - - - - - - - - - - - - - - - - - - - 3-30
Intra Cardiac Ultrasound Catheters- - - - - - - - - - - - - - - - - - - - - - - - - - 3-31
The Scanning screen
The Title bar- - - - - - - - - - - - - - - - - - - - - - - - - - - - - - - - - - - - - - - - - - 3-33
Parameters window - - - - - - - - - - - - - - - - - - - - - - - - - - - - - - - - - - - - 3-34
Clipboard - - - - - - - - - - - - - - - - - - - - - - - - - - - - - - - - - - - - - - - - - - - - 3-34
Control panel
Control Panel overview - - - - - - - - - - - - - - - - - - - - - - - - - - - - - - - - - - 3-35
Trackball area - - - - - - - - - - - - - - - - - - - - - - - - - - - - - - - - - - - - - - - - 3-37
Touch panel - - - - - - - - - - - - - - - - - - - - - - - - - - - - - - - - - - - - - - - - - - 3-38
The alphanumeric keyboard (option)- - - - - - - - - - - - - - - - - - - - - - - - - 3-42
Main display adjustment
Lock/unlock the main display - - - - - - - - - - - - - - - - - - - - - - - - - - - - - - 3-44
Image Adjustment- - - - - - - - - - - - - - - - - - - - - - - - - - - - - - - - - - - - - - 3-45
Moving and transporting the system
Wheels - - - - - - - - - - - - - - - - - - - - - - - - - - - - - - - - - - - - - - - - - - - - - 3-48
Moving the system - - - - - - - - - - - - - - - - - - - - - - - - - - - - - - - - - - - - - 3-48
Using Transportation mode - - - - - - - - - - - - - - - - - - - - - - - - - - - - - - - 3-51
Transporting the system - - - - - - - - - - - - - - - - - - - - - - - - - - - - - - - - - 3-52
Reinstalling at a new location- - - - - - - - - - - - - - - - - - - - - - - - - - - - - - 3-53
Preparing Vivid S70 / S60 for scanning - - - - - - - - - - - - - - - - - - - - - - - 3-53

Vivid S70 / S60 – User Manual i-9
BC092760-1EN 01
Chapter 4 — Start an Examination
Starting an examination
Creating a new patient record - - - - - - - - - - - - - - - - - - - - - - - - - - - - - - 4-2
Selecting an existing patient record - - - - - - - - - - - - - - - - - - - - - - - - - - 4-3
Ending an examination - - - - - - - - - - - - - - - - - - - - - - - - - - - - - - - - - - - 4-3
Cineloop
Cineloop overview - - - - - - - - - - - - - - - - - - - - - - - - - - - - - - - - - - - - - - 4-6
Using cineloop - - - - - - - - - - - - - - - - - - - - - - - - - - - - - - - - - - - - - - - - - 4-7
Zoom
Display zoom - - - - - - - - - - - - - - - - - - - - - - - - - - - - - - - - - - - - - - - - - - 4-9
HR zoom - - - - - - - - - - - - - - - - - - - - - - - - - - - - - - - - - - - - - - - - - - - - - 4-9
Annotations
To insert an annotation - - - - - - - - - - - - - - - - - - - - - - - - - - - - - - - - - - 4-10
Editing annotations - - - - - - - - - - - - - - - - - - - - - - - - - - - - - - - - - - - - - 4-12
To erase text annotations - - - - - - - - - - - - - - - - - - - - - - - - - - - - - - - - 4-13
Bodymark - - - - - - - - - - - - - - - - - - - - - - - - - - - - - - - - - - - - - - - - - - - 4-13
Annotation and bodymark configuration - - - - - - - - - - - - - - - - - - - - - - 4-14
Chapter 5 — Image Optimization
2D-Mode
2D-Mode overview - - - - - - - - - - - - - - - - - - - - - - - - - - - - - - - - - - - - - - 5-3
Using 2D-Mode - - - - - - - - - - - - - - - - - - - - - - - - - - - - - - - - - - - - - - - - 5-5
Optimizing 2D- - - - - - - - - - - - - - - - - - - - - - - - - - - - - - - - - - - - - - - - - - 5-5
M-Mode
M-Mode overview - - - - - - - - - - - - - - - - - - - - - - - - - - - - - - - - - - - - - - - 5-7
Using M-Mode - - - - - - - - - - - - - - - - - - - - - - - - - - - - - - - - - - - - - - - - - 5-9
Optimizing M-Mode- - - - - - - - - - - - - - - - - - - - - - - - - - - - - - - - - - - - - 5-11
Color Mode
Color 2D Mode overview - - - - - - - - - - - - - - - - - - - - - - - - - - - - - - - - - 5-12
Color M-Mode overview- - - - - - - - - - - - - - - - - - - - - - - - - - - - - - - - - - 5-14
Using Color Mode - - - - - - - - - - - - - - - - - - - - - - - - - - - - - - - - - - - - - - 5-16
Optimizing Color Mode - - - - - - - - - - - - - - - - - - - - - - - - - - - - - - - - - - 5-16
PW and CW Doppler
PW and CW Doppler overview- - - - - - - - - - - - - - - - - - - - - - - - - - - - - 5-19
Using PW/CW Doppler modes - - - - - - - - - - - - - - - - - - - - - - - - - - - - - 5-21
Optimizing PW/CW Doppler modes - - - - - - - - - - - - - - - - - - - - - - - - - 5-21
Tissue Velocity Imaging (TVI)
TVI overview - - - - - - - - - - - - - - - - - - - - - - - - - - - - - - - - - - - - - - - - - 5-23
Using TVI- - - - - - - - - - - - - - - - - - - - - - - - - - - - - - - - - - - - - - - - - - - - 5-25
Optimizing TVI - - - - - - - - - - - - - - - - - - - - - - - - - - - - - - - - - - - - - - - - 5-25
Tissue Tracking
Tissue Tracking overview - - - - - - - - - - - - - - - - - - - - - - - - - - - - - - - - 5-26
Using Tissue Tracking- - - - - - - - - - - - - - - - - - - - - - - - - - - - - - - - - - - 5-28
Optimizing Tissue Tracking - - - - - - - - - - - - - - - - - - - - - - - - - - - - - - - 5-28
Strain rate
Strain rate overview - - - - - - - - - - - - - - - - - - - - - - - - - - - - - - - - - - - - 5-29
Using Strain rate- - - - - - - - - - - - - - - - - - - - - - - - - - - - - - - - - - - - - - - 5-31
Optimizing Strain rate - - - - - - - - - - - - - - - - - - - - - - - - - - - - - - - - - - - 5-31

i-10 Vivid S70 / S60 – User Manual
BC092760-1EN 01
Strain
Strain overview- - - - - - - - - - - - - - - - - - - - - - - - - - - - - - - - - - - - - - - - 5-32
Using Strain - - - - - - - - - - - - - - - - - - - - - - - - - - - - - - - - - - - - - - - - - - 5-34
Optimizing Strain - - - - - - - - - - - - - - - - - - - - - - - - - - - - - - - - - - - - - - 5-34
Tissue Synchronization Imaging (TSI)
TSI overview - - - - - - - - - - - - - - - - - - - - - - - - - - - - - - - - - - - - - - - - - 5-35
Using TSI- - - - - - - - - - - - - - - - - - - - - - - - - - - - - - - - - - - - - - - - - - - - 5-37
Contrast Imaging
Data acquisition - - - - - - - - - - - - - - - - - - - - - - - - - - - - - - - - - - - - - - - 5-39
Quantification - - - - - - - - - - - - - - - - - - - - - - - - - - - - - - - - - - - - - - - - - 5-44
Contrast Echocardiography Box - - - - - - - - - - - - - - - - - - - - - - - - - - - - 5-45
Additional scanning features
LogiqView - - - - - - - - - - - - - - - - - - - - - - - - - - - - - - - - - - - - - - - - - - - 5-46
Compound - - - - - - - - - - - - - - - - - - - - - - - - - - - - - - - - - - - - - - - - - - - 5-47
Virtual Convex - - - - - - - - - - - - - - - - - - - - - - - - - - - - - - - - - - - - - - - - 5-47
B-Flow - - - - - - - - - - - - - - - - - - - - - - - - - - - - - - - - - - - - - - - - - - - - - - 5-47
Blood Flow Imaging - - - - - - - - - - - - - - - - - - - - - - - - - - - - - - - - - - - - 5-48
Image controls
Control panel - - - - - - - - - - - - - - - - - - - - - - - - - - - - - - - - - - - - - - - - - 5-49
Touch panel and rotaries - - - - - - - - - - - - - - - - - - - - - - - - - - - - - - - - - 5-49
Scan Assist Pro
Scan Assist Pro overview - - - - - - - - - - - - - - - - - - - - - - - - - - - - - - - - 5-59
Setting up Scan Assist Pro - - - - - - - - - - - - - - - - - - - - - - - - - - - - - - - 5-61
Using Scan Assist Pro- - - - - - - - - - - - - - - - - - - - - - - - - - - - - - - - - - - 5-63
Chapter 6 — 4D and Multi-plane Modes
4D-Mode
Real-time, single beat 4D imaging - - - - - - - - - - - - - - - - - - - - - - - - - - - 6-2
Real-time, multi beat 4D imaging - - - - - - - - - - - - - - - - - - - - - - - - - - - - 6-2
4D-Mode - - - - - - - - - - - - - - - - - - - - - - - - - - - - - - - - - - - - - - - - - - - - - 6-3
4D Color Flow mode - - - - - - - - - - - - - - - - - - - - - - - - - - - - - - - - - - - - 6-14
Flexi-Slice - - - - - - - - - - - - - - - - - - - - - - - - - - - - - - - - - - - - - - - - - - - 6-18
Basic operations - - - - - - - - - - - - - - - - - - - - - - - - - - - - - - - - - - - - - - - 6-20
4D-Mode controls - - - - - - - - - - - - - - - - - - - - - - - - - - - - - - - - - - - - - - 6-28
Multi-plane mode
Bi-plane mode screen - - - - - - - - - - - - - - - - - - - - - - - - - - - - - - - - - - - 6-35
Tri-plane mode screen - - - - - - - - - - - - - - - - - - - - - - - - - - - - - - - - - - 6-37
Using Multi-plane mode- - - - - - - - - - - - - - - - - - - - - - - - - - - - - - - - - - 6-39
Bi-plane prepare - - - - - - - - - - - - - - - - - - - - - - - - - - - - - - - - - - - - - - - 6-39
Basic operations - - - - - - - - - - - - - - - - - - - - - - - - - - - - - - - - - - - - - - - 6-41
Multi-plane mode controls - - - - - - - - - - - - - - - - - - - - - - - - - - - - - - - - 6-43
FlexiViews
Chapter 7 — Stress Echo
Introduction
Selection of a stress test protocol template
Image acquisition
Starting acquisition - - - - - - - - - - - - - - - - - - - - - - - - - - - - - - - - - - - - - - 7-5
Continuous capture mode - - - - - - - - - - - - - - - - - - - - - - - - - - - - - - - - - 7-9

Vivid S70 / S60 – User Manual i-11
BC092760-1EN 01
Stress Echo analysis
Image selection for analysis- - - - - - - - - - - - - - - - - - - - - - - - - - - - - - - 7-16
Wall motion scoring- - - - - - - - - - - - - - - - - - - - - - - - - - - - - - - - - - - - - 7-18
Quantitative TVI Stress echo analysis
Accessing QTVI Stress analysis tools - - - - - - - - - - - - - - - - - - - - - - - - 7-22
Vpeak measurement - - - - - - - - - - - - - - - - - - - - - - - - - - - - - - - - - - - - 7-22
Tissue Tracking - - - - - - - - - - - - - - - - - - - - - - - - - - - - - - - - - - - - - - - 7-25
Quantitative analysis - - - - - - - - - - - - - - - - - - - - - - - - - - - - - - - - - - - - 7-25
References - - - - - - - - - - - - - - - - - - - - - - - - - - - - - - - - - - - - - - - - - - 7-25
Editing/creating a Stress Echo protocol template
Entering the Template editor screen - - - - - - - - - - - - - - - - - - - - - - - - - 7-26
Editing/Creating a template - - - - - - - - - - - - - - - - - - - - - - - - - - - - - - - 7-27
Chapter 8 — Measurements and Analysis
Introduction
General recommendations about measurements - - - - - - - - - - - - - - - - - 8-4
About Measurement results display - - - - - - - - - - - - - - - - - - - - - - - - - - 8-4
Assign and Measure modality
Measure and Assign modality
Measurements on volume renderings - - - - - - - - - - - - - - - - - - - - - - - - - 8-9
Measurements on protocol images
Example results - - - - - - - - - - - - - - - - - - - - - - - - - - - - - - - - - - - - - - - 8-10
Advanced cardiac measurements and analysis
Event timing measurements- - - - - - - - - - - - - - - - - - - - - - - - - - - - - - - 8-11
TSI Measurements - - - - - - - - - - - - - - - - - - - - - - - - - - - - - - - - - - - - - 8-12
Automated Function Imaging - - - - - - - - - - - - - - - - - - - - - - - - - - - - - - 8-18
Cardiac AutoDoppler- - - - - - - - - - - - - - - - - - - - - - - - - - - - - - - - - - - - 8-46
Pediatric Z-score measurements - - - - - - - - - - - - - - - - - - - - - - - - - - - 8-49
4D/Multi-plane LV
4D/multi-plane LV analysis tools- - - - - - - - - - - - - - - - - - - - - - - - - - - - 8-50
4D Auto LVQ - - - - - - - - - - - - - - - - - - - - - - - - - - - - - - - - - - - - - - - - - 8-50
Manual left ventricular volume measurements - - - - - - - - - - - - - - - - - - 8-60
TSI surface model- - - - - - - - - - - - - - - - - - - - - - - - - - - - - - - - - - - - - - 8-65
4D Auto MVQ
Requirements- - - - - - - - - - - - - - - - - - - - - - - - - - - - - - - - - - - - - - - - - 8-67
Starting 4D Auto MVQ- - - - - - - - - - - - - - - - - - - - - - - - - - - - - - - - - - - 8-68
Align Views - - - - - - - - - - - - - - - - - - - - - - - - - - - - - - - - - - - - - - - - - - 8-69
Set Landmarks - - - - - - - - - - - - - - - - - - - - - - - - - - - - - - - - - - - - - - - - 8-70
Review - - - - - - - - - - - - - - - - - - - - - - - - - - - - - - - - - - - - - - - - - - - - - 8-72
Results - - - - - - - - - - - - - - - - - - - - - - - - - - - - - - - - - - - - - - - - - - - - - 8-73
Approval - - - - - - - - - - - - - - - - - - - - - - - - - - - - - - - - - - - - - - - - - - - - 8-75
4D Auto AVQ
Requirements- - - - - - - - - - - - - - - - - - - - - - - - - - - - - - - - - - - - - - - - - 8-76
Starting the 4D Auto AVQ tool - - - - - - - - - - - - - - - - - - - - - - - - - - - - - 8-77
Slice alignment - - - - - - - - - - - - - - - - - - - - - - - - - - - - - - - - - - - - - - - - 8-78
LVOT segmentation - - - - - - - - - - - - - - - - - - - - - - - - - - - - - - - - - - - - 8-78
Measurements - - - - - - - - - - - - - - - - - - - - - - - - - - - - - - - - - - - - - - - - 8-80
Approval - - - - - - - - - - - - - - - - - - - - - - - - - - - - - - - - - - - - - - - - - - - - 8-81

i-12 Vivid S70 / S60 – User Manual
BC092760-1EN 01
Advanced vascular measurements and analysis
Intima-Media Thickness- - - - - - - - - - - - - - - - - - - - - - - - - - - - - - - - - - 8-82
Vascular AutoDoppler - - - - - - - - - - - - - - - - - - - - - - - - - - - - - - - - - - - 8-85
OB measurements
OB graphs - - - - - - - - - - - - - - - - - - - - - - - - - - - - - - - - - - - - - - - - - - - 8-87
Measurement result table
Minimizing the Measurement result table - - - - - - - - - - - - - - - - - - - - - 8-93
Moving the Measurement result table - - - - - - - - - - - - - - - - - - - - - - - - 8-93
Deleting measurements- - - - - - - - - - - - - - - - - - - - - - - - - - - - - - - - - - 8-93
Worksheet
Overview - - - - - - - - - - - - - - - - - - - - - - - - - - - - - - - - - - - - - - - - - - - - 8-94
Using the Worksheet- - - - - - - - - - - - - - - - - - - - - - - - - - - - - - - - - - - - 8-95
Measurement accuracy
General - - - - - - - - - - - - - - - - - - - - - - - - - - - - - - - - - - - - - - - - - - - - - 8-97
Sources of error - - - - - - - - - - - - - - - - - - - - - - - - - - - - - - - - - - - - - - - 8-97
Optimizing Measurement Accuracy - - - - - - - - - - - - - - - - - - - - - - - - - 8-99
Measurement Uncertainties - - - - - - - - - - - - - - - - - - - - - - - - - - - - - - - 8-99
Chapter 9 — Quantitative Analysis
Introduction
Q Analysis overview
Starting Q Analysis - - - - - - - - - - - - - - - - - - - - - - - - - - - - - - - - - - - - - - 9-3
Q Analysis screen- - - - - - - - - - - - - - - - - - - - - - - - - - - - - - - - - - - - - - - 9-4
Using Q Analysis
Generation of a trace - - - - - - - - - - - - - - - - - - - - - - - - - - - - - - - - - - - - 9-9
Saving/retrieving Q Analysis - - - - - - - - - - - - - - - - - - - - - - - - - - - - - - 9-13
Frame disabling - - - - - - - - - - - - - - - - - - - - - - - - - - - - - - - - - - - - - - - 9-13
Optimization - - - - - - - - - - - - - - - - - - - - - - - - - - - - - - - - - - - - - - - - - - 9-15
Switching modes or traces- - - - - - - - - - - - - - - - - - - - - - - - - - - - - - - - 9-19
Anatomical M-Mode - - - - - - - - - - - - - - - - - - - - - - - - - - - - - - - - - - - - 9-20
Chapter 10 — Archiving
Introduction
The dataflow concept
Dataflows available - - - - - - - - - - - - - - - - - - - - - - - - - - - - - - - - - - - - - 10-3
Storing images and cineloops
Storing an image - - - - - - - - - - - - - - - - - - - - - - - - - - - - - - - - - - - - - - 10-7
Storing a cineloop - - - - - - - - - - - - - - - - - - - - - - - - - - - - - - - - - - - - - - 10-8
Saving images and cineloops to a standard format - - - - - - - - - - - - - - 10-9
EZ DICOM CD Viewer- - - - - - - - - - - - - - - - - - - - - - - - - - - - - - - - - - 10-11
Retrieving and editing archived information
Searching for a patient record - - - - - - - - - - - - - - - - - - - - - - - - - - - - 10-14
Editing data in the archive - - - - - - - - - - - - - - - - - - - - - - - - - - - - - - - 10-17
Deleting archived information- - - - - - - - - - - - - - - - - - - - - - - - - - - - - 10-25
Moving examinations - - - - - - - - - - - - - - - - - - - - - - - - - - - - - - - - - - 10-27
Review images in archive
Review the images from a selected examination - - - - - - - - - - - - - - - 10-29
Review images from a selected patient record- - - - - - - - - - - - - - - - - 10-31

Vivid S70 / S60 – User Manual i-13
BC092760-1EN 01
Connectivity
The dataflow concept - - - - - - - - - - - - - - - - - - - - - - - - - - - - - - - - - - 10-36
Dataflow selection- - - - - - - - - - - - - - - - - - - - - - - - - - - - - - - - - - - - - 10-39
Transfer of patient records/examinations
Transfer patient records/examinations between archives - - - - - - - - - 10-40
Transferring patient records/examinations- - - - - - - - - - - - - - - - - - - - 10-41
Disk management
Configuring the Disk management function - - - - - - - - - - - - - - - - - - - 10-49
Running the Disk management function - - - - - - - - - - - - - - - - - - - - - 10-52
Data Backup and restore
Backup procedure- - - - - - - - - - - - - - - - - - - - - - - - - - - - - - - - - - - - - 10-57
Restore procedure - - - - - - - - - - - - - - - - - - - - - - - - - - - - - - - - - - - - 10-61
Tricefy
To register a Tricefy account - - - - - - - - - - - - - - - - - - - - - - - - - - - - - 10-64
Configuration of Tricefy storage - - - - - - - - - - - - - - - - - - - - - - - - - - - 10-65
TricefyPatientShare - - - - - - - - - - - - - - - - - - - - - - - - - - - - - - - - - - - 10-66
Storing an exam in Tricefy - - - - - - - - - - - - - - - - - - - - - - - - - - - - - - - 10-68
Configuration of Tricefy QR - - - - - - - - - - - - - - - - - - - - - - - - - - - - - - 10-70
Data streaming
Streaming in process - - - - - - - - - - - - - - - - - - - - - - - - - - - - - - - - - - 10-71
Chapter 11 — Report
Introduction
Creating a report
Working with the report function
To open a report - - - - - - - - - - - - - - - - - - - - - - - - - - - - - - - - - - - - - - - 11-4
To choose another report template- - - - - - - - - - - - - - - - - - - - - - - - - - 11-6
To change patient information - - - - - - - - - - - - - - - - - - - - - - - - - - - - - 11-6
Images in the report - - - - - - - - - - - - - - - - - - - - - - - - - - - - - - - - - - - - 11-6
To print a report - - - - - - - - - - - - - - - - - - - - - - - - - - - - - - - - - - - - - - - 11-7
To store a report - - - - - - - - - - - - - - - - - - - - - - - - - - - - - - - - - - - - - - - 11-7
Retrieving an archived report - - - - - - - - - - - - - - - - - - - - - - - - - - - - - - 11-8
Deleting an archived report - - - - - - - - - - - - - - - - - - - - - - - - - - - - - - - 11-8
Structured Findings
Prerequisite - - - - - - - - - - - - - - - - - - - - - - - - - - - - - - - - - - - - - - - - - - 11-9
Starting Structured Findings- - - - - - - - - - - - - - - - - - - - - - - - - - - - - - 11-10
Using Structured Findings - - - - - - - - - - - - - - - - - - - - - - - - - - - - - - - 11-12
Structured Findings configuration - - - - - - - - - - - - - - - - - - - - - - - - - - 11-14
Direct report
Creating comments- - - - - - - - - - - - - - - - - - - - - - - - - - - - - - - - - - - - 11-25
Creating pre-defined text inputs - - - - - - - - - - - - - - - - - - - - - - - - - - - 11-26
Report designer
Accessing the Report designer- - - - - - - - - - - - - - - - - - - - - - - - - - - - 11-27
Report designer overview - - - - - - - - - - - - - - - - - - - - - - - - - - - - - - - 11-28
Designing a report template - - - - - - - - - - - - - - - - - - - - - - - - - - - - - - 11-30
Saving the report template- - - - - - - - - - - - - - - - - - - - - - - - - - - - - - - 11-42
To exit the Report designer - - - - - - - - - - - - - - - - - - - - - - - - - - - - - - 11-42

i-14 Vivid S70 / S60 – User Manual
BC092760-1EN 01
Report templates management
Configuration of the Template selection menu - - - - - - - - - - - - - - - - - 11-44
Export/Import of Report templates - - - - - - - - - - - - - - - - - - - - - - - - - 11-45
Chapter 12 — Customize Configuration
Customize System Settings
About system Configuration - - - - - - - - - - - - - - - - - - - - - - - - - - - - - - - 12-2
General system settings - - - - - - - - - - - - - - - - - - - - - - - - - - - - - - - - - 12-4
Touch Panel
Shortcuts - - - - - - - - - - - - - - - - - - - - - - - - - - - - - - - - - - - - - - - - - - - - 12-6
Users and Security
Local System Users - - - - - - - - - - - - - - - - - - - - - - - - - - - - - - - - - - - - 12-8
User Policies - - - - - - - - - - - - - - - - - - - - - - - - - - - - - - - - - - - - - - - - 12-11
LDAP- - - - - - - - - - - - - - - - - - - - - - - - - - - - - - - - - - - - - - - - - - - - - - 12-12
System password - - - - - - - - - - - - - - - - - - - - - - - - - - - - - - - - - - - - - 12-14
Storage Encryption - - - - - - - - - - - - - - - - - - - - - - - - - - - - - - - - - - - - 12-15
Global imaging settings
Global imaging settings - - - - - - - - - - - - - - - - - - - - - - - - - - - - - - - - - 12-18
Measurement Package
Basic operations - - - - - - - - - - - - - - - - - - - - - - - - - - - - - - - - - - - - - - 12-19
Measurement package configuration - example- - - - - - - - - - - - - - - - 12-21
User-defined formulas - - - - - - - - - - - - - - - - - - - - - - - - - - - - - - - - - - 12-23
Advanced settings - - - - - - - - - - - - - - - - - - - - - - - - - - - - - - - - - - - - 12-31
Normal values - - - - - - - - - - - - - - - - - - - - - - - - - - - - - - - - - - - - - - - 12-38
Transfer of user-defined measurements transfer in DICOM SR- - - - - 12-39
Advanced Quantification - - - - - - - - - - - - - - - - - - - - - - - - - - - - - - - - 12-40
Connectivity configuration
System in a network environment- - - - - - - - - - - - - - - - - - - - - - - - - - 12-42
System in a network environment with a DICOM server - - - - - - - - - - 12-43
Wireless Network Configuration - - - - - - - - - - - - - - - - - - - - - - - - - - - 12-54
Data Streaming - - - - - - - - - - - - - - - - - - - - - - - - - - - - - - - - - - - - - - 12-60
Archive
Configuration of the archiving functions- - - - - - - - - - - - - - - - - - - - - - 12-64
TCP/IP configuration - - - - - - - - - - - - - - - - - - - - - - - - - - - - - - - - - - - 12-65
Dataflow - - - - - - - - - - - - - - - - - - - - - - - - - - - - - - - - - - - - - - - - - - - 12-65
Default remote path setting - - - - - - - - - - - - - - - - - - - - - - - - - - - - - - 12-69
XML Export configuration - - - - - - - - - - - - - - - - - - - - - - - - - - - - - - - 12-70
Patient ID- - - - - - - - - - - - - - - - - - - - - - - - - - - - - - - - - - - - - - - - - - - 12-71
Other - - - - - - - - - - - - - - - - - - - - - - - - - - - - - - - - - - - - - - - - - - - - - - 12-72
Scan Assist Pro Creator
Overview - - - - - - - - - - - - - - - - - - - - - - - - - - - - - - - - - - - - - - - - - - - 12-75
Protocol export from Vivid S70 / S60 and off-system installation of the Scan
Assist Pro Creator - - - - - - - - - - - - - - - - - - - - - - - - - - - - - - - - - 12-75
Starting Scan Assist Pro Creator - - - - - - - - - - - - - - - - - - - - - - - - - - 12-77
File handling- - - - - - - - - - - - - - - - - - - - - - - - - - - - - - - - - - - - - - - - - 12-78
Creating new Protocols - - - - - - - - - - - - - - - - - - - - - - - - - - - - - - - - - 12-79
Saving Protocols- - - - - - - - - - - - - - - - - - - - - - - - - - - - - - - - - - - - - - 12-80
Views - - - - - - - - - - - - - - - - - - - - - - - - - - - - - - - - - - - - - - - - - - - - - 12-81

Vivid S70 / S60 – User Manual i-15
BC092760-1EN 01
Step attributes - - - - - - - - - - - - - - - - - - - - - - - - - - - - - - - - - - - - - - - 12-83
Stress Echo
Application Presets List
Generating a new preset - - - - - - - - - - - - - - - - - - - - - - - - - - - - - - - - 12-90
Deleting an application preset - - - - - - - - - - - - - - - - - - - - - - - - - - - - 12-93
6VT-D TEE Probe
Chapter 13 — Probes
Probe overview
Supported probes - - - - - - - - - - - - - - - - - - - - - - - - - - - - - - - - - - - - - - 13-2
Probe presets- - - - - - - - - - - - - - - - - - - - - - - - - - - - - - - - - - - - - - - - - 13-6
Maximum probe temperature - - - - - - - - - - - - - - - - - - - - - - - - - - - - - - 13-8
Probe orientation - - - - - - - - - - - - - - - - - - - - - - - - - - - - - - - - - - - - - - 13-9
Probe labeling - - - - - - - - - - - - - - - - - - - - - - - - - - - - - - - - - - - - - - - 13-10
Intracardiac Ultrasound Catheters - - - - - - - - - - - - - - - - - - - - - - - - - 13-11
Care and Maintenance
Planned maintenance - - - - - - - - - - - - - - - - - - - - - - - - - - - - - - - - - - 13-15
Inspecting the probe - - - - - - - - - - - - - - - - - - - - - - - - - - - - - - - - - - - 13-15
Cleaning and disinfecting probes - - - - - - - - - - - - - - - - - - - - - - - - - - 13-17
Coupling gels - - - - - - - - - - - - - - - - - - - - - - - - - - - - - - - - - - - - - - - - 13-42
Probe safety
Electrical hazards - - - - - - - - - - - - - - - - - - - - - - - - - - - - - - - - - - - - - 13-43
Mechanical hazards - - - - - - - - - - - - - - - - - - - - - - - - - - - - - - - - - - - 13-43
Biological hazards- - - - - - - - - - - - - - - - - - - - - - - - - - - - - - - - - - - - - 13-44
Biopsy
Biopsy capability for probes - - - - - - - - - - - - - - - - - - - - - - - - - - - - - - 13-46
Precaution concerning the use of biopsy procedures - - - - - - - - - - - - 13-47
Preparing the Biopsy guide attachment - Convex, Sector and Linear probes
13-47
Preparing the Biopsy guide attachment - endocavity probe- - - - - - - - 13-51
Displaying the Guide zone- - - - - - - - - - - - - - - - - - - - - - - - - - - - - - - 13-52
Biopsy needle path verification- - - - - - - - - - - - - - - - - - - - - - - - - - - - 13-53
Starting the biopsy procedure - - - - - - - - - - - - - - - - - - - - - - - - - - - - 13-53
Cleaning, disinfection and disposal- - - - - - - - - - - - - - - - - - - - - - - - - 13-53
Chapter 14 — Peripherals
Introduction
Printing
To print an image - - - - - - - - - - - - - - - - - - - - - - - - - - - - - - - - - - - - - - 14-4
Printing configuration
P1 button configuration - - - - - - - - - - - - - - - - - - - - - - - - - - - - - - - - - - 14-5
Printer setup- - - - - - - - - - - - - - - - - - - - - - - - - - - - - - - - - - - - - - - - - - 14-6
External Monitor Configuration
Flexible Video Out
Connect external monitor- - - - - - - - - - - - - - - - - - - - - - - - - - - - - - - - - 14-9
Select region to show on the external monitor - - - - - - - - - - - - - - - - - 14-10
Full Screen video out region - - - - - - - - - - - - - - - - - - - - - - - - - - - - - 14-11
Image video out region - - - - - - - - - - - - - - - - - - - - - - - - - - - - - - - - - 14-11

i-16 Vivid S70 / S60 – User Manual
BC092760-1EN 01
View-X
TCP/IP Configuration for View-X - - - - - - - - - - - - - - - - - - - - - - - - - - 14-14
View-X Direct - - - - - - - - - - - - - - - - - - - - - - - - - - - - - - - - - - - - - - - - 14-16
Adjust Cropping of the Video Stream - - - - - - - - - - - - - - - - - - - - - - - 14-18
CartoSound
CartoSound/SoundStar - - - - - - - - - - - - - - - - - - - - - - - - - - - - - - - - - 14-20
Chapter 15 — Maintenance
System Care and Maintenance
Overview - - - - - - - - - - - - - - - - - - - - - - - - - - - - - - - - - - - - - - - - - - - - 15-2
Expected Service Life Description - - - - - - - - - - - - - - - - - - - - - - - - - - 15-2
Inspecting the system - - - - - - - - - - - - - - - - - - - - - - - - - - - - - - - - - - - 15-2
Disinfection - - - - - - - - - - - - - - - - - - - - - - - - - - - - - - - - - - - - - - - - - - 15-3
Cleaning the system - - - - - - - - - - - - - - - - - - - - - - - - - - - - - - - - - - - - 15-3
Cleaning the probes - - - - - - - - - - - - - - - - - - - - - - - - - - - - - - - - - - - - 15-7
Prevention of static electricity interference- - - - - - - - - - - - - - - - - - - - - 15-7
System self-test
System malfunction- - - - - - - - - - - - - - - - - - - - - - - - - - - - - - - - - - - - - 15-8
Software update
Software download and installation- - - - - - - - - - - - - - - - - - - - - - - - - 15-10
Save TCP/IP settings - - - - - - - - - - - - - - - - - - - - - - - - - - - - - - - - - - 15-13
Index

Vivid S70 / S60 – User Manual 1-1
BC092760-1EN 01
Chapter 1
Introduction
The Vivid S70 / S60 is a high performance digital
ultrasound imaging system with total data management.
The system provides image generation in 4D (option on
Vivid S70), 2D (B) Mode, Color Doppler, Power Doppler
(Angio), M-Mode, Color M-Mode, PW and CW Doppler
spectral, Tissue Velocity imaging, advanced Strain and
Contrast applications.
The fully digital architecture of the Vivid S70 / S60
system allows optimal usage of all scanning modes and
probe types, throughout the full spectrum of operating
frequencies.
This chapter provides information concerning
indications for use/contraindications, contact
information, and how this documentation is organized.

Introduction
1-2 Vivid S70 / S60 – User Manual
BC092760-1EN 01
Overview
Attention
This manual contains necessary and sufficient information to
operate the ultrasound system safely.
Read and understand all instructions in the User Manual before
attempting to use the ultrasound system.
Keep this manual with the equipment at all time. Periodically
review the procedures for operation and safety precautions.
Disregarding information on safety is considered abnormal use.
Not all features or products described in this document may be
available or cleared for sale in all markets. Please contact your
local GE Healthcare representative to get the latest information.
NOTE: Please note that orders are based on the individually agreed
upon specifications and may not contain all features listed in this
manual.
NOTE: All references to standards / regulations and their revisions are
valid at the time of publication of the user manual.
This manual suits for next models
1
Table of contents
Other GE Medical Equipment manuals
Popular Medical Equipment manuals by other brands

BOCK
BOCK floorline 15 Assembly and operation manual

Impulse Dynamics
Impulse Dynamics OPTIMIZER Smart Mini Patient manual

Chiroform
Chiroform PRIMO COMBINATION 860 user manual

Plinth 2000
Plinth 2000 BARI1 Service manual

Ossur
Ossur TOTAL KNEE 1900 Instructions for use

Bort
Bort EpiBasic Sport elbow support manual