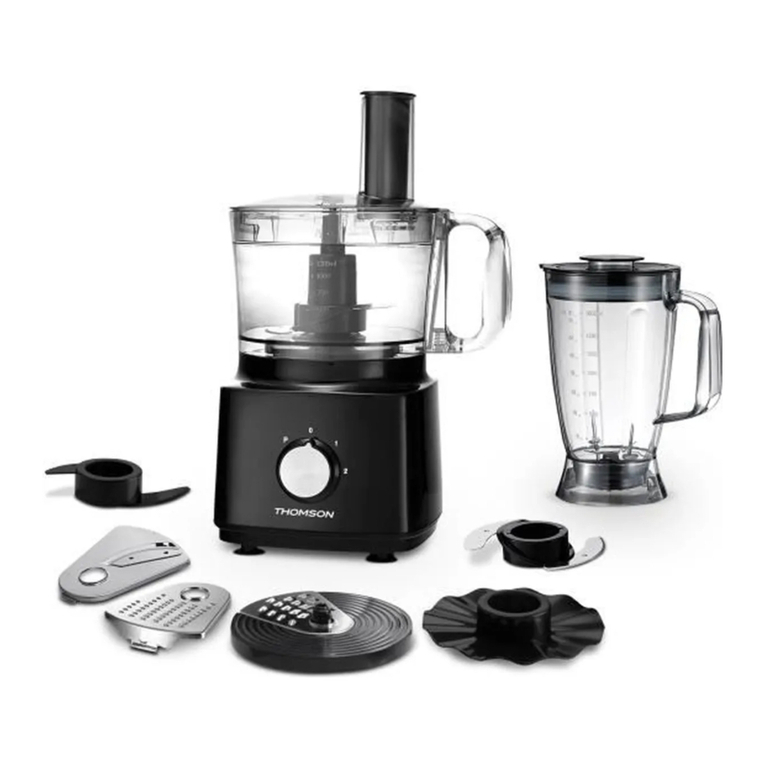
Chef Tested 797085 User manual

Instruction Manual
ITEM: 797085
wards.com 1•888•557•3848
Montgomery Ward Customer Service
8:00 am to Midnight, Monday through Friday
Recipes
and tips
inside!
wards.com 1•888•557•3848
Food Chopper and Blender

Thank you for purchasing your Chef Tested Food Chopper and
Blender by Montgomery Ward. Put through the paces by the
experts, we guarantee that it will perform to the highest
standard, time after time, with all the convenience, easy cleanup
and durability you rely on from Wards.
3
Important Safeguards ................... 3
Electrical Safety ...............................4
Specications.................................... 4
Parts & Features............................... 5
How to Use.................................... 6–8
Troubleshooting............................... 8
Cleaning & Care................................ 9
Recipes............................................ 9–11
Return Information ........................ 12
Warranty..............................................13
Thank you
for your
purchase!
Table of Contents
21•888•557•3848
wards.com
Important Safeguards
READ CAREFULLY BEFORE USING AND SAVE THESE INSTRUCTIONS!
• FOR HOUSEHOLD USE ONLY. DO NOT USE THIS APPLIANCE FOR OTHER
THAN ITS INTENDED USE.
• REMOVE all packaging materials before rst use.
• Wash all removable parts before rst use. See Cleaning & Care.
• A short cord is provided to reduce the hazards resulting from entanglement or
tripping. DO NOT drape the cord over a counter or tabletop where it can be
pulled on or tripped over.
• We DO NOT recommend using an extension cord with this appliance. However,
if an extension cord is used, the marked electrical rating should be at least as
great as the electrical rating of this appliance.
• CLOSE SUPERVISION IS NECESSARY WHEN USING THIS APPLIANCE NEAR
CHILDREN.
• A re may occur if this appliance is used near ammable materials, including
curtains, towels, walls, etc. DO NOT place any paper, plastic or other nonfood
items in the appliance.
• DO NOT place the appliance or its cord on or near a heated surface or in a
heated oven.
• This appliance should always be used on a stable, dry, heat-resistant surface.
• DO NOT use near water. DO NOT operate with wet hands.
• DO NOT operate this appliance with an external timer or remote control.
• DO NOT use an accessory or attachment not recommended by the manufac-
turer, as this may cause injury or damage the appliance.
• Keep hands, hair and clothing away from all openings and moving parts.
• Always use oven mitts when handling hot food or appliances. DO NOT attempt
to move an appliance when it is hot or has hot contents.
• DO NOT use outdoors.
• Wait until all components stop running before unplugging the power cord and
removing the lid or bowl.
• DO NOT exceed recommended capacities.
• Turn off and unplug this appliance when not in use.
• THERE ARE NO SERVICEABLE PARTS INSIDE THIS APPLIANCE.
• DO NOT USE AN APPLIANCE WITH A DAMAGED CORD OR PLUG, OR AFTER
THE APPLIANCE MALFUNCTIONS OR HAS BEEN DAMAGED IN ANY MANNER.
• Appliances contain valuable materials that can be recycled. Dispose of old
appliances using appropriate collection systems in accordance with federal and
local regulations.

Parts & Features
Specications
Electrical Safety
41•888•557•3848
wards.com
45
This appliance is equipped with a polarized plug in which one prong is wider
than the other. This is a safety feature to reduce the risk of electrical shock. The
plug will t into a polarized outlet only 1 way. If you are unable to insert the plug
into the outlet, try reversing the plug. If it still does not t, contact a qualied
electrician. DO NOT attempt to modify the plug in any way. Montgomery Ward can
not accept any liability for damage or injury resulting from failure to observe these
safety procedures.
POWER RATING 600Hz, 120V, 300W
CAPACITY 50 oz.
CORD LENGTH 33"+/- 2"
DIMENSIONS CHOPPER 9"W x 10.5"H x 7.5"D
DIMENSIONS BLENDER 7.5"W x 12"H x 5.875"D
MODEL SLB-092
1. Motor Housing
2. Bowl Lid
3. Bowl Lid Gasket
4. Chopping Blade Top
5. Chopping Blade Bottom
6. Bowl
7. Bowl Nonslip Gasket
8. Blender Lid
9. Blender Blade Top
10. Blender Blade Bottom
11. Blender Jar
12. Blender Nonslip Gasket
13. Scraper
1
2
5
6
10
7
4
3
13
12
9
8
11

1•888•557•3848
wards.com 7
6
How to Use How to Use
WARNING: Be extremely careful when handling blades— they are very sharp!
Note: DO NOT operate the appliance for more than 30 seconds at a time. If
needed, let the motor cool for a few minutes before the next round of
operation. (This can lengthen the lifespan of the motor.)
CHOPPING
1. Attach the nonslip gasket to the bottom of the bowl and place the bowl on a
stable surface.
2. Position the blade over the stainless steel rod in the center of the bowl.
3. Place ingredients to be chopped in the bowl per your recipe instructions. Work
in batches, if needed. DO NOT overll the bowl (food should not exceed height
of 3rd highest blade).
4. Place the lid on the bowl, aligning the handles on each side. The gear on the top
of the blade will poke through the hole in the lid.
Note: The lid gasket must be in place on the bottom of the lid to achieve a
secure t of the lid to the bowl.
5. Insert the bottom of the motor housing, with the stainless steel panel facing you,
down into the round indentation of the lid.
6. Swivel the motor housing left and right until the 4 notches in the lid align with
the notches on the bottom of the motor and the gear on the blade inserts up
into the center of the motor.
BLENDING
1. Attach the nonslip gasket to the bottom of the jar and place the jar on a
stable surface.
2. Position the blade over the stainless steel rod in the center of the jar.
3. Place ingredients to be blended in the jar per your recipe instructions. Work
in batches, if needed. DO NOT overll the jar (food should not exceed height
of highest blade).
4. Place the lid on the jar, aligning the 4 locking tabs. Turn the lid slightly
counterclockwise to lock in place. The gear on the top of the blade will poke
through the hole in the lid.
Note: The lid must be properly locked in place or the blender will not operate.
5. Insert the bottom of the motor housing, with the stainless steel panel facing
you, down into the round indentation of the lid.
7. Plug the power cord into an electrical outlet.
8. Use 1 hand on top of the lid to stabilize the bowl and use the other hand to
press speed I or II per recipe instructions to chop food to desired consistency.
Press the speed button with a “pulsing” motion so you can easily monitor the
progress of the chopping. The motor will stop when the button is released.
9. When nished, unplug the power cord and lift the motor housing up off the
chopper. Set aside.
10. Lift off the lid and carefully grasp the gear of the blade and lift the blade up
and out of the bowl. Use the scraper to remove the chopped food.
continued on next page
continued on next page

1•888•557•3848
wards.com
89
Troubleshooting
How to Use
Recipes
Cleaning & Care
1. Turn off and unplug the appliance.
2. Always allow the appliance to cool completely before cleaning.
3. DO NOT use abrasive brushes or pads, or harsh cleaning solutions.
4. Use a rubber spatula to remove any stuck-on food or residue.
5. Bowl, jar, lids and blades are dishwasher safe. Water temperature must not
exceed 176° F and DO NOT use drying function.
6. Wipe the exterior motor housing with a damp cloth.
7. DO NOT immerse any cord, plug or electrical appliance into water.
8. Ensure all parts are dried thoroughly before reassembling and using
this appliance.
Problem Solution
Machine does not work. Ensure the lid is snuggly in place.
Make sure power plug is plugged in
properly.
Check fuses or circuit breakers.
Machine stops running suddenly. Ensure the lid is snuggly in place.
Appliance has become too hot. Resume
operation when the motor has cooled
sufciently (after about 15 minutes).
Motor is running, but blade does not
turn.
Make sure gear on top of blade is
properly positioned up into the motor
housing.
Make sure the machine is not overload-
ed with ingredients. Try a smaller batch
or cut ingredients into smaller pieces.
6. Swivel the motor housing left and right until the 4 notches in the lid align with
the notches on the bottom of the motor and the gear on the blade inserts up
into the center of the motor.
7. Plug the power cord into an electrical outlet.
8. Hold the handle of the jar with 1 hand and press speed I or II with other hand
per recipe instructions to blend food to desired consistency. Press the speed
button with a “pulsing” motion so you can easily monitor the progress of the
blending. The motor will stop when the button is released.
9. When nished, unplug the power cord and lift the motor housing up off the
blender. Set aside.
10. Turn the lid clockwise and lift it off the jar. Carefully grasp the gear of the
blade and lift the blade up and out of the jar. Use the scraper to remove the
food.
Horseradish and Ginger Coleslaw
½cup mayonnaise 1” ginger, chopped
¼cup apple cider vinegar ⅓large head of cabbage, chopped
3 Tbsp. sugar ¼onion, chopped
½tsp. black pepper 2 carrots, chopped
1 Tbsp. prepared horseradish ½ cup roasted salted sunower seeds
1. Put the rst 6 ingredients in the bowl and pulse on II until smooth. Pour
into a large mixing bowl.
2. Put the cabbage and onion in the chopping bowl (in batches) and pulse on I
until coarsely chopped. Pour the cabbage mixture into the large mixing bowl.
3. Coarsely chop the carrots on speed I and add to the large mixing bowl.
4. Stir until all is well coated. Refrigerate for at least 1 hour to allow avors to
blend. Stir in sunower seeds before serving.
Serves 4
Restaurant Style Salsa
28 oz. diced tomatoes, with juice ¼ ½cup cilantro, tightly packed
2 Tbsp. canned diced jalapenos ½tsp. ground cumin
3 cloves garlic ½tsp. black pepper
Place all ingredients in the jar and pulse on II until desired consistency is reached.
Makes 3 cups

1•888•557•3848
wards.com
10 11
RecipesRecipes
Chipotle Chicken Stew
20 oz. diced tomatoes with chilies 1 tsp. ground cumin
½large onion, chopped 1 tsp. salt
3 chipotle chilies in adobo sauce 1 large zucchini, sliced and quartered
2 Tbsp. adobo sauce 15 oz. black beans, drained
4 cloves garlic 2 lbs. boneless, skinless chicken thighs
1 cup chicken broth shedded cheddar cheese, to taste
1. Wash hands with soap and water. DO NOT rinse raw poultry. To avoid cross
contamination, wash hands and utensils after touching raw poultry.
2. With the chopping blade placed in the bowl, pulse the rst 8 ingredients (do in
batches, if needed) on speed II. Pour this into the pot of your slow cooker.
3. Stir the zucchini and beans into the sauce. Push the chicken down into the
sauce.
4. Cover and cook on HIGH for 3 hours or LOW for 6–7 hours (internal
temperature of the chicken should be 165° F when done).
5. Shred the chicken with 2 forks, top with cheese and serve hot.
Serves 4–6
Roasted Red Pepper Pasta Sauce
24 oz. jar of roasted red peppers, chopped crushed red pepper, to taste
10 fresh basil leaves ½tsp. black pepper
¼cup Parmesan cheese, grated 1 Tbsp. salt
4 cloves garlic 3 Tbsp. olive oil
1 cup half & half
1. Place all ingredients except the olive oil in the blending jar.
2. Lock on the lid and pulse on speed II. (The sauce does not need to be
completely smooth.)
3. Add the olive oil and pulse on speed I until blended.
4. Pour the sauce into a saucepan on stovetop. Heat on medium–low, simmering
for 1 hour. Stir intermittently.
Makes 1 quart
Crowd Pleasing Guacamole
2 avocados 2 Tbsp. lemon juice
½large onion, chopped ½tsp salt
3 cloves garlic 2 Tbsp. chunky salsa (optional)
2 Tbsp. canned jalapenos slices,
1. Put all ingredients in the jar or bowl and pulse on II until desired consistency is
reached.
2. Store in an air-tight container.
Serves 4
Cheddar Broccoli Soup
1 medium sweet onion, chopped 2 large carrots, thinly sliced
5 tablespoons butter, divided salt and pepper, to taste
1 clove garlic, minced ½tsp. smoked paprika
¼ cup our ½tsp. dry mustard
2 cups chicken stock ¼tsp. cayenne pepper
2 cups half & half 8 oz. cheddar cheese, grated
1 bunch broccoli, chopped
1. Finely chop the onion in the chopping bowl, pulsing on speed II.
2. In a saucepan, melt 1 tbsp. butter and sauté the onion over medium heat until
translucent, stirring intermittently.
3. Add the garlic and cook about 30 seconds, stirring constantly. Remove from
heat.
4. Melt 4 Tbsp. butter in a Dutch oven. Stir in the our and cook over medium
heat for 3–5 minutes, stirring constantly, until thickened. Slowly add the stock,
whisking constantly.
5. Slowly add the half & half, whisking constantly. Simmer over low heat for 15–20
minutes to reduce and thicken, whisking intermittently.
6. Finely chop the broccoli and stems in the chopper bowl using speed I.
7. Add the broccoli, carrots, onion and garlic to the Dutch oven with salt & pepper
and other seasonings. Stir well and continue to simmer, stirring intermittently.
8. Simmer 15–20 minutes, then stir in the cheese until melted and incorporated
into the soup.
Serves 4

1•888•557•3848
wards.com
12 13
If any item, for any reason, does not meet your expectations, just
return it to us. We’ll gladly either:
• Refund your merchandise amount
• Credit your account
• Send a replacement
You can return any unused item in its original packaging within 60
days of its receipt for a full refund of the purchase price (excluding
shipping and handling charges).
Please send returns to:
Montgomery Ward, Inc.
Attn: Customer Returns
2000 Harrison Suite 100
Clinton, IA 52732-6676
When returning an item:
• Use the original packaging and pack it securely.
• Please adequately insure your item in case you need to
make a claim with the carrier you choose for returning your
item.
• Include your order number and reason for return.
• We recommend keeping the receipt for 4 weeks.
Montgomery Ward, Inc. warrants this Chef Tested product
to be free from defects in material and workmanship
for one year from provable date of purchase.
Within this warranty period,
Montgomery Ward will repair or
replace, at its option, defective parts of this Chef Tested
product at no charge provided the product is returned
freight prepaid with proof of purchase to
Montgomery Ward.
Allow 2–4 weeks for return shipping.
This warranty does not cover improper installation, misuse,
abuse or neglect on part of the owner. Warranty is also
invalid in any case that the product is taken apart or
serviced by an unauthorized service station.
This warranty gives you specic legal rights and they may
vary from state to state.
THE FOREGOING WARRANTIES ARE IN LIEU OF ALL
OTHER WARRANTIES AND CONDITIONS,
EXPRESS OR IMPLIED, INCLUDING
BUT NOT LIMITED TO THOSE OF MERCHANTABILITY
OR FITNESS FOR A PARTICULAR PURPOSE.
1 Year Limited Warranty
Montgomery Ward Customer Service
8:00 am to Midnight CST, Monday through Friday
wards.com 1•888•557•3848
Returns

1514
Table of contents
