CHI 13120 User manual

1
USE AND CARE MANUAL
MANUEL D’UTILISATION ET D’ENTRETIEN
MANUAL DE USO Y CUIDADO
Before operating the iron, please read these instructions carefully
and keep them for future reference.
Avant d’utiliser le fer, liser attentivement ces instructions
et conserver-les pour référence ultérieure.
Antes de usar la plancha, lea atentamente estas instrucciones
y guárdelas para futuras consultas.

2
When using electrical appliances, basic safety precautions
should always be followed to reduce the risk of re, electric
shock, and/or injury to persons, including the following:
1. Read all instructions.
2. This appliance is not intended for use by persons (including
children) with reduced physical, sensory, or mental
capabilities, or lack of experience and knowledge, unless
they are closely supervised and instructed concerning use
of the appliance by a person responsible for their safety.
3. Close supervision is necessary when any appliance is
used by or near children. Children should be supervised to
ensure that they do not play with the appliance.
4. Use appliance only for its intended use.
5. To avoid the risk of electric shock, do not immerse the iron
in water or other liquids.
6. Always turn the iron to OFF ( ) before plugging or
unplugging the iron from the electrical outlet. To unplug,
grasp the plug and pull from the outlet. Never pull from the
power cord.
7. Do not let the cord touch hot surfaces. Let the iron cool
completely before putting the iron away. Coil the cord
loosely around the iron when storing.
8. Always disconnect the iron from the electrical outlet before
filling the iron with water, emptying the water from the iron,
and when the iron is not in use.
IMPORTANT SAFEGUARDS

3
SAVE THESE INSTRUCTIONS
9. Do not operate the iron with a damaged cord or in the
event the iron has been dropped or damaged or there are
visible signs of damage or it is leaking. To avoid the risk
of electric shock, do not disassemble the iron. Supply
cord replacement and iron repairs must be conducted
by a qualied serviceman or the manufacturer. Incorrect
assembly might result in a risk of electric shock when the
iron is used after reassembly. Contact Customer Service
for information on examination, repair, or adjustment as set
forth in the Limited Warranty.
10. The iron must be used and rested on a stable surface.
11. When placing the iron on its heel rest, ensure that the
surface on which the stand is placed is stable.
12. Do not leave the iron unattended while the iron is connected
or on an ironing board.
13. Burns can occur from touching hot metal parts, hot water,
or steam. Use caution when you turn a steam iron upside
down—there might be hot water in the reservoir.
14. To avoid a circuit overload, do not operate an iron on the
same circuit with another high-wattage appliance.
15. If an extension cord is absolutely necessary, a cord with
an ampere rating equal to or greater than the maximum
rating of the iron shall be used. A cord rated for less
amperage can result in a risk of re or electric shock due to
overheating. Care shall be taken to arrange the cord so that
it cannot be pulled or be tripped over.
16. Always close the lling aperture when operating the
appliance.

4
Other Consumer Safety Information
This appliance is intended for household use only.
wWARNING Electrical Shock Hazard: This appliance is
provided with a polarized plug (one wide blade) to reduce
the risk of electric shock. The plug ts only one way into a
polarized outlet. Do not defeat the safety purpose of the plug
by modifying the plug in any way or by using an adapter. If the
plug does not t fully into the outlet, reverse the plug. If it still
does not t, have an electrician replace the outlet.
The length of the cord used on this appliance was selected
to reduce the hazards of becoming tangled in or tripping
over a longer cord. If a longer cord is necessary, an approved
extension cord may be used. The electrical rating of the
extension cord must be equal to or greater than the rating of
the appliance. Care must be taken to arrange the extension
cord so that it will not drape over the countertop or tabletop
where it can be pulled on by children or accidentally tripped
over.

5
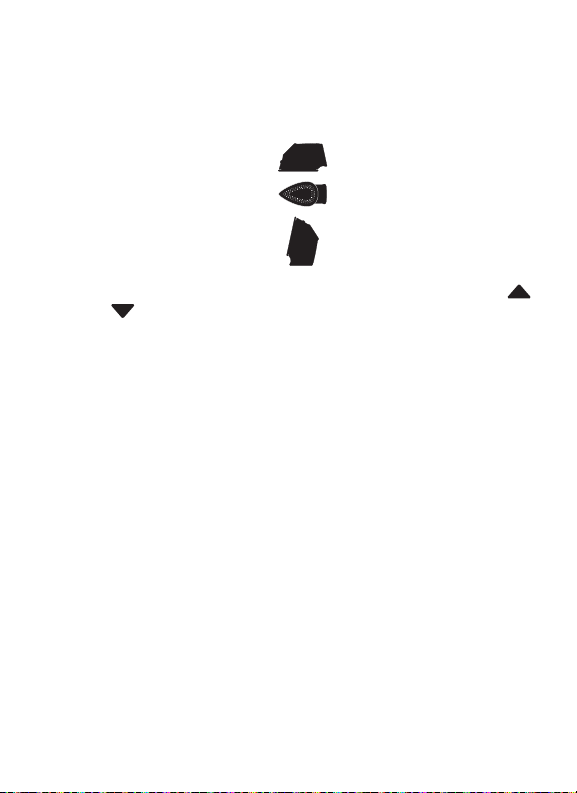
Parts and Features
1. Adjustable Steam Lever
2. Steam Burst Buttons
([on sides])
3. Fabric Temperature
Display/Control Panel
4. Water Fill Door with Latch
(MAX Fill Line in Reservoir)
5. Heel Rest
6. Titanium Ceramic
Soleplate
Fabric Temperature Display/Control Panel

6
How to Dry and Steam Iron
1. To Steam Iron: Make sure Iron is
unplugged and Adjustable Steam Lever
is in Off (Dry Iron) position. To ll
Water Reservoir: Slide Water Fill Door
Latch back to release door. Lift Water Fill
Door and add untreated tap water up to
the MAX Fill Line through the opening.
If you have extremely hard water, mix
50% untreated tap water with 50% distilled or demineralized
water for use in the Iron. Press Water Fill Door down to secure
in place. Plug into outlet and the white arrows ( /)
will ash. Press the up ( ) or down ( ) arrow to select
temperature setting. See recommended Ironing Chart on
page 8. Move Adjustable Steam Lever to On ( ) (Steam Iron).
To Dry Iron: Plug into outlet. Press
up ( ) or down ( ) arrow to select
temperature setting.
2.
Preheat 2 minutes to reach desired
temperature. Iron will beep and display
setting will stop ashing when ready.
Make sure Adjustable Steam Lever is in
Off
(Dry Iron)
position.
You are now
ready to iron.
3. To turn Iron off, move Adjustable Steam Lever to (Dry Iron)
position and press up ( ) or down ( ) arrow to turn OFF.
Unplug.
wCAUTION Burn Hazard. Attempting to steam iron on a lower
temperature setting or failing to allow the iron to preheat for
2 minutes can result in hot water dripping from the soleplate.
7
FABRIC FACTS AND LABELS:
Every fabric is different and should be treated accordingly. The
label inside clothing or linens should recommend fabric care
instructions that include ironing treatment. As a general rule, these
instructions should be followed. If the fabric is a blend, use a low
temperature setting. If you do not know what the content of the
fabric is, use the lowest temperature rst and test on an inside
seam.
Tips for Best Ironing Results
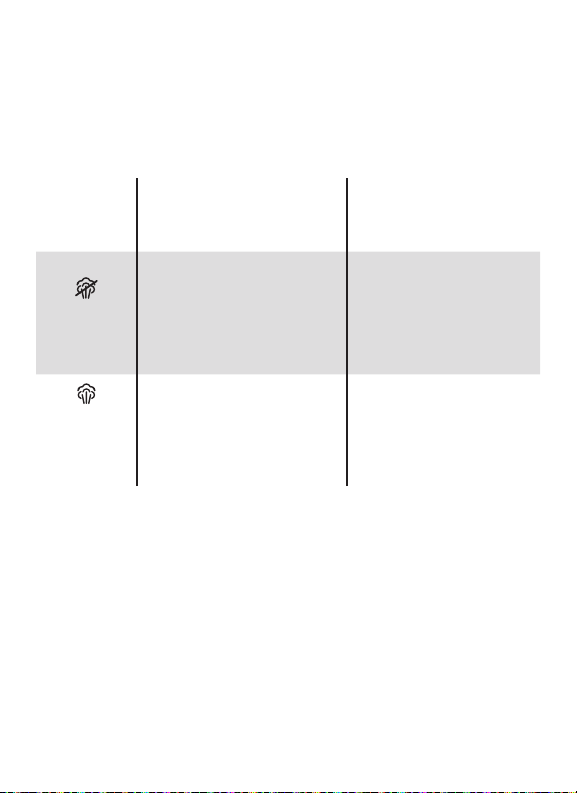
POSITION SENSING/AUTO SHUTOFF
The Iron will turn off automatically when left in the following
positions. The auto shutoff time varies based on the Iron’s position.
NOTE: Tilting the Iron more than 30 degrees or pressing up ( )
or down ( ) arrow will reset the auto shutoff sensor.
Iron position Motionless time
Resting on soleplate 60 seconds
Resting on either side 60 seconds
Resting on heel 30 minutes

8
Tips for Best Ironing Results (cont.)
PREPARE TO IRON:
NOTE: To avoid garment damage, check garment label for fabric
composition and ironing instructions.
Steam
Setting Temperature Setting Ironing
Instructions
Dry Iron
OFF OFF
Synthetic •
Low
Dry iron, using spray
if necessary.
Silk ••
Medium Iron silk on wrong
side.
Steam
Iron
Cotton,
Linen
•••
High
For cotton, iron while
still damp, or use
spray.
For linen, iron fabric
on wrong side.
Wool ••
Medium
1. Cover your ironing board with a padded, heat-resistant cover.
Brush or wipe off any dust, dirt, or debris so it doesn’t transfer
to clothing.
2. To set the height of the ironing board, stand with your elbows
bent at right angles; then drop your hands slightly so that
your arms are in a comfortable position. Adjust the height of
your ironing board to this height.
3. Check the soleplate for mineral deposits or scorched material
before you begin ironing.

9
FAST FACTS:
• Always iron with a lengthwise motion. Ironing in a circular
motion may stretch fabric.
• Natural bers such as cotton and linen should be ironed
slightly damp for faster, easier ironing. If they are completely
dry, use maximum steam while ironing, or mist them with
water prior to ironing.
• Any portion of a garment that has two layers of fabric such as
pockets, seams, collars, and cuffs should be ironed inside out
rst.
• To press a collar, iron from the points in using small strokes
of the iron. After wrinkles are removed, crease the collar into
place by hand. Treat French cuffs similarly, gently creasing by
hand after ironing.
IRONING VERSUS PRESSING:
• Y
ou may have heard the terms “ironing” and “pressing” used
interchangeably, but they are actually quite different. When
ironing, you slide the iron back and forth over fabric. When
pressing, the iron is placed and held on the fabric in one spot,
lifted up, and this process is repeated until the areas that need
attention are smooth. A “pressing” technique is helpful to
avoid stretching fabrics.
• A pressing cloth can help reduce unwanted “shine” on fabrics.
You can purchase a pressing cloth in the laundry care section,
or a clean white dish towel or 100% cotton pillowcase works
equally well. You do not need to increase the recommended
iron temperature when using a pressing cloth.
Tips for Best Ironing Results (cont.)

10
1. Unplug and allow Iron to cool.
2. To empty water from Iron, slide Water Fill Door Latch back
to release door. Lift Water Fill Door and slowly tilt pointed
end of Iron over a sink until all the water has poured out.
3. Store Iron on the Heel Rest. NOTE: Use the Steam Burst
Buttons to help clear steam vents of any mineral buildup.
Care and Cleaning
NOTES:
• Care should be used while cleaning; steam can burn.
• Never iron over zippers, pins, metal rivets, or snaps since
these may scratch the soleplate.
• Do not use abrasive cleansers or metal scouring pads.
• Do not use chemical cleaners or hot cleaners, as this will
damage the soleplate nish.

11
Iron won’t heat.
• Plug Iron into a working outlet.
• Select a temperature.
• Move or tilt the Iron to reset.
Water is leaking.
• Too much water is in the Reservoir.
• Steam Burst Buttons ( ) have been pressed while the Iron
was cold. Select a temperature and let Iron preheat for 2
minutes.
• If dry ironing, make sure the Adjustable Steam Lever is in the
Off (Dry Iron) position.
Iron won’t steam.
• Ensure there is water in the Reservoir.
• Move the Adjustable Steam Lever to the (Steam Iron)
position.
• Preheat for 2 minutes.
Twisted cord.
• If the iron cord should become twisted, unplug Iron and let
cool. Hold Iron cord in the middle of entire length. Let plug
and Iron dangle freely until cord uncoils. This will extend the
life of the iron cord.
Troubleshooting

12
This warranty applies to products purchased and used in the U.S. and Canada.
This is the only express warranty for this product and is in lieu of any other
warranty or condition.
This product is warranted to be free from defects in material and workmanship
for a period of two (2) years from the date of original purchase. During this period,
your exclusive remedy is repair or replacement of this product or any component
found to be defective, at our option; however, you are responsible for all costs
associated with returning the product to us and our returning a product or
component under this warranty to you. If the product or component is no longer
available, we will replace with a similar one of equal or greater value.
This warranty does not cover glass, lters, wear from normal use, use not in
conformity with the printed directions, or damage to the product resulting from
accident, alteration, abuse, or misuse. This warranty extends only to the original
consumer purchaser or gift recipient. Keep the original sales receipt, as proof of
purchase is required to make a warranty claim. This warranty is void if the product
is used for other than single-family household use or subjected to any voltage and
waveform other than as specied on the rating label (e.g., 120 V ~ 60 Hz).
We exclude all claims for special, incidental, and consequential damages caused
by breach of express or implied warranty. All liability is limited to the amount of
the purchase price. Every implied warranty, including any statutory warranty
or condition of merchantability or tness for a particular purpose, is disclaimed
except to the extent prohibited by law, in which case such warranty or
condition is limited to the duration of this written warranty. This warranty gives
you specic legal rights. You may have other legal rights that vary depending
on where you live. Some states or provinces do not allow limitations on implied
warranties or special, incidental, or consequential damages, so the foregoing
limitations may not apply to you.
To make a warranty claim, do not return this appliance to the store. Please call CHI
Garment Care 1.844.882.9038 in the U.S. or visit www.chisteam.com in the U.S.
For faster service, locate the model, type, and series numbers on your appliance.
Limited Warranty

13
Notes

14
Pour utiliser un appareil électroménager, vous devez toujours
prendre des mesures élémentaires de sécurité pour réduire le
risqued’incendie, d’électrocution et/ou de blessure corporelle,
en particulier les mesures suivantes :
1. Lire toutes les instructions.
2. Cet appareil n’est pas destiné à être utilisé par des
personnes (y compris les enfants) dont les capacités
physiques, sensorielles ou mentales sont réduites, ou
manquant d’expérience et de connaissance, sauf si elles
sont étroitement surveillées et instruites sur l’utilisation de
l’appareil par une personne responsable de leur sécurité.
3. Une surveillance étroite est requise pour tout appareil utilisé
par ou près des enfants. Surveiller que les enfants ne jouent
pas avec l’appareil.
4. Utiliser exclusivement le fer pour son usage prévu.
5. Pour éviter le risque de choc électrique, ne pas plonger le fer
dans l’eau ou d’autres liquides.
6. Le fer doit toujours être éteint (réglé à OFF/ ) avant d’être
branché à une prise de courant ou débranché. Pour
débrancher, saisir la che et la retirer de la prise. Ne pas tirer
sur le cordon d’alimentation.
7. Ne pas laisser le cordon toucher les surfaces chaudes.
Laisser refroidir le fer complètement avant de le remiser.
Enrouler lâchement le cordon autour du fer à repasser pour
ranger.
8. Toujours débrancher le fer d’une prise de courant électrique
lorsqu’on le remplit d’eau ou lorsqu’on le vide, ou si l’appareil
n’est pas utilisé.
PRÉCAUTIONS IMPORTANTES

15
CONSERVER CES INSTRUCTIONS
9. Ne pas utiliser le fer avec un cordon endommagé, si le
fer est tombé ou endommagé, s’il y a des signes visibles
de dommage ou s’il fuit. Pour éviter le risque de choc
électrique, ne pas démonter le fer. Le faire examiner et
réparer par un dépanneur qualié. Un assemblage incorrect
risque d’entraîner un risque de choc électrique lorsque le
fer est utilisé après réassemblage. Veuillez communiquer
avec le service à la clientèle pour obtenir de l’information
concernant l’inspection, la réparation ou le réglage, comme
précisé dans la garantie limitée.
10. Le fer doit être utilisé et reposé sur une surface stable.
11. En plaçant le fer sur son talon d’appui, assurez-vous que la
surface sur laquelle le support est placé est stable.
12. Ne pas laisser le fer sans surveillance pendant qu’il est
branché ou pendant qu’il est sur une planche à repasser.
13. Des brûlures peuvent survenir lorsqu’on touche des pièces
chaudes en métal, de l’eau chaude ou de la vapeur. Adopter
des précautions lorsqu’on tourne un fer à vapeur à l’envers,
car il peut rester de l’eau chaude dans le réservoir.
14. Pour éviter une surcharge du circuit, ne pas utiliser le fer sur
le même circuit qu’un autre appareil de haute puissance.
15. Si une rallonge électrique est absolument nécessaire, un
cordon d’intensité nominale égale ou supérieure à l’intensité
nominale maximale du fer doit être utilisé. Un cordon
d’une intensité nominale moindre peut entraîner un risque
d’incendie ou de choc électrique en raison d’une surchauffe.
Il faut prendre soin de placer le cordon de rallonge pour qu’il
ne puisse pas être tiré par des enfants ou faire trébucher.
16. Veuillez toujours fermer l’ouverture pour le remplissage lors
de l’utilisation de l’appareil.

16
Autres consignes de sécurité pour
le consommateur
Cet appareil est destiné à un usage domestique uniquement.
wAVERTISSEMENT Risque de choc électrique : Cet appareil
est fourni avec une che polarisée (une broche large) pour
réduire le risque d’électrocution. Cette che n’entre que dans
un seul sens dans une prise polarisée. Ne contrecarrez pas
l’objectif sécuritaire de cette che en la modiant de quelque
manière que ce soit ou en utilisant un adaptateur. Si vous
ne pouvez pas insérer complètement la che dans la prise,
inversez la che. Si elle refuse toujours de s’insérer, faire
remplacer la prise par un électricien.
La longueur du cordon installé sur cet appareil a été
sélectionnée an de réduire les risques d’enchevêtrement
ou de faux pas causés par un l trop long. L’utilisation d’une
rallonge approuvée est permise si le cordon est trop court.
Les caractéristiques électriques de la rallonge doivent être
équivalentes ou supérieures aux caractéristiques de l’appareil.
Prendre toutes les précautions nécessaires pour installer la
rallonge de manière à ne pas la faire courir sur le comptoir ou
sur une table pour éviter qu’un enfant ne tire sur le cordon ou
trébuche accidentellement.
Afcheur/panneau de commandes
de températures pour les tissus

17
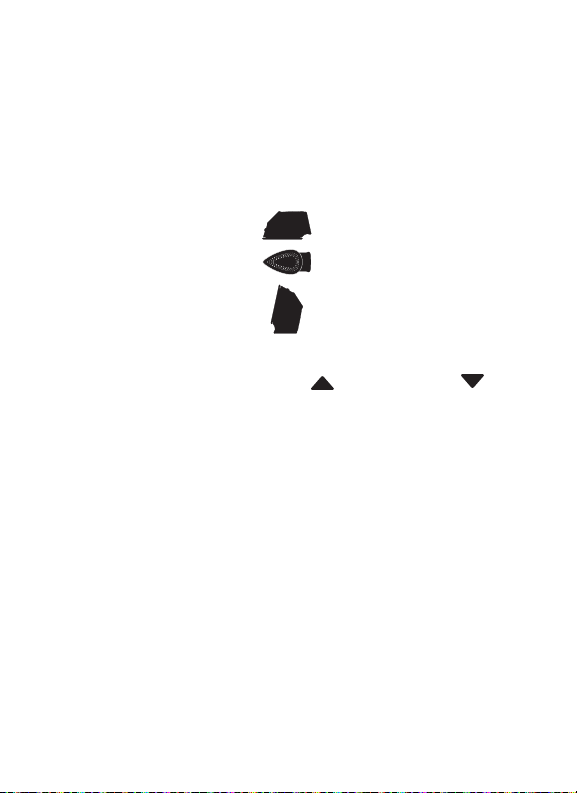
Pièces et caractéristiques
1. Levier d’ajustement de la
vapeur
2. Boutons de jets de vapeur
( [sur les côtés])
3. Afcheur/panneau
de commandes de
températures pour les
tissus
4. Couvercle pour le
remplissage d’eau
avec loquet (ligne de
remplissage MAX dans le
réservoir)
5. Talon d’appui
6. Semelle en céramique de
titane
Afcheur/panneau de commandes
de températures pour les tissus

18
Repassage à sec et à la vapeur
1.
Repassage à la vapeur : Veuillez vous
assurer que le fer est débranché et que le
levier d’ajustement de la vapeur est à arrêt
(repassage à sec). Pour remplir le réservoir
d’eau : Glisser le loquet du couvercle
pour le remplissage d’eau vers l’arrière
pour déverrouiller le couvercle. Soulever
l’ouverture du réservoir et le remplir d’eau
du robinet jusqu’à la ligne indiquant la
capacité maximale (MAX). Si vous avez de l’eau extrêmement
dure, faire un mélange de 50 % d’eau du robinet non traitée et
de 50 % d’eau distillée ou déminéralisée pour utiliser dans le fer.
Appuyer sur le couvercle pour le remplissage d’eau an de le xer
en place. Brancher dans la prise et les èches blanches ( /)
clignoteront. Appuyer sur la èche vers le haut ( ) ou vers le bas
() pour sélectionner le réglage de température. Voir le tableau
de recommandations de repassage à la page 20 . Déplacer le levier
d’ajustement de la vapeur à marche ( (repassage avec vapeur).
Repassage à sec: Brancher dans la prise de
courant. Appuyer sur la èche vers le haut
() ou vers le bas ( ) pour sélectionner le
réglage de température.
2.
Préchauffer 2 minutes pour atteindre la
temperature désirée. Le fer émettra un
signal sonore et le réglage apparaissant
dans l’afcheur arrêtera de clignoter lorsque
prêt. Veuillez vous assurer que le levier
d’ajustement de la vapeur est à arrêt (repassage à sec). Vous êtes
maintenant prêt à repasser.
3.
Pour éteindre le fer, déplacer le levier d’ajustement de la vapeur à la
position (repassage à sec) et appuyer sur la èche vers le haut
() ou vers le bas ( ) pour mettre à arrêt. Débrancher.
wATTENTION
Risque de brûlures. La vapeur à un réglage de
température inférieur ou ne pas laisser le fer chauffer pendant 2
minutes peut occasionner un égouttement d’eau depuis la semelle.
19
FAITS AU SUJET DES TISSUS ET ÉTIQUETTES :
Chaque tissu est différent et doit être traité selon ses
caractéristiques. L’étiquette à l’intérieur du vêtement ou de la literie
recommande les instructions d’entretien et de repassage. Ces
directives générales doivent être respectées. Utiliser un réglage
de basse température pour les tissus comportant un mélange
de bres. Utiliser le réglage de température le plus faible si la
composition du tissu est inconnue et faire un essai sur une couture
intérieure.
Conseils pour des résultats de repassage optimaux
DÉTECTION DE MOUVEMENT/MISE HORS TENSION
AUTOMATIQUE
Le fer se coupe automatiquement lorsqu’il est laissé dans les
positions suivantes. La durée de mise hors tension automatique varie
selon la position du fer.
REMARQUE : En inclinant le fer de plus de 30 degrés ou en
appuyant sur la èche vers le haut ( ) ou vers le bas ( ), le
capteur d’arrêt automatique sera réinitialisé.
Position du fer Temps
d’immobilisation
Repos sur la semelle 60 secondes
Repos sur le côté 60 secondes
Repos sur talon 30 minutes
20
Conseils pour des résultats de repassage optimaux (suite)
PRÉPARATION DU FER À REPASSER :
REMARQUE : Vérier l’étiquette du vêtement pour obtenir les
informations de composition des tissus et les instructions de
repassage pour éviter les dommages aux vêtements.
Réglage
de
vapeur Réglage de
température Instructions de
repassage
Repassage
à sec
OFF (arrêt) OFF (arrêt)
Synthétiques
•
Bas
Repasser à sec,
avec vaporisation si
nécessaire.
Soie ••
Moyen Repasser le soie sur
l’envers du tissu.
Repassage
avec
vapeur
Coton, lin •••
Haut
Pour le coton,
repasser pendant que
le tissu est encore
humide. Pour le lin,
repasser sur l’envers
du tissu.
Laine ••
Moyen
1. Couvrir la planche à repasser avec une housse matelassée et
résistante à la chaleur. Brosser ou essuyer toute poussière,
saleté ou débris pour éviter leur incrustation dans les
vêtements.
2. Pour régler la hauteur de la planche à repasser, tenir les
coudes à un angle droit ; puis abaisser légèrement les mains
pour que les bras adoptent une position confortable. Régler la
hauteur de la planche à repasser selon cette hauteur.
3. Vérier la semelle à la recherche de dépôts minéraux et de
matériau éraé avant de commencer le repassage.
This manual suits for next models
1
Table of contents
Languages:
Other CHI Iron manuals


