Chinook Tornado 6 User manual

Tornado 6
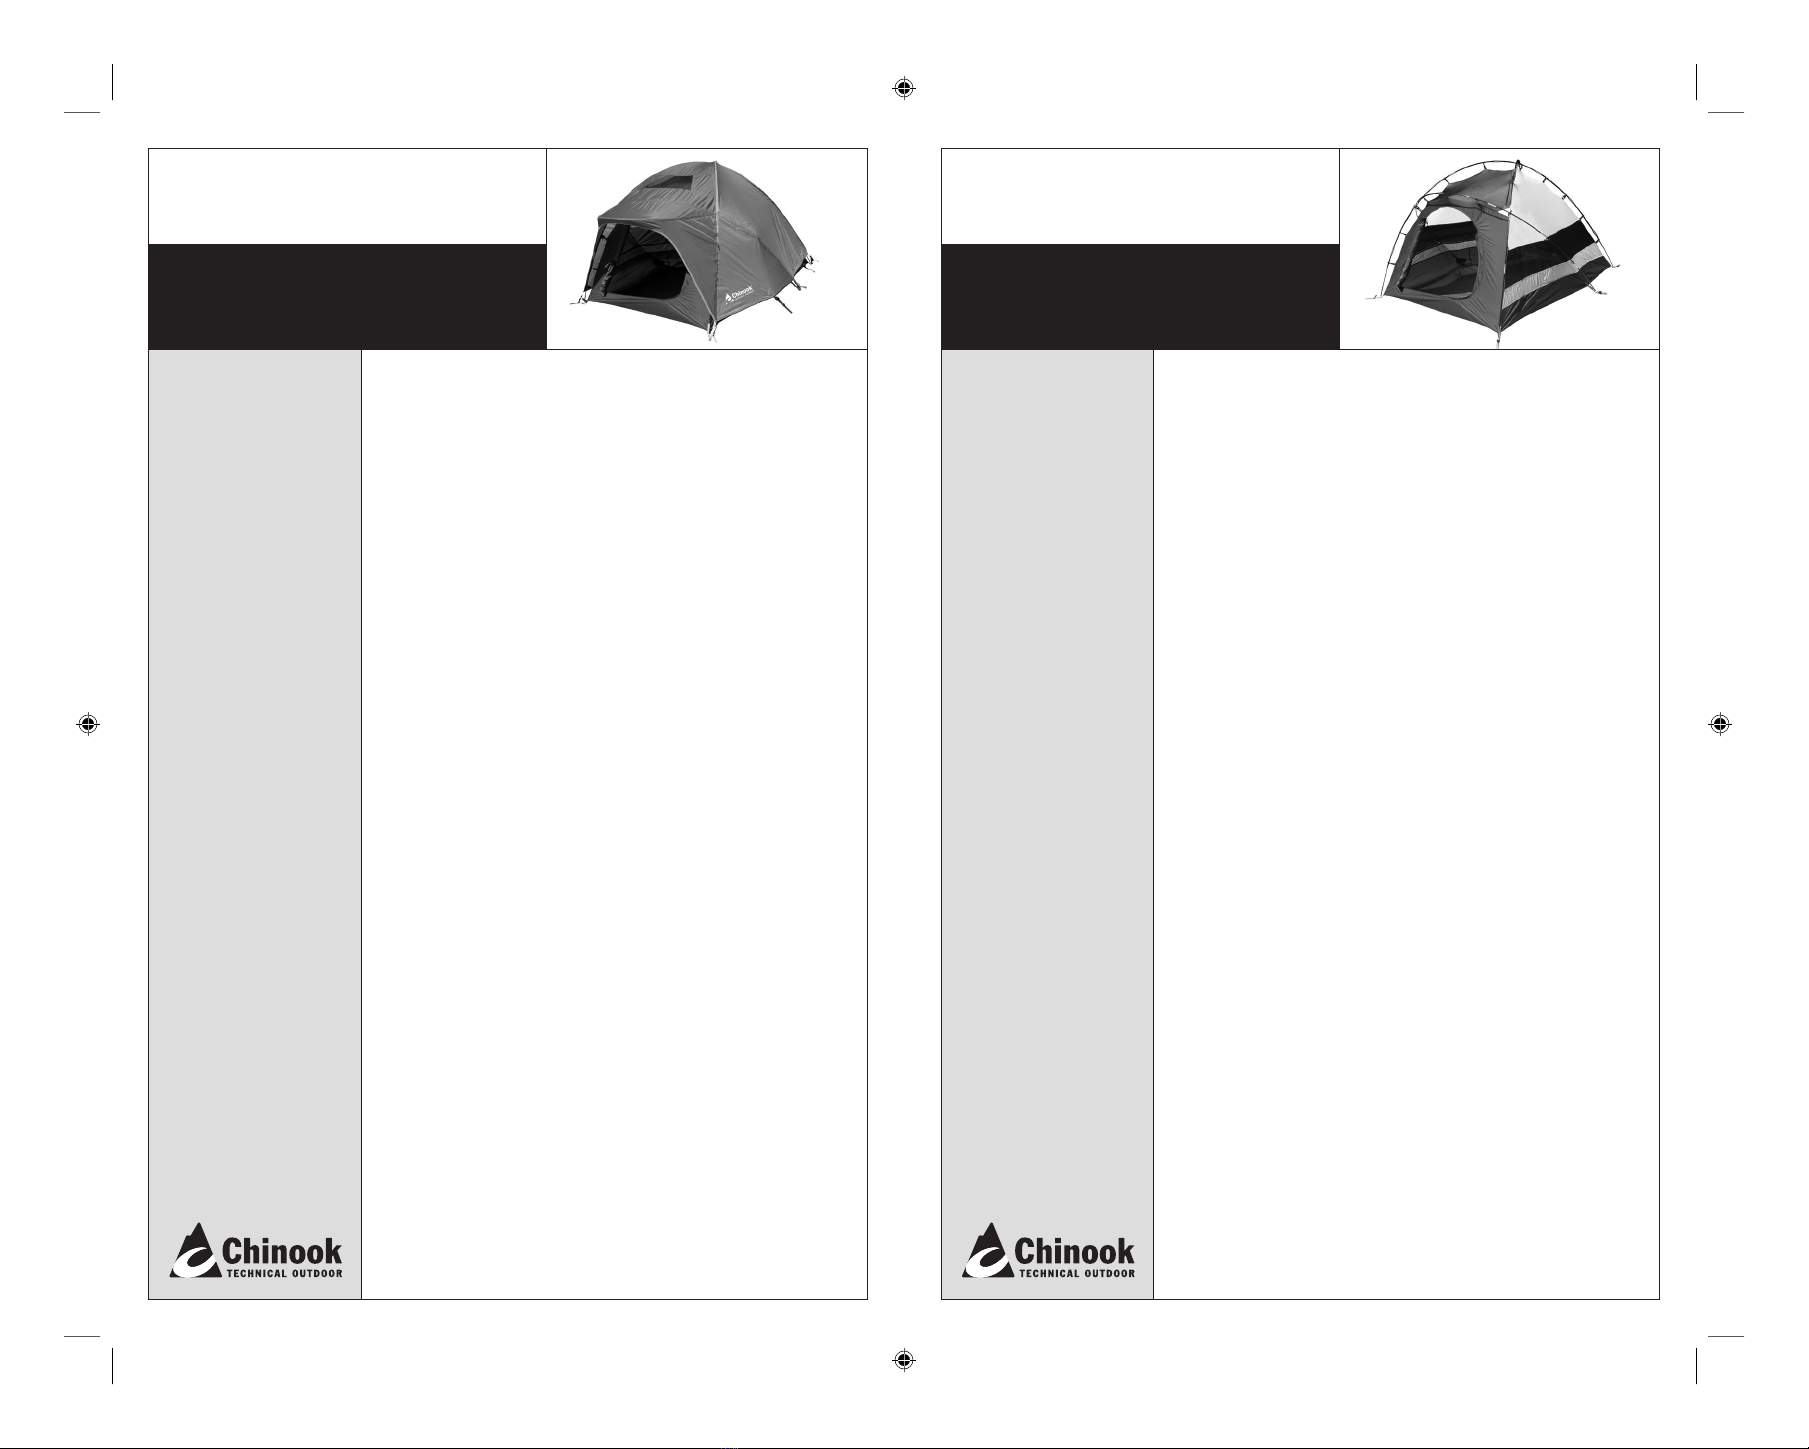
6-person tent
tent assembly instructions
instructions de montage
tent parts: accessoires de tente:
> Tornado 6 Tent Body
> Tornado 6 Fly
> 3 Tent Body poles: 212"/538 cm
> Front awning pole: 100"/254 cm
> Back awning pole: 78"/198 cm
> Tent peg set
> Guylines
> 3 Stuff Sacks:
• Peg stuff sack
• Pole stuff sack
• Tent stuff sack
Tente à 6 personnes
Tornado 6 use & care
utilisation et entretien
> Tente Tornado 6
> Double toit Tornado 6
> 3 mâts principaux (chacun 212"/538 cm)
> Mât d’auvent avant (100"/254 cm)
> Mât d’auvent arrière (78"/198 cm)
> Ensemble de piquets de tente
> Tendeurs
> Sacs de rangement
• Sac de rangement pour piquets
• Sac de rangement pour armature
• Sac de rangement pour tente
CLEANING AND STORAGE
• Set up the tent and wipe it down with a mild soap
(liquid hand soap works well) and lukewarm water
solution. Rinse thoroughly and dry completely. Never
machine wash or dry as this can cause damage to the
tent’s protective coating and seams.
• Never store your tent wet. After cleaning, make sure
the tent is completely dry before storing or mold and
mildew are likely to occur. Store the loosely rolled tent
in a cool, dry area.
• Clean the zippers by immersing them in water and
gently cleaning, allowing any dirt and sand to wash
away. Rinse thoroughly and dry completely.
• Fiberglass and Aluminum poles should be cleaned
with a damp cloth and dried thoroughly before storage.
A light coating of Silicone spray will help protect the
Aluminum and ferrules.
ULTRAVIOLET
• Excessive exposure to sunlight can cause Ultraviolet
damage to tent fabric and will cause nylon and
polyester to become brittle and tear easily. Chinook
tent fabrics have been treated with a UV-resistant
coating during the manufacturing process but
any synthetic fabric is susceptible to ultraviolet
degradation.
• You can minimize damage by erecting your tent on
sites where exposure to direct sunlight can be avoided.
Always use the rain y as this will help protect the
inner tent from UV damage and less is expensive to
replace if damaged. PLEASE NOTE: Ultraviolet damage
is not covered under the Chinook Warranty.
www.chinooktec.com
WARNING: KEEP ALL FLAME AND HEAT SOURCES
AWAY FROM THIS TENT FABRIC. MEETS CPAI-84
SPECIFICATIONS. This tent is made of ame-resistant
fabric. It is not reproof. The fabric will burn if left in
continuous contact with a ame source.
PLEASE NOTE: THE APPLICATION OF ANY FOREIGN
SUBSTANCE TO THE TENT FABRIC MAY RENDER THE
FLAME RESISTANT PROPERTIES INEFFECTIVE.
NETTOYAGE ET ENTREPOSAGE
• Monter la tente, essuyer et nottoyer avec un savon
doux (savon à main) et eau tiède. Bien rincer et
sécher complètement. Ne jamais laver ou sécher
à la machine car cette dernière peut causer des
dommages aux coutures et à la couche protectrice.
• Ne jamais remiser votre tente quand votre tente est
humide ou mouillée.
• Nettoyer les fermetures glissières en les trempants
dans l’eau pour enlever saleté et sable. Bien rincer
et sécher.
• Les tiges de bre de verre ou d’aluminium devraient
être nettoyer avec un linge humide et bien sécher
avant l’entreposage. Un silicone en aerosol peut-
être appliqué pour une meilleure protection.
RAYONS ULTRAVIOLET
• Les ultraviolet du soleil causent certains dommages
a votre tente en asséchant le materiel, le rendant
fragile et plus facilement déchirable. Les tentes
Chinook ont été spécialement traitées avec un
enduit contre les rayons “UV” pour une protection
maximale.
• Le montage de votre tente dans un endoit ombragé
accentura la longévité de vie de votre tente.
Toujours utiliser votre double toit pour une meilleure
protection de votre tente intérieure. Les dommages
causés par les “ultraviolet” ne sont pas couverts par
la guarantie Chinook.
MISE EN GARDE: TENIR LE TISSU DE CETTE
TENTE LOIN DE TOUTE FLAMME ET DE TOUTE
SOURCE DE CHALEUR. Cette tente est fabriquée
d’un tissue resistant au feu, mais qui n’est pas
inammable. Ce tissue brûlera s’il est laissé en
contact continu avec une source d’inammation.
A NOTER: UNE APPLICATION DE SUBSTANCE
ETRANGERE SUR LA TENTE PEUT ENDOMMAGER
LA PROTECTION ANTI-FEU DE LA TOILE.
CANADA
GREENLAND SALES LTD.
3145 14th Avenue
Markham, Ontario
Canada L3R 0H1
Tel: 1-905-513-0333
Fax: 1-905-513-9809
USA
GREENLAND SALES CORP.
Box 11, 2221 Niagara Falls Blvd.
Niagara Falls, New York
USA 14304
Tel: 1-800-513-8299
Fax: 1-800-273-8451
Tornado6_TAI_2006.ID 11/2/06, 1:07 PM1
Tornado 6
tent assembly
instructions
Tornado 6
instructions de
montage
IMPORTANT INFORMATION
Thank you for purchasing your
new Chinook tent. We have
designed and manufactured
these tents to give years
of trouble free enjoyment
and use. To maximize the
enjoyment of your tent, please
read the following information
and assembly instructions
with care.
• Become familiar with your
new Chinook tent at home
by assembling the tent
at home before your rst
camping trip. After a long day
of travel a campsite is not a
good place to learn how to
set up a new tent.
• When selecting a campsite,
make sure that the area is
at, has good drainage and is
free of sharp objects that may
damage the tent.
• Carefully push each pole
through the proper pole
sleeve. Never force the pole
as this may cause damage to
the sleeve or pole.
PLEASE USE
COMMON SENSE
• Erect your tent upwind away
from campres.
• Do not cook with open ames
inside the tent.
• Do not store ammables or
refuel stoves or lanterns in
your tent.
FIRE WARNING
Your Chinook tent fabric is
treated with a re retardant
but is NOT FIREPROOF. If
exposed to open ames or
other ignition sources the tent
may ignite and burn.
Tent
1. Remove all parts from the tent bag. Spread the tent body with its oor on the
ground and with the web/grommet loops in each corner. Be sure to clear the
area of any sharp objects that may damage the tent fabric.
2. Assemble all of the shock-corded poles. Carefully join each section to avoid
damaging the rod ends.
3. Insert each tent body pole (212"/538 cm) into its corresponding web grommet
(matching colors). Two of the poles run from the front corners of the tent body
to the back corners, crossing in the center of the tent canopy. The third pole
runs from one side of the tent to the other underneath the other two poles.
4. Situated at each corner and at each side of the tent body are web stakeout
loops with grommets attached. Working with one pole at a time, insert the pole
tips into the grommet located closest to the tent.
5. Attach all clips onto the poles.
Fly
1. Spread the y over the tent canopy.
2. Insert the long front awning pole (100"/254 cm) into the front pole sleeve on
the y. The awning pole ends should be inserted into the grommets attached
to the side carabiner clips on the tent body located on the upper sides of the
front tent canopy.
3 Insert the back awning pole (78"/198 cm) into the back pole sleeve on the
y. The awning pole ends should be inserted into the grommet attached to the
pole clips on the back of the tent body.
4. Attach the Velcro tabs on the inner y to the tent poles.
5. Attach the y to the tent body using the quick-release buckle/strap system at
each corner.
6. Adjust quick-release buckle/strap system for a more taut y.
Pegging and Guylines
1. Starting with the tent corners, place a peg through each web loop located
along the oor of the tent body and peg out securely.
2. Located along the lower sides of the y are shock-corded loops, peg each loop
securely.
3. There are delta guyline points with a grommet located on the outer surface
of the y. Attach a guyline to each point and fasten to a peg or other secure
object making sure the guylines are taut.
4. By staking and guying your tent
a. the tent will be more stable in windy conditions
b. the y will shed rain better
c. air circulation to the inner tent will be increased
IMPORTANTE INFORMATION
Merci pour l’achat de votre
nouvelle tente Chinook. Nous
avons dessiné et fabriqué nos
tentes pour vour donner des
années de plaisir sans maux
de tête. Pour maximiser votre
plaisir, s.v.p. lire attentivement
les instructions de montage
et de soins à prendre pour
conserver votre tente en bonne
condition.
• Familiariser vous avec votre
tente Chinook en la montant
au moins une fois dans la
cour arrière chez vous avant
votre excursion.
• Quand vous choisissez votre
emplacement pour monter
votre tente, assurez vous
d’un endroit plat, bien drainé
et nettoyer de tous objets
pouvant endommager votre
tente.
• Glisser soigneusement
chaque tige dans sa gaine
respective. Ne jamais forcer
les tiges car cela pourrait
causer des dommages à la
pole ou à la gaine.
VEUILLEZ UTILISER VOTRE
BON SENS
• Monter votre tente eloignée du
feu de camp.
• Ne jamais cuisiner à l’intérieur
de la tente.
• Ne pas remiser de liquides
inammable dans votre tente.
INFLAMMABILITÉ
Votre tente Chinook a été traité
avec un enduit antiamme
mais n’est pas à l’épreuve du
feu. Une exposition directe à
une amme ou une source de
chaleur excessive peut causer
une incendie.
Tente
1. Sortir toutes les composantes du sac de rangement. Étaler le plancher de la
tente sur le sol. Assurez vous de bien nettoyer l’espace de tout objet pouvant
endommager le plancher de tente.
2. Assembler tous les mâts. Prendre soin de ne pas endommager les embouts.
3. Insérer les extremités de chaque mât principal (212"/538 cm) dans les
œillets des languettes à chaque coin de la tente. Les couleurs du mâts
doivent se correspondre avec les couleurs des œillets. Deux des mâts doivent
être placés dans l’oeillet du coin avant à celui arrière. La troisième tige doit
être placé d’un côté à l’autre côté de la tente passant en dessous des deux
autres tiges.
4. À chaque coin de la tente et de chaque côté il y a des attaches renforcies.
Installer un mât à la fois, insérer l’embout du mât dans l’attache la plus près
de la tente.
5. Attacher tous les crochets aux mâts.
Double Toit
1. Déployer le double toit en vous assurant que l’ouverture de la porte soit en
avant de la tente.
2. Insérer le mât du auvent avant (100"/254 cm) dans la pochette avant du
double toit. Les embouts doivent être insérés dans les œillets attachés aux
mousquetons situés aux côtés supérieures de la porte de la tente.
3. Insérer le mât du auvent arrière (78"/198 cm) dans la pochette arrière
du double toit. Les embouts doivent être insérés dans les œillets attachés
crochets situés à l’arrière de la tente.
4. Attacher les “Velcro” du double toit à l’armature de la tente.
5. Attacher le double toit à l’armature de la tente en utilisant les courroies
d’attaches rapides.
6. Ajuster les courroies d’attaches rapides pour un double toit bien tendu.
Piquets et Tendeurs
1. Commencer par les coins de la tente, placer un piquet dans chacune des
attaches renforcies tout autour de la tente et bien ancrer.
2. Situé tout autour du double toit il y a les cordes élastiques qu’il faut bien
ancrer à l’aide de piquets.
3. À la surface extérieur du double toit il y a des points d’attaches delta avec
oeillet. Attacher un tendeur à chacun de ses oeillets bien ancrer et bien
tendre le tendeur.
4. Par un bon ancrage de votre tente
a) Votre tente sera plus stable par temps venteux
b) Le double toit évacura mieux la pluie
c) L’aération de la tente sera augmentée
Tornado6_TAI_2006.ID 11/2/06, 1:07 PM2
Other Chinook Tent manuals


Popular Tent manuals by other brands

Summit Treestands
Summit Treestands Run-N-Gun Ground Blind Setup instructions

Décor et Jardin
Décor et Jardin Gamagran 81801S000 Assembly Notice

Kiwi Camping
Kiwi Camping Kakapo 8 Pitching instructions

RioOutdoors
RioOutdoors 4F-DC installation instructions

Mec
Mec LIGHTFIELD manual

ShelterLogic
ShelterLogic MaxAP 23521 Assembly instructions


