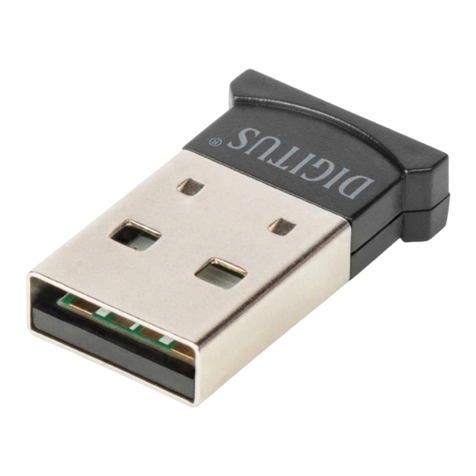
Chipset Technology UTS-3232i User manual

Industrially Isolated
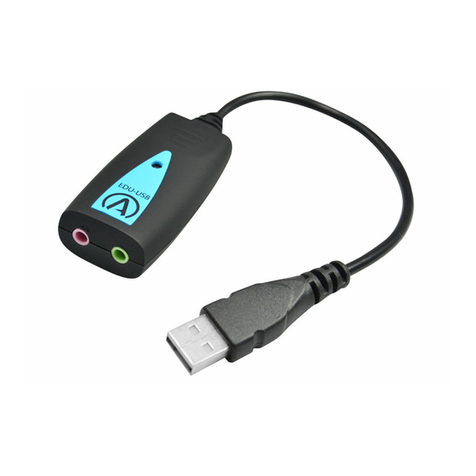
USB To RS-232 Adapter
User’s Manual
UTS-3232i / UTS-6232i / UTS-112

-1
Table of Contents
1. Introduction............................................................................................................................................. 2
System Requirements......................................................................................................................... 2
Features.............................................................................................................................................. 2
Specification........................................................................................................................................ 3
2. Windows OS Installation Guide.............................................................................................................. 5
3. Driver Installation thru the FTDI Driver Package .................................................................................... 7
4. USB to Serial Application Operation..................................................................................................... 10
5. Driver Installation.................................................................................................................................. 13
Windows XP Installation Guide.......................................................................................................... 13
Uninstalling Instruction............................................................................................................... 21
Troubleshooting.......................................................................................................................... 22
Windows VISTA (Win 7, 8, 8.1, 10) Installation Guide....................................................................... 24
Uninstalling Instruction............................................................................................................... 28
Troubleshooting.......................................................................................................................... 29
MAC OS X Installation Guide............................................................................................................ 31
Uninstalling instruction ............................................................................................................... 34
Troubleshooting.......................................................................................................................... 35
Regulatory Compliance ............................................................................................................................ 37

-2
1. Introduction
The Industrially Isolated 3-Port/6-Port USB to RS-232 adapter features 2.5kV isolation to ensure 3/6 serial devices
by DB-9 port connected require long range or multi-drop capabilities won’t be damaged between the PC and serial
applications. Simply installs the drivers, connect the 3-Port/6-Port Serial adapter to your computer, plug in your
serial devices, and you’re ready to go. Programming is not required, and you do not need to worry about IRQs,
configuring aboard, power requirements, or connection schemes. Additionally, the isolated adapter is bus-powered
to eliminate the need for an external power adapter or wall outlet.
The Industrial 12-Port USB to RS-232 adapter features to ensure 12 serial devices by DB-9 port connected require
long range or multi-drop capabilities won’t be damaged between the PC and serial applications. Simply install the
drivers, connect the 12-Port Serial adapter to your computer, plug in your serial devices, and you’re ready to go.
Programming is not required, and you do not need to worry about IRQs, configuring aboard, power requirements,
or connection schemes. Maximum 48 serial devices can be connected under cascading 4 units.
System Requirements
Windows OS : XP SP3 / Vista / 7 / 8 / 8.1, 10; Windows Server 2003 / 2008 / 2008R2 / 2012 / 2012R2 or
higher
WinCE OS: V4.2 ~ V7.0
Mac OS: 8.6 / 9.x / 10.x
Linux OS: Kernel 1.5.0 or higher
The system is equipped with USB Host Controller
Features
Fully Compliant with USB Specification 1.1 and 2.0
Supports the asynchronous serial interfaces.
Supports data transfer rate up to 230 kbps
Supports ±15kV (air), ±8kV (contact) ESD protection
Supports 2.5kV Isolation; Isolated ground loops (for 3-Port/6-Port only)
Supports 40A (5/50ns) & Peak Pulse Power 250 W ( 8/20 us ) Surge and Transient spikes protection
Supports USB branching up to 3 tire levels (max. 48 devices connection; for 12-Port only)

Specification
Model No. UTS-3232i UTS-6232i UTS-112
Chipset FTDI
USB Specification USB 1.1/2.0 compliant
USB 1.5 / 12 / 480 Mbps
Data Speed Serial 230 kbps
LED 7 (3TX / 3RX / ACT) 13 (6TX / 6RX / ACT) 3 (TX / RX / ACT) each
Host USB A/M
Connector RS-232 Out DB-9/M x 3 DB-9/M x 6 DB-9/M x 12
Power Mode Bus Powered DC5V
Operating/Storage
Temperature -40 to 85°C (-40 to 185°F)
Cable Length 1.8 m
Housing Aluminum Metal
Dimension ( L x W x H ) 170 x 80 x 30mm 170 x 80 x 30mm 268 x 102 x 40 mm
RS-232 Pin Assignment
-3

UTS-3232i
UTS-6232i
UTS-112
-4

2. Windows OS Installation Guide
Driver can be installed through Windows Update automatically (Internet connection needed)
The FTDI drivers that have passed the WHQL tests are available for download using Windows Update.
OS requirements: Windows 7/8/8.1/10 or later.
Please go below ways for easy installation.
1. You may plug the device into host computer. And then it will pop up ‘Installing device driver software’ from the
taskbar of the screen. (Fig. 1) Click and connect to the Windows Update.
2. It will check your computer OS and download the applicable driver at the Windows Update automatically.
Fig. 1
3. The program goes ‘Searching Windows Update’ from ‘Driver Software Installation’. (Fig. 2)
Fig. 2
4. When the applicable driver is detected, it will run ‘Installing device driver software’. (Fig. 3)
Fig. 3
-5

5. Then it shows ‘USB Serial Port (COM8) installed’. Click ‘Close’ and go next step. (Fig. 4)
.
Fig. 4
6. Check ‘Device Manager’ of Control Panel from the computer OS and there shows USB Serial Port (COM8) under
‘Ports (COM & LPT)’; the other one shows USB Serial Converter under ‘Universal Serial Bus controllers’. (Fig. 5)
Congratulation! You have finished installing the USB to Serial device successfully.
Fig. 5
NOTE: It may occur when driver is not installed successfully, please check below steps.
1. There is busy on access databank of Microsoft’s Support link. Please try again or install driver of CD-ROM
provided.
2. Check your internet if it is failed to access Microsoft’s Support link.
3. Check your computer configuration if it is disabled on Windows Update wizard.
-6

3. Driver Installation thru the FTDI Driver Package
Driver can be installed through the FTDI driver package of the CD-ROM provided.
3.1. Double click ‘Setup_v2.12.00 WHQL Certified For Windows OS_x86.x64.exe’
3.2. It will pop up ‘FTDI CDM Drivers’ from the screen. Click ‘Extract’ and go next step.
-7

3.3. Extracting Files
3.4. Click ‘Next’ to continue.
-8

3.5. Select ‘I accept this agreement’ and click ‘Next’.
3.6. The Device Driver Installation Wizard will detect your computer OS and install the applicable driver
automatically.
-9

3.7. While the Device Driver Installation Wizard is completing, click ‘Finish’ to exit.
4. USB to Serial Application Operation
Note: The application programmer ‘USB_RS232_AP.exe’ only complies with Windows XP SP3 / Vista / 7 / 8 /
8.1 / 10 or higher.
Steps:
4.1. Make sure the device drivers are installed; and double click the ‘USB_RS232_AP.exe’ to install.
-10

4.2. The ‘USB To SerialApplication Programmer’ screenshot will appear from the screen. It will detect all serial
devices connected to the PC.
4.3. Click ‘DETECT’ and then it may detect in 5~10 seconds and show the device’s COM port automatically.
-11

For detecting UTS-3232i
In this case we may see Port 1 is set at COM59; Port 2 set at COM60, Port 3 set at COM62 for USB to 3-Port
RS232 Adapter
For detecting UTS-6232i
In this case we may see Port 1 is set at COM59; Port 2 set at COM60…Port 5 set at COM70, Port 6 set at COM69
for USB to 6-Port RS232 Adapter
-12

For detecting UTS-112
In this case we may see Port 1 is set at COM18; Port 2 set at COM19…Port 11 set at COM28, Port 12 set at
COM29 for USB to 12-Port RS232 Adapter
Congratulation! You have finished installing the Isolated USB to Serial Adapter successfully.
Note: Some of host computers have built in USB 3.0 hub may not detect USB to Serial devices well. In order
to prevent detecting failure, to connect to USB 2.0 port would be better.
5. Driver Installation
Windows XP Installation Guide
1. Installing Via The Found New Hardware Wizard
If a device of the same type has been installed on your machine before and the drivers that are about to be installed
are different from those installed already, the original drivers need to be uninstalled. Please refer to the Uninstalling
instruction.
Download the latest available drivers from the FTDI web site and unzip them to a location on your PC.
If you are running Windows XP or Windows XP SP 1, temporarily disconnect your PC from the Internet. This can be
done by either removing the network cable from your PC or by disabling your network card by going to the "Control
Panel\Network and Dial Up Connections", right clicking on the appropriate connection and selecting "Disable" from
the menu. The connection can be re enabled after the installation is complete. This is not necessary under Windows
XP SP 2 if configured to ask before connecting to Windows Update. Windows XP SP 2 can have the settings for
Windows Update changed through "Control Panel\System" then select the "Hardware" tab and click "Windows
Update".
Connect the device to a spare USB port on your PC. If the device is based on the FT2232, the Microsoft composite
device driver is automatically loaded in the background. Once the composite driver has been installed Windows
Found New Hardware Wizard will launch. If there is no available Internet connection or Windows XP SP 2 is
-13

configured to ask before connecting to Windows Update, the screen shown in Figure 2.1 is displayed. Select "No,
not this time" from the options available and then click "Next" to proceed with the installation. If there is an available
Internet connection, Windows XP will silently connect to the Windows Update website and install any suitable driver
it finds for the device in preference to the driver manually selected.
Figure 2.1
Select "Install from a list or specific location (Advanced)" as shown in Figure 2.2 below and then click "Next".
Select "Search for the best driver in these locations" and enter the file path in the combo box ("C:\CDM 2.02.04" in
Figure 2.3 below) or browse to it by clicking the browse button. Once the file path has been entered in the box, click
next to proceed.
Figure 2.2
-14

Figure 2.3
If Windows XP is configured to warn when unsigned (non WHQL certified) drivers are about to be installed, the
message dialogue shown in Figure 2.4 will be displayed unless installing a Microsoft WHQL certified driver. Click on
"Continue Anyway" to continue with the installation. If Windows XP is configured to ignore file signature warnings, no
message will appear.
The screen shown in Figure 2.5 will be displayed as Windows XP copies the required driver files.
Figure 2.4
-15

Figure 2.5
Windows should then display a message indicating that the installation was successful (Figure 2.6). Click "Finish" to
complete the installation for the first port of the device.
If the device is based on the FT2232, the Found New Hardware Wizard will continue by installing the USB Serial
Converter driver for the second port of the FT2232 device. The procedure for installing the second port is identical to
that for installing the first port from the first screen of the Found New Hardware Wizard. This is done automatically if
the driver is Microsoft WHQL certified. If the device is not based on the FT2232, the COM port emulation driver is
loaded as indicated in the following steps.
The Found New Hardware Wizard will launch automatically to install the COM port emulation drivers. As above,
select "No, not this time" From the options and click "Next" to proceed with the installation (Figure 2.7).
Figure 2.6
-16

Figure 2.7
Select "Install from a list or specific location (Advanced)" as shown in Figure 2.8 below and then click "Next".
Select "Search for the best driver in these locations" and enter the file path in the combo box ("C:\CDM 2.02.04" in
figure 2.9 below) or browse to it by clicking the browse button. Once the file path has been entered in the box, click
next to proceed.
Figure 2.8
Figure 2.9
-17

If Windows XP is configured to warn when unsigned (non WHQL certified) drivers are about to be installed, the
message dialogue shown in Figure 2.10 will be displayed unless installing a Microsoft WHQL certified driver. Click
on "Continue Anyway" to continue with the installation. If Windows XP is configured to ignore file signature warnings,
no message will appear.
The screen shown in Figure 2.11 will be displayed as Windows XP copies the required driver files.
Figure 2.10
Figure 2.11
Windows should then display a message indicating that the installation was successful (Figure 2.12). Click "Finish"
to complete the installation for the first port of the device.
If the device is based on the FT2232, the second port must also be installed. The procedure for installing the second
port is identical to that for installing the first port from the first screen of the Found New Hardware Wizard for the
USB Serial Port device. If the driver is Microsoft WHQL certified, this is done automatically.
-18

Open the Device Manager (located in "Control Panel\System" then select the "Hardware" tab and click "Device
Manger") and select "View > Devices by Connection", the device appears as a "USB Serial Converter" with an
additional COM port with the label "USB Serial Port" (Figure 2.13). If the device is based on the FT2232, two ports
will be available from a composite USB device.
Figure 2.12
Figure 2.13
In the case of the FT2232, port A of the FT2232 will be installed as COMX and port B will be installed as COMX+1
where COMX is the first available COM port number.
Figure 2.14
-19
This manual suits for next models
2
Table of contents
