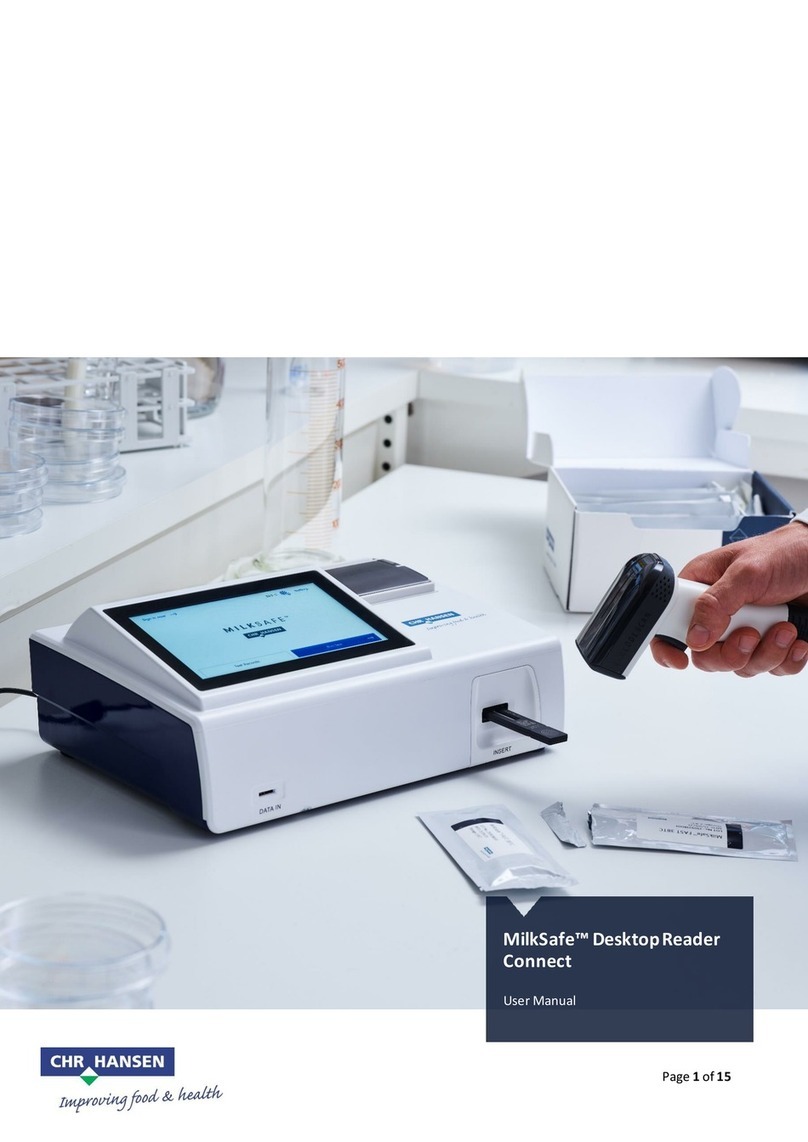
Chr. Hansen MilkSafe User manual

MilkSafe™
Desktop Reader
User Manual

2
The information contained herein is presented in good faith and is, to the best of our knowledge and belief, true
and reliable. It is oered solely for your consideration, testing and evaluation, and is subject to change without
prior and further notice unless otherwise required by law or agreed upon in writing. There is no warranty being
extended as to its accuracy, completeness, currentness, noninfringement, merchantability or fitness for a
particular purpose. To the best of our knowledge and belief, the product(s) mentioned herein do(es) not infringe
the intellectual property rights of any third party. The product(s) may be covered by pending or issued patents,
registered or unregistered trademarks, or similar intellectual property rights. All rights reserved.

3
Introduction
Intended use
Materials included
Warranty
Main features
Run test
Records
Settings
Safety precautions
Operating locations
Ambient conditions
Power supply
Getting started
Reader
Software
PC and system requirements
Installing the software
Updating the Reader software
Reader operation
Reading test strips
Test records
Verification procedure
Export data
Maintenance notes
Cleaning of the Reader
Service and repairs
Contents
4
4
4
4
4
4
5
5
5
5
5
5
6
6
7
7
7
8
9
9
10
10
11
11
11
11

4
Introduction
Intended use
The MilkSafe™ Desktop Reader (referred to as “the Reader”) is used for digital
interpretation of MilkSafe™ Rapid Tests for antibiotic residues and aflatoxins in
milk.
Materials included
Reader
Power cable
Test cartridge
Touch screen pen
Thermal printer paper. Specifications: 58g/m2, width: 57mm, diameter:
30 mm (not supplied by Chr. Hansen additionally)
Serial to USB cable
Converter
Warranty
The MilkSafe™ Desktop Reader is covered by a warranty for 12 months against
defects in materials and workmanship. This period begins from the date of first
delivery, and within this period readers will be repaired or replaced as decided by
Chr. Hansen A/S.
The warranty does not cover defects caused by excessive wear and tear or da-
mage due to shipping, accident, abuse, misuse, problems with electrical power,
or usage not in accordance with product instructions, if other than original spare
parts supplied by the manufacturer have been used or if repairs or alterations
have been performed by anyone else than the manufacturer or agents approved
by the manufacturer. The warranty does not cover removable parts (such as car-
tridges for the test strips) or consumables.
Main features
Run test
When selecting the Run test button, the user will be presented with two main
groups of tests, Qualitative or Quantitative tests. After selecting a test group, a
specific test must be selected, and the Reader will guide the user through the test
process.

5
Records
Records allow the user to view previous test results. Each test is represented on
a single line which displays the date, sample ID, type of test, and overall result
among others. By selecting a test, it is possible to view further details of the
selected test and print or export the results.
Settings
The Settings button on the right-hand side will enable the user to configure
language, date and time, change password, turn on automatic printing and load a
curve for the quantitative tests.
Safety precautions
Operating location
The location of the MilkSafe™ Desktop Reader should be on a desk or on a stable
and level surface with enough surrounding space to easily insert the test strip
cartridge or to unplug the Reader.
The results may be influenced by vibrations, e.g. if the Reader is used close to
vibrating machines.
Ambient conditions
Temperature range: 5 to 40°C / 41 to 104°F
Humidity: Max 80%
Protect from water (incl. splashes)
The Reader can be operated up to 2,000 m altitude
Power supply
The instrument is powered by 100V-240V AC 50Hz/60Hz. Do not connect the
Reader to any power supply outside this range.

6
Getting started
Reader
Unpack the Reader carefully and check that the following parts are present:
Reader
Power cable
Test cartridge
Touch screen pen
Thermal printer paper
Serial to USB cable
Converter
Place the Reader on a level and stable surface.
Open the printer cover, insert thermal printing paper, and close the printer
cover.
Connect the power supply.
Turn on the Reader (switch on the left side of the Reader).
After the system self-test the Home screen will appear.
Choose Settings and enter the initial password CH123456 to edit the
instrument elements. Press OK.
Select Language to change the language of the Reader. Press Confirm to
approve the change and Back to return to all setting options.
Select Date & Time and use the ▼/▲buttons on the screen to adjust the
date and time fields to the current date and time. Press Confirm to accept
the changes or Cancel to return to the menu screen without setting the date
and time.
When reading quantitative tests, the standard curve from the specific batch
must be loaded. To load a curve go to Settings, select Load a curve, click
View to see if any previous curves have been loaded. If yes, click Empty to
remove it. Insert the included USB from the test kit in use in the Data In slot
located in the front of the Reader and select Load. The curve is loaded. For
every new batch of a quantitative test, a standard curve must be loaded.
The MilkSafe® Desktop Reader is now ready for use.
1
2
3
4
5
6
7
8
9
10

7
Software
PC and system requirements
Windows 7 or higher (not applicable for Mac)
32- and 64-bit
Administrative rights to install the software (may require support from your
local IT department)
Installing the software
Download the MilkSafe™ Desktop Reader zip file from MilkSafe™ Downloads on
http://milksafe.chr-hansen.com. In the zipped file you will find the following files:
Driver file
Data Manager file
ROM.bin file
Install the Driver.
Connect the Reader to PC with the serial to USB cable included.
Open the Data Manager file, right click the MS-DR19 data
export software and create a shortcut.
Double click the MilkSafe™ icon on your desktop and the following screen
will open:
1
2
3
4

8
5
6
7
8
9
On your PC, search for and open the Control Panel, go to System and
Security System Device Manager.
In the Device Manager scroll to “Ports (COM & LPT)” and find the port
device name in the brackets (Prolific USB-to-Serial Comm Port(COM4))
(any number).
In the port list in the MilkSafe™ Data Manager, choose the serial port which
you found in the Device Manager.
Click Open Serial Port and the red dot will turn green.
If the used connection port on the computer is not changed from time
to time, the COM Port will remember its COM; if the connection port is
changed, the COM port may change and step 5 through 7 must be repeated.
To customize the data fields and export standards click Settings. Change
field names, file types etc. and click Save.
The MilkSafe™ Data Manager is now ready for use.
Updating the Reader software
It is recommended to keep your device updated with the newest software. The
software can be found on MilkSafe™ Downloads.
Export the data stored on the Reader to the Data Manager if the data should
be saved. For instructions see section Export Data.
From the MilkSafe™ Desktop Reader zip file transfer the Reader Update
file to an empty USB of the format FAT32. Rename the file to ROM.bin so
the filename is without version number. The file must be located in the root
directory of the USB - do not put it in a folder.
Connect the Reader to power.
Insert the USB in the USB port on the back of the Reader.
Turn on the Reader. The Reader automatically prints a piece of paper and the
update is initiated. The update takes approximately 1 minute.
1
2
3
4
5

9
Once the update is complete, the screen will light up and the Reader will
print out a notification on the successful update.
Connect the Reader to the computer with the Serial to USB cable and open
the Data Manager.
In the upper right corner click Change to write.
Click Clear Project to remove previously inscribed Test Items.
Click Open file and select the file Test Items.
Tick all the required Test items and click Write.
When the test items have successfully been written, unplug the Reader from
the computer, connect to power and restart the Reader. The Reader is now
ready to use.
Reader operation
Reading test strips
Turn on the Reader on the left-hand side of the Reader.
Select Test on the main screen.
Select Qualitative for antibiotic tests or Quantitative for aflatoxin tests.
OBS!! Quantitative tests require the standard curve corresponding to the
batch in use to be loaded before testing. See the Reader section step 10
under Getting Started for guidance.
Select the relevant test from the list of tests.
Fill out Sample ID, Lot No., and Operator ID (optional).
Press Test and the test port located to the right in the front of the Reader will
open and a “platform” will emerge.
As soon as the test incubation has finished as according to the test protocol,
place the test strip in the Reader cartridge.
Insert the test cartridge fully into the port on the Reader.
Press Test again, the cartridge will enter the Reader and the test is initiated.
The reading will start automatically and show the Result screen after a few
seconds.
Interpret the result: Positive results are shown with a + after the line
antibiotics type. Negative results are shown with a -after the line antibiotics
type. The numbers given represent the line ratio: the intensity of the test
8
9
10
11
1
2
3
4
6
7
12
5
6
7
8
9
10
11

10
line divided by the intensity of the control line. For qualitative tests, the ratio
numbers cannot be used for quantitative purposes.
Ratio < 0.9: Positive
Ratio 0.9 – 1.1: Weak positive
Ratio >1.1: Negative
Upon test completion, the cartridge will exit the Reader and can be removed.
The platform should be pushed back in, once the Reader is turned o.
The test result is automatically saved on the Reader.
The result can be printed with the built-in printer by selecting Print.
To perform a new test press Home and repeat step 2 through 12.
Test records
To view previous test results, select Records.
Select Qualitative for antibiotic tests or Quantitative for toxin tests.
To scroll up and down, either use the PgUp and PgDn buttons or the scrolling
bar. To scroll to the side use the scrolling bar in the bottom.
To resize the columns drag on column header edges.
View the details of a specific test result by first selecting the test by clicking
anywhere on the line and then select Details.
Print the results by selecting Print.
Verification procedure
Verify the accuracy of the measurements performed with the MilkSafe™ Desktop
Reader by reading standard strips. The standard strips with 4 lines can be used to
verify the results of MilkSafe™ 2BC while standard strips with 5 lines can be used
to verify the results of MilkSafe™ 3BTC, 3BTS and 4BTSC.
Select the standard strip corresponding to the test you are using.
Complete step 3 through 10 in section Reading test strips with the standard
strip. The strip is ready for use.
The obtained ratios for each substance line should be 1.0 ± 0.1. If the ratios
exceed 1.0 ± 0.2, perform the reading again. If the ratios again exceed
1.0 ± 0.2, please contact your local Chr. Hansen representative.
12
13
1
2
3
4
5
6
14
15
1
2
3

11
Export data
Open the MilkSafe™ Data Manager software and ensure that the serial port
dot is green. If not, complete step 5 through 8 in the section Installing the
Software on page 7.
Connect the Reader to the computer using the serial to USB cable included.
Go to Records, select a test group Qualitative or Quantitative and select
Export. An export window will appear displaying the export status. When
the export is completed go to the computer software.
Select the data lines to be exported. You can use the checkboxes on the left
to choose data lines to export. The checkbox in the top left corner selects or
deselects all data lines.
Click Export in the MilkSafe™ Data Manager. To change the Export format
go to Settings.
Maintenance notes
Cleaning of the Reader
It is recommended to clean the Reader on a regular basis.
If you use the Reader in a working area that is subject to dust or contamination,
you should clean the Reader more often. Use a damp cloth to clean the Reader. If
the contamination is persistent, you can also rub the surface of the Reader with
a cloth that has been moisturized with pure alcohol (isopropanol or ethanol). Do
not use aggressive cleaning agents such as acetone. If the inside of the Reader is
contaminated, please contact your supplier for technical assistance.
Service and repairs
For all service or repairs needed, please contact your supplier for assistance.
Attempts to open or repair the Reader by any non-authorized personnel will void
the warranty.
1
2
3
4
5

Experts for the dairy industry
Chr. Hansen believes in improving the quality of food and health. We believe the
best results are achieved when working closely with you.
Our experienced application and industry specialists provide you with the
knowledge, inspiration, support, and customized solutions you need to be
successful.
Contact your local Chr. Hansen representative to learn more about how we can
work together to find the perfect solution for you.
info@chr-hansen.com
www.chr-hansen.com
+45 74 74 74 74
Version 2
Other manuals for MilkSafe
3
Table of contents
Other Chr. Hansen Laboratory Equipment manuals
Popular Laboratory Equipment manuals by other brands
Globe
Globe GCM-R-24 quick start guide

Argos Technologies
Argos Technologies Flexifuge C1000 Operator's manual
Peak Scientific
Peak Scientific Horizen 24 installation guide
IKA
IKA MICROSTAR control Series user manual

BMC
BMC Oratect III HM11 user guide
Omni International
Omni International TIP HOMOGENIZING KIT user manual
