Chr. Hansen MilkSafe Fast User manual

Page 1of 15
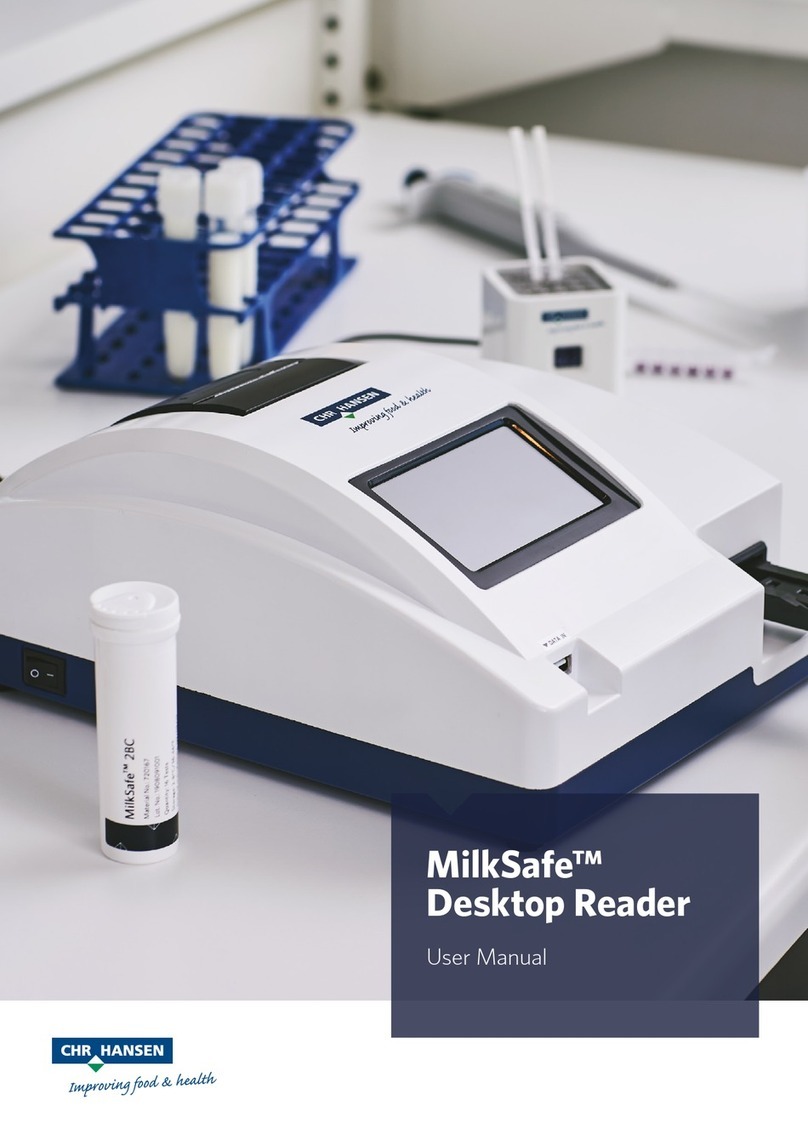
MilkSafe™DesktopReader
Connect
User Manual

Page 2of 15
Contents
Introduction ................................................................................................................................ 3
Intended Use ........................................................................................................................... 3
Materials Included ...................................................................................................................3
Warranty .....................................................................................................................................3
Main features of the app .............................................................................................................3
Run Test...................................................................................................................................3
Test Records ............................................................................................................................ 3
Settings.................................................................................................................................... 3
Safety Precautions....................................................................................................................... 4
Operating location ...................................................................................................................4
Ambient conditions.................................................................................................................. 4
Power Supply........................................................................................................................... 4
Getting started ............................................................................................................................ 5
Setting up the Reader (standard functionalities)......................................................................5
Handheld scanner....................................................................................................................5
Setting up the Reader (advanced functionalities).....................................................................6
Connectivity and data transfer................................................................................................. 7
Reader Operation ........................................................................................................................ 8
Reading test strips (or pre-incubated cassette tests) ................................................................8
Incubating and reading cassette tests (Milksafe™ FAST)........................................................... 9
Performing a confirmation flow ............................................................................................. 11
Test Records and Export data................................................................................................. 12
Reader verification .................................................................................................................... 12
Determing the internval between verification tests ............................................................... 12
Verification procedure ........................................................................................................... 12
Maintenance Notes ................................................................................................................... 13
Regular cleaning of the Reader .............................................................................................. 13
Cleaning of the Reader in case of milk spillage ....................................................................... 13
Service and repairs................................................................................................................. 14

Page 3of 15
Introduction
Intended Use
The MilkSafe® DesktopReader Connect (referred to as “the Reader”) is used for digital interpretation of
MilkSafe® Rapid Tests for antibiotic residues and aflatoxins in milk.
Materials Included
›Reader
›Handheld scanner, USB stick and power cable
›Digitalthermometer
›Test cartridge(tobe used with Milksafe™ strip tests)
›Verification strips (for calibration control)
›Thermalprinter paper
›Serial to USB
›Power cable
›USB stick
Warranty
The MilkSafe® DesktopReaderConnect is covered by a warrantyfor 12 months against defects in materials
and workmanship. This period begins from thedate of first delivery, and within this period readers will be
repaired or replacedas decided by Chr. HansenA/S.
The warrantydoes not cover defects caused by excessive wear and tear or damage due to shipping,
accident, abuse, misuse, problems with electricalpower, or usage not in accordancewith product
instructions, if other thanoriginal spare parts supplied by the manufacturerhave been used or if repairs or
alterations havebeen performed by anyone else than the manufactureror agents approvedby the
manufacturer. Thewarrantydoes not cover removable parts (such as cartridges for the test strips)or
consumables. The batteryincluded is not covered by the warrantyand Chr. Hansendoes not carry any
responsibility of use.
Main features of the app
Run Test
When selecting the Run test button, the user will be presentedwith a list of test types activatedon the
reader. After selecting the desired test type, the reader will guide the user through the test process. As the
readeris compatible with stripand cassetted-basedtests,thereadealsoenable the user to perform simple
end-point reading or a combined flow of incubation and reading of Milksafe™ FAST tests.
Test Records
Test records allow the user to view previous test results. Eachtest is represented on a singleline which
displays the date, test type, result, sample ID, andannotation. Incase of a positive test result the reader
will annotate a group of test results toform a conclusive result for multiple test in a flow (Original, 1st
confirmation and 2nd confirmation).
Settings
The Settings buttonin the right-hand corner will enable the user to configure language, test types, internet
connection, printer setup, scanning of QR code, enable commenting on test results, sound, date & time,

Page 4of 15
screen brightness, connect to Milksafe™ Cloud, LIMS& PLC integration, incubation and calibration
verficiation, and software update.
Safety Precautions
Operating location
The location of the Milksafe™ Desktop Reader Connect should be on a desk or on a stable and level surface
with enough surrounding space to easily insert the test strip/test cassette or tounplug the Reader.
The results maybe influenced by vibrations .e.g, ifthe Readeris used close a vibrating machine, or if the
Reader is positioned outside thedefined temperature range.
Ambient conditions
›Temperature range: 5 to 40°C / 41 to 104°F
›Humidity: Max 80%
›Protect from water (including water splashes)
Power Supply
The instrument is powered by 100V-220V AC 50Hz/60Hz 100VA. Do not connect the Reader toany power
supply outside this range.

Page 5of 15
Getting started
Setting up the Reader (standard functionalities)
1. Unpack the Reader carefully and check that the following parts are present;
›Reader
›Handheld scanner, USB stick and power cable
›Digitalthermometer
›Test cartridge (to be used with Milksafe™ strip tests)
›Verification strips (for calibration control)
›Thermalprinter paper
›Serial to USB
›Power cable
›USB stick
2. Place the Readeder on a level and stable surface
3. Open theprinter cover, insert thermalprinting paper, and close the printer cover.
4. Connect the power supply and insert the USB stickfor the hand-held scanner into the USB port on
the back of the Reader
5. Turn on theReader(switch on the left backsideof the Reader)
6. Please select the preferredlanguage
7. Connect the Reader to the internet by cable or wifi to automaticallyaccess software updates and
download the latest range oftest types.
8. If the Reader should be connected to Milksafe™ Cloud, please login with the usernameand
passwordprovided by your administrator(or Chr. Hansenrepresentative). TheReaderwill
hereafter automaticallysynchronize with the account settings determined in the Milksafe™ Cloud.
9. If the Reader is supposed to operate without any internet connection, please select thetest types
manually during the installationflow or afterwards in Settings
10. Determine if the Reader should enable or disable printing of test results
11. Determine if the Reader should enable or disable commenting of test results
The Milksafe™ Desktop Reader Connect is now ready for use.
Handheld scanner
The scanner is powered by a lithium batterywith an estimatedbatterytimeof 18 hours. With occasional
use of the scanner e.g., inmilk reception area, thebatterytimeis approx. 12-15 days. The battery
model/type used is INR 19/65-2000mAh with nominal voltage 3.6V. The batterycannot be removed from
the scanner during recharging.

Page 6of 15
The scanner may be used to scan the QR code on the Milksafe™ FAST tests. To activate this functionality
see under advancedfunctionalities. Furthermore, the scanner mayalso be used to scanQR or barcodes
during the test flow to record test relatedinformation and operator identification.
Howto usethe scanner
1. Insert theUSB sticksupplied in the assesroryboxin the USB plug on the back for the Reader
2. Power-on thescanner by clicking the black botton. The lighton the top of the scanner will change
from Green to Blue. When thecolor is constant Blue the scanner is connected and readyfor use. If
the color stays Green, thescanner has failed to connect.
3. IMPORTANT: Place the scanner in a 45 degree angle and approx. 10-15 cmfrom the QR or
barcode that needs to bescanned, and press theBlack button.The scanner will beep onetime
and the Blue light flash for a successfulscanning.
4. If thereis no sound the scanner has failed to scanthe object.
5. To save battery the scanner goes into sleep mode after 60 seconds
Charging the scanner
1. The scanner will make a series of beep sounds when it needs recharing
2. The scanner can be chargedby using the USB power cord supplied in theassecorybox
3. Insert min-usb into the scanner and the USB cord into any device witha USB port e.g., theReader
or a USB 5V1Aadaptor.
4. A full recharge maytake up to 4 hours, and the scanner canbe used while recharging. Thelight on
the top of the scanner will constantlyRedand Blue indicating “active and charge mode”
5. If the lighton the top of the scanner is only Red, the scanner is in sleepmode and can be activated
by clicking thebutton.
Setting up the Reader (advanced functionalities)
To enable the advanced functionalities, the Readercan either be connected to Milksafe™ Cloud to retrieve
the relevant account settings, and/or manually managedon the Reader:
1. Access Settings on theReader by use of password(CH123456)
2. In Settings theReadercan be setupfor:
›Test types: Manually enable new test types if the Reader is not connected to Milksafe™
Cloud.
›QR code setup: To enable/disable the functionality of mandatoryscanning of QR codes for
Milksafe™ FAST tests beforestarting incubation
›LIMS: To enable/disable automatic data transfer via serial cable connection
›Milksafe™ Cloud: Login to Milksafe™ Cloud with the username and passwordprovided
›Verification:Define the number of tests betweeneachverification flow

Page 7of 15
Connectivity and data transfer
The Reader supports various usage scenarios andmodes of data transfer:
1. By installing the Reader without internet or cabled serial connection the Reader will function as a
stand-alonedevice and support manual data export by USB.
›Go to Test Records onthe home screen
›Insert a USB stickon the backof the reader
›Select Export all and determine the preferred file type (Excelor CSV). The data will than be
exported to the insertedUSB stick.
2. By connecting the Reader to the internet and/or serial cabel connection. Data transfer is performed
in real-time to Milksafe™ Cloud and/or local systems e.g.,LIMS, PLC, SQLetc.
›For data export via serialcable:
›Go into Settings on the home screen (password “CH123456”)
›Select LIMS and enable data export. Everytime a new test result is performed, the
readerwill export the test result via serialcable
›Connect the reader using the data cable provided by inserting into the COM port
on theback of the reader and USB into a PC.
›Setup the device management on PC by;
›BaudR: 9600
›DPaity: None
›DataB: 8 bit
›StopB: 1 bit
›Data format: UTF8
›Data transfer mode: One-way communication
›The text string transmitted will start with “R” and end with “1234”. Word
separationwill be perform by “|”
›The data being transmittedis:
›Date & Time
›Reader serial no.
›Operator ID
›Sample ID
›Overall result
›Substancename(s)
›Substanceratio(s)
›For data export to Milksafe™ Cloud:
›Go into Settings on the home screen (password “CH123456”)
›Select Milksafe™ Cloud and enable login with the usernameand passwordprivded
by the administrator or Chr. Hansenrepresentative.
›The test records on the Reader and any future test results will hereafter be
automaticallyexported to the cloud from wheretest records can be exported.
3. The Readeris not supportedby any proprietary software e.g., PC Data Manager

Page 8of 15
Updating the Reader software
It is recommend to keep the device updated with the newest software to enable new features, test types
etc. The software can be found on Milksafe ™ Downloads, or downloaded automatically from Milksafe™
Cloud if the Readeris connected to the internet.
›To perform a manual software update:
›Export thedata storedon the Reader by use of USB (see sectionon Connectivity and
dataexport)
›From Milksafe™ Downloads obtain the necessary software package
›Unzip the file and transfer the folder “Update” to the empty USB provided in the
assesorybox with the Reader.
›Insert theUSB stickon the back thereader
›Go into Settings on the home screen (password “CH123456”)
›Select Software updates andselect USB update
›The readerwill hereafter start theinstallationand restart the devices.
›To manully initiate software update from Milksafe™ Cloud.
›Go into Settings on the home screen (password “CH123456”)
›Select Software updates andselect Net update
›The Reader will hereafter verify if a new software versionis availableon Milksafe™
Cloud. The Readerwill download and installthe new software and restart thedevice.
›OBS: Ifthe Reader is connected to Milksafe™ Cloud a notification will display on the home screen
when a new software versionis available from Milksafe™ Cloud.
Reader Operation
Reading test strips (or pre-incubated cassette tests)
1. Turn on theReader.
The Reader will take approx. 5-7 minutes to reachthe desired temperatureof 50 degrees Celsius. If
the Readerwas heatedup to50 degrees Celsius andthe specific temperatureof the test required is
40 degrees Celsius, the Reader will take approx. 3 mininuttes to go down to thelower temperature.
2. Select Run Test on the main screen
3. Select the preferred test type (if the relevant test type does not appear, see previous section on
setting up the Reader)
4. OBS!! Milksafe Afla M1 is a quantitative test, please loadthe required standardcurve into the
readerby using the supplied data chip from thetest box. The curve only needs to be loaded one
time per batch.
5. Fill out the operatorID and press continue (the hand-held scanner may be used for scanning any
barcode or QR code in this sequence)

Page 9of 15
6. Fill out test relatedinformation and press continue (the hand-held scanner maybe usedfor
scanning any barcode or QR code in this sequence)
7. Insert thetest stripinto the supplied standard carridgeandfully insert the cartridge into the reader
housing. Press Start Test, or for Milksafe FAST insert the cassette inthe Reader and press Read
only
8. The reading will start automatically andshow the Result screenafter a few seconds.
9. Interpret theresult: Positive and Weak Positive results are shown with a X for eachantibiotic
tested. Negative results areshownwith a ✓. The numbers given represent the line ratio: the
intensity of the test line divided by the intensity of the control line. For qualitative tests, theratio
cannot be used quantitative purposes.
Ratio<0.9: Positive
Ratio0.9-1.1 Weak positive
Ratio>1.1 Negative
10. The test result is automatically saved in the Reader, and if connected with Milksafe™ Cloud the test
result will alsobe synchronized with the cloud. If commenting has been enabled on the Reader, a
specific comment maybe added in Add comment
11. If the test is a positive control, the test result canbe annotated by selecting the Mark as positive
controlwhichhelp separate regular test records from positive control samples
12. The test result will be automaticallyprinted, if this functionality has been enabled on theReader.
13. If the test result is positive, the Readerwill initiate a confirmation flow to determine the validity of
the initial positive test result. Pleasesee section performing a confirmation flow
Incubating and reading cassette tests (Milksafe™ FAST)
1. Turn on theReader
2. Select Run Test on the main screen
3. Select the preferred test type (if the relevant test type does not appear, see previous section on
setting up the Reader)
4. If scanning QR code has been enabled on the Reader, please scanthe unique QR code on the
cassette byusing the hand-held scanner supplied with the Reader
5. Fill out the operatorID and press continue (the hand-held scanner may be used for scanning any
barcode or QR code in this sequence)
6. Fill out test relatedinformation and press continue (the hand-held scanner maybe usedfor
scanning any barcode or QR code in this sequence)

Page 10 of 15
7. Pipette the milk into the cassette andinsert fully thecassetteintothe Reader housing. Press
Incubate and Read
8. The incubation will start automatically andafter the defined incubation time the Readerwill
automativallyinterpret the test result and show the Result screenafter a few seconds.
9. Interpret theresult: Positive and Weak Positive results areshown with a X for eachantibiotic
tested. Negative results areshownwith a ✓.The numbers given represent the line ratio: the
intensity of the test line divided by the intensity of the control line. For qualitative tests, theratio
cannot be used quantitative purposes.
Ratio<0.9: Positive
Ratio0.9-1.1 Weak positive
Ratio>1.1 Negative
10. The test result is automatically saved in the Reader, and if connected with Milksafe™ Cloud the test
result will alsobe synchronized with the cloud. If commenting has been enabled on the Reader, a
specific comment maybe added in Add comment
11. If the test is a positive control, the test result canbe annotated by selecting the Mark as positive
controlwhichhelp separate regular test records from positive control samples
12. The test result will be automaticallyprinted, if this functionality has been enabled on theReader.
13. If the test result is positive, the Readerwill initiate a confirmation flow to determine the validity of
the initial positive test result. Pleasesee sectionperforming a confirmation flow.

Page 11 of 15
Performing a confirmation flow
A confirmation flow will be initiated on the Reader when thetest result is positive or weak-positive (ratio
<1.1). Please see below flow chart for illustration:
1. The confirmation flow will be actiavedupon the1st positive result. Please repositionthe same
strip/cassette intotheReader and select Re-read test on the result screen. This stepwill eliminate
any false positives due to position issues of the test.
2. If the Re-read test result remains positive. Please initiate the confirmation flow by incubating and
reading a new test. Select Run confirmation test onthe Reader to initiate this step.
3. To complete the confirmation flow. Please run the 2nd confirmation test by incubating and reading
a new test. Select Run secondconfirmation test ontheReader to complete this step.
4. The overall test result is therefore based on the flow of testsperformed:
1st Test
1st test re-read
1st confirmation
2nd confirmation
Overall test result
Positive
Negative
-
-
Negative
Positive
Positive
Positive
Positive
Positive
Positive
Positive
Negative
Negative
Negative
Positive
Positive
Positive
Negative
Inconclusive
Positive
Positive
Negative
Positive
Inconclusive
5. Despite an overall flow result, theindividual test results gets annotatedaccording totheir position
in the flow and the annotation will be displayed in Test records onthe Reader.
Test
Test result
Annotation
1st test
Positive
Rejected
1st test re-read
Positive
Original
Negative
“Blank”
1st confirmation
Positive or Negative
Confirmation
2nd confirmation
Positive or Negative
Second confirmation

Page 12 of 15
Test Records and Export data
›To view previous test results, select Test Recordsonthe home screenof theReader. The Reader
has a storage capacityof approx. 100,000 test results.
›To navigate up and down use the Page up and Page Down buttons.
›To export the test results, select Exportalland determine if the export should be in CSV or Excel.
›To view additional details, pleaseselect the specifictest result and the complete details will display
in a new window
›From the detailed view you can Add comment to the testresult and Print the details
Reader verification
To verify thehealth of theReaderand secure accuracyin the measurements performed, it is recommended
to perform a verification test of the Readeron a routine basis. A notification to perform a verification test
will automaticallydisplay for each500 tests performed on the reader.
Determing the internval between verification tests
To set a specific interval between eachverification test or to manually initiate a verification test, please
follow thesesteps:
›Go to Settings onthe home screen(passwordCH123456)
›Select Verification test
›Type in thenumber of tests betweeneach verficiation test and press Save
›To manually initiate a verification test, select Start verficiation now
›To view previous verification tests, select the Verification history
Verification procedure
To perform a verification test theuser is required to use the supplied thermometer and standardstrips
accompanying thereader.
1. Initiate the verification test from the notification message onthe home screenor from Settings
2. Make sure the temperature is stabilizedon the Reader and external thermometer before
entering the displayed temperature. This may take1-2 minutes.

Page 13 of 15
3. Select the standardtest corresponding to the regular test performed on thereader e.g., for
MilksafeFAST 3BTC, please select thestandardtest cassette with 5 lines and press Start test
4. Upon completion of the verification test, theReaderwill deplay the results for temperatureand
readerverification on the final result screen. The verification may fail if;
›the measuredtemperature withthe externalthermometer is >2degrees (+/-) from the
defined temperatureon the Reader e.g., measured53degrees Celsius versus 50degress
Celsius defined for the test type.
›The verification reading is outside the intervalof ratio0.9-1.1.
Maintenance Notes
Regular cleaning of the Reader
It is recommended to clean theReaderon a regular basis. Ifyou use the Reader in a working area that is
subject to dust or contamination, you should cleanthe Readermore often. Usea dry cloth to clean the
Reader. Ifthe contamination is persistent, you canalso rub the surface of theReader with a cloth that has
been moisturizedwith pure alcohol (isopropanol or ethanol). Donot use aggressive cleaning agents suchas
acetone.
Cleaning of the Reader in case of milk spillage
OBS: Before cleaning theinstrument turn-offthe powerand remove thepowercord to avoid any short-
circuit and electric shock hazards.
1. Prepare a 75% alcohol or ethanol cottonpad/swab. Do not use strong bleach as oxidants and
solvents may damage the housing and touch screen.
2. Cleanthe outside of the instrument by using the prescribed resolution above. Gently wipe the
surfaceor the instrument and try to avoid the edges of thedisplay to prevent alcohol/ethanol from
infiltrating the screencausing display faults.
3. To thoroughly cleanthe cassette slot, please remove the outer protection by pulling downwards.
Do not pull outwards, as it will breakthe clamps on the upper backside.

Page 14 of 15
4. After removing outer protection use a cotton swab dipped in 75% alcohol or ethanol to cleanthe
cassette slot.
5. If milk residues are visible on thelens, gently clean the lens by useof similar cotton swaband 75%
alcohol or ethanok. Then use a cleanand dry cloth to wipe the lens, or wait for it to dry naturally.
6. After cleaning the cassette slot. Turnon the reader and run a verification flow to certify the reader
return normal values.
OBS: Ifthe optical module (lens) by mistakehas been touched, please run a Verification test to check
calibration of the reader.
Service and repairs
For all service or repair needed beyond the regular verification protocol, exchange of external devices e.g.,
hand-held scanner etc., please contact your local Chr. Hansenrepresentative for assistance. Attemptsto
open or repair the Reader by non-authorized personnel will void the warranty.

Page 15 of 15
Experts for the dairy industry
Chr.Hansen believes in improvingthe quality of foodand health.We believethe bestresultsare achieved
when working closelywith you.
Our experienced application and industry specialists provideyou with the knowledge,inspiration, support,
and customized solutions you need to be successful.
Contact your localChr. Hansenrepresentative to learnmore about howwe canwork together to find the
perfectsolution foryou.
www.chr-hansen.com
info@chr-hansen.com
+45 74 74 74 74
Version 1
Table of contents
Other Chr. Hansen Laboratory Equipment manuals
