ASSEMBLY
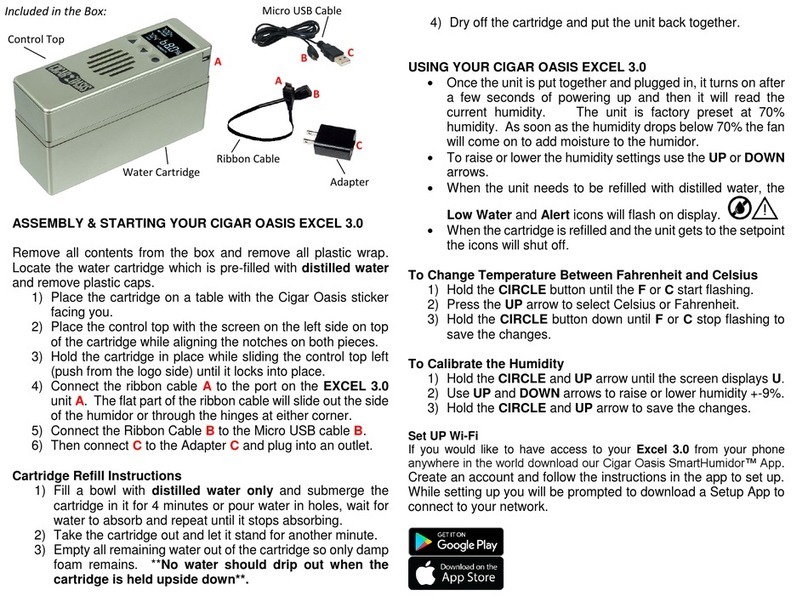
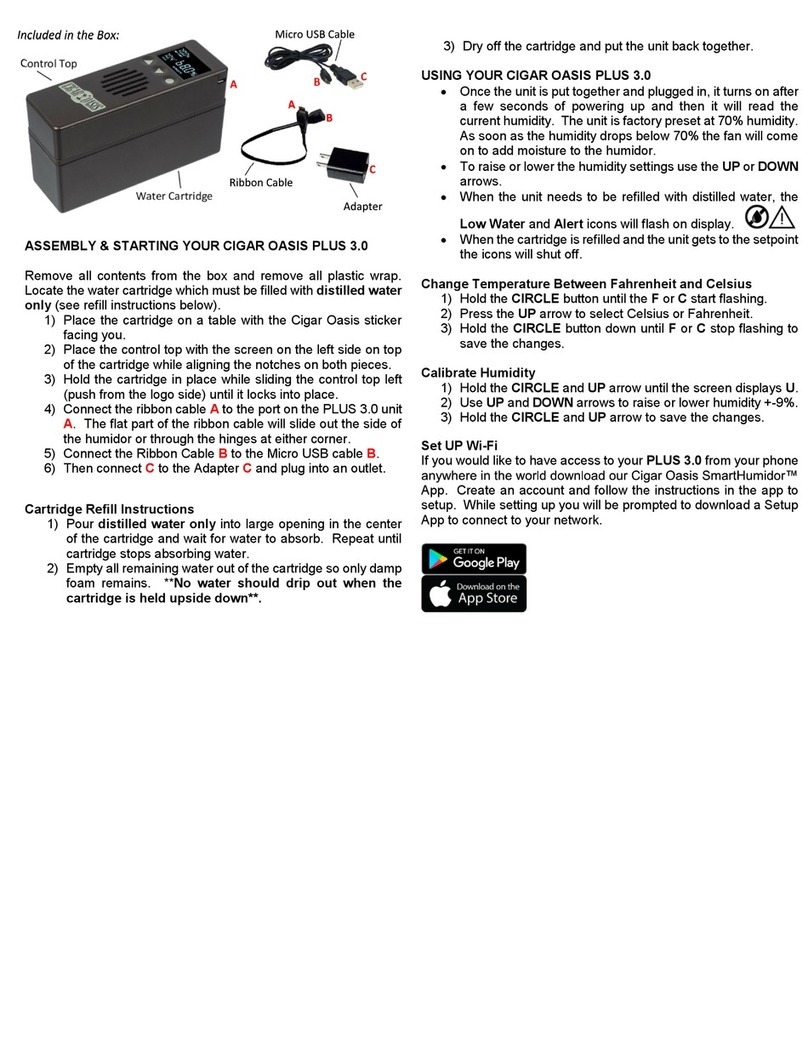
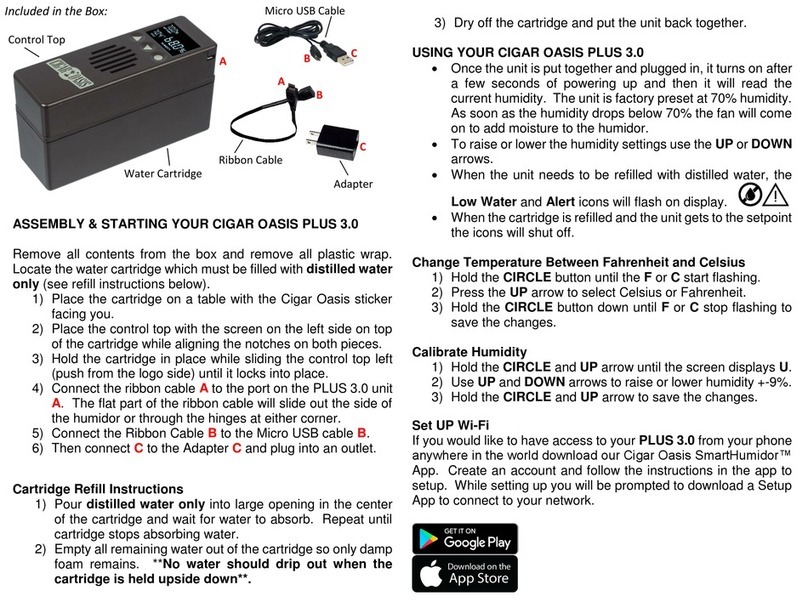
CIGAR OASIS ULTRA comes in two main pieces
that easily assemble for placing in your humidor.
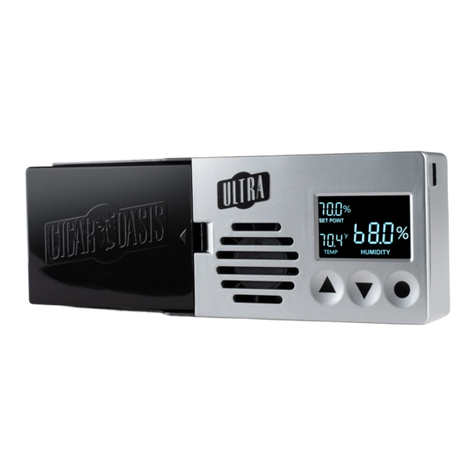
The silver piece is the control unit, the black piece
is a refillable/replaceable water cartridge. The
water cartridge, which comes prefilled, must be
attached to the control top before use.
To attach the cartridge, remove all protective
plastic packaging from the control top and the
cartridge. Align the tabs on the left side of the
cartridge when placing on control unit. Press
firmly on right side of cartridge until it locks into
place.
Refilling the Cartridge
Fill a bowl with distilled water only and
submerge the cartridge in it for 4 minutes.
Take out the cartridge and let it stand on the
countertop for another minute.
At the sink, empty all remaining water out of the
cartridge so only damp foam remains.** No water
should drip out when the cartridge is held
upside down **
Dry off the cartridge completely and put the unit
back together.
A full cartridge should last up to two months in an
average, well-sealed 75 cigar humidor which is
accessed about three times a week.
INSTALLATION
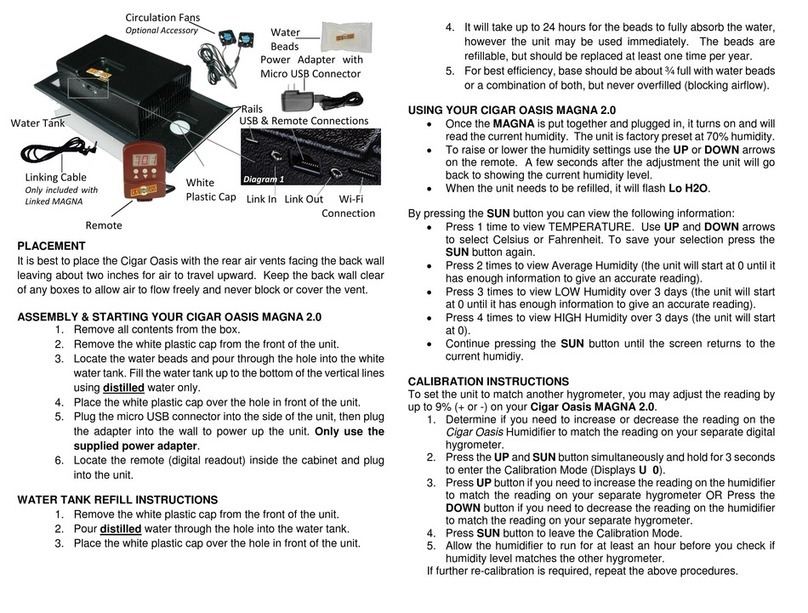
CIGAR OASIS ULTRA may be mounted on your
humidor lid or side or just be placed in the
humidor. When putting the Ultra in the humidor,
be sure to keep the areas with air vents clear of
cigars, walls and the humidor lid with at least ¼ ”
of clearance. This will assure free and even
circulation of humidified air in your humidor.
Remove the magnets from the plastic bag and
remove backing from one of the magnet parts
and mount in the center of your humidor lid.
Remove the backing from the other magnet and
place it on the back of the silver control unit
To operate from wall outlet:
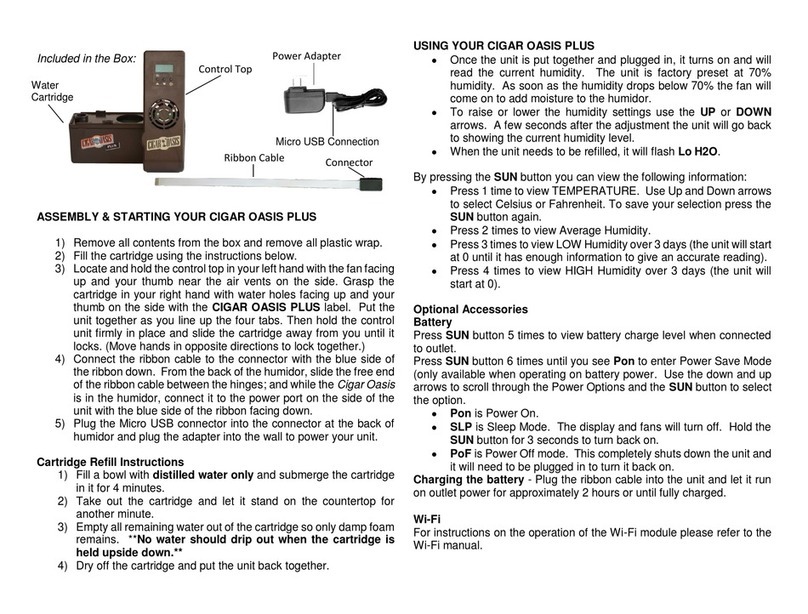
Use the power adapter, connector and flexible
ribbon cable supplied. Slip the free end of the
ribbon cable between the hinges of the humidor
so the cable is inside the humidor and the power
connector is outside in the back of the humidor.
The ribbon cable may be bent or folded to suit
your needs. Plug the free end of the power strip
into the power connection on the side of the Cigar
Oasis ULTRA control unit. In back of the humidor,
peel protective backing from the adhesive on the
plastic connector and mount it behind the
humidor. Plug the power adapter into the plastic
connector and the other end into nearest outlet.
When operating from a wall outlet and power
consumption is not a problem, the humidity is
sampled every few seconds and displayed. When
depressing the ☼ Display button you will turn on
or off the display and it will show the measured
humidity.
To operate from battery:
Attach battery pack to plastic connector. You may
mount the battery pack inside the humidor lid or in
back of the humidor. CIGAR OASIS ULTRA is
now operating on battery power.
In order to conserve power and make the batteries
last for several weeks, the CIGAR OASIS ULTRA
smart microprocessor turns off the display and
samples the humidity once every five minutes.
When depressing the ☼ Display button, it will
display the measured humidity as it was on the
last reading before the humidor was opened.
OPERATING THE CIGAR OASIS ULTRA
When the unit is powered, the sensor measures
the humidity in the humidor and the microproces-
sor controls the fan which increases the humidity.
If the humidity is below the set point, the control
system fan is turned on until the set point humidity
is reached. CIGAR OASIS ULTRA has been set
at about 70% at the factory; however, you may
adjust it to your taste.
Adjusting humidity to desired set point
A humidity indicator is built in to allow you to
check the humidity and adjust the setting. The set
point is adjusted by pressing the two buttons
denoted ▲ Set point Up and ▼ Set point Down.
After the button is released, the display will
continue to show the set point for a few seconds.
The set point won’t be lost if power or batteries
are disconnected or replaced.
Low battery and/or water indications
When depressing the ☼ Display button to check
the humidity, if battery needs replacement, the
display will flash L0. When the water is low, it will
flash H20 alerting you to refill the cartridge.
Reading the humidity
On outlet power the display is on all the time.
When opening humidor the indicated humidity is
the last measured value but in a few seconds will
go to actual humidity with the lid open. On battery
power press the ☼ button to display the last
humidity reading.
Calibration Instructions
Look at the humidity reading on your separate
digital hygrometer. If you absolutely trust your
hygrometer, and it is different by more than 6%
compared to your Cigar Oasis Humidifier, then
you should re-calibrate the humidifier. Determine
if you need to increase or decrease the reading on
the Cigar Oasis Humidifier to match the reading
on your separate digital hygrometer.
Press the ‘Up” and ‘Sun’ button simultaneously
to enter the Calibration Mode (Displays CA2).
Press and Hold the ‘Up’ button if you need
to increase the reading on the humidifier to
match the reading on your separate
hygrometer. Press and Hold the ‘Down’ button
if you need to decrease the reading on the
humidifier to match the reading on a separate
hygrometer.
Press both the ‘UP’ and ‘Sun’ buttons
simultaneously twice to leave the Calibration
Mode.
Allow the humidifier to run for at least an
hour to check the humidity level.
If further re-calibration is necessary, follow the
above procedures again.
