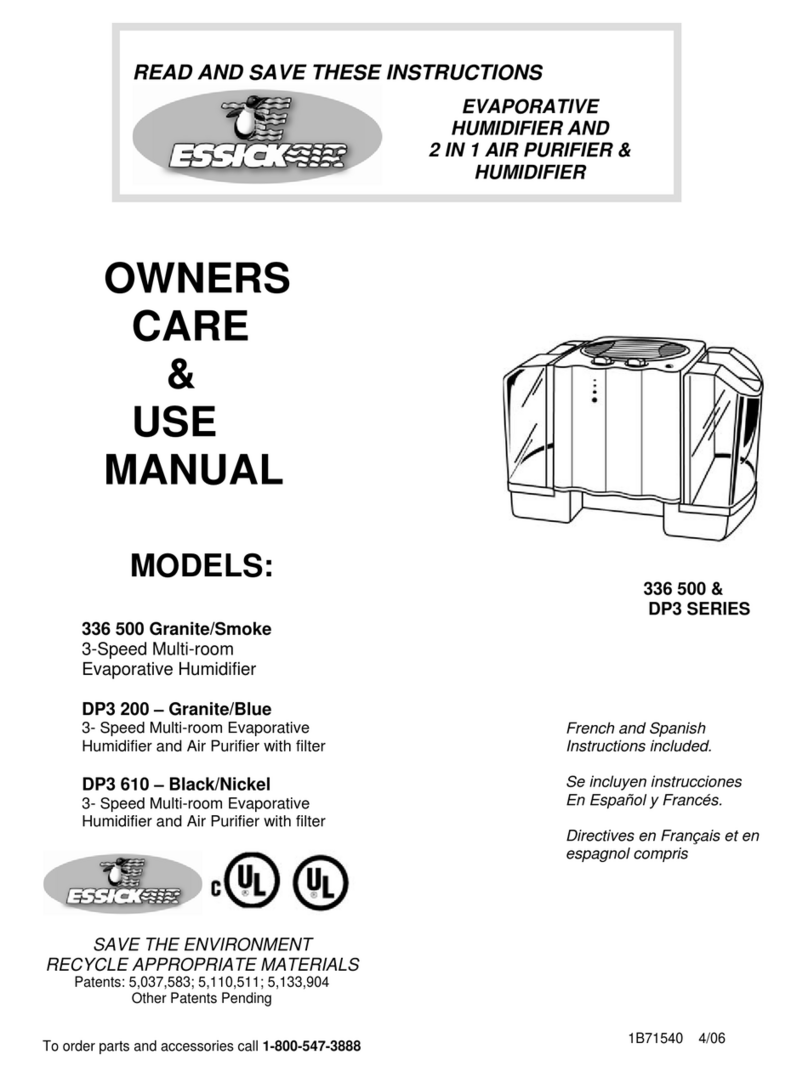
Essick EP9 500 Guide

READ AND SAVE THESE INSTRUCTIONS
OWNER’S
CARE
&
USE
MANUAL
MODELS:
EP9 500
EP9R 500 with Remote
EP9 700
Digital Control
Variable Speed
Auto Humidistat
Automatic Shutoff
Quiet Setting for Nighttime use
EP Series
Frenchand Spanish
Instructionsincluded.
Seincluyeninstrucciones
EnEspañol yFrancés.
DirectivesenFrançais etenespagnol compris
SAVE THE ENVIRONMENT
RECYCLE APPROPRIATE MATERIALS
1B72504 4/2013 Printed in China
EVAPORATIVE
HUMIDIFIER

2
General Safety Instructions
READ BEFORE USING YOUR HUMIDIFIER
DANGER: means if the safety information is not followed someone will be seriously
injured or killed.
WARNING: means if the safety information is not followed someone could be
seriously injured or killed.
CAUTION: means if the safety information is not followed someone may be injured.
1. To reduce the risk of fire or shock hazard, this humidifier has a polarized plug
(one blade is wider than the other.) Plug humidifier directly into a 120V, A.C.
electrical outlet. Do not use extension cords. If the plug does not fully fit
into the outlet, reverse plug. If it still does not fit, contact a qualified electrician to
install the proper outlet. Do not change the plug in any way.
2. Keep the electric cord out of traffic areas. To reduce the risk of fire hazard, never
put the electric cord under rugs, near heat registers, radiators, stoves or heaters.
3. Always unplug the unit before moving, cleaning or removing the fan assembly
section from the humidifier, or whenever it is not in service.
4. Keep the humidifier clean.
5. Do not put foreign objects inside the humidifier.
6. Do not allow unit to be used as a toy. Close attention is necessary when used by
or near children.
7. To reduce the risk of electrical hazard or damage to humidifier, do not tilt, jolt or
tip humidifier while unit is running.
8. To reduce the risk of damage to humidifier, unplug when not in use.
9. To reduce the risk of accidental electrical shock, do not touch the cord or controls
with wet hands.
10.To reduce the risk of fire, do not use near an open flame such as a candle or
other flame source.
WARNING: For your own safety, do not use humidifier if any parts are
damaged or missing.
WARNING: To reduce risk of fire, electric shock, or injury always unplug before
servicing or cleaning.
CAUTION: If a plant is placed on the pedestal, ensure unit is unplugged when
watering the plant. Ensure no water is poured onto the control panel when
watering the plant. If water enters the electronic control panel, damage may
result. Ensure control panel is entirely dry before use.
WARNING: To reduce the risk of fire or shock hazard, do not pour or spill water
into control or motor area. If controls get wet, let them dry completely and have
unit checked by authorized service personnel before plugging in.

3
How Your
Humidifier Works
Once the wick becomes
saturated, air is drawn in,
passes through the wick
and moisture is absorbed
into the air.
All evaporation occurs in
the humidifier so any
residue remains in the
wick. This natural process
of evaporation creates no
white dust like some other
humidifiers.
Dryair is drawn into the
humidifier though the back
and moisturized as it
passes through the
evaporative wick. It is then
fanned out into the room.
Description
EP9 Series / EP9R†
*Output per 24 hrs
9 + gallons
Capacity of Unit
3.5 gallons
Sq. ft. coverage
2000-2800 *
Fan Speeds
Variable (9)
Replacement Wick
No. 1043
Automatic Humidistat
Yes
Controls
Digital († w/ Remote)
ETL Listed
Yes
Volts
120
Hertz
60
Watts
70
IMPORTANT:
Water damage may result
if condensation starts to
form on windows or walls.
Humidity SET point should
be lowered until
condensation no longer
forms. We recommend
room humidity levels do
not exceed 50%.
* Output based on 8’
ceiling. Coverage may
vary due to tight or
average construction.
Notes On Location:
Do NOT position the unit directly in front of a hot air duct or radiator. Do NOT place
on soft carpet.
Direct air flow away from thermostat and hot air registers, and position humidifier
next to an inside wall. Unit should not be placed where cold air from outside walls or
warm air from a hot air register blows directly on it.
Place the humidifier on a level place at least 2 inches away from the wall or curtains
Position the humidifier where the most humidity is needed or where the most air will
be circulated throughout the house such as near a cold air return. If the unit is
positioned close to a window, condensation may form on the window pane. If this
occurs the unit should be repositioned in another location.

4
Assembly
CASTERS
1. Lift chassis off of base and set aside.
2. Remove float and wick/wick retainer from base. Turn the empty base upside
down. Insert each caster stem into a caster hole on each corner of the humidifier
bottom. The casters should fit snugly and be inserted until the stem shoulder
reaches the cabinet surface.
3. Turn the base right side up.
EVAPORATIVE WICK
4. Ensure the 1043 Superwick is
installed in the two-part wick
retainer base in the base of the
humidifier
5. Position the chassis over the base
frame and press it onto the base
firmly until it is in place.
6. Ensure the chassis is placed on the
base with the float facing forward.
FILLING INFORMATION
Open the fill door on the front of the unit. Insert funnel into open fill door. Using a
pitcher, carefully pour water to the MAX FILL level on the wick frame.
NOTE: On initial fill up, it will take approximately 20
minutes for the unit to become ready for operation,
since the wick must become saturated. Subsequent
fillings will take approximately 12 minutes, since the
wick is already saturated.
After the filling process is complete, and the wick is
saturated, the unit is ready for use.
7. Plug cord into wall receptacle. Your humidifier is
now ready for use. The humidifier should not be
near any heat registers. Place the unit at least
TWO inches away from any walls or curtains.
Unrestricted airflow into the unit will result in the
best efficiency and performance.
Controls and Operation
This unit has a digital control panel
that allows you to adjust fan speed
and humidity level, as well as view
information on the status of the unit.
The display will also indicate if the
optional Remote Control (EP9R
500 only) is in use at the time.
CAUTION: If a plant is placed on the pedestal, ensure no water is poured onto the
control panel when watering the plant. If water enters the electronic control panel,
damage may result. If controls get wet, let them dry completely and have unit
checked by authorized service personnel before plugging in.

5
1. The digital controller has a displaythat provides information on the status of the unit.
Depending on which function is being accessed, itdisplays relative humidity, fan
speed, set humidityand indicates when the unit is out of water.
FAN SPEED
2. The Speed button controls the variable
speed motor. Nine speeds provide
precise fan control. Press the power
button and select fan speed: F1
through F9 proceeding from low to
high speed. The fan speed will display
on the control panel as the speeds are
stepped through.
NOTE:Whenexcessivecondensation exists,alowerfanspeedsettingis recommended.
HUMIDITY CONTROL
NOTE: Allow 10 to 15 minutes for the
humidistat to adjust to the room when
setting up the unit for the first time.
NOTE: The EP9 / EP9R Series has
an automatic humidistat located on
the cord that measures the relative humidity
in the room. When the selected humidity
level drops 3% below the relative humidity,
the humidifier cycles on and off as required
to maintain the selected setting.
3. At initial startup the relative humidity of the room will be displayed.
Each successive push of the Humidity Control Button will increase the setting in
5% increments. At 65% set point, the unit will operate continuously
OTHER FEATURES / INDICATIONS
4. This humidifier has a check filter reminder timed to appear after 720
hours of operation. When the Check Filter (CF) message is
displayed, disconnect the power cord and check the condition of the
filter. The CF function is reset after plugging the unit back in.
5. Whentheunitisoutofwater,aflashingFwilldisplayonthedisplaypanel.
AUTO DRYOUT
At this time the unit will automatically switch into AUTO DRY OUT
MODE and continue to run on the lowest speed until the filter is
completely dry. The fan will shut off leaving you with a dry humidifier
that is less prone to mold and mildew.
If AUTO DRY OUT MODE is not desired, refill the humidifier with
water and the fan will return to the set speed.

6
If your unit has the remote control, or if you have purchased the remote control, Model 1999, you
have the option of controlling your humidifier functions from a distance.
To Turn the Remote on:
With both the humidifier and remote control OFF,
Press the I/O button on the remote control once.
This turns the humidifier ON and enables the
remote control to operate all the functions of the
humidifier.
(The humidifier control panel will display EC, for
External Control)
Press the respective humidity and Fan Speed
buttons to adjust the settings on the remote, just
as you would the actual humidifier.
The default setting for temperature readout is
Fahrenheit (F). If you prefer degrees Celsius (C),
press the I/O button one more time to use that unit
of measure.
Pressing the I/O button one more time will turn
both the Remote Control and the Humidifier OFF.
If the Humidifier is already on and operating when the I/O button on the remote is pressed,
command of the humidifier transfers to the Remote, and reverts to the settings last used with the
remote. You can readjust the settings as desired.
If the controls on the humidifier are used while the Remote Control is in command, control will
revert to the humidifier, and the settings will revert to those last used on the humidifier control
panel. The remote control will remain on until turned off.
REMOTE CONTROL INSTRUCTIONS (EP9R 500)
USING THE REMOTE CONTROL
When the remote is in control, the display on the humidifier will read EC (for
External Control).
The humidity and speed buttons operate the same way as their counterparts
on the unit.
The fan speed and humidity setting will display on the control panel as you
adjust them.
The default measure for temperature is Fahrenheit (°F), but pressing the I/O
button a second time will change to Celsius (°C)
Periodically the remote performs a frequency check and will be unresponsive
to input. Wait 5 seconds and try your input again.

7
Wick Replacement
The EP9 / EP9R Series uses the 1043 Super Wick. Always use the original Essick
brand wick to maintain your unit and maintain your warranty.
1. First, remove any items on top of the pedestal and remove the natural stone tile
and place in a safe location.
2. Lift chassis up off the base to reveal the wick, wick retainer and float.
3. Remove the wick and retainer assembly. Separate the two-part wick retainer.
4. Remove the old wick, drain excess water and discard.
5. Place new Essick 1043 wick into front side of the wick retainer and snap the
larger, back section into place.
6. Then place the assembly into the base, aligning it with the built-in guides.

8
Care and Maintenance
CAUTION: Disconnect power before filling, cleaning or servicing unit. Keep grille dry
at all times.
Cleaning your humidifier regularly helps eliminate odors and bacterial and fungal
growth. Ordinary household bleach is a good disinfectant and can be used to wipe
out the humidifier base after cleaning. We recommend cleaning your humidifier at
least once every two weeks to maintain optimum environmental conditions for your
home.
We also recommend using Essick Air Bacteriostat Treatment each time you refill
your humidifier to eliminate bacterial growth. Add bacteriostat according to the
instructions on the bottle. Please call 1-800-547-3888 to order Bacteriostat
Treatment reference part number 1970.
1. Remove any items from the pedestal top. Remove natural stone tile and place
in safe location. Turn off unit completely and unplug from outlet.
2. Lift off chassis and set aside.
3. Carry base to cleaning basin. Lift wick and retainers from the base allowing the
water to drain. Rinse wick under fresh water only. Do not use soap, detergent,
or any other cleaners on the wick. Leave in sink to drain.
REMOVING SCALE
4. Empty the water from the base. Fill base with water and add 8 oz. (1 cup) of
white vinegar. Let stand 20 minutes. Then empty solution.
5. Dampen a soft cloth with white vinegar and wipe out base to remove scale.
Rinse the entire water reservoir area thoroughly with fresh water to remove
scale and cleaning solution before disinfecting.
DISINFECTING UNIT
6. Fill base to with water and add 1 teaspoon of bleach. Wipe interior surfaces
with this solution. Let solution stay for 20 minutes, then rinse with water until
bleach smell is gone. Dry with clean cloth. The outside of the unit may be wiped
down with a soft cloth dampened with fresh water.
7. Replace the chassis onto the base and refill unit through the pour-fill spout.
SUMMER STORAGE
Although the pedestal humidifier is attractive enough to be kept out year round, if
you choose to put the unit away for the summer, ensure proper care is taken to
protect the humidifier during storage. We do not recommend removing the stone tile
from the unit’s top. We recommend storing the optional remote control (with batteries
removed) with the humidifier for easy access when the humidifier is used again.
Clean unit as outlined in Care & Maintenance section.
1. Discard used wick and any water in the base and allow to dry thoroughly before
storage. Do not store with water inside the base.
2. Do not store unit in an attic or other high-temperature area, as damage will
occur.
3. Install new filter at beginning of season.

9
Parts List for EP9/EP9R Series
Parts and accessories may be ordered by calling 1-800-547-3888. Always order
by part number, not key no. Please have model number of humidifier available
when calling.
Replacement Parts Available For Purchase
Key
No.
Description
Part Number
EP9(R) 500
EP9 700
1
Deflector/Vent
1B71973
1B72219
2
Funnel
1B72282
1B72282
2
Float
1B71971
1B71971
3
Float Retainer
1B71972
1B71972
4
Casters (4)
1B5460070
1B5460070
5
Wick support assy.
1B72081
1B72081
6
Wick
1043
1043
7
12” x 12” x 3/8” Natural Stone Tile
1B72077
1B72496
8
Remote Control
7V1999
NA
--
Owner’s Manual (Not pictured)
1B72120
1B72504
9

10
ESSICK AIR PRODUCTS
HUMIDIFIER WARRANTY
POLICY
EFFECTIVE APRIL 1, 2013
SALES RECEIPT REQUIRED AS PROOF OF
PURCHASE FOR ALL WARRANTY CLAIMS.
This product is warranted against defects in workmanship and materials as listed below:
One year from the date of sale on factory installed components.
Two years from the date of sale on motor and control.
Thirty (30) days on replacement components.
This warranty does not apply to filters or wicks which are customer replaceable parts.
This warranty applies only to the original purchaser of the product when it is purchased from
a reputable retailer/dealer.
This warranty does not apply to damage from accident, misuse, alterations, unauthorized
repairs, unauthorized use, mishandling, unreasonable use, abuse, including failure to perform
care and maintenance as listed in the owner’s manual, normal wear and tear, nor where the
connected voltage is more than 5% above the nameplate voltage, nor to the equipment or
products being improperly installed or wired or maintained in violation of this Owner’s Manual.
Alterations include the substitution of name brand components including, but not limited to
wicks and bacteria treatment.
THIS PRODUCT IS NOT INTENDED FOR COMMERCIAL USE. THIS IS THE SOLE AND
EXCLUSIVE WARRANTY GIVEN BY MANUFACTURER WITH RESPECT TO THE PRODUCTS
AND, TO THE MAXIMUM EXTENT PERMITTED BY LAW, IS IN LIEU OF AND EXCLUDES ALL
OTHER WARRANTIES AND CONDITIONS, EXPRESSED OR IMPLIED, ARISING BY
OPERATION OF LAW OR OTHERWISE. INCLUDING WITHOUT LIMITATION,
MERCHANTABILITY AND/OR FITNESS FOR A PARTICULAR PURPOSE.
No employee, agent, dealer or other person is authorized to give any warranties or conditions
on behalf of the manufacturer. The customer shall be responsible for all costs incurred in the
removal or reinstallation and shipping of the product for repairs.
Within the limitations of this warranty, purchaser with inoperative units should contact
customer service @ 800-547-3888 for paperwork and instructions on the return of the unit
for replacement. A copy of the sales receipt is required before authorization to return a
unit for repair is approved. The manufacturer will replace the chassis, at its discretion, with
return freight paid by the manufacturer and that TO THE MAXIMUM EXTENT PERMITTED BY
LAW, THE MANUFACTURER IS NOT RESPONSIBLE FOR DAMAGES OF ANY KIND,
INCLUDING INCIDENTAL AND CONSEQUENTIAL DAMAGE OR LOSS OF PROFITS OR
REVENUES.
This warranty will be null & void if purchaser attempts to repair or replace any parts
which are mechanical or electrical.
The warranty gives the customer specific legal rights, and the customer may also have
other rights which vary from province to province, or state to state.

11
LEA Y GUARDE ESTAS INSTRUCCIONES
MANUAL
DE
CUIDADOS
Y USO DEL
PROPIETARIO
MODELOS:
EP9 500
EP9R 500 con mando a distancia
EP9 700
Control Digital
Velocidad variable
Humidistato Automático
Apagado automático
Funcionamiento silencioso para
uso nocturno
EP9 Serie
Frenchand Spanish
Instructionsincluded.
Seincluyeninstrucciones
EnEspañolyFrancés.
Directives enFrançaisetenespagnolcompris
CUIDE EL MEDIOAMBIENTE
RECICLE LOS MATERIALES APROPIADOS
Para encomendar piezas y accesorios,
llame al 1-800-547-3888
1B72504 4/2013 Imprimé en China
HUMIDIFICADOR
VAPORIZADOR

12
Instrucciones generales de seguridad
LEER ANTES DE USAR SU HUMIDIFICADOR
PELIGRO: significa que si no se respeta la información de seguridad,
alguien puede resultar seriamente herido o muerto.
ADVERTENCIA: significa que si no se respeta la información de seguridad,
alguien podría resultar seriamente herido o muerto.
PRECAUCIÓN: significa que si no se respeta la información de seguridad,
alguien puede resultar herido.
1. Para reducir el riesgo de incendio o descarga eléctrica, este humidificador
posee un enchufe polarizado (una espiga es más ancha que la otra).
Enchufe el humidificador directamente a un tomacorriente eléctrico de 120
V de CA. No utilice extensiones. Si el enchufe no encaja completamente en
el tomacorriente, inviértalo. Si aún así no encaja, contacte a un electricista
calificado para que instale el tomacorriente adecuado. No cambie el
enchufe de ninguna manera..
2. Mantenga el cable fuera de las áreas de tránsito. Para reducir el riesgo de
peligro de incendio, nunca coloque el cable debajo de alfombras, cerca de
fuentes de calor, radiadores, cocinas o calentadores.
3. Siempre desenchufe el humidificador antes de moverlo, antes de limpiarlo o
cada vez que el humidificador no esté funcionando.
4. Mantenga el humidificador limpio.
5. No coloque objetos extraños dentro del humidificador.
6. No permita que la unidad se utilice como un juguete. Se debe prestar
atención cuando lo utilizan niños o cuando se lo utiliza cerca de niños
7. Para reducir el riesgo de peligro eléctrico o daño al humidificador, no lo
mueva, sacuda ni incline mientras la unidad esté en funcionamiento.
8. Para reducir el riesgo de daños en el humidificador, desenchúfelo cuando
no lo esté utilizando.
9. Para reducir el riesgo de descargas eléctricas accidentales, no toque el
cable ni los controles con las manos húmedas.
10. Para reducir el riesgo de incendio, no lo utilice cerca de una fuente de
fuego abierta, como una vela u otra fuente.
PRECAUCIÓN: Nunca utilice su humidificador cuando le falte una parte o
una parte esté dañada en alguna forma.
PRECAUCIÓN Para reducir el riesgo de incendio, descarga eléctrica o daños,
siempre desconecte la unidad antes de realizar el mantenimiento o la limpieza.
PRECAUCIÓN: Si una planta se coloca en el pedestal, asegurar que la unidad
se desconecta cuando se riega la planta. Asegúrese sin agua se vierte sobre
el panel de control cuando se riega la planta. Si el agua entra en el panel de
control electrónico, el daño puede resultar. Asegúrese de que el panel de
control está completamente seca antes de su uso.
PRECAUCIÓN: Para reducir el riesgo de incendio o electrocución, no vierta ni
derrame agua sobre la zona del motor o del control. Si se mojan los controles,
déjelos secar completamente y haga revisar la unidad por personal de
mantenimiento autorizado antes de conectarla.

13
FUNCIONAMIENTODE
SUHUMIDIFICADOR
Una vez que la mecha se
satura, el aire ingresa, pasa
a través de la mecha y la
humedad se absorbe en el
aire. Toda la evaporación
se produce en el
humidificador de manera
que todo residuo
permanezca en la mecha.
A diferencia de otros
humidificadores, este
proceso natural de
evaporación no produce
polvo blanco.
El aire seco ingresa en el
humidificador por la parte
trasera y se humedece a
medida que atraviesa la
mecha de evaporación.
IM
PO
RTANTE: El agua
puede producir daños si
se comienza a formar
condensación en las
ventanas o paredes. Se
debe disminuir el punto
de AJUSTE de humedad
hasta que no se forme
más condensación.
Recomendamos que los
niveles de humedad del
ambiente no excedan el
50%.
* Salida basado en 8 '
techo. La cobertura puede
variar debido a la
construcción promedio o
construcción hermética.
Descripción
EP9 Serie y †EP9R
*Rendimiento de galones
durante 24 horas
*9+ galones
Capacidad de la
humidificador
3.5 galones
Cobertura en pies
cuadrados
2000-2800
Velocidades del ventilador
Variable (9)
Meche de reemplazo
No. 1043
Humidistato automático
Si
Controles
Electrónico †con
mando a distancia
Registrado por ETL
Si
Voltios
120
Hertz
60
Watts
70
Nota sobre la ubicación:
NO dejar la unidad directamente en frente a tuberías de aire caliente o radiadores.
NO ubicarlo sobre moquettes blandas.Orientar la dirección del aire lejos del termostato
y de las rejillas de aire caliente y colocar el humidificador cerca de una pared interna. No
se debe situarla unidad donde reciba directamente el aire frío de las paredes externas o
el aire cálido de una rejilla de aire caliente.
Coloque el humidificador a 5 centímetros de la pared o cortinas como mínimo.
NOTE: Coloque el humidificador sobre una superficie plana y nivelada. Sitúe el
humidificador donde se requiera la mayor cantidad de humedad o en el lugar de la
casa donde circulará la mayor cantidad de aire; por ejemplo, cerca de un retorno de
aire frío. Si la unidad se coloca cerca de una ventana, puede formarse condensación
en el cristal de la ventana. Si esto sucede, se debe colocar la unidad en otro lugar.

14
Ensamblaje
RUEDAS
1. Separe el armazón de la base y déjelo a un lado.
2. Retire el flotador y la mecha/retenedor de la mecha de la base. Coloque la base vacía
boca abajo. Introduzca el eje de cada rueda en los orificios que se encuentran en los
ángulos de la base del humidificador. Las ruedas deben encajar perfectamente e
insertarse hasta que el tope del eje alcance la superficie del gabinete.
3. Coloque la base boca arriba.
MECHA DE EVAPORACIÓN
4. Asegúrese de que la mecha Superwick 1043 sea instalada
en la base del retenedor de mecha de dos partes en la
base del humidificador.
5. Coloqueelarmazón sobre elbastidorde labase ypresiónelo
firmementesobrelabasehastaque quedeensulugar.
6. Asegúrese de que el armazón esté situado sobre la base
con el flotador orientado hacia el frente.
INFORMACIÓN SOBRE EL LLENADO
Abra la puerta de llenado en la parte frontal de la unidad. Inserte embudo en la
puerta de llenado abierta. Usando una jarra, verter cuidadosamente el agua al
nivel de MAX FILL indicado en el marco mecha.
NOTA: El inicial se llenan, tomará aproximadamente
20 minutos para que la unidad quede lista para la
operación, ya que la mecha debe ser saturado.
Rellenos posteriores tardarán aproximadamente 12
minutos, ya que la mecha ya está saturada.
Una vez que el proceso de llenado está completo
y la mecha está saturada, la unidad está lista para
ser utilizada.
7. Conecte el enchufe en un tomacorriente de
pared. Su humidificador ya está listo para ser
utilizado. El humidificador no debe estar cerca
de ninguna rejilla de calor. Coloque la unidad a
CINCO centímetros, como mínimo, de
cualquier pared o cortinas. Con la libre
circulación de aire en la unidad, se obtendrá el
mejor rendimiento y funcionamiento.
ControlesyFuncionamiento
Esta unidad posee un panel de
control digital que le permite
regular la velocidad del ventilador
y el nivel de humedad, así como
también visualizar la información
sobre el estado de la unidad.El
visualizadortambién indicará si el
control remoto opcional (EP9R
500 solamente) se encuentra en
uso en ese momento.
ADVERTENCIA: Si coloca una planta sobre la unidad, asegúrese de que al regarla no
se derrame agua sobre el panel de control. Si el agua ingresa en el panel de control,
pueden producirse daños. Si se mojan los controle, déjelos secar completamente y
haga revisar la unidad por personal de mantenimiento autorizado antes de conectarla.

15
1. El controlador digital posee un visualizador que brinda información sobre el estado
de la unidad. Dependiendo de la función a la que se esté accediendo, el visualizador
muestra la humedad relativa y la velocidad del ventilador e indica si la unidad se ha
quedado sin agua.
VELOCIDAD DEL VENTILADOR
2. El botón Speed (Velocidad) controla
el motor de velocidad variable. Las
nueve velocidades proporcionan un
control preciso sobre el ventilador.
Presione el botón de encendido y
seleccione la velocidad del ventilador:
desde F1 (velocidad baja) hasta F9
(velocidad alta). La velocidad del
ventilador se visualizará en el panel
de control a medida que se aumente
o se disminuya.
NOTA: Se recomienda disminuir la velocidad del ventilador cuando exista una condensación excesiva.
CONTROL DE LA HUMEDAD
NOTA: Permita10 a15 minutos para el
humidistato para ajustar al cuarto al
establecer la unidad por primera vez.
NOTA: La Serie EP9 / EP9R tiene un
humidistato automático situado en el
cable, que mide la humedad relativa de
la habitación. Cuando el nivel de
humedad seleccionado desciende un 3%
por debajo de la humedad relativa, el
humidificador entra en un ciclo de
encendido y apagado, según se
requiera, para mantener el ajuste
seleccionado.
3. En la instalación inicial se visualizará la humedad relativa del ambiente. Cada vez
que pulse el botón de control de humedad, se aumentará la configuración en incre-
mentos del 5%. Aun puntodeajustedel65%,launidadfuncionarádemaneracontinua.
OTRAS FUNCIONES / INDICACIONES
4. Este humidificador tiene un recordatorio de verificación del filtro
que aparecerádespuésdelas720horasde uso.Cuando apareceel
mensaje de Verificación de filtro (CF, por sus siglas en inglés), de-
senchufe el cable y verifique el estado del filtro. El mensaje CF se
reiniciará cuando se vuelva a conectarel humidificador.
5. Cuando la unidad se encuentre sin agua, aparecerá una F
intermitente en el visualizador.
AUTOMODODESECADO
También en este momento, la unidad cambiará automáticamente al
AUTOMODO DE SECADO y continuará funcionando a la velocidad
más baja hasta que el filtro se seque.. El ventilador se apagará,
dejando un humidificador seco que es menos propenso al
crecimiento de moho y verdín.
Si no se desea AUTO MODO DE SECADO, rellene con agua el humidificador.

16
Si su unidad posee el control remoto o si usted ha adquirido el control remoto Modelo 1999,
tiene la opción de controlar las funciones del humidificador desde cierta distancia.
Activación del control remoto:
Estando el humidificador y el control remoto
apagados, Presione una vez el botón I/O del
control remoto.
Esto enciende el humidificador y permite que el
control remoto controle todas las funciones del
humidificador.
(En el panel de control del humidificador, se
visualizará EC, por External Control [Control externo])
Presione los respectivos botones de humedad y de
velocidad del ventilador para regular los ajustes en
el control remoto, tal como lo haría en el
humidificador.
La lectura de la temperatura está predeterminada
en grados Fahrenheit (F). Si prefiere la lectura en
grados Celsius (C), presione nuevamente el botón
I/O para acceder a esa unidad de medida.
Si se presiona el botón I/O una vez más, se
apagará el control remoto y el humidificador.
Si el humidificador ya se encuentra encendido y funcionando, cuando se presiona el botón I/O del
control remoto, la señal del humidificador se transmite al control remoto y se retoman los últimos
ajustes realizados con el control remoto. Usted puede volver a regular los ajustes como desee.
Si se utilizan los controles del humidificador a la vez que se acciona el control remoto, la señal
volverá al humidificador y se retomarán los últimos ajustes realizados en el panel de control del
humidificador. El control remoto permanecerá encendido hasta que sea apagado.
Instrucciones de Control Remote (EP9R 500)
USO DEL CONTROL REMOTO
Cuando las órdenes se transmitan mediante el control remoto, el visualizador del
humidificador mostrará EC (por External Control [Control externo]).
Los botones de humedad y de velocidad del control remoto funcionan de la misma
manera que sus equivalentes en la unidad.
El ajuste de la velocidad del ventilador y de la humedad se visualizarán en el panel
de control a medida que usted los regula.
La medida de temperatura predeterminada está expresada en grados Fahrenheit
(°F). Sin embargo, cambiará a grados Celsius (°C) si se presiona el botón I/O por
segunda vez.
Periódicamente, el control remoto realiza un control de frecuencia y no responderá
cuando se presionen los botones. Espere 5 segundos e intente dar la orden
nuevamente.

17
REEMPLAZO DE MECHA
La Serie EP9 / EP9R utiliza la mecha Super Wick 1043. Siempre utilice la mecha
original de marca Essick para mantener su unidad y conservar su garantía.
1. Primero, quite cualquier objeto que se encuentre sobre la unidad,
retire la loseta de piedra natural y colóquela en un lugar seguro.
2. Levante y separe el armazón de la base para que la mecha,
el retenedor de mecha y el flotador queden a la vista.
3. Retire el ensamblaje del retenedor y la mecha. Separe el retenedor de mecha
de dos partes.
4. Retire la mecha usada, extraiga el exceso de agua y deséchela.
5. Coloque la nueva mecha Essick 1043 del lado más pequeño del retenedor
de la mecha y cierre a presión la parte posterior más grande.
6. Luego coloque el ensamblaje en la base, alineándolo con las guías
incorporadas.

18
CUIDADO Y MANTENIMIENTO
ADVERTENCIA: Desconecte el suministro de energía antes de realizar el llenado,
limpieza o mantenimiento de la unidad. Mantenga la rejilla seca en todo momento.
Limpiar frecuentemente su humidificador ayuda a eliminar los olores y el desarrollo
de hongos y bacterias. El blanqueador doméstico común es un buen desinfectante
y puede utilizarse para repasar la base del humidificador luego de la limpieza.
Se recomienda limpiar el humidificador por lo menos cada dos semanas a fin de
mantener su hogar en óptimas condiciones ambientales.
Asimismo se recomienda utilizar el Tratamiento Antibacteriano Essick Air cada vez
que rellene su humidificador para eliminar el desarrollo de bacterias. Añada el
bactericida según las instrucciones del envase. Para adquirir el Tratamiento
Antibacteriano (Nº de referencia 1970), comuníquese al 1-800-547-3888.
1. Retire todos los objetos que se encuentren sobre la unidad. Retire la loseta de
piedra natural y colóquela en un lugar seguro. Apague la unidad
completamente y desconéctela del tomacorriente.
2. Separe el armazón de la base y déjelo a un lado.
3. Traslade la base a un lavabo. Levante la mecha y los retenedores de la base
para permitir que se escurra el agua. Enjuague la mecha únicamente con agua
limpia. No utilice jabón, detergente ni cualquier otro producto de limpieza en la
mecha. Deje escurrir en la pileta.
ELIMINACIÓN DEL SARRO
4. Vacíe el agua de la base. Llene la base con agua y añada 250 cm cúbicos
(una taza) de vinagre blanco. Deje reposar durante 20 minutos.
Luego vacíe la solución.
5. Humedezca un paño suave con vinagre blanco y repase la base para eliminar
el sarro. Enjuague completamente toda el área del depósito de agua con agua
limpia para eliminar el sarro y la solución de limpieza antes de la desinfección.
DESINFECCIÓN DE LA UNIDAD
6. Llene la base con agua y añada una cucharadita de blanqueador. Limpie las
superficies interiores con esta solución. Deje actuar la solución durante 20
minutos. Luego enjuague con agua hasta que el olor del blanqueador
desaparezca. Seque con un paño limpio. El exterior de la unidad puede
limpiarse con un paño suave humedecido en agua limpia.
7. Vuelva a colocar el armazón en la base y rellene la unidad a través del
conducto de llenado.
ALMACENAMIENTO DURANTE EL VERANO
Aunque el humidificador tenga una apariencia lo suficientemente estética como
para dejarlo en la habitación todo el año, si opta por guardar la unidad durante el
verano, asegúrese de tomar las precauciones necesarias para proteger el
humidificador durante el almacenamiento No se recomienda la eliminación de las
baldosas de piedra de la parte superior unidad, si es posible. Se recomienda
guardar el humidificador junto con el control remoto opcional (sin pilas) a fin de
acceder con facilidad a él cuando se vuelva utilizar.
Limpie la unidad como se describe en la sección Cuidado y mantenimiento.
1. Deseche la mecha usada y toda el agua que se encuentre en la base y deje
secar completamente antes del almacenamiento. No guarde la unidad con agua
en la base.
2. No guarde la unidad en un ático u otra zona de alta temperatura, que se
produzcan daños.
3. Instale un nuevo filtro al comienzo de la estación.

19
Listado de piezas para EP9 /EP9R Serie
Las piezas y los accesorios se pueden adquirir llamando al 1-800-547-3888.
Siempre realice los encargos por el número de pieza, no por el número de clave.
Tenga a su alcance el número de modelo del humidificador cuando se comunique.
Piezas de repuesto disponibles en el mercado
N.º de
clave
Descripción
Número de pieza
EP9 500 (R)
EP9 700
1
Deflector
1B71973
1B72219
2
Embudo
1B72282
1B72282
3
Flotador
1B71971
1B71971
3
Retenedor del flotador
1B71972
1B71972
4
Ruedas (4)
1B5460070
1B5460070
5
Retenedor de mecha
1B72081
1B72081
6
Mecha
1043
1043
7
Loseta de piedra natural
de 30 cm x 30 cm x 1 cm
1B72077
1B72496
8
Control remoto (opcional)
7V1999
NA
--
Manual del usuario (sin
ilustración)
1B72504
1B72504
9

20
GARANTÍA DEL ESSICK AIR PRODUCTS HUMIDIFICADOR
VÁLIDA AL 1 DE ABRIL DE 2013:
SE REQUIERE EL RECIBO DE VENTA COMO PRUEBA DE LA COMPRA
PARA TODOS LOS RECLAMOS DE GARANTÍA.
PARA CUALQUIER RECLAMO RELACIONADO CON LA GARANTÍA ES NECESARIO
PRESENTAR EL RECIBO COMO PRUEBA DE COMPRA.
Este producto posee garantía por defectos en la fabricación y en los materiales según se detalla a
continuación:
Un año desde la fecha de venta para los componentes instalados en fábrica.
Dos años desde la fecha de venta para el motor.y el control.
Treinta (30) días para las piezas de repuesto.
Esta garantía no es aplicable a filtros o mechas que el cliente pueda reemplazar.
Esta garantía es aplicable solamente al comprador original del producto siempre que haya adquirido el
producto en una tienda o un distribuidor de buena reputación.
Esta garantía no es aplicable a productos que se hayan dañado como consecuencia de accidentes, uso
indebido, alteraciones, reparaciones no autorizadas, uso no autorizado, manipulación incorrecta, uso no
razonable, abuso, incluyendo el incumplimiento de realizar cuidado y mantenimiento que se
enumeran en el manual del propietario, el desgaste normal o cuando la tensión de conexión supera en
más de 5% aquélla especificada en la placa del fabricante. Asimismo, esta garantía tampoco es
aplicable al equipo o a los productos que fueran instalados, conectados o sometidos a mantenimiento de
forma incorrecta sin seguir las especificaciones de este Manual del Usuario.
Las alteraciones que puede sufrir el producto incluyen la sustitución de componentes de marca,
incluido el tratamiento de bacterias y mechas.
ESTE PRODUCTO NO FUE DISEÑADO PARA USO COMERCIAL. LA PRESENTE ES LA ÚNICA
GARANTÍA QUE OFRECE EL FABRICANTE CON RESPECTO A LOS PRODUCTOS Y, HASTA EL
GRADO MÁXIMO PERMITIDO POR LA LEY, REEMPLAZA A CUALQUIER OTRA GARANTÍA,
POR ESCRITO O TÁCITA, QUE OPERE DE PLENO DERECHO O DE OTRA FORMA. SE INCLUYE,
SIN LIMITACIONES, LA COMERCIABILIDAD Y/O APTITUD PARA UN PROPÓSITO EN
PARTICULAR.
Los empleados, agentes, distribuidores u otras personas no se encuentran autorizados a brindar
garantías o condiciones en nombre del fabricante. El cliente será responsable por todos los costos
relacionados con el retiro o la reinstalación y el envío del producto para su reparación.
Dentro de las limitaciones de esta garantía, el comprador que posea unidades que no
funcionen correctamente debe contactarse con el servicio de atención al cliente al 800-547-
3888 para recibir los documentos y las instrucciones a fin de realizar la devolución de la unidad
para su reemplazar. Es necesario presentar una copia del recibo de compra para que
se apruebe la autorización de devolución de la unidad para su reparación
Esta garantía se anulará si el comprador intenta reparar o reemplazar cualquier pieza
mecánica o eléctrica.
El fabricante reemplazará el producto, según lo crea conveniente, y se hará cargo de los gastos de
envío de la devolución al cliente. Se acuerda que el reemplazo es la única solucione que el fabricante
tiene disponibles. ASIMISMO, HASTA EL GRADO MÁXIMO PERMITIDO POR LA LEY, EL
FABRICANTE NO SE HACE RESPONSABLE POR LOS DAÑOS DE CUALQUIER TIPO, INCLUIDOS
DAÑOS INCIDENTALES Y EMERGENTES, O LA PÉRDIDA DE GANANCIAS O INGRESOS.
Esta garantía le confiere al cliente derechos específicos. Además, el cliente puede gozar de otros
derechos que varían según la provincia o el estado.
Other manuals for EP9 500
4
This manual suits for next models
2
Table of contents
Languages:
Other Essick Humidifier manuals
Essick
Essick Bemis H12 001 Guide

Essick
Essick 7D6 100 Guide
Essick
Essick Bemis DP3 200 User manual
Essick
Essick ED11 600 Guide

Essick
Essick H12 300HB Guide

Essick
Essick 4D7 300 OAK BURL Guide
Essick
Essick 3D6 100 Guide
Essick
Essick EP9 500 Guide
Essick
Essick 826 800 Guide
Essick
Essick 400 Series Instruction manual
