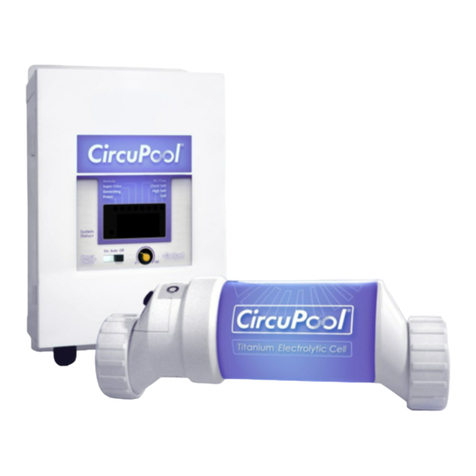
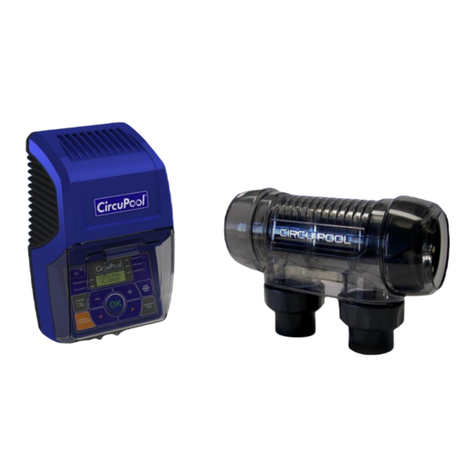
CircuPool RJ Classic Series User manual

CircuPool Help Guides: RJ Classic Series
1
RJ Classic
Series
Trouble Shooting Guide
Table of contents:
Basic Water Chemistry pg.2
Phosphates & Nitrates pg.4
Langelier Saturation Index pg.5
Low Chlorine Level in Pool pg.6
No Power to Control Unit pg.9
Water Fault or Add Salt LED Indicators pg.12
How to Clean the Electrolytic Cell pg.18
How to Disassemble the Cell pg.19
How to Inspect the Seals on the Cell pg.22
How to Install the LCD Display Circuit Board pg.23
How to Install the Keypad pg.24
The complete RJ Classic manual is always available at Circupool.com:
http://www.circupool.com/how-to-install-a-salt-chlorine-generator.php
IMPORTANT -REMEMBER THAT YOUR POOL IS COMPATIBLE WITH CHLORINE AND SHOCK AS NORMAL. IF YOUR POOL IS
EXPERIENCING TEMPORARY LOSS OF CHLORINE OR OTHER DIFFICULTIES, ADD SANITIZER AS NEEDED TO MAINTAIN THE POOL.
WARNING - ALWAYS MAKE SURE THE INPUT POWER IS COMPLETELY DISCONNECTED BEFORE ATTEMPTING ANY
TROUBLESHOOTING PROCEDURES. ALL TROUBLESHOOTING SHOULD BE DONE BY A QUALIFIED PROFESSIONAL.

CircuPool Help Guides: RJ Classic Series
2
BASIC WATER CHEMISTRY
Managing the water chemistry of your pool is critical for effective chlorination and ensuring the safety of swimmers in the pool and preventing
damage to your pool materials and equipment. This guide reflects national standards for pool water chemistry; for in-depth assistance, please
consult your local pool professional and provide them with a copy of your manual in order to ensure that they are familiar with your specific pool
equipment.
*Helpful Tip: The Pool Calculator App takes care of all of the math that might come up when keeping your swimming pool's water chemistry in
balance. It is able to tell you exactly how much of each chemical to add. Visit www.poolcalculator.com
Swimming Pools Spas
Free Available Chlorine 1.0 - 3.0 ppm 3.0 - 5.0 ppm
Salinity 3000 - 4000 ppm 3000-4000 ppm
pH 7.2 - 7.8 7.2 - 7.8
Stabilizer (Cyanuric Acid) 50 - 75 ppm 50 - 75 ppm
Total Alkalinity 100 - 200 ppm 100 - 200 ppm
Calcium Hardness 200 - 400 ppm 150 - 450 ppm
Saturation Index -0.2 to +0.2 (0 best) -0.2 to +0.2 (0 best)
Phosphates 0 to 100 ppb (0 best) 0 to 100 ppb (0 best)
Nitrates 0 to 10 ppm (0 best) 0 to 10 ppm (0 best)
Metals 0 0
Ammonia 0 0
Chlorine
Measurable chlorine shows the level of disinfecting chlorine available to keep your pool sanitary. Chlorine is consumed by sunlight,
and by breaking down organic material in your pool. The level of chlorine you need to maintain depends on your CYA level and how
much you use the pool. It is important that you do not allow chlorine to get too low, or you run the risk of getting algae or germs.
Maintaining an appropriate chlorine level is the most important part of keeping your water in balance. The chlorine level should be
between 1.0-3.0ppm. It can be efficient to raise the chlorine level in the evening, since none will be lost to sunlight until the next
morning. Without constant supply, the chlorine level goes down by itself. If you must lower the chlorine level quickly, you can
manually turn off your salt system at any time.
Salt
This level will typically be around 3,500. This level is less than one tenth of the salt level in ocean water, which has around
35,000ppm of salt.
Salinity can be raised by adding salt sold for use in pools water softeners (sodium chloride). Ensure that the salt is 99.8% pure or
better, and which doesn't have any rust inhibitor or other additives. Crystals are fine, pellets will work but dissolve slowly.
CYA - Cyanuric Acid
Cyanuric acid, often called stabilizer or conditioner, both protects chlorine from sunlight and lowers the effective strength of the
chlorine. If you don't have problems from extremely high amounts of sunlight, CYA is typically kept between 30 and 50. If you have a
salt system or very high levels of direct sunlight, CYA is typically kept between 70 and 80.

CircuPool Help Guides: RJ Classic Series
3
pH - Acidity/Alkalinity
pH indicates how acidic or basic the water is. pH should be tested daily at first. Once you gain experience with your pool, less
frequent monitoring may be appropriate, depending on your pool's typical rate of pH change. pH levels between 7.5 and 7.8 are
ideal, while levels between 7.2 and 7.8 are acceptable for swimming.
TA - Total Alkalinity
Total alkalinity indicates the water's ability to buffer pH changes. Buffering means you need to use a larger quantity of a chemical to
change the pH. At low TA levels, the pH tends to swing around wildly. At high TA levels, the pH tends to drift up. TA contributes to
the LSI which indicates the tendency for plaster damage or calcium scaling.
You can raise TA with baking soda. It is often best to make large TA adjustments in a couple of steps, testing the water after each
one, as adding baking soda will also affect the pH and you don't want the pH going out of range.
CH - Calcium Hardness
Calcium hardness indicates the amount of calcium in the water. A plaster pool should have CH levels between 250 and 350 if
possible. If you have a spa you might want to keep CH at at least 100 to 150 to reduce foaming. CH contributes to the LSI which
indicates the tendency for plaster damage or calcium scaling. You increase CH with calcium chloride, sold as a deicer and by pool
stores, or calcium chloride dihydrate, sold by pools stores for increasing calcium. You lower calcium by replacing water or using a
reverse osmosis water treatment.
See following Basic Water Chemistry pages for more specific information about Phosphates, Nitrates, and Saturation Index (LSI)

CircuPool Help Guides: RJ Classic Series
4
BASIC WATER CHEMISTRY - PHOSPHATES & NITRATES
Phosphates are a part of the environment: Phosphates became a household word in the 1970's. This is when people started to use
low-phosphate and phosphate-free laundry detergents to help minimize the detrimental effects of excess phosphates in lakes,
streams, wetlands and other runoff areas- effects such as unwanted algae blooms.
Phosphates accumulate in pools: What's true for lakes is also true for swimming pools; there are innumerable ways phosphates can
get into your pool. Phosphates are a natural component of most swimmer wastes. It is also present in rain water. It can be blown in
on the wind, in dirt or dust, or in plant material that enters the pool. It may also be introduced by landscaper's fertilizers at very
high levels, which may blow into the pool or come in from water runoff. Phosphate levels are persistent and do not break down
naturally- you have to treat the water to remove phosphates. For all of these reasons, pools can quickly build up phosphate levels.
This can lower chlorine levels and create an abundant source for all strains of algae & microorganisms, and can make controlling
their growth difficult. Remove the food source, and you can normalize chlorine demand and have a strong weapon against algae.
When phosphates are present, chlorine levels go down and algae grows: Phosphate is the main ingredient in fertilizer. Phosphate is
plant food, and algae are plants. If you have had persistent trouble with chlorine levels or algae, you may have a phosphate problem
in your pool. When excess phosphate is present in a swimming pool, the symptoms often include the following: Quickly Dissipating
Chlorine Levels or Excessive Chemical Consumption; Cloudy, Green Water; Slippery and Slimy Surfaces; Mustard and Green Colored
Debris; Poor Water Quality.
Remove the phosphates and solve the problem: It only takes tiny amounts of phosphates to become significant in pools. The
maximum level of phosphate in pool water should be less than 100 ppb, as close to 0 as possible. Once the phosphates climbs above
this level, the water quality begins to decrease. Fortunately, draining to eliminate the accumulated phosphate is no longer
necessary. Phosphate removers can be added which allow the phosphates to be removed from the water. A popular choice is
Natural Chemistry's Phos-Free, which is a natural mineral product and is non-toxic.
You can test for phosphates in your pool with the AquaChek Phosphate Test Kit found at www.aquachek.com
Nitrates: Nitrates are a matter similar to Phosphates, but of different origin; however both a food source for algae. Nitrate is a plant
nutrient and is present in all green plants and fertilizers. It is natural occurring and is found everywhere something is growing.
Nitrites (NO2) are a close cousin to Nitrates (NO3) and are just as much of a problem for pools, because when a Nitrite comes in
contact with water, it easily gains another Oxygen atom to become a Nitrate. This additional atom gives Nitrates real stability, and
makes eradication difficult. In fact, the only known way of Nitrate removal in pools practiced today is to drain a portion of the pool,
and refill with water that is Nitrate free, if possible. Shocking a pool heavily will revert the Nitrates back to Nitrites, but can easily
revert once again as an additional Oxygen atom is easy to come by in a swimming pool filled with H2O.
Where do Nitrates come from? Rural areas - those with water wells and septic tanks are particularly prone to Nitrate contamination
in pools. Fertilizer is the most common source of Nitrates in pools. Animals that enter the pool, as well as birds spend time above the
pool, can become a significant source of contaminants. Rain spilling off of overhanging trees can add Nitrates to a pool, and even
acid rain itself, so common in the Northeast, can increase Nitrate levels. Finally, human waste, sweat, cosmetics can all bring traces
of Nitrates into the pool. At levels as low as 10ppm of Nitrate, algae will grow even though you have used algaecide and are keeping
a proper chlorine residual. But keeping a proper residual of chlorine in the water can prove to be difficult when Nitrates are present.
This is what tricks people into believing in Chlorine Lock- it's not blocking chlorine, but using it very quickly.
What can be done to Eliminate Nitrates in my pool? There still however is no chemical to remove the Nitrates from the pool water,
so if you have a contamination, you will need to drain most if not all of the pool water.

CircuPool Help Guides: RJ Classic Series
5
BASIC WATER CHEMISTRY - LANGELIER SATURATION INDEX (LSI)
LSI is a measurement of the water’s ability to absorb and hold solids in a solution. It is important to know that the scale on which LSI
is measured is very narrow, meaning that a small change can indicate a significant difference in your pool. Like pH, the LSI value is
logarithmic, meaning that a difference of 1.0 equates to a difference of ten times in reality. A Saturation Index of -2.0 is ten times
more corrosive than an SI of –1.0. This is important, as many pool equipment manufacturers may not be able to warranty damage
caused by an out-of-balance LSI.
STEPS TO TAKE:
1. Obtain a complete water chemistry test from a pool store for the following items:
pH, Water Temperature, Alkalinity, Cyanuric Acid (Stabilizer), Calcium Hardness, Total Dissolved Solids
2. Go to www.aquachek.com
a. Click on “Calculators”
b. Click on “Langelier Saturation Index”
c. Plug in your results and obtain your Saturation Index number.
3. Go to www.poolcalculator.com to balance your water accordingly.
If LSI Index is between -0.2 and +0.2 pool water is Balanced. When pool water is balanced, it has no effect on the pool or
equipment. There are two values you can readily change to help improve your LSI value to get it into the optimum range: pH and
Alkalinity level.
If LSI Index is less than -0.2 pool water is Corrosive. Pool water may cause etching, pitting, dissolving and staining of walls, grouting
and plumbing. It will also cause erosion to the titanium salt cell.
As Stabilizer Increases, LSI Decreases
As Total Dissolved Solids Increase, LSI Decreases
To raise your LSI value, you should first balance the calcium hardness in the pool. It needs to be between 200-400 PPM at all times. If
the calcium hardness is in the correct range, add sodium bicarbonate or baking soda. Consult the calculator at
www.poolcalculator.com to determine the target Alkalinity value (recommended range is 80-120ppm; however, you may find that a
level lower than 80 may be ideal for a balanced LSI value).
If LSI Index is greater than +0.2 pool water is Scale Forming. Pool water may deposit excess minerals on the pool and equipment.
Scale generally appears as white or lightly colored rough blotches on the pool walls. It also adheres to other objects in the pool,
piping and filter system. This will cause calcium deposits to rapidly form on the titanium salt cell. Scale can restrict water flow,
shortening filter runs and reducing filtration efficiency.
As Temperature Increases LSI Increases
As Total Alkalinity Increases LSI Increases
As pH Increases, LSI Increases
As Calcium Hardness Increases, LSI Increases
To lower your LSI value, you should first consider adding muriatic acid (can be found in pool supply stores), as it is more difficult to
lower Calcium Hardness and especially temperature. Consult the calculator to determine the target pH value.

CircuPool Help Guides: RJ Classic Series
6
LOW CHLORINE LEVEL IN POOL
IMPORTANT: Measuring a low chlorine level does not indicate that your system is not working. Water chemistry and
environmental conditions are the #1 cause of a low chlorine level in a saltwater pool. The following steps will enable you to verify
with certainty whether or not your system is operational and creating chlorine. Following that, this help guide will help identify what
may contributing to the low chlorine level in the pool water.
Verifying that the system is operational
There are two variables involved in the generation of chlorine: salt and electricity. If there is salt in the water and power being sent
to the Electrolytic Cell, the system is generating chlorine normally. If the salt level is in question, independently test a water sample.
+ =.
Verifying Power is present in Cell
1. Water Fault LED Indicator
oIs the Water Fault LED indicator illuminated? If it is, the system is not able to send power through the cell (like
what would happen if there were no water present in the cell). See "Water Fault" troubleshooting, page 12.
oIf the Water Fault LED indicator is not on, then your system is successfully able to send power through the cell.
2. Power Graph
oIf the Water Fault light is off, power is passing through the cell. The Control Module has a built in power meter that
ensures that the full and complete amount of power is able to pass through the cell.
oThe power meter is the bar graph that appears underneath the time and percentage output that you set; it should
match the percentage number. The graph initially will be blank, and will slowly grow from left to right over the
course of up to 60 seconds.
OK - Normal power OK- Normal power Problem - Insufficient Power
oIf your power graph cannot ramp up from left to right when set to 100%, the system is not able to create chlorine
normally. This may occur when the cell has reached the end of its lifespan. Note: If your system begins its salt test
before the graph has fully ramped, this does not indicate a problem. You will need to wait for the test to complete
and for the test results to clear from the screen, which may take 5-10 minutes.
oIf your power graph can ramp up from left to right when set to 100%, the system is able to pass the full amount of
power through the cell, and is fully operational and creating chlorine normally.
Summary: If salt is present above the minimum level of 3000 ppm, if the Water Fault light is off, and if the power graph matches
the percentage output, then the system is fully operational and creating chlorine normally. See below for troubleshooting.
IMPORTANT -REMEMBER THAT YOUR POOL IS COMPATIBLE WITH CHLORINE AND SHOCK AS NORMAL. IF YOUR POOL IS
EXPERIENCING TEMPORARY LOSS OF CHLORINE OR OTHER DIFFICULTIES, ADD SANITIZER AS NEEDED TO MAINTAIN THE POOL.
CHLORINE
PRODUCTION
salt
power

CircuPool Help Guides: RJ Classic Series
7
LOW CHLORINE LEVEL IN POOL (Continued)
Common Causes of Low Chlorine Levels
Examine the Water Chemistry (Also see Page 2):
Water chemistry and environmental conditions are the #1 cause of a low chlorine level in a saltwater pool, as they cause
chlorine demand to rise above normal levels. High chlorine demand means that chlorine is being consumed quicker than it is
being replenished, resulting in the inability to measure the chlorine residual in the water. If operation has been verified (as
described on the previous page), this does not mean that the chlorine generator is not working, only that the chlorine demand
currently exceeds the rate of chlorine production.
The ideal levels for a salt water pool are
Free Available Chlorine 1.0 - 3.0 ppm
Salinity 3000 - 4000 ppm
pH 7.2 - 7.8
Stabilizer (Cyanuric Acid) 50 - 75 ppm
Total Alkalinity 100 - 200 ppm
Calcium Hardness 200 - 400 ppm
Saturation Index -0.2 to +0.2 (0 best)
Phosphates 0 to 100 ppb (0 best)
Nitrates 0 to 10 ppm (0 best)
Iron 0
Copper 0
Other metals 0
Ammonia 0
The levels that are highlighted levels are the most common causes of high chlorine demand and depleted chlorine levels in
pools. Ensure that all three levels are being tested for and that their values are included on your chemistry report.
The Chlorine Stabilizer (Cyanuric Acid, or CYA) level must be within range, especially during the spring and summer
months. If there is not enough CYA in the pool, then your chlorine will not be protected from the sun and the chlorine
being produced by the salt system will be consumed once the sun hits the pool water. Up to 90% of the pool's chlorine can
be depleted within 2 hours without a sufficient level of chlorine stabilizer.
Phosphates and Nitrates that are present in the pool will cause the chlorine demand to rise and/or will consume the
chlorine being made by the salt system (Also see page 4). Phosphates are very common. Any Phosphate level near or
above 100 parts per billion can greatly increase the chlorine demand in the pool. Any Phosphate level over 200 Part Per
Billion will not only consume your chlorine, it will also readily feed algae. To remove phosphates, use commercial grade
Phosfree. When trying to lower significant phosphate levels, phosphate products meant for weekly maintenance are
usually not effective Nitrates will also rapidly consume your chlorine. If the Nitrate level is high, it is often most effective to
drain the pool and refill with new water, being sure to add the necessary amount of salt back to the pool.
Lower salt levels can affect chlorine generation and cause the system to work inefficiently.
Other chemistry imbalances and the presence of metals, ammonia, and other impurities can cause high chlorine demand.

CircuPool Help Guides: RJ Classic Series
8
Common Causes of Low Chlorine Levels (Continued)
Insufficient Operation:
Ensure input power- Is the salt system turning on and off with the pump as normal? Has the fuse / fuse reset button / circuit
breaker been tripped? If so, see "No Power", page 9.
Output Level - The percentage output level that you set tells the system how much of its maximum capacity to use in order to
create chlorine. If you are experiencing high chlorine demand, ensure that you have your system turned up to 100% output so
that it is doing as much as possible to compensate. Leave the system at 100% output until the pool is balanced again. Since
every pool operates differently and has a different level of chlorine demand, during normal operation there is not a standard
percentage level at which to set the output.
Run time - When sized right, a chlorine generator can typically achieve sufficient chlorination when run on the filter pump's
normal schedule. However, every pool has different equipment and its operation is unique, and you may require (or choose) to
run the filter pump more or less than is standard. As a rule of thumb however, run your system one hour for every ten degrees
of ambient temperature in order to achieve both sufficient filtration and chlorination. Periods of high use, harsh environmental
conditions, or excessive chlorine demand may require extended run times. For example, running your system twice as long will
allow it to create twice as much chlorine.
Cell Maintenance - Make sure the cell plates are clean and free from any debris. The Self-Cleaning feature minimizes the
amount of mineral deposits that will occur, but as with every salt system, the electrolytic cell should be cleaned periodically. If
there are any calcium deposits which are causing the cell plates to bridge together, clean the cell with one part muriatic acid
and five parts water for 10 minutes. See page 18 or go to www.youtube.com/circupool to see a video of this being done.
Example of a cell that needs to be cleaned:
During initial startup (springtime / new pools) - When being opened, pools typically have much higher than normal chlorine
demand. In these circumstances a pool requires a large amount of sanitizer all at once, which means that it is often more
effective to add chlorine or shock as needed initially instead of waiting on the system to slowly reach "break-point" chlorination.

CircuPool Help Guides: RJ Classic Series
9
No Power to Control Unit
1. The Control Module is displaying "Power Off"
If this is displayed, the unit is receiving power, but is currently deactivated in its "Power Off" mode. Press the Power button at
the top of your keypad to activate the system.
2. There are no LED Lights illuminated, no display on the LCD Screen, but input power has been confirmed
The power protection mechanism has activated.
Common Causes:
Power surge, lightning strike, heavy storm.
The calcium deposits or debris that are making contact with the titanium cell are excessive or have
bridged the plates together. This will cause the current across the cell to jump and activate the power
protection. Clean the cell plates. See page 18 for instructions.
The CircuPool Control Panel comes in 2 different types of power protection:
Model-A - 5amp Reset Breaker located at the bottom of the control panel in between the cell cable and
electrical cable. (picture below)
If the reset button has tripped, the yellow button on the 5amp breaker will be ejected. Simply press the
yellow button and restore power to the unit.
WARNING - ALWAYS MAKE SURE THE INPUT POWER IS COMPLETELY DISCONNECTED BEFORE ATTEMPTING ANY
TROUBLESHOOTING PROCEDURES. ALL TROUBLESHOOTING SHOULD BE DONE BY A QUALIFIED PROFESSIONAL.

CircuPool Help Guides: RJ Classic Series
10
Model-B - 5amp/250 volt Slow-Blow glass fuse located inside the unit on the bottom of the power
control board. Found at RadioShack (part #270-1067) or any Auto Parts store. (picture below)
If the glass fuse is bad, it will have a black or grey mark in the middle of the glass portion area of the
fuse. Do not service unless all power has been disconnected.
Replacing the power protection mechanism (WARNING: Make sure all power has been disconnected):
Model-A - 5amp Reset Breaker
1) Disconnect the control panel from the black wall mounting bracket.
2) Unscrew the six screws from the back of the control panel (picture 1, below)
3) Locate and unscrew the exterior ½ inch hex nut located on the bottom the control unit.
4) Disconnect the two wires that are attached to the back of the reset breaker.
5) Reconnect the two wires onto the new breaker (position of wires on the breaker doesn't matter).
6) Install new breaker making sure that the sticker label faces the right side of the unit. (picture 2,
below)
7) Screw back on the ½ inch hex nut on the outside of the control panel
8) Put the front cover back on. IMPORTANT: Make sure the grey ribbon cable does not get
positioned over one of the screw holes
.
Pic. 1, removing screws
Pic. 2, replacing fuse reset breaker

CircuPool Help Guides: RJ Classic Series
11
Replacing the power protection mechanism, continued (WARNING: Make sure all power has been disconnected):
Model-B - 5amp/250 volt Slow-Blow glass fuse
1) Disconnect the control panel from the black wall mounting bracket.
2) Unscrew the six screws from the back of the control panel.
3) Remove the front control panel cover.
4) Locate and remove the glass fuse from the metal clips.
5) Install the 5amp/250v slow blow fuse.(Radio Shack part #270-1067)
6) Put the front cover back on. IMPORTANT: Make sure the grey ribbon cable does not get positioned over one of
the screw holes during this process.
3. The input voltage from power source does not match the Control Module's voltage configuration.
The CircuPool units come from the factory wired for 220V unless the customer requests 110V at the time of purchase. Below
are the internal wiring schematics for the CircuPool RJ Series:
If the CircuPool unit is wired for 220V and it is connected to a 110V power source, all the lights will illuminate and the
display screen will be blank, or flash the boot-up screen.
If the CircuPool unit is wired for 110V and it is connected to a 220V power source, the power protection mechanism will
activate.
When wiring to the power source:
a. At 220V, the black wire and red wire are both hot legs. Each of them are pulling 110V. Green is the ground.
b. At 110V, the black wire is the hot leg, red is the neutral and green is the ground. If wiring the unit into a 110V plug,
the black wires goes to the brass screw and the red wire goes to the silver screw
4. The control unit has been damaged by a power surge
Examine the motherboard for any damaged parts. If the control unit has suffered a power surge or lighting damage, the unit
will cease to function and power cannot be restored.

CircuPool Help Guides: RJ Classic Series
12
Water Fault / Add Salt LED Indicators
This Help Guide will troubleshoot possible causes for the “Water Fault” and/or “Add Salt” light to remain continuously illuminated.
IMPORTANT: The "Add Salt" light is only a display indicator and does not cause the system to change its behavior or cease operation
if the salt level is above the minimum level required. If your system does not appear to be affected by any cause listed here, there
may simply be environmental factors affecting the salinity reading and no action is required. If "Water Fault" is illuminated, the
system has ceased generating chlorine.
1. Low Salt Level in the Pool
The salinity level in the pool should be above 3000 ppm at all times. Check your salt level with test strips, or have a pool store
test it for you to determine the current salt level. Always independently test salt levels before adding salt or adding more water.
Adjust your salt content according to your pool size by using the chart below,

CircuPool Help Guides: RJ Classic Series
13
2. Low or Absent Water Flow through the Salt Cell
The water flow should always fully fill the entire Electrolytic Cell at all times. The minimum flow requirement is typically 30
gallons per minute. As the Electrolytic Cell has no ability to increase or decrease water flow, if the water is not completely
filling the Cell then that indicates a problem with the pool's circulation system. Common things to check include: check the
integrity of the o-rings on the pump and filter, clean or backwash your filter, check the water pressure from your pump
motor, check for cracks or leaks in the pool's plumbing and plumbing unions that could be allowing air to be sucked into the
circulation system.
3. Bad Connection between Cell Cord and Cell Terminals
Ensure that all electrical connections are tight, free of corrosion, and fully seated.
Models with 3-plug connectors
Make sure the blue female cell cable connector is properly seated on the center brass post.
Make sure that none of the prongs on each female terminal are broken off.
Ensure that no dirt, debris or corrosion are causing a poor connection between the male and female terminals. If
dulled by corrosion, steel wool or fine sandpaper can be used to remove the corrosion.
Ensure that each female terminal is pressed fully on to each male terminal
Models with single circular plug
Use needle-nose pliers to crimp female connections on plug to ensure each has a tight connection to male terminals.
Ensure that plug is 100% seated on to male terminals. Removing the Cell's UV Shell case can allow easier access and
show if the plug is pressed fully into place.
Ensure that no dirt, debris or corrosion are causing a poor connection between the male and female terminals. If dulled
by corrosion, steel wool or fine sandpaper can be used to remove the corrosion.
4. Cell has excessive scaling / mineral deposits / filter debris on titanium plates
The Electrolytic Cell should be free of calcium scale or any debris (hair, grass, etc..) that have accumulated between the titanium
plates. Frequency of cleaning is dependent upon your pool's water chemistry, but for many people is required just a couple
times per season (see Saturation Index, page 5, for help balancing the water). If present, the Cell is not able to pass along power
efficiently and needs to be cleaned. See page 18 for instructions.
5. Loose or disconnected Titanium Plates in Electrolytic Cell caused by corrosive water
Remove and examine the titanium plates from within the Cell. Normal wear should not cause any significant thinning of the
metal, change of shape, degradation of edges, etching or pitting of surface, disconnection or separation of metal, or creation of
any holes in the metal. If such damage is present, it is not normal and is important to identify because it can be prevented
through water chemistry maintenance. In order to disassemble the cell for easy inspection, see instructions on page 19. See the
next few pages for examples.
The damage pictured in these examples is caused by the Saturation Index of the water being too low, causing the water to be
corrosive. (see “Saturation Index” on page 5). The recommended range for the Saturation Index is (-0.2 to +0.2).

CircuPool Help Guides: RJ Classic Series
14
Examples of GOOD titanium plates:

CircuPool Help Guides: RJ Classic Series
15
Examples of DAMAGED titanium plates:

CircuPool Help Guides: RJ Classic Series
16
Examples of DAMAGED titanium plates, continued:

CircuPool Help Guides: RJ Classic Series
17
6. Damage to the Control Module (WARNING: Make sure all power has been disconnected)
To troubleshoot the Control Module, dismount the control unit from the wall bracket, set on a stable surface, and remove the
six screws from the back of the unit. Remove the entire front plastic to access the Control Module interior.
A. Damaged Rectifier Circuit - There are four rectifiers located directly below the transformer. If the salt system has suffered a
lightning strike, power surge, or water damage these rectifiers may be damaged. If the rectifiers are damaged, there will be
visible cracks in the black squares or black burn marks (see picture below). Once damaged, the Water Fault light may
illuminate, or the unit may not power up at all.
B. Damaged Capacitor - The capacitor is located on the motherboard to left of the copper coil inside the unit (see below, left).
If the salt system has suffered a lightning strike, power surge, or water damage this capacitor may be damaged. If the
capacitor is damaged, there will be visible blackening or burn marks on the surface of it (see below, right). Once damaged,
the Water Fault light will illuminate.
7. Electrolytic Cell needs replacement
If all of the parts in the preceding troubleshooting are operational and the Water Fault LED is still illuminated, then the
Electrolytic Cell may need to be replaced.

CircuPool Help Guides: RJ Classic Series
18
How to Clean the Electrolytic Cell
The Electrolytic Cell has the self-cleaning Reverse Polarity feature built-in, which prevents mineral deposits from forming rapidly.
However, the Cell may eventually need to be manually cleaned. The frequency of mineral build-up is dependent upon the balance of
the pool's water chemistry, specifically the Saturation Index (see page 5).
To determine if the Cell needs to be cleaned, examine the titanium plates for any calcium deposits that are close to bridging the
plates together. Example:
Follow these steps to clean the cell:
1. Turn all power to the filter system and salt system off. Close return
line valves if applicable.
2. Completely disconnect the Cell Cord from the terminals on the
Electrolytic Cell.
3. Unscrew the two small threaded collars at the inlet and outlet side
of the cell housing (on bottom).
4. Remove cell from the inlet and the outlet fittings.
5. IMPORTANT: Using gloves and eye protection during this process is
recommended. Always add acid to the water, never water to the
acid.
6. In a separate bucket, mix a solution of: one part Muriatic Acid and
five parts water.
7. Turn the cell upside down, so that inlet and outlet face the sky, and
brace it to make sure it stays upright.
8. Pour the acid/water solution into the cell housing.
9. You will notice a fizzing or fogging effect inside the cell once the
solution has made contact with the titanium cell, this is normal.
10. The solution should completely cover the titanium plates, and
should be allowed to soak for no longer than 10 minutes.
11. Dispose of the solution and wash out any remaining debris.

CircuPool Help Guides: RJ Classic Series
19
How to Disassemble the Cell
Step 1: Disconnect the UV shell
Method A: Pull apart the UV shell by gripping the bottom of the left and right side in between in the inlet and outlet pipes( Model 2
ONLY)- ARROW “A”
Method B: Pull apart the UV shell by gripping the left and right sides near the cell connection (Model 1 ONLY) - ARROW “B”
Method C: Use a small flat head screwdriver to disconnect the UV shell at the middle seam on the top and bottom. ARROW “C”
Top: MODEL 2 | Bottom: MODEL 1
Cell Assembly with UV Shell removed
C
C
C
C
C
C
B
A

CircuPool Help Guides: RJ Classic Series
20
Step 2: Remove the Cell Plates
a. Disconnect the cell connection from the male copper posts and unscrew the large threaded collar.
b. Position a flathead screwdriver in the seam where the black cell connection plastic meets the clear plastic.
c. Slide the cell plates out of the clear housing
Table of contents
Other CircuPool Lighting Equipment manuals
Popular Lighting Equipment manuals by other brands

Philips
Philips hue Flourish user manual
Lunasea
Lunasea LLB-53BK-01-00 Wiring diagram

MPK
MPK VisionVent M pro Installation and operating instructions

Laserworld
Laserworld GREEN-200A user manual
NEXT pool
NEXT pool ABRIBLUE BANC D.SIGN installation manual
Jacuzzi
Jacuzzi SANICLEAR10 Operation and installation manual
