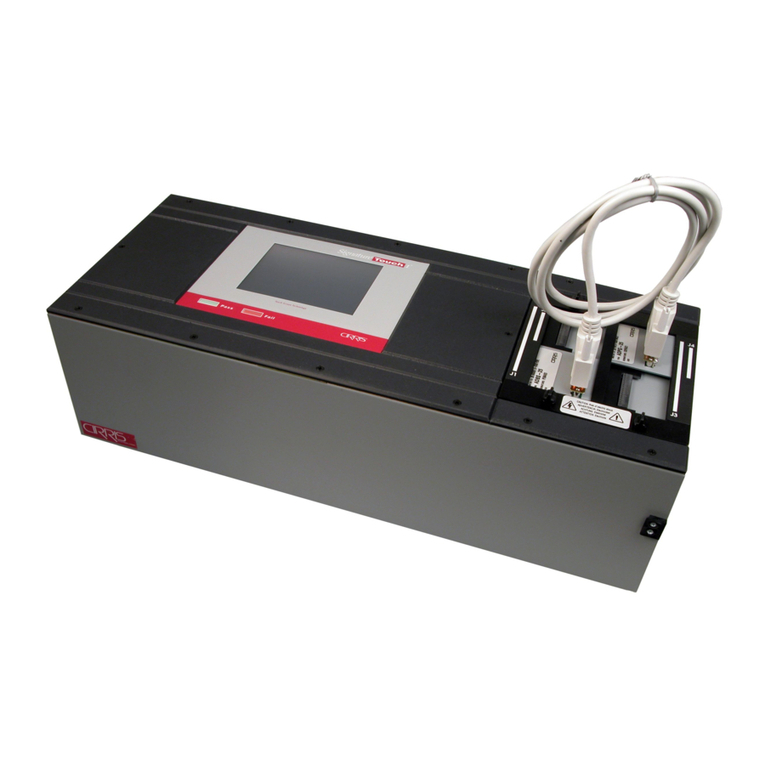
Cirris Signature 1000M User manual

Signature 1000M Cable Analyzer
User’s Guide
Version 4.1
6 October, 2004

Signature 1000M Cable Analyzer User’s Guide
Version 4.1
6 October, 2004
Copyright 1999 by Cirris Systems Corporation
1991 Parkway Boulevard
Salt Lake City, Utah 84119-2026
United States of America
All rights reserved
Visit our web site at www.cirris.com

I Need Your Help!
As Senior Editor, it’s my responsibility to constantly improve the manuals and other documentation
we include with our equipment. We try hard, but we know we’ll never please everyone. If you were
in my chair, how would you change the documentation to make it better? Here’s your chance to
take gripes, suggestions and (we hope) praise directly to the guy who can change things. Please
fax or mail this form to me, or contact me by e-mail.
Thanks!
Van Nielson
Senior Editor, Technical Documentation
Fax Telephone: 801-973-4609
e-mail: [email protected]
Van Nielson
c/o Cirris Systems Corporation
1991 Parkway Boulevard
Salt Lake City, Utah 84119-2026
U.S.A.
1000M User’s Guide
Attach more pages if needed


Table of Contents
Introduction to the Cirris 1000M 7
Section 1: Work With the Hardware 9
Section 2: Check the Option Settings 17
Section 3: What the Option Settings Mean 19
Section 4: Learn a Sample Cable, Store it in Memory 21
Section 5: Test Your First Cable 25
Section 6: Retrieve a Cable from Memory 27
Section 7: Delete a Cable from Memory 29
Section 8: Print a Directory of Cables Stored in Memory 31
Section 9: Cable Documentation and Signatures 33
Section 10: Rework and Guided Assembly 37
Section 11: Troubleshooting 43
Section 12: Specifications 51
Section 13: Glossary 53
Section 14: Statement of Warranty 55
Section 15: Blank Forms to Photocopy 57


1000M User’s Guide / page 7
Lets get started! The Cirris 1000M cable analyzer is an easy-to-use machine that will allow you to test
cables quickly, and with little fuss. In simple terms, the process of using your 1000M
goes like this:
1. Install connector adapters to match the cables you want to test (see page9 for
details).
2. Check the test option settings; reset the options if you need to (see page17 for
details).
3. Either:
•Learn a Sample Cable (a cable you know is built correctly) of the kind
you want to test (see page21 for details), or...
•Retrieve the wirelist data for the kind of cable you want to test from the
analyzer’s memory (see page27 for details).
This completes programming the analyzer for testing cables. If you have connected a
Sample Cable to learn it, disconnect it now.
4. Connect the first cable you want to test.
5. Test the cable (see page25 for details).
6. Record and/or or print the test results (see page26 for details).
That’s it! We’ll show you how to do each of these steps in this manual.
What your order
should contain Your order should contain these things in addition to this manual:
•1000M main unit, including a wall transformer with cord, to provide
power for the analyzer.
•Hand-held test probe.
•Whatever connector adapters you have ordered (usually shipped in a 3 x
5-inch card file). You may also have ordered an optional tilt stand, or an
optional frame stand. If so, these should be included.
Introduction
to the Cirris
1000M

Introduction to the Cirris 1000M / What your order should contain
1000M User’s Guide / page 8

1000M User’s Guide / page 9
The Cirris 1000M can be used to test many different types of cables. To connect the
cables you want to test to the analyzer, you use connector adapters which match the
connectors on the cable you want to test.
In this section, we will explain how to work with the hardware. We will show you
how to install your connector adapters, and how to disassemble the analyzer in case
you need to replace one of its subassemblies, or its EPROM.
How to install
connector adapters To install connector adapters onto the Cirris 1000M, follow these steps:
1. Turn the two twistlock fasteners on each adapter cover plate to unlock them, and
remove the cover plates.
2. Plug in the connector adapters. Be sure the pins on the bottom of each adapter
are lined up properly, so they don’t bend as they are inserted into the sockets. To
line the pins up properly, press the adapter against the inside edge of the metal
frame, and have the bottom of the adapter card resting on the plastic adapter
support.
Twistlock fastener unlocked
Twistlock fastener locked
J1
J1
J2
J3
J4
These horizontal pin sockets...
accept the adapter connector
pins on the bottom of each
adapter
Section 1:
Work With
the Hardware

Section 1: Work With the Hardware / How to change the EPROM
1000M User’s Guide / page 10
3. Replace the cover plates, making sure the small alignment pins on their under-
sides fit into the corresponding holes on the scanner’s upper surface.
4. Lock the twistlock fasteners to hold the adapters firmly in place.
How to change the
EPROM You may need to change the EPROM on the microprocessor assembly. To do this,
follow these steps:
1. Disconnect the wall transformer from the wall outlet, then disconnect the power
cable from the socket on the back of the analyzer.
2. Unlock the twistlock fasteners, remove the cover plates, and gently lift both the
microprocessor and scanner assemblies out of the box. Turn them over care-
fully.You’ll now be able to see the EPROM. To make the microprocessor
assembly easier to handle, you might wish to disconnect the box-to-box cable
that leads to the scanner assembly, and turn the microprocessor assembly .
.
Each alignment pin
on the bottom of
the cover plates
fits into a hole on
the scanner’s
upper surface
Scanner assembly
Microprocessor assembly
EPROM

Section 1: Work With the Hardware / Adding a printer
1000M User’s Guide / page 11
3. Using a small, flat-bladed screwdriver, gently pry the EPROM out of its socket,
and remove it.
4. Gently align the pins on the new EPROM with the holes in the socket.
5. Carefully push the new EPROM down into the socket using even pressure. Be
careful not to misalign or bend the pins!
6. If you have disconnected the box-to-box cable, be sure to reconnect it securely.
Carefully turn both assemblies over, and lower them carefully into the box.
Replace the cover plate, and lock the twistlock fasteners. Your unit is
reassembled!
Adding a printer The 1000M works with almost any printer that has an Epson/Centronics parallel inter-
face. WARNING!! Connecting the analyzer to a printer with an RS-232 serial inter-
face will cause serious damage to the analyer, and is not covered by your factory
warranty.
To connect the printer, use a standard Epson/Centronic parallel interface cable,
readily available from almost any PC dealer. Plug one end of the cable into the
Note: In this photo, we have turned the microprocessor assembly anticlockwise
by ninety degrees to make the EPROM easier to reach.
EPROM
Small, flat-bladed
screwdriver

Section 1: Work With the Hardware / How do I know if I have a parallel printer?
1000M User’s Guide / page 12
printer, and the other end into the analyzer’s parallel printer socket as shown in the
photo.
How do I know if I
have a parallel
printer?
To see if you have a parallel printer, look for the parallel connector on the printer.
Printers usually have a parallel interface located in back. Many printers have both a
serial and a parallel connector. To work with the 1000M your printer must have a 36-
position female ribbon connector similar to the one shown here.
Can I use one printer
with more than one
analyzer?
Yes. To use your printer with more than one analyzer, use a switchbox. To change
which analyzer the printer is receiving information from, simply change the switch
setting on the box.
How do I use a printer
without an on-line/off-
line switch?
If your printer does not happen to have an on-line/off-line switch, you can use either
of two solutions:
•Add a switch by placing a switch in the wire to pin 11 of the Epson/Cen-
tronics printer cable. When pin 11 on either side of the cable is open,
the analyzer will see the printer as being off-line, and will display infor-
mation rather than send it to the printer. When you close the switch so
that pin 11 is closed, information will be sent to the printer.
•If you have a switch box available, you can connect the cable to the
switchbox, and use its switch as the on-line/off-line switch.
Changing the
company name To change the company name that appears in the documentation produced by the
1000M, you can order an EPROM change from Cirris Systems. Replace the
EPROM. For details on how to do this, see page10.
Plug the printer
in here

Section 1: Work With the Hardware / The Frame Mount Stand
1000M User’s Guide / page 13
The Frame Mount
Stand There may be times when you will want to test custom fixtures with mating adapters
that are not offered by Cirris. These fixtures then connect into standard Cirris connec-
tor adapters plugged into the 1000M. To secure your custom fixtures, use a frame
mount stand from Cirris. This photo shows a frame mount stand for use at scanner
positions J1-J2 (part number ACIR-12).
To install the frame mount stand, do these things:
1. Remove the cover plate, and plug the appropriate connector adapter into the
1000M as usual. In our example, we’ll install a double-high adapter into position
J1-J2.
2. Install the frame mount stand onto the 1000M in place of the cover plate you
would normally use to secure the adapter. Be sure to lock the twistlock fasteners
securely.

Section 1: Work With the Hardware / The Tilt Stand
1000M User’s Guide / page 14
3. Once the frame stand is installed, install your custom fixture on top of the frame
stand. Be sure to connect the cable from the custom fixture into the standard
adapter installed in the 1000M. The setup is ready to learn and test. Note: For
more details, see the documentation packed with your frame stand, or contact the
Cirris technical support team at 801-973-4600 or 800-441-9910. You may also
wish to vist our web site at www.cirris.com.
In the example in this photo, we show a 1000M analyzer with frame stands installed
in both scanner positions (an ACIR-12 frame stand in J1-J2, and an ACIR-34 frame
stand in J3-J4). Custom fixtures have been installed on top of each frame stand.
The Tilt Stand The tilt stand holds your analyzer at a convenient angle for viewing. If you are work-
ing from a seated position, the tilt stand is particularly useful.
To install the tilt stand, do these things:
1. Adjust the two screws in the tilt stand until they can accomodate the thickness of
the analyzer’s chassis box bottom. The screws are preset at the factory, but the
setting sometimes changes during shipping.
Please see next page...
No. 10 x 1/4
inch screws

Section 1: Work With the Hardware / The Tilt Stand
1000M User’s Guide / page 15
2. Slide the screws on the tilt stand into the slotted holes on the bottom of the ana-
lyzer, then slide the analyzer into position so that the screws engage the slots.
3. Turn the analyzer and tilt stand right side up. Once the stand is in place, the ana-
lyzer sits on the tilt stand at a thirty degree angle.
Slide the tilt stand’s screws into these slotted openings

Section 1: Work With the Hardware / The Tilt Stand
1000M User’s Guide / page 16

1000M User’s Guide / page 17
Overview: The Cirris 1000M has seven test options. Before we learn a Sample Cable, we’ll
make sure they are set to their factory defaults.
How to check the
option settings To check the option settings, do these things:
1. Press in and hold the Advance Display switch as you turn on the analyzer by
pressing the LearnThenTestswitch. Hold AdvanceDisplayuntil Ready To
Set Up Options appears.
2. Once Ready To Set Up Options appears in the display, release Advance
Display.
3. The first option shown will be Error Tones. Set the option to ONby pressing
Store. The option toggles on and off as you keep pressing Store.
4. Continue stepping through the options by pressing Advance Display, changing
the settings as necessary by pressing Store, until all the options are set as shown
in this table: When you are done, Ready to Learn will appear on the display.
Press and hold...
...then press here
Press to step
Press to change
option settings
through options
READY TO
SET UP OPTIONS
Section 2:
Check the
Option
Settings

Section 2: Check the Option Settings / What to do if you go past the value you want
1000M User’s Guide / page 18
What to do if you go
past the value you
want
If you want to go backward through either the options or settings, press in and hold
the Memory button on the back of the analyzer, while pressing Advance Display or
Store. Note: All options or settings will roll over to the beginning when you are
going forward or backward.
.
Your option settings
are saved When you set the value you want, it is saved once it is displayed on the screen.Turn
off the analyzer, the analyzer will use those settings when you power it up again.
Factory Default Option Settings
Option Setting
Error Tones are ON
Lock On Learn OFF
Test Delay Is SHORT
Ignore Unused ON
Sorted Wire List ON
Count All Cables OFF
Auto Print is OFF
Memory button

1000M User’s Guide / page 19
Overview The Cirris 1000M has seven test option settings which you set to meet your testing
requirements. In this section, we’ll tell you what each of the settings means.
Error Tones When the analyzer detects errors, it emits a series of sharp beeps. If these tones
become an annoyance, you can turn them OFF.
Lock On Learn When this option is set to ON, the analyzer always uses the wirelist it has learned for
testing cables. This allows you to learn a cable, then “lock” the test so it will only test
that kind of cable. The ON setting protects your test setup in case of a power failure.
Note: You can still program the 1000M by retrieving a cable from memory when this
option is set to ONif you hold in the Memory button while you turn on the analyzer
by pressing Learn Then Test.
Long Test Delay This option sets the time it will take for test signals to travel through the cable. The
1000M is shipped with this option set to SHORT.
•When this option is set to SHORT, the analyzer tests all 256 points in
approximately 0.3 seconds. When the option is set to MEDIUMor
LONG, the test speed is deliberately slowed down. This makes testing
especially long cables possible
•The MEDIUMsetting is appropriate for cables over 100 feet long.
•The LONGsetting is appropriate for cables over 1000 feet long.
Ignore Unused When this option is ON, the analyzer scans only those “J” positions that have connec-
tor adapters installed in them, and ignores all other “J” positions. When this option is
OFF, the analyzer scans all pins in adapters that are in use. This option increases the
test speed.
When this option is ON, the analyzer begins scanning at position J1, then contrinues
through to the highest-numbered position which contains connector adapter. The
increased speed helps detect intermittent errors when you flex cables you are testing.
Note: Because the testing time is so short for small cable assemblies, the clicks
which indicate that a cable has tested as “good” may sound more like a buzzing
sound.
Sorted Wire List When this option is ON, the order that pins appear in a net is changed. For example,
pin J1-01 will always precede pin J1-14 if they are connected in the same net. When
the option is OFF, the order that pins appear in a net is controlled by the wire position
of an IDC connector.
Section 3:
What the
Option
Settings Mean

Section 3: What the Option Settings Mean / Count All Cables
1000M User’s Guide / page 20
Count All Cables Once the analyzer is programmed, it begins to count the cables it has tested. When
this option is ON, the printout of test results shows the total number of cables that
have been tested since it was programmed, and the number of cables that have tested
as good. If this option is OFF, the printout will show only the number of cables
which tested as good.
Auto Print When you have a printer connected to your 1000M, and this option is set to ON, a
one-line result will be printed out after each cable is tested. It will indicate if the
cable tested as good or bad. If this option is OFF, the analyzer will only display the
test result (good or bad) on its LCD display. It will not print a one-line report on each
test.
Table of contents
Other Cirris Measuring Instrument manuals
