1-9
Cisco Nexus 1000V for Microsoft Hyper-V Installation Guide, Release 5.2(1)SM1(5.2)
OL-30997-01
Chapter 1 Installing the Cisco Nexus 1000V for Microsoft Hyper-V
Installing the VSM Software
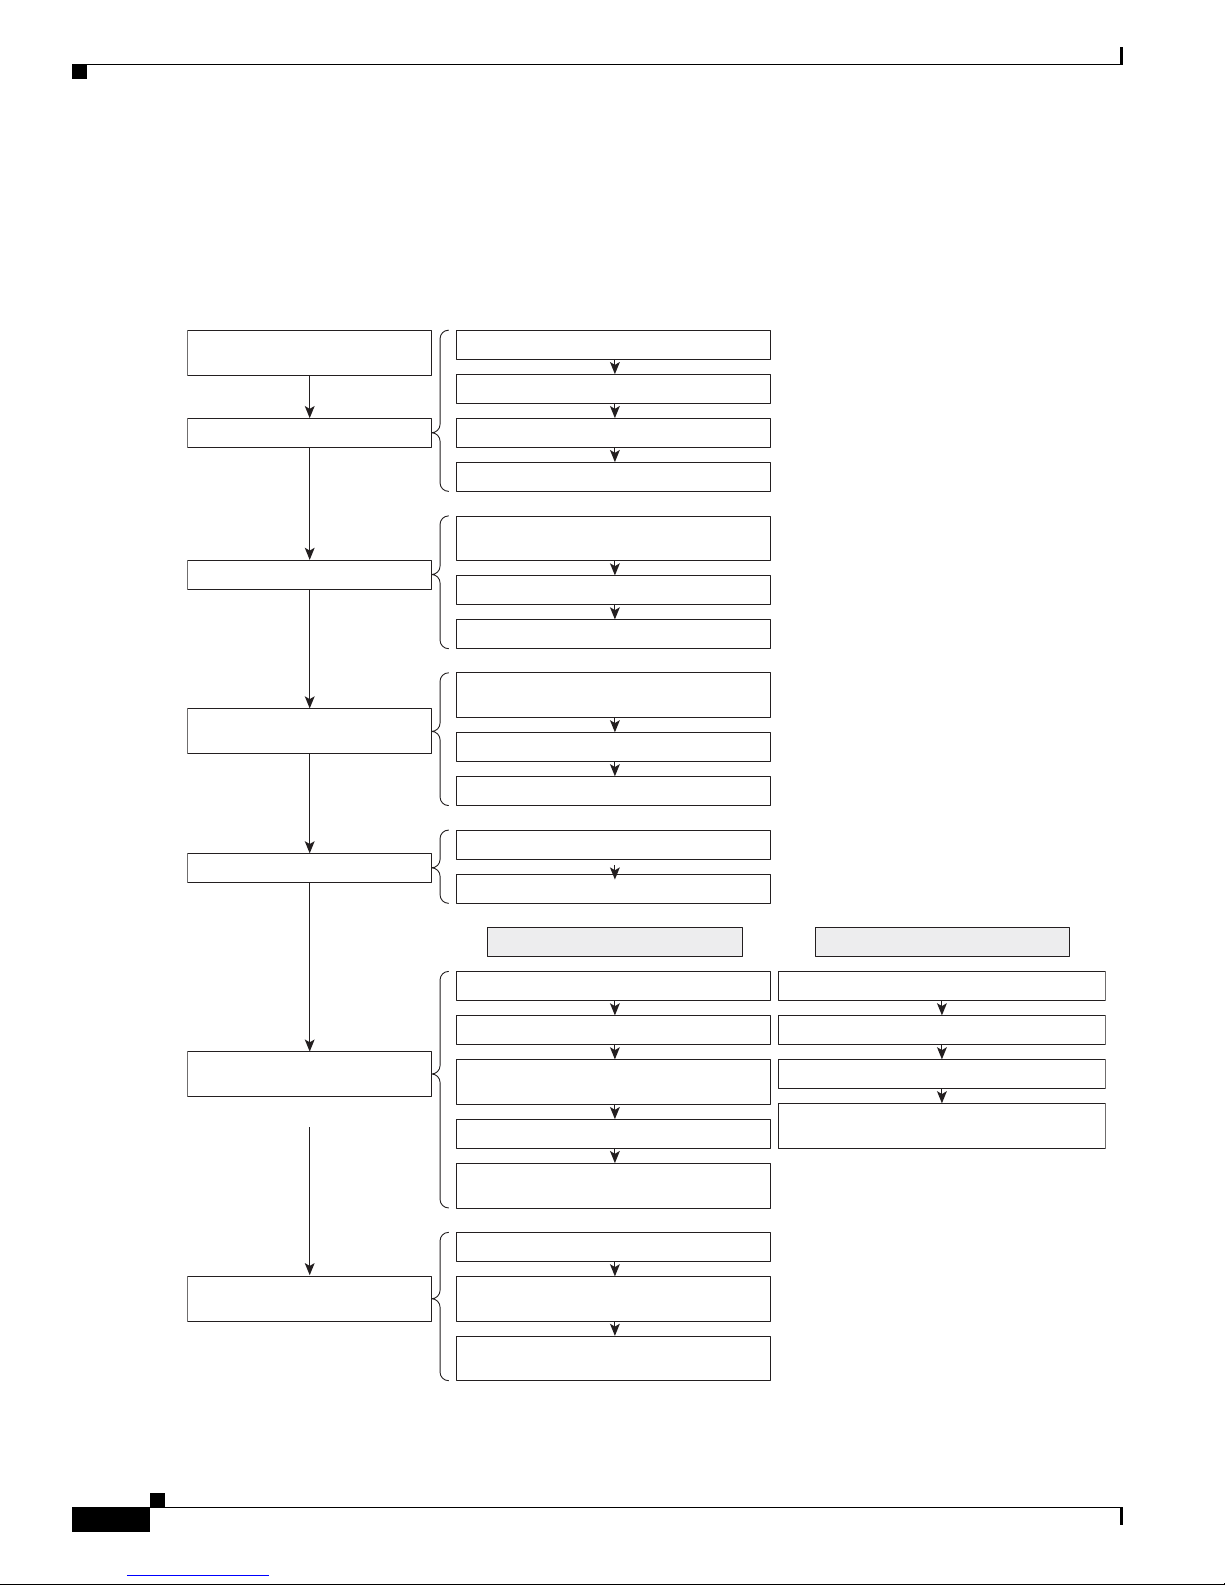
Installing and Configuring the VSM Workflow
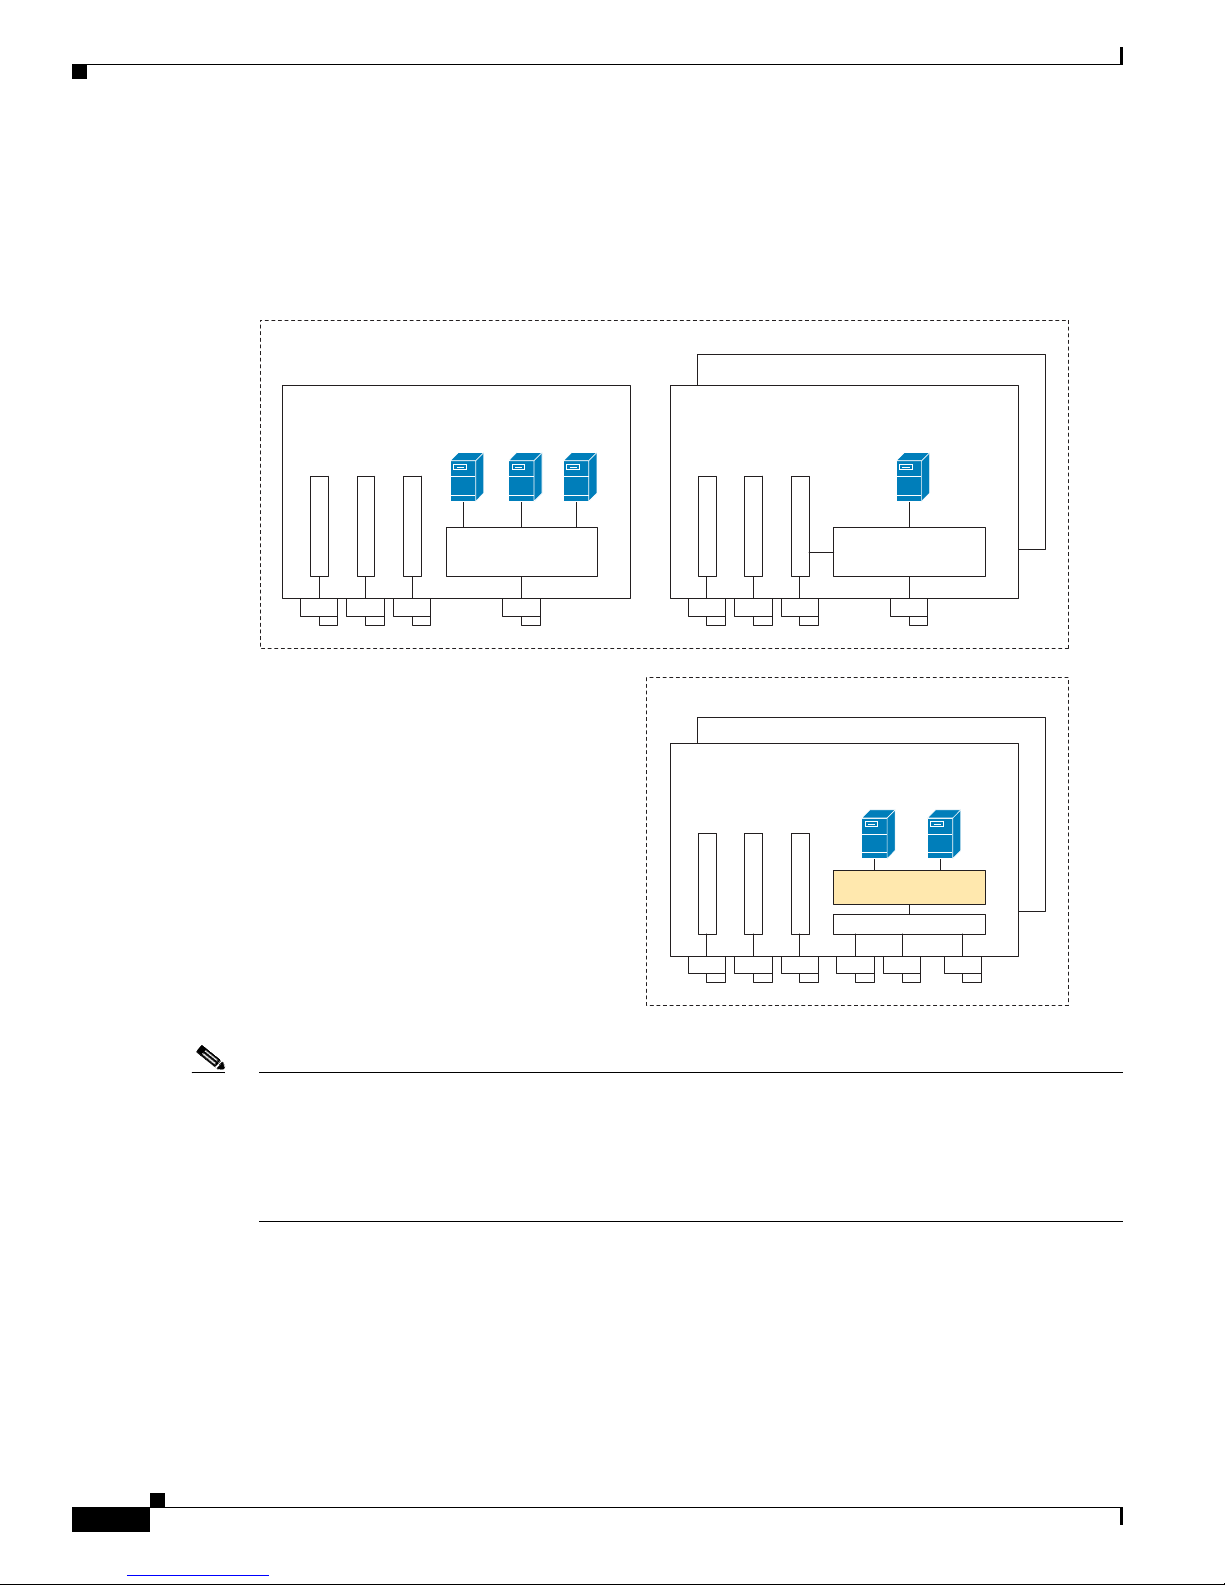
To install and configure the VSM workflow, use an existing Microsoft Switch with external connectivity
or create a new one, for the VSM connectivity.
1. Installing the VSM using a VM Template, page 1-9
2. Configuring the VSM, page 1-10
3. Deploying the VSM, page 1-11
4. Configuring the VSM, page 1-12
Installing the VSM using a VM Template
To install the VSM using a VM template, perform the following steps:
Step 1 From the left navigation pane in the SCVMM user interface, click the VMs and Services icon and from
the top menu bar, choose Create Virtual Machine. The Create Virtual Machine Wizard window
opens.
Step 2 In the Select Source panel, choose the Use an existing virtual machine, VM template, or virtual hard
disk option and click Browse.
Step 3 Choose the Nexus1000V_VSM_Template file listed under the Type: VM Template header.
Step 4 Click OK and click Next.
Step 5 In the Specify Virtual Machine Identity panel, enter the name of the virtual machine and click Next.
Step 6 In the Configure Hardware panel, configure the hardware settings for the virtual machine. If you are
using a template, most of the settings have already been configured (For example, the hard drive is set
to 4 GB and there are three network adapters). The only item that you have to manually configure is the
ISO image.
Step 7 Click Virtual DVD drive below the Bus Configuration header in the center pane.
Step 8 Click Existing ISO image file and click Browse.
Step 9 Choose the ISO image from the SCVMM library, click OK, and click Next.
Step 10 In the Select Destination panel, keep the default settings of Place the virtual machine on a host;
Destination: All Hosts and click Next.
Step 11 After the host is displayed in the Select Host panel, chose it, and click Next.
Step 12 In the Configure Settings panel, review the settings and click Next.
Step 13 In the Select Networks panel, choose the virtual switches that are used for the virtual machine. For each
network adapter, select the type of the virtual switch, for example, choose Standard Switch or Logical
Switch and click Next.
Step 14 In the Add Properties panel, keep the default settings of the Automatic Actions and click Next.
Step 15 In the Confirm the Settings panel in the final Summary window, review and confirm the settings.
Step 16 Click Create to begin the virtual machine creation. A progress bar is displayed in the Job Status column
in the VM window.
Step 17 After the virtual machine creation is complete, right-click the Name of the virtual machine in the
SCVMM user interface and choose Power On.
Step 18 Right-click the Name of the virtual machine again, click Connect or View, and choose Connect via
Console.