manuals.online logo
Brands
  1. Home
  2. •
  3. Brands
  4. •
  5. Cisco
  6. •
  7. Wireless Router
  8. •
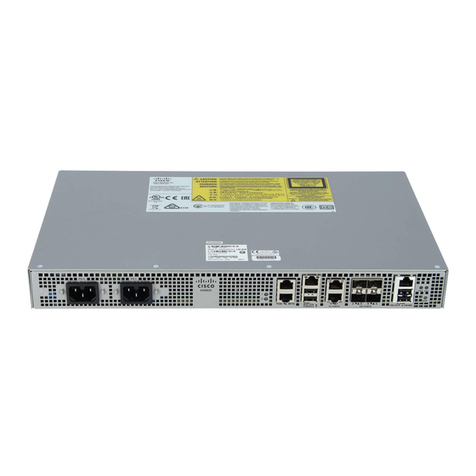
  9. Cisco ASR 9010 Instruction Manual

Cisco ASR 9010 Instruction Manual

Unpacking and Installing the Chassis
This chapter describes how to unpack and install the chassis into a rack.
•Pre-Installation Considerations and Requirements, on page 1
•Installation Overview, on page 1
•Unpacking the Router, on page 3
•Removing Components Before Installing the Chassis, on page 20
•Rack-Mounting the Router Chassis, on page 48
•Supplemental Bonding and Grounding Connections, on page 64
•Installing Chassis Accessories, on page 68
Pre-Installation Considerations and Requirements
Before you perform any procedures in this chapter, review the following sections:
Observe the guidelines for preventing electrostatic discharge (ESD) damage described in Preventing Electrostatic
Discharge Damage.
See the Regulatory Compliance and Safety Information for the Cisco ASR 9000 Series Router document for
additional safety and compliance information,
This router is not designed to be installed as a shelf-mounted or a free-standing router. The router must be
installed in a rack that is secured to the building structure. You must install the router in either a telco-style
frame or a 4-post equipment rack.
Caution
Installation Overview
The following figure shows how the Cisco ASR 9010 Router is shipped and strapped to a shipping pallet.
Unpacking and Installing the Chassis
1
Figure 1: Cisco ASR 9010 Router Packaged on a Shipping Pallet
A fully equipped router with six power modules can weigh as much as 375 lbs (170.5 kg); an empty chassis
weighs 150 lbs (67.8 kg). The chassis is designed to be lifted by two persons after you remove some of the
components, such as line cards, power supplies, and the fan tray, to reduce the weight before lifting the chassis.
See Removing Components Before Installing the Chassis, on page 20 for procedures to remove these
components.
Required Tools and Equipment
Before you begin the rack-mount installation, you must read and understand the information in the
Rack-Mounting and Air Flow Clearance Guidelines, page 1-24 , and have the following tools and equipment:
• ESD-preventive wrist strap
• Number 1 and number 2 Phillips screwdrivers
• 1/4-inch (6.35-mm) and 3/16-inch (4.5-mm) flat-blade screwdrivers
• Tape measure
• Level (optional)
Unpacking and Installing the Chassis
2
Unpacking and Installing the Chassis
Required Tools and Equipment
• Minimum of 10 slotted binderhead screws (usually provided with the rack) to secure the chassis to the
mounting flanges (also called rails ) in the rack. Five screws should be installed on each side of the
chassis.
• 11/16-inch (17.46-mm) wrench (for chassis hold-down bolts and pallet hold-down bracket bolts)
• 3/4-inch (19-mm) socket and ratchet wrench
Unpacking the Router
The following instructions describe how to unpack the Cisco ASR 9000 Series Router from its shipping
container.
Unpacking the Cisco ASR 9006 Router
Follow these steps to unpack the Cisco ASR 9006 Router from its shipping container (see the figure below).
Procedure
Step 1 Cut the straps that secure the cardboard shipping container to the pallet.
Step 2 Remove the cardboard shipping container.
Step 3 Remove the packaging material (see the figure below).
a) Remove the foam packaging material from the top of the router.
b) Remove all screws that secure the four hold-down brackets to the router chassis. The forward hold-down
brackets are secured to the router mounting brackets by two screws. The rear hold-down brackets are
secured to the chassis by four screws.
c) Remove two bolts per hold-down bracket that secure the brackets to the pallet.
Unpacking and Installing the Chassis
3
Unpacking and Installing the Chassis
Unpacking the Router
Figure 2: Unpacking the Cisco ASR 9006 Router from the Shipping Container and Pallet
Chassis accessories7Cardboard
packaging container
4Top cardboard
packaging cap
1
Foam packaging
material- top cap
8Cardboard accessory
tray
5Three packaged
power modules
2
Hold-down brackets
(four places)
9Accessories and
power cables
6Cardboard
packaging dividers
3
Unpacking and Installing the Chassis
4
Unpacking and Installing the Chassis
Unpacking the Cisco ASR 9006 Router
Step 4 Remove components, such as line cards, power supplies, and the fan tray, to reduce the weight before lifting
or moving the chassis. See Removing Components Before Installing the Chassis, on page 20 for more
information.
Step 5 Save the packaging materials in case the router needs repackaging or shipping.
Unpacking the Cisco ASR 9010 Router
Follow these steps to unpack the Cisco ASR 9010 Router from its shipping container.
Procedure
Step 1 Cut the straps that secure the cardboard shipping container to the pallet.
Step 2 Remove the cardboard shipping container.
Step 3 Remove the packaging material.
a) Remove the foam packaging material from the top of the router.
b) Remove all screws that secure the four hold-down brackets to the router chassis. The forward hold-down
brackets are secured to the router mounting brackets by two screws. The rear hold-down brackets are
secured to the chassis by four screws. Save these four screws used to hold the rear bracket to the chassis
to use later to attach the ground strap.
Step 4 Remove two bolts per hold-down bracket that secure the brackets to the pallet.
Unpacking and Installing the Chassis
5
Unpacking and Installing the Chassis
Unpacking the Cisco ASR 9010 Router
Figure 3: Unpacking the Cisco ASR 9010 Router from the Shipping Container and Pallet
Rear hold-down
bracket secured
by four screws to
the chassis, and
by two bolts to
the pallet (two
places)
3Front hold-down
bracket secured
by two screws to
the chassis
mounting
brackets, and by
two bolts to the
pallet (two
places)
2Foam packaging
material- top cap
1
Step 5 Remove components, such as line cards and the fan tray, to reduce the weight before lifting or moving the
chassis. See the Removing Components Before Installing the Chassis for more information.
Step 6 Save the packaging materials in case the router needs repackaging or shipping.
Unpacking and Installing the Chassis
6
Unpacking and Installing the Chassis
Unpacking the Cisco ASR 9010 Router
Unpacking the Cisco ASR 9904 Router
Follow these steps to unpack the Cisco ASR 9904 Router from its wooden shipping container.
Procedure
Step 1 Cut the straps that secure the cardboard shipping container to the pallet.
Step 2 Remove the corrugated top shipping container.
Step 3 Remove the accessories and corrugated packing accessory tray.
Step 4 Remove the packing material (see the figure below).
a) Remove the foam packaging material from the top of the router.
b) Remove the plastic covering from the router and remove it from the bottom foam.
Figure 4: Unpacking the Cisco ASR 9904 Router from the Shipping Container and Pallet
Unpacking and Installing the Chassis
7
Unpacking and Installing the Chassis
Unpacking the Cisco ASR 9904 Router
Cardboard shipping
container
7Foam packaging
material(top cap)
4Shipping pallet1
Foam packaging
material (bottom
cap)
5Top corrugated
packaging cap
2
Corrugated
packaging (lower
tray)
6Corrugated
packaging accessory
tray
3
Step 5 Remove components, such as line cards, power supplies, and the fan tray, to reduce the weight before lifting
or moving the chassis. See Removing Components Before Installing the Chassis, on page 20 for more
information.
Step 6 Save the packaging materials in case the router needs repackaging or shipping.
Unpacking the Cisco ASR 9906 Router
Follow these steps to unpack the Cisco ASR 9906 Router from its shipping container (see the figure below).
Procedure
Step 1 Cut the straps that secure the cardboard shipping container to the pallet.
Step 2 Remove the three connecting clips.
Step 3 Remove the cardboard shipping container.
Step 4 Remove the accessory tray and chassis accessories.
Step 5 Remove the packaging material (see the figure below).
a) Remove the foam packaging material from the top of the router.
b) Remove all screws that secure the two hold-down brackets to the router chassis.
c) Remove four bolts per hold-down bracket that secure the brackets to the pallet.
Unpacking and Installing the Chassis
8
Unpacking and Installing the Chassis
Unpacking the Cisco ASR 9906 Router
Figure 5: Unpacking the Cisco ASR 9906 Router from the Shipping Container and Pallet
Shipping pallet5Straps1
Hold-down bracket and
screws
6Connecting clips2
Cardboard accessory tray
and chassis accessories
7Top cardboard packaging
cap
3
Cardboard packaging
container
8Foam packaging material4
Step 6 Remove components, such as line cards, power supplies, and the fan tray, to reduce the weight before lifting
or moving the chassis. See Removing Components Before Installing the Chassis, on page 20 for more
information.
Step 7 Save the packaging materials in case the router needs repackaging or shipping.
Unpacking and Installing the Chassis
9
Unpacking and Installing the Chassis
Unpacking the Cisco ASR 9906 Router
Unpacking the Cisco ASR 9910 Router
Follow these steps to unpack the Cisco ASR 9910 Router from its shipping container.
Procedure
Step 1 Cut the straps that secure the cardboard shipping container to the pallet.
Step 2 Remove the cardboard shipping container.
Step 3 Remove the packaging material (see the figure below).
a) Remove the foam packaging material from the top of the router.
b) Remove all screws that secure the two brackets to the router chassis. Save these screws used to hold the
bracket to the chassis to use later to attach the ground strap.
Step 4 Remove two bolts per hold-down bracket that secure the brackets to the pallet.
Unpacking and Installing the Chassis
10
Unpacking and Installing the Chassis
Unpacking the Cisco ASR 9910 Router
Figure 6: Unpacking the Cisco ASR 9910 Router from the Shipping Container and Pallet
Unpacking and Installing the Chassis
11
Unpacking and Installing the Chassis
Unpacking the Cisco ASR 9910 Router
Unpacking and Installing the Chassis
12
Unpacking and Installing the Chassis
Unpacking the Cisco ASR 9910 Router
Step 5 Remove components, such as line cards and the fan tray, to reduce the weight before lifting or moving the
chassis. See Removing Components Before Installing the Chassis, on page 20 for more information.
Step 6 Save the packaging materials in case the router needs repackaging or shipping.
Unpacking the Cisco ASR 9912 Router
Follow these steps to unpack the Cisco ASR 9912 Router from its wooden shipping container.
Procedure
Step 1 Cut the straps that secure the cardboard shipping container to the pallet.
Step 2 Remove the cardboard shipping container.
Step 3 Remove the packaging material (see the figure below).
a) Remove the foam packaging material from the top of the router.
b) Remove all screws that secure the four brackets to the router chassis. Save these screws used to hold the
bracket to the chassis to use later to attach the ground strap.
c) Remove two bolts per hold-down bracket that secure the brackets to the pallet.
Unpacking and Installing the Chassis
13
Unpacking and Installing the Chassis
Unpacking the Cisco ASR 9912 Router
Figure 7: Unpacking the Cisco ASR 9912 Router from the Shipping Container and Pallet
Foam packaging material4Straps1
Cardboard packaging
container
5Shipping pallet2
Top cardboard packaging
cap
6Hold-down brackets and
screws
3
Step 4 Remove components, such as line cards and the fan tray, to reduce the weight before lifting or moving the
chassis. See Removing Components Before Installing the Chassis, on page 20 for more information.
Step 5 Save the packaging materials in case the router needs repackaging or shipping.
Unpacking the Cisco ASR 9922 Router
Follow these steps to unpack the Cisco ASR 9922 Router from its wooden shipping container.
Unpacking and Installing the Chassis
14
Unpacking and Installing the Chassis
Unpacking the Cisco ASR 9922 Router
Procedure
Step 1 Remove any strapping on the outside of the crate.
Step 2 Remove the crate cap door. Disengage the twist locks located along the bottom first. Then, disengage the twist
locks located along the sides, working your way up from the bottom to the top. Refer to the right and middle
figures in Figure 8: Unpacking the Cisco ASR 9922 Router from the Shipping Container, on page 15.
Step 3 Remove the crate cap. Disengage the twist locks located around the bottom of the crate cap (Figure 8: Unpacking
the Cisco ASR 9922 Router from the Shipping Container, on page 15).
Two people are required to evenly slide the crate cap back off of the plastic pallet base.
Note
Step 4 Remove the foam packaging material from the top of the router.
Figure 8: Unpacking the Cisco ASR 9922 Router from the Shipping Container
Step 5 Using a 5/16” wrench or ratchet, remove the four attachment bolts and cross-brace from the shipping rack
(see the figure below).
Unpacking and Installing the Chassis
15
Unpacking and Installing the Chassis
Unpacking the Cisco ASR 9922 Router
Figure 9: Cross-brace and Attachment Bolts on the Shipping Rack
Step 6 Use a Phillips screwdriver to unscrew the rear mounting flange from the system and rack.
Step 7 Use a Phillips screwdriver to unscrew the front mounting flange from the rack.
Step 8 Remove two bolts per hold-down bracket that secure the brackets to the pallet (see the figure below).
Unpacking and Installing the Chassis
16
Unpacking and Installing the Chassis
Unpacking the Cisco ASR 9922 Router
Figure 10: Hold-Down Brackets on the Cisco ASR 9922 Router Shipping Pallet
Do not unbolt the shipping rack from the pallet.
Note
Step 9 Save the rear brackets and screws from the shipping packaging for reuse in rack mounting of the chassis (see
the figure below).
The two guide rails at the bottom of the rack come in the ASR-9922-ACC-KIT accessory kit.
Note
Unpacking and Installing the Chassis
17
Unpacking and Installing the Chassis
Unpacking the Cisco ASR 9922 Router
Figure 11: Rack Mount Installation Kit for the Cisco ASR 9922 Router
Step 10 Remove components, such as line cards and fan trays, to reduce the weight before lifting or moving the chassis.
See Removing Components Before Installing the Chassis, on page 20 for procedures showing how to remove
these components.
Step 11 Save the packaging materials in case the router needs to be repackaged for shipping.
Unpacking and Installing the Chassis
18
Unpacking and Installing the Chassis
Unpacking the Cisco ASR 9922 Router
Positioning the Router
Positioning the Cisco ASR 9006 Router, Cisco ASR 9010 Router, Cisco 9904 Router, Cisco ASR 9906
Router, Cisco ASR 9910 Router, and Cisco ASR 9912 Router
Use a safety hand truck to move the Cisco ASR 9006 Router, Cisco ASR 9010 Router, Cisco ASR 9904
Router, Cisco ASR 9906 Router, Cisco ASR 9910 Router, or Cisco ASR 9912 Router to its final location for
rack installation.
Positioning the Cisco ASR 9922 Router
The Cisco ASR 9922 Router ships in a carton similar to the CRS-1 16-Slot shipping carton. Each chassis is
installed in a shipping rack used only for shipping purposes. Remove the chassis from the shipping rack before
installing it into the rack.
To prepare the 19-inch 45-RU rack:
Procedure
Step 1 Install the two guide rails onto the bottom of the rack.
The guide rails are included with the ASR-9922-ACC-KIT accessory kits. Each accessory kit ships with the
chassis and includes the guide rails, grounding lug, associated hardware, and a warranty card.
Step 2 Use screws to fasten these two guide rails onto the front and rear rails of the rack.
The two guide rails at the bottom of the rack (Unpacking the Cisco ASR 9922 Router, on page 14) have six
holes (three per rail) that accommodate 12-24 or M6 screws. If you are using smaller 10-32 screws, you must
use bushings to fit the larger holes (see the figure below).
Figure 12: One 10-32 Screw with Bushings in Guide Rail Holes
Delrin bushings with part number 17234-D-1 can be obtained from ASM at www.accuratescrew.com.
Note
Step 3 Remove the shipping carton, plastic covering, rear brackets, attachment screws and bolts, shipping rack bar,
and any cosmetic accessories included with the chassis.
Unpacking and Installing the Chassis
19
Unpacking and Installing the Chassis
Positioning the Router
Step 4 Use a scissors jack to remove the chassis from the shipping rack. Place a pallet jack next to the chassis inside
the shipping rack and push/pull the chassis onto the pallet jack for transport to the rack.
Tilt the chassis only when absolutely necessary. The chassis is large and heavy. If it were to fall, it
could cause harm to itself and its surroundings. Before attempting to tilt the chassis, reduce the
weight of the system by removing all of the components in the chassis. The chassis should then be
tilted in a direction so that the rear of the chassis is facing downward. The distance the chassis
travels without its packaging should be as short as possible.
Caution
Step 5 On the rear of the chassis is an integrated handle which is used to pull the chassis from the pallet jack into the
rack where the chassis is to be installed. Position the chassis so that the rear handle is facing the front of the
rack.
Step 6 From the rear of the rack, pull the chassis by the handle into the rack, making sure that the chassis sits on top
of the guide rails in the rack.
Step 7 Once the chassis is pulled into the rack and sits on top of the guide rails, use screws to fasten the chassis to
the rack.
Removing Components Before Installing the Chassis
The Cisco ASR 9000 Series Routers are designed to be lifted for mounting into a rack. To reduce the weight
of the system, you must remove some of the components before attempting to mount it into the rack.
Removing Power Modules
The power modules for the Cisco ASR 9000 Series Routers are shipped separately. If you need to remove an
AC or DC power module at a later time, see Removing and Replacing Power System Components, page 5-14
.
Removing Fan Trays
If an accessory grill or fan tray cover is installed on the front of the router, you must remove it first.
Note
Removing a Fan Tray from the Cisco ASR 9010 Router, Cisco 9910 Router, Cisco ASR 9922 Router,
and Cisco ASR 9912 Router
Follow these steps to remove a fan tray from the Cisco ASR 9010 Router (Figure 13: Removing or Installing
the Fan Tray on the Cisco ASR 9010 Router Chassis, on page 21), Cisco ASR 9910 Router (Figure 14:
Removing or Installing the Fan Tray on the Cisco ASR 9910 Router Chassis, on page 22), Cisco ASR 9922
Router (Figure 15: Removing or Installing the Fan Tray on the Cisco ASR 9922 Router Chassis, on page 23),
or Cisco ASR 9912 Router (Figure 16: Removing or Installing the Fan Tray on the Cisco ASR 9912 Router
Chassis, on page 23).
Unpacking and Installing the Chassis
20
Unpacking and Installing the Chassis
Removing Components Before Installing the Chassis

This manual suits for next models

6

Other Cisco Wireless Router manuals

Cisco BBSM 1 User manual

Cisco

Cisco BBSM 1 User manual

Cisco SRP521W Instruction Manual

Cisco

Cisco SRP521W Instruction Manual

Cisco Linksys WRT610N User manual

Cisco

Cisco Linksys WRT610N User manual

Cisco 7246 - uBR Router Manual

Cisco

Cisco 7246 - uBR Router Manual

Cisco Linksys WKPC54G User manual

Cisco

Cisco Linksys WKPC54G User manual

Cisco Valet Plus User manual

Cisco

Cisco Valet Plus User manual

Cisco Valet Plus User manual

Cisco

Cisco Valet Plus User manual

Cisco 2000 Series Manual

Cisco

Cisco 2000 Series Manual

Cisco WRT54G2 Linksys User manual

Cisco

Cisco WRT54G2 Linksys User manual

Cisco WRT610N - Simultaneous Dual-N Band Wireless... User manual

Cisco

Cisco WRT610N - Simultaneous Dual-N Band Wireless... User manual

Cisco Linksys EA2700 User manual

Cisco

Cisco Linksys EA2700 User manual
Cisco 1812W - Integrated Services Router Wireless User manual

Cisco

Cisco 1812W - Integrated Services Router Wireless User manual

Cisco Catalyst IR1800 Rugged Series User manual

Cisco

Cisco Catalyst IR1800 Rugged Series User manual

Cisco Linksys E3000 User manual

Cisco

Cisco Linksys E3000 User manual

Cisco MWR 1941-DC - 1941 Mobile Wireless Router User manual

Cisco

Cisco MWR 1941-DC - 1941 Mobile Wireless Router User manual

Cisco SR520W-FE-K9 User manual

Cisco

Cisco SR520W-FE-K9 User manual

Cisco 881W - Integrated Services Router Wireless Manual

Cisco

Cisco 881W - Integrated Services Router Wireless Manual

Cisco Linksys SE1500 User manual

Cisco

Cisco Linksys SE1500 User manual

Cisco Universal Broadband Router Cisco uBR10012 User manual

Cisco

Cisco Universal Broadband Router Cisco uBR10012 User manual

Cisco Linksys WAG54G2 User manual

Cisco

Cisco Linksys WAG54G2 User manual

Cisco ASR 9000 Series User manual

Cisco

Cisco ASR 9000 Series User manual

Cisco Linksys RT31P2 Original operating instructions

Cisco

Cisco Linksys RT31P2 Original operating instructions

Cisco Valet Plus User manual

Cisco

Cisco Valet Plus User manual

Cisco WRT54G2 Linksys User manual

Cisco

Cisco WRT54G2 Linksys User manual
Popular Wireless Router manuals by other brands

NETGEAR DGND3700v2 Guida all'installazione

NETGEAR

NETGEAR DGND3700v2 Guida all'installazione

Zte MF25A user guide

Zte

Zte MF25A user guide

TP-Link Deco X75 quick start guide

TP-Link

TP-Link Deco X75 quick start guide

Lanpro LP-1521 manual

Lanpro

Lanpro LP-1521 manual

Edimax BR-6428nS V4 user manual

Edimax

Edimax BR-6428nS V4 user manual

Kasda KW52283 user manual

Kasda

Kasda KW52283 user manual

GSD WL3HR1500 quick start guide

GSD

GSD WL3HR1500 quick start guide

Inseego MiFi X PRO 5G UW user guide

Inseego

Inseego MiFi X PRO 5G UW user guide

Aztech FG7008GR(AC) Easy start guide

Aztech

Aztech FG7008GR(AC) Easy start guide

ZyXEL Communications NBG6616 user guide

ZyXEL Communications

ZyXEL Communications NBG6616 user guide

Canyon CNP-WF514 user manual

Canyon

Canyon CNP-WF514 user manual

Advantech EKI-9502G Series user manual

Advantech

Advantech EKI-9502G Series user manual

NETGEAR ProSafe FVM318 Reference manual

NETGEAR

NETGEAR ProSafe FVM318 Reference manual

Billion BiPAC 7300GX Quick install guide

Billion

Billion BiPAC 7300GX Quick install guide

Edimax BR-6428nS V2 Brochure & specs

Edimax

Edimax BR-6428nS V2 Brochure & specs

Linksys MX2000 Series user guide

Linksys

Linksys MX2000 Series user guide

LevelOne WBR-6001 Technical specifications

LevelOne

LevelOne WBR-6001 Technical specifications

D-Link DIR-330 - Wireless G VPN Router user manual

D-Link

D-Link DIR-330 - Wireless G VPN Router user manual

manuals.online logo
manuals.online logoBrands
  • About & Mission
  • Contact us
  • Privacy Policy
  • Terms and Conditions

Copyright 2025 Manuals.Online. All Rights Reserved.