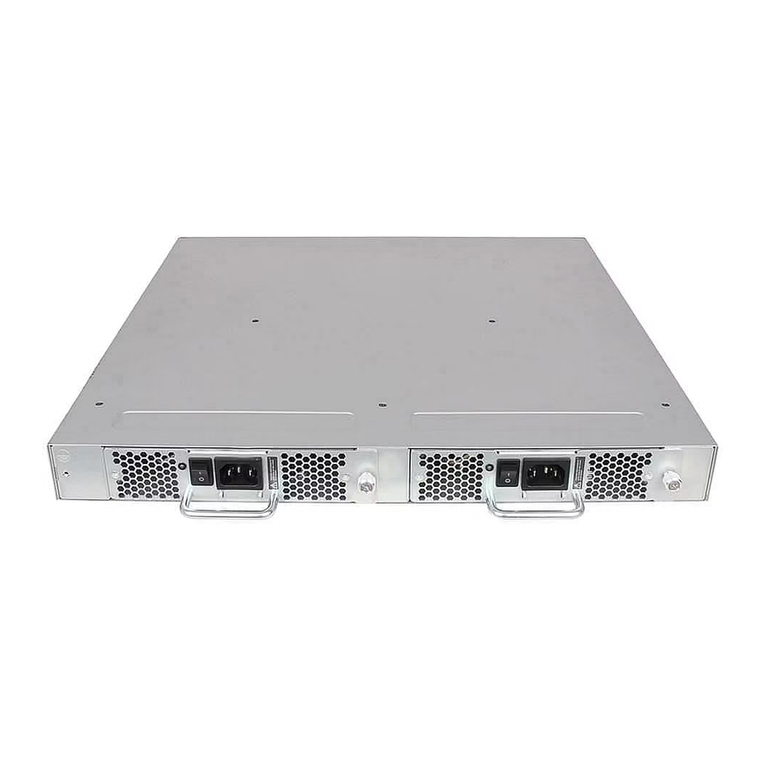
Citel TVA-A Quick setup guide

12 and 24 Port PorticoTM TVATM
Softswitch Integration Guide
Document Number: G-SIP3DS-RUC Version: AF

12 AND 24 PORT PORTICO TVA
SOFTSWITCH INTEGRATION GUIDE
ii Version: AF Document Number: G-SIP3DS-RUC
Copyright Information
© Copyright 2007 Citel plc All Rights Reserved
No part of this publication, including text, examples, diagrams, or icons, may be
reproduced, transmitted, or translated in any form or by any means, electronic,
mechanical, manual, optical, or otherwise, for any purpose, without prior
written permission of Citel.
Citel and its wholly-owned subsidiaries may have patents or pending patents
applications, trademarks, copyrights, or other intellectual property rights
covering subject matter in this publication. The furnishing of this document
does not give the recipient license to these patents, trademarks, copyrights, or
other intellectual properties.
Trademark Information
Citel, the Citel logo, Portico Telephone VoIP Adapter (TVA), Citel SIP Handset
Gateway, and The VoIP Migration Company are trademarks or registered
trademarks of Citel or its wholly-owned subsidiaries in the United States and
other jurisdictions. All other trademarks, registered trademarks, and service
marks are the property of their respective owners.
Accuracy Notice
Every effort was made to ensure that the information in this guide is complete
and accurate. However, Citel makes no representations or warranties, whether
expressed or implied, as to the accuracy or completeness of these materials
and shall not be liable for any loss or damage suffered or incurred as a result of
reliance upon or use of them.
Information in this publication is subject to change without notice. Citel
reserves the right, without prior notice, to change the equipment, designs or
documentation referred to herein as it considers necessary.
Your Responsibility for your System’s Security
Toll fraud is the use of your telecommunications system by an unauthorized
party, for example, persons other than your company’s employees, agents,
subcontractors, or persons working on your company’s behalf. Please note that
there may be a risk of toll fraud associated with your telecommunications
system and, if toll fraud occurs, it can result in substantial additional charges for
your telecommunications services.
You and your System Manager/System Administrator are responsible for the
security of your system such as programming and configuring your equipment
to prevent unauthorized use. The System Manager is also responsible for
reading all installation, instruction and system administration documents
provided with this product in order to understand fully the features that can
introduce risk of toll fraud and the steps that can be taken to reduce that risk.

12 AND 24 PORT PORTICO TVA
SOFTSWITCH INTEGRATION GUIDE
Document Number: G-SIP3DS-RUC Version: AF iii
Citel does not warrant that this product is immune from or will prevent
unauthorized use of common-carrier telecommunications services or facilities
accessed through or connected to it. Citel will not be responsible for any
charges that result from such authorized or unauthorized use.
Symbols and Conventions
Important symbols and conventions used throughout this guide are shown
below.
Safety information, ignoring this information may lead to physical
danger to people.
Information alerting you to potential loss of data or damage to an
application, system or device.
Important information.
Bold Dialog box titles, labels, and options. Button and icon names. Menu
titles, commands, and selections. Things that you type in either the
web-based or console-based management interface.
ALL CAPS Key names: CTRL, TAB, DEL and keyboard buttons that you press.
For example:
Make your choice from the dropdown menu and press ENTER.
Blue Italic Cross-references to other places in the document. For example: See
How To Update on page 17.
Single words within a sentence without page numbers are
references to entries in the glossary. For example:
The ISP provides the IP telephone service.
Italic Placeholder (in syntax and in user input). For example:
Type password
Also used for book and document titles. and to identify new terms.
Hyperlink References to email addresses or Internet addresses. For example:
for help with installation, contact support@citel.com.
Bold italic This is used for emphasis.
For example: Do not switch off the unit during the update.
“Title caps, in
double
quotes”
Double quotes are used to indicate the chapters of documents.
monospace
font
Program input and output text.
!

12 AND 24 PORT PORTICO TVA
SOFTSWITCH INTEGRATION GUIDE
iv Version: AF Document Number: G-SIP3DS-RUC
Contacting Citel
Product Numbers
The information contained within this document refers to the following
products:
Mail Citel Technologies, Inc
3131 Elliott Avenue
Suite 250
Seattle, Washington
98121 USA
Citel Technologies, Ltd
Wheatcroft Business Park
Unit 4, Landmere Lane
Edwalton, Nottingham
NG12 4DG United Kingdom
Email [email protected]
Web www.citel.com
Telephone +1 877 248 3587 – select the support option
Part Number Description
H-SIP3D-RUC12 Portico TVA12D 12 port (digital only)
H-SIP3D-RUC1241 Portico TVA12D 12 port (digital only)*
H-SIP3D-RUC24 Portico TVA24D 24 port (digital only)
H-SIP3D-RUC2441 Portico TVA24D 24 port (digital only)*
H-SIP3DZ-RUC12 Portico TVA12D 12 port (digital) with FXO port
H-SIP3DZ-RUC1241 Portico TVA12D 12 port (digital) with FXO port*
H-SIP3DZ-RUC24 Portico TVA24D 24 port (digital) with FXO port
H-SIP3DZ-RUC2441 Portico TVA24D 24 port (digital) with FXO port*
H-SIP3DY-RUC12 Portico TVA12D 12 port (digital) with 2 FXO ports
H-SIP3DY-RUC1241 Portico TVA12D 12 port (digital) with 2 FXO ports*
H-SIP3DY-RUC24 Portico TVA24D 24 port (digital) with 2 FXO ports
H-SIP3DY-RUC2441 Portico TVA24D 24 port (digital) with 2 FXO ports*
H-SIP3P-RUC24 Portico TVA24P 24 port (Pphone/analog only)
H-SIP3P-RUC2441 Portico TVA24P 24 port (Pphone/analog only)*
H-SIP3PZ-RUC24 Portico TVA24P 24 port (Pphone/analog) FXO port
H-SIP3PZ-RUC2441 Portico TVA24P 24 port (Pphone/analog) FXO port*
H-SIP3PY-RUC24 Portico TVA24P 24 port (Pphone/analog) with 2 FXO ports
H-SIP3PY-RUC2441 Portico TVA24P 24 port (Pphone/analog) with 2 FXO ports*
Table 1: Product Part Numbers

12 AND 24 PORT PORTICO TVA
SOFTSWITCH INTEGRATION GUIDE
Document Number: G-SIP3DS-RUC Version: AF v
* European Version
H-SIP3A-RUC12 Portico TVA12D 12 port (analog only)
H-SIP3A-RUC1241 Portico TVA12D 12 port (analog only)*
H-SIP3A-RUC24 Portico TVA24D 24 port (analog only)
H-SIP3A-RUC2441 Portico TVA24D 24 port (analog only)*
H-SIP3AZ-RUC12 Portico TVA12D 12 port (analog) with FXO port
H-SIP3AZ-RUC1241 Portico TVA12D 12 port (analog) with FXO port*
H-SIP3AZ-RUC24 Portico TVA24D 24 port (analog) with FXO port
H-SIP3AZ-RUC2441 Portico TVA24D 24 port (analog) with FXO port*
H-SIP3AY-RUC12 Portico TVA12D 12 port (analog) with 2 FXO ports
H-SIP3DY-RUC1241 Portico TVA12D 12 port (analog) with 2 FXO ports*
H-SIP3DY-RUC24 Portico TVA24D 24 port (analog) with 2 FXO ports
H-SIP3AY-RUC2441 Portico TVA24D 24 port (analog) with 2 FXO ports*
Part Number Description
Table 1: Product Part Numbers

12 AND 24 PORT PORTICO TVA
SOFTSWITCH INTEGRATION GUIDE
vi Version: AF Document Number: G-SIP3DS-RUC

12 AND 24 PORT PORTICO TVA TABLE OF CONTENTS
SOFTSWITCH INTEGRATION GUIDE
Document Number: G-SIP3DS-RUC Version: AF vii
Table of Contents
Introduction . . . . . . . . . . . . . . . . . . . . . . . . . . . . . . . . . . . . . . . . . . . . . . . . . . . . . . . . . . . . . . . . 1
Purpose of This Document . . . . . . . . . . . . . . . . . . . . . . . . . . . . . . . . . . . . . . . . . . . . . . . . . . . . . . . . . 1
Who Should Read This Document? . . . . . . . . . . . . . . . . . . . . . . . . . . . . . . . . . . . . . . . . . . . . . . . . . 1
Which Sections Should You Read? . . . . . . . . . . . . . . . . . . . . . . . . . . . . . . . . . . . . . . . . . . . . . . . . 1
Other Documentation . . . . . . . . . . . . . . . . . . . . . . . . . . . . . . . . . . . . . . . . . . . . . . . . . . . . . . . . . . . . . . 2
Asterisk . . . . . . . . . . . . . . . . . . . . . . . . . . . . . . . . . . . . . . . . . . . . . . . . . . . . . . . . . . . . . . . . . . . . 3
Conferencing . . . . . . . . . . . . . . . . . . . . . . . . . . . . . . . . . . . . . . . . . . . . . . . . . . . . . . . . . . . . . . . . . . . . . . 3
Configuring Portico TVA for End Point Conferencing . . . . . . . . . . . . . . . . . . . . . . . . . . . . . . . . . . 3
Conference Room Method . . . . . . . . . . . . . . . . . . . . . . . . . . . . . . . . . . . . . . . . . . . . . . . . . . . . . . 5
Click to Call . . . . . . . . . . . . . . . . . . . . . . . . . . . . . . . . . . . . . . . . . . . . . . . . . . . . . . . . . . . . . . . . . . . . . . . . 6
Example Server Configuration using Trixbox . . . . . . . . . . . . . . . . . . . . . . . . . . . . . . . . . . . . . . . . 6
Example AstTapi / Outlook Configuration using MS Windows . . . . . . . . . . . . . . . . . . . . . . . . . . . 9
Call Logs . . . . . . . . . . . . . . . . . . . . . . . . . . . . . . . . . . . . . . . . . . . . . . . . . . . . . . . . . . . . . . . . . . . . . . . . . . 10
BLF . . . . . . . . . . . . . . . . . . . . . . . . . . . . . . . . . . . . . . . . . . . . . . . . . . . . . . . . . . . . . . . . . . . . . . . . . . . . . . . 10
Configure the extensions.conf file . . . . . . . . . . . . . . . . . . . . . . . . . . . . . . . . . . . . . . . . . . . . . . . . 10
Call Pickup . . . . . . . . . . . . . . . . . . . . . . . . . . . . . . . . . . . . . . . . . . . . . . . . . . . . . . . . . . . . . . . . . . . . . . . . 11
Broadsoft . . . . . . . . . . . . . . . . . . . . . . . . . . . . . . . . . . . . . . . . . . . . . . . . . . . . . . . . . . . . . . . . . 13
Conferencing . . . . . . . . . . . . . . . . . . . . . . . . . . . . . . . . . . . . . . . . . . . . . . . . . . . . . . . . . . . . . . . . . . . . . 13
End Point Conference Method . . . . . . . . . . . . . . . . . . . . . . . . . . . . . . . . . . . . . . . . . . . . . . . . . . 13
Conference Room Method . . . . . . . . . . . . . . . . . . . . . . . . . . . . . . . . . . . . . . . . . . . . . . . . . . . . . 13
Portico TVA Configuration . . . . . . . . . . . . . . . . . . . . . . . . . . . . . . . . . . . . . . . . . . . . . . . . . . . . . . 14
Shared Call Appearances . . . . . . . . . . . . . . . . . . . . . . . . . . . . . . . . . . . . . . . . . . . . . . . . . . . . . . . . . . 16
BroadSoft Configuration . . . . . . . . . . . . . . . . . . . . . . . . . . . . . . . . . . . . . . . . . . . . . . . . . . . . . . . 16
Portico TVA Configuration . . . . . . . . . . . . . . . . . . . . . . . . . . . . . . . . . . . . . . . . . . . . . . . . . . . . . . 17
Click to Call . . . . . . . . . . . . . . . . . . . . . . . . . . . . . . . . . . . . . . . . . . . . . . . . . . . . . . . . . . . . . . . . . . . . . . . 19
Sylantro . . . . . . . . . . . . . . . . . . . . . . . . . . . . . . . . . . . . . . . . . . . . . . . . . . . . . . . . . . . . . . . . . . 21
Conferencing . . . . . . . . . . . . . . . . . . . . . . . . . . . . . . . . . . . . . . . . . . . . . . . . . . . . . . . . . . . . . . . . . . . . . 21
End Point Conference Method . . . . . . . . . . . . . . . . . . . . . . . . . . . . . . . . . . . . . . . . . . . . . . . . . . 21
Sylantro Configuration Conference Method . . . . . . . . . . . . . . . . . . . . . . . . . . . . . . . . . . . . . . . . 21
Portico TVA Configuration . . . . . . . . . . . . . . . . . . . . . . . . . . . . . . . . . . . . . . . . . . . . . . . . . . . . . . 22
Bridged Line Appearances . . . . . . . . . . . . . . . . . . . . . . . . . . . . . . . . . . . . . . . . . . . . . . . . . . . . . . . . . 24
Sylantro Configuration . . . . . . . . . . . . . . . . . . . . . . . . . . . . . . . . . . . . . . . . . . . . . . . . . . . . . . . . 25
Portico TVA Configuration . . . . . . . . . . . . . . . . . . . . . . . . . . . . . . . . . . . . . . . . . . . . . . . . . . . . . . 27
Click to Call . . . . . . . . . . . . . . . . . . . . . . . . . . . . . . . . . . . . . . . . . . . . . . . . . . . . . . . . . . . . . . . . . . . . . . . 28

TABLE OF CONTENTS 12 AND 24 PORT PORTICO TVA
SOFTSWITCH INTEGRATION GUIDE
viii Version: AF Document Number: G-SIP3DS-RUC

12 AND 24 PORT PORTICO TVA INTRODUCTION
SOFTSWITCH INTEGRATION GUIDE
Document Number: G-SIP3DS-RUC Version: AF 1
1INTRODUCTION
Purpose of This Document
This document contains an overview of the steps required to configure Portico
TVA for softswitch-specific functionality. If the configuration is the same on all
softswitches, the instructions can be found in the Portico TVA Installation and
Configuration Guide.
The softswitches included in this document are:
Asterisk
BroadSoft
Sylantro
Support for additional softswitches is added on an ongoing basis. If your softswitch is
not listed above, please contact Citel to see if it is currently supported.
This document contains basic instructions, based on examples, for configuring
Portico TVA to work with the listed softswitches.
It is not intended to be a comprehensive guide to your softswitch. Please read
the documentation provided with your softswitch for full configuration
instructions.
Who Should Read This Document?
This document should be read by those installing the Portico TVA and those
responsible for managing it.
Which Sections Should You Read?
The rest of this document is divided into chapters, one for each of the different
types of softswitch. You only need to read the chapter for the softswitch you
are using.

INTRODUCTION 12 AND 24 PORT PORTICO TVA
SOFTSWITCH INTEGRATION GUIDE
2 Version: AF Document Number: G-SIP3DS-RUC
Other Documentation
You should read the Portico TVA Installation and Configuration Guide,
especially the Installation and Initial Configuration chapters.
You should locate the pages in the Phone User Guide containing the default
button mappings for the telephones in use at your location and update them
to show which have been allocated to the functions described in this
document.

12 AND 24 PORT PORTICO TVA ASTERISK
SOFTSWITCH INTEGRATION GUIDE
Document Number: G-SIP3DS-RUC Version: AF 3
2ASTERISK
If you are using an interface to your Asterisk softswitch, you may need to make changes
to comply with the requirements of the interface. For example, you may need to edit
custom versions of the files, which are managed by the interface.
Conferencing
Conference calls can be made using functionality provided by Portico TVA,
without the need for additional configuration. Making conference calls locally
in this way reduces network traffic and is the default recommended method.
Conference calls using the Asterisk softswitch can be made several ways. Here
we will describe end-point conferencing using your Conf or your Transfer/Conf
button. If you do not have either of these buttons on your phone, ask your
system administrator to map it for you.
For step-by-step instructions for making a conference call, refer to the Phone
User Guide.
Configuring Portico TVA for End Point Conferencing
Ensure that you have a button mapped for conferencing; either Conf or
Transfer/Conf.
1. Log in to the Web MI and select Configure Handsets. The Configure
Handsets page opens.
2. Locate the port you are configuring and click Lines.
3. In the Edit column, click on Edit Line. The Port # Line # Configuration page
opens.
Conferencing
Configuring Portico TVA for End Point
Conferencing........................................................ 3
Conference Room Method.............................. 5
Click to Call...............................................6
Call Logs ................................................ 10
BLF ......................................................... 10
Call Pickup............................................. 11

ASTERISK 12 AND 24 PORT PORTICO TVA
SOFTSWITCH INTEGRATION GUIDE
4 Version: AF Document Number: G-SIP3DS-RUC
4. Ensure that the Conference URI is left blank (see Figure 1). Click
Submit.
Figure 1: End-point Conferencing - Blank Conference URI
5. Click Reset to reset the port.
6. Click Home.
7. Select Configure Handsets. The Configure Handsets page opens.
8. Locate the port you are configuring and click Handsets. The Port # Handset
Configuration page opens.

12 AND 24 PORT PORTICO TVA ASTERISK
SOFTSWITCH INTEGRATION GUIDE
Document Number: G-SIP3DS-RUC Version: AF 5
9. Ensure the line appears on at least two telephone handset button
mappings (Figure 2).
Figure 2: End Point Conference Method - Port Configuration
Conference Room Method
This method is also known as Media Conferencing and server-based
conferencing. Participants dial a conference room number and then enter a
PIN. The conference room number and PIN must be set up by the Systems
Administrator (see below).
Before editing any configuration file, create a configuration backup file using the
maintenance page of the Citel Portico TVA. Maintenance -> Configuration Settings ->
Backup Configuration Settings -> Backup. Document the changes you make.
Remember that changes may affect the entire telephone system.
Asterisk Configuration
Conferencing is achieved by using the Asterisk MeetMe Application. This
requires a timer device such as a Zaptel.
1. Edit the meetme.conf file

ASTERISK 12 AND 24 PORT PORTICO TVA
SOFTSWITCH INTEGRATION GUIDE
6 Version: AF Document Number: G-SIP3DS-RUC
The example below demonstrates how a conference room is configured
using the meetme.conf file, where 1234 is the conference room and
6789 is the PIN required to access it.
[rooms]
;
; Usage is conf => confno[,pin]
;
conf => 1234,6789
2. Edit the extensions.conf file
The dial plan is configured in the extensions.conf file. It controls how
all calls are routed and handled and controls the behavior of all
connections through the PBX.
An example of the changes needed is given below. 1234 is the conference
room and 6789 is the PIN to enter the conference.
[default]
...
exten => 1234,1,Meetme,1234,6789 ; dial 1234, conf
room 1234, pin 6789
Click to Call
This feature allows business applications to initiate phone calls from phones
attached to Portico TVA. The user does not need to pick up their phone,
applications such as Outlook and Act can dial contacts directly from the
application.
An example configuration process for ASTTapi and Outlook is given here; all
configuration is as specified by the application (there is no Portico TVA
configuration), so this example is provided for clarity. Consult your application
for more information.
Example Server Configuration using Trixbox
AstTapi works by sending commands, via a telnet connection, to the Manager
on the trixbox server.
1. Configure manager_custom.conf by logging on to trixbox and selecting
Admin Mode > Asterisk > FreePBX > Tools > Asterisk API > Add
Manager and configuring as shown in Figure 3.

12 AND 24 PORT PORTICO TVA ASTERISK
SOFTSWITCH INTEGRATION GUIDE
Document Number: G-SIP3DS-RUC Version: AF 7
Figure 3: Configure Server for Click To Call
2. Click Submit Changes.
3. Click the red Apply Configuration Changes banner.
Test the configuration
1. To test this from your workstation, open a DOS window and type:
telnet <address> 5038
Where <address> is either the hostname or IP address of your Trixbox
server.
Asterisk Call Manager/1.0 will display.
2. Login to the trixbox Manager configured above.
Configure Auto-Answer
The two custom contexts mentioned in the next section need to be configured
on the server. For this example using trixbox, they are added to the
extensions_custom.conf file.
1. Log onto trixbox and select Admin Mode > Asterisk > Config Edit >
extensions_custom.conf.

ASTERISK 12 AND 24 PORT PORTICO TVA
SOFTSWITCH INTEGRATION GUIDE
8 Version: AF Document Number: G-SIP3DS-RUC
2. Add the following (see Figure 4):
[click-to-call-originate-custom]
exten => _X.,1,NoOp("Click to Call Originator")
exten => _X.,2,SetVar(_ALERT_INFO=info=alert-autoanswer)
exten => _X.,3,Goto(from-internal,${EXTEN},1)
[click-to-call-target-custom]
exten => _X.,1,NoOp("Click to Call Target")
exten => _X.,2,Goto(from-internal,${EXTEN},1)
Note that “from-internal” syntax may vary, depending on your Asterisk installation.
Figure 4: Configure Auto-Answer
3. Click Update.
4. Reboot the server by selecting System > System Maint > Reboot.

12 AND 24 PORT PORTICO TVA ASTERISK
SOFTSWITCH INTEGRATION GUIDE
Document Number: G-SIP3DS-RUC Version: AF 9
Example AstTapi / Outlook Configuration using MS Windows
1. Download and install the AstTapi driver onto your workstation. The driver is
available from:
http://sourceforge.net/projects/asttapi/
2. To configure the AstTapi driver from your PC’s Control Panel.
a. Open Control Panel > Phone and Modem Options > Advanced >
select Omniis TAPI Driver for Asterisk > Configure. Alternatively you
can use your TAPI application, e.g. Outlook.
3. To configure the AstTapi driver from Outlook 2003:
a. In Outlook, go to your contacts folder.
b. Right click on one of your contacts and select Call Contact…. The New
Call window opens.
c. Click Dialing Options. The Dialing Options window opens.
d. Under Connect using line select Asterisk and click Line Properties.
The Configure Asterisk TAPI driver window opens (Figure 5).
Figure 5: Configure TAPI Driver
Figure 5 shows a configuration of auto-answer click-to-call for a user with
extension 5303.
Host, Port, User and Password should already be set up to enable AstTapi to
communicate with the Asterisk server.

ASTERISK 12 AND 24 PORT PORTICO TVA
SOFTSWITCH INTEGRATION GUIDE
10 Version: AF Document Number: G-SIP3DS-RUC
4. Specify the User Channel to use to originate the call (your phone). For
example: Local/5303@click-to-call-originate-custom.
This phone will be forced off-hook (via auto-answer) by trixbox signalling
(via alert-info header) when you wish to initiate a call.
Note that the last portion of the User Channel, click-to-call-originate-
custom, is one of the custom contexts described in “Configure Auto-Answer”
on page 7.
5. Select the Dial by ‘Context’ radio button, and enter the following:
•Context - the outgoing context. For example: click-to-call-target-custom.
•Caller ID - the information that will display on the originator’s phone. In this
case, C2C 5303 is used to indicate Click-to-Call from user extension 5303.
6. Enter a Line Name to initiate screen popping. The Line Name must be
placed in to the dial plan.
At this point make sure you have the Asterisk manager window running; here
you can see manager's logging on and any problems which may occur.
The Trixbox server and the AstTapi driver are now set up to handle calls made
from the Outlook Contacts AutoDialer.
Call Logs
When using call logs, you may wish to configure Asterisk to ensure that URIs
presented to the Portico TVA for incoming (and missed) calls are suitable for
calling back. The call log gathers caller ID and caller URI information from calls.
It uses the caller ID when browsing the log, but uses the URI when placing calls
from the log. If the URI stored in the log does not contain sufficient information
to place the call then it will fail.
BLF
For each resource that will be monitored by one or more BLF buttons, ensure
that a hint exists in the extensions.conf file or equivalent.
Configure the extensions.conf file
The following example shows the configuration of hints for three extensions
(5301..5303), associating them with the state of the SIP channels (SIP/5301..SIP/
5303).
exten => 5301,hint,SIP/5301
exten => 5302,hint,SIP/5302
exten => 5303,hint,SIP/5303

12 AND 24 PORT PORTICO TVA ASTERISK
SOFTSWITCH INTEGRATION GUIDE
Document Number: G-SIP3DS-RUC Version: AF 11
Note that hints may be applied to resources other than just extensions, though
the resources that one can apply hints to depends on the exact version and
patch level of the Asterisk software.
The following is an example of a hint applied to the parking lot, using the
device state patch associated with defect 5779 on http://bugs.digium.com.
exten => 71,hint,Local/71@parkedcalls
The following is an example of a hint applied to an ACD agent's status.
exten => 1001,hint,Agent/1001
Configuring BLF Call Pickup
For call pickup to be handled by an Asterisk IP-PBX, something similar to the
following should be placed in the extensions.conf file or equivalent:
exten => _pickup-x.,1,Pickup(${EXTEN:7})
exten => _pickup-x.,2,Hangup
Call Pickup
Asterisk calls can be picked up using a feature code (*8). Unlike other
softswitches which use a pickup button, Asterisk users must press *8 to pick up
directed and group calls.

ASTERISK 12 AND 24 PORT PORTICO TVA
SOFTSWITCH INTEGRATION GUIDE
12 Version: AF Document Number: G-SIP3DS-RUC
Other manuals for TVA-A
1
This manual suits for next models
33
Table of contents
Other Citel Switch manuals
Popular Switch manuals by other brands
ST
ST EPSILON TNC Series instruction manual
Bircher
Bircher ESD3 Translation of the original instructions
Agilent Technologies
Agilent Technologies Switch/Measure user guide
nux
nux PML-2 user manual
LITETRONICS
LITETRONICS BSC02 user guide

United Electric Controls
United Electric Controls ONE Series Installation and maintenance instructions
