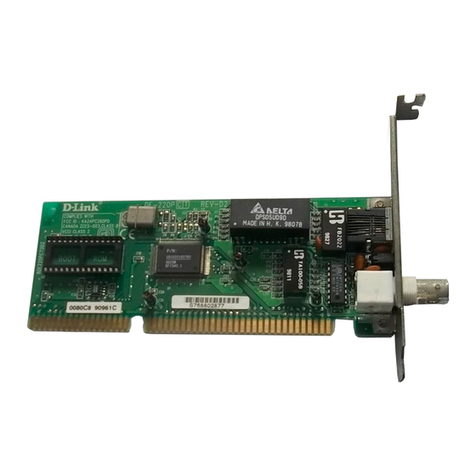
City-Netek HomePNA PCI Adapter User manual

HomePNA PCI Adapter
User’s Manual

1
Table of Contents
Preface---------------------------------------------------------------------------------2
1. Product Features and Specifications------------------------------------------3
Product Features
Product Specifications
2. HomePNA PCI adapter Installation Procedures -----------------------------5
I. Checklist
II. System Requirements
III. Installation Steps
A. Hardware Installation--------------------------------------------6
B. Software DriverInstallation-------------------------------------9
3. HomePNA Operations -----------------------------------------------------------13
Setting Up the Protocols------------------------------------------------------14
Sharing the Same Internet Account Number------------------------------16
Setting Up Files and Printer Sharing Services-----------------------------17

2
Preface
HomePNA enables two or more personal computers (PCs) to use a single
telephone line to form a local area network (LAN) in a Small Office or Home
Office (SOHO). HomePNA PCI adapter provides you with the easiest and the
most economical way to build a network with an Ethernet switch, hub or
special hardware. At the same time, these PCs can:
ŸShare a single Internet dial up account
ŸShare printers, modems, hard disks, CD-ROM drives or other
computer peripheral devices
ŸExchange files
ŸPlay Internet games
HomePNA can be quickly installed and is easy to use. You can get Internet
access from any place with a phone jack, and you never need to worry about
wiring the network or destroying the beauty of home decorations.

3
1. Product Features and Specifications
Product Features:
ŸSuitable for SOHO, Company and Home use.
ŸRequires only the regular RJ-11 phone wire to set up the office or
home's local area network (LAN).
ŸConnects the PC with two RJ-11 digital phone ports through a phone
jack or via daisy chaining.
ŸEliminates the expensive and time-consuming problem of using
RJ-45 area networking wiring, and preserves the original beauty of
the building or house.
ŸTransfers data at up to 1Mbps, which is 18 times faster than a 56K
modem.
ŸCompatible with Windows95/98/ME/2000/XP/NT4.0 Operating
Systems.
ŸHas less distance restriction (500 ft or 160 m) than regular Ethernet
(100 m).
ŸCan simultaneously run phone line communication (voice service),
broadband xDSL Internet Access and Network Data Transmission
(uploading/downloading data files) without being interrupted

4
Product Specifications
ŸStandards: HomePNA 1.0, IEEE 802.3, PC98, Net PC
ŸCertification: FCC, CE
ŸProtocol: CSMA/CD
ŸSpeed: 1Mbps (RJ-11, phone line)
ŸCabling: Standard Copper RJ-11
ŸLED Indicator: Link, Activity
ŸPower Consumption: 5W max.
ŸOperating Temperature: 0 –50OC
ŸStorage Temperature: -25 –70OC
ŸHumidity: 10% -90% non-condensing
ŸSafety: FCC/DoC, CE/EMC, VCCI, AS, NIS
ŸDimensions: 136 mm ×120 mm ×21.7 mm
ŸNet Weight: approx. 0.06 kg

5
2. HomePNA PCI adapter Installation Procedures
I. Checklist
Before installing the HomePNA PCI adapter, verify the package contains the
following items. Contact the dealer or the store if any items are missing.
ŸOne HomePNA PCI adapter
ŸOne Software Driver Diskette
ŸOne 4-wire Phone Cable
ŸThis User's Manual
II. System Requirements
ŸPentium 100 or higher
ŸMicrosoft Windows 98 Operating System (at least WIN95B edition)
Ÿ8 MB RAM (recommend 16 MB RAM)
ŸFloppy Drive
III. Installation Steps
Before installation, you need to check the following:
ŸWindows 98 Installed Disk Driver:
During installation, the computer will ask to insert Window 98
installed disk driver.
ŸPrinter:
Make sure that you verify the normal operations of the printer
with HomePNA.
ŸPCs which will share the same Internet Account:
If you use more than one PC to share one Internet Account, make sure
that one of the PCs (the server) is able to get to the Internet access (see
page 13for detailed procedures).

6
A. Hardware Installation
1. Turn off the PC and other peripherals that you are using.
2. Open the PC case cover.
3. Insert the HomePNA PCI adapter into the PCI interface slot.
4. Make sure that the coated portion of the board is fully inserted.
5. Firmly secure the HomePNA PCI adapter board with the screws
from the rear side of the PC board.
6. Put back the PC case cover.
7. Connect one end of the phone cable to the phone jack and the
other end to the LINE port of the HomePNA PCI adapter.
8. Turn on your PC and other peripherals.
If there are two or more telephone numbers in your office or home,
make sure to confirm that all the PCs, which are to be networked in the LAN,
are connected to the same telephone number. Otherwise, the LAN will not
work.
Line
Phone

7
There should be a phone jack near each PC:
:HomePNA :Phone Jack :Phone :Computer
PCI adapter
If there are several PCs sharing one phone jack:

8
HPNA SWITCH
HPNA USB HPNA PCI HPNAPCI
HPNA PCI
HPNA USB
HPNA PCI
HPNA PCI HPNA PCI
HPNA USB
HPNA USB
:
HomePNA USB Interface
HPNA PCI
:
HomePNA PCI Interface
ISP
Networks between Buildings setup diagram
C.O
***Each user bandwidth up to 1000K***
MDF

9
B. Software Driver Installation
The HomePNA PCI adapter is a“plug-and-play”PCI card. That means
that all you need to do is plugin the HomePNA PCI adapter intoan empty
slot onto the mainboard of the PC. Once you turn on the PC, a dialogue
box will appear on the screen notifying you that the PC has detected the
new hardware.
Simply insert the Windows diskette and the Software Driver diskette
into the PC's drivers. The installation steps are as follows:
Figure 1
Figure 2
1.Press [next].
2.
Select [search for the
best driver for your
device.] and press
[Next].

10
Figure 3
Figure 4
Figure 5
3. Select [Specify a
location] to search for
the software driver,
type in destination
path.
4. When the PCdetects
the needed driver
software, press [Next].
5. Wait while the PC is
installing the
software driver.

11
Figure 6
Figure 7
Figure 8
Figure 9
7. Type [D:\Win98] in
the blank space of
“duplicate file source”
then press [OK].
6.
Insert the Windows
98 diskette in the disk
drive, then press [OK]
8.Type in path, example
([A:\9598\Win9598])
in the blank space of
“duplicate file source”
then press [OK].
9. YourHomePNA PCI
adapter board
installation is now
completed, press
[
Finish
].

12
Figure 10
Congratulations! You have successfully installed the HomePNA PCI adapter.
10. Press [yes] to allow
the system restart PC.

13
3. HomePNA Operations
This section will describe how to operate the HomePNA. We will use
existing functions on Windows98 without employing extra
applications software. We will show you:
•Sharing the Printer:
How you can let your HomePNA local area network system (LAN)
share one printer.
•Transferring the Files:
How you can you transfer data files within your HomePNA local
area system.
•Sharing the Internet Account Number:
How you can let your HomePNA area local network system share
one Internet account number.
HomePNA LAN

14
Setting Up The Protocols:
Before the above functions are set up, you must first set up the
communications protocol. Begin by selecting the [start/setup/controller]
command, and double click [network]. You will enter into a dialogue box:
1. Press [add].
Figure 1
2. Double click [protocol].
Figure 2

15
3. Select [Microsoft] and
protocol [NetBEUI] then
press [OK].
Figure 3
4. The figure on the left
hand side shows the
just installed NetBEUI
protocol.
Figure 4
Before you press [OK], read the
section on the next page about
“Setting Up Files and Printer
Sharing Services”

16
Setting Up Files and Printer Sharing Services:
After setting up the protocol, there is another important step -to set up the
files and printer sharing services. The setup procedures are as following:
1.In the dialogue frame,
select [Files and Printer
Sharing]
Figure 1
2. Check on both block
spaces, then press [OK]
Figure 2
When you return to the
screen shown in figure 1,
press [OK] to complete
the setup.

17
Sharing The Same Internet Account Number
Before sharing the same Internet account number, you must first verify
that:
1. One of the PCs (the server) among the HomePNA LAN already has
Internet access, and the modem and the HomePNA PCI adapter are
correctly connected;
2. The server is turned on, or if an external modem is used, the modem
should be turned on;
3. Any one of the PCs among the HomePNA LAN must have been
installed with an Internet browser –such as Netscape Navigator /
Communicator or IE5.0, etc.
After completing the above three verifications, all you need to do is start the
browser or the e-mail sending/receiving software. You then can use the
HomePNA LAN to browse the Internet and to receive or send e-mails.
(Recommend using Sygate or Wingate).
Table of contents
Popular Network Card manuals by other brands
Linksys
Linksys WUSB300N user guide
Extron electronics
Extron electronics 066-01 Specification sheet
ADTRAN
ADTRAN Total Access 1500 Installation and Maintenance
Socket
Socket Go Wi-Fi! E300 quick start guide
IBM
IBM EM78P809N specification

Atlantis Land
Atlantis Land I-Fly PCMCIA Wireless Card A02-WPCM-11B Quick installation guide
