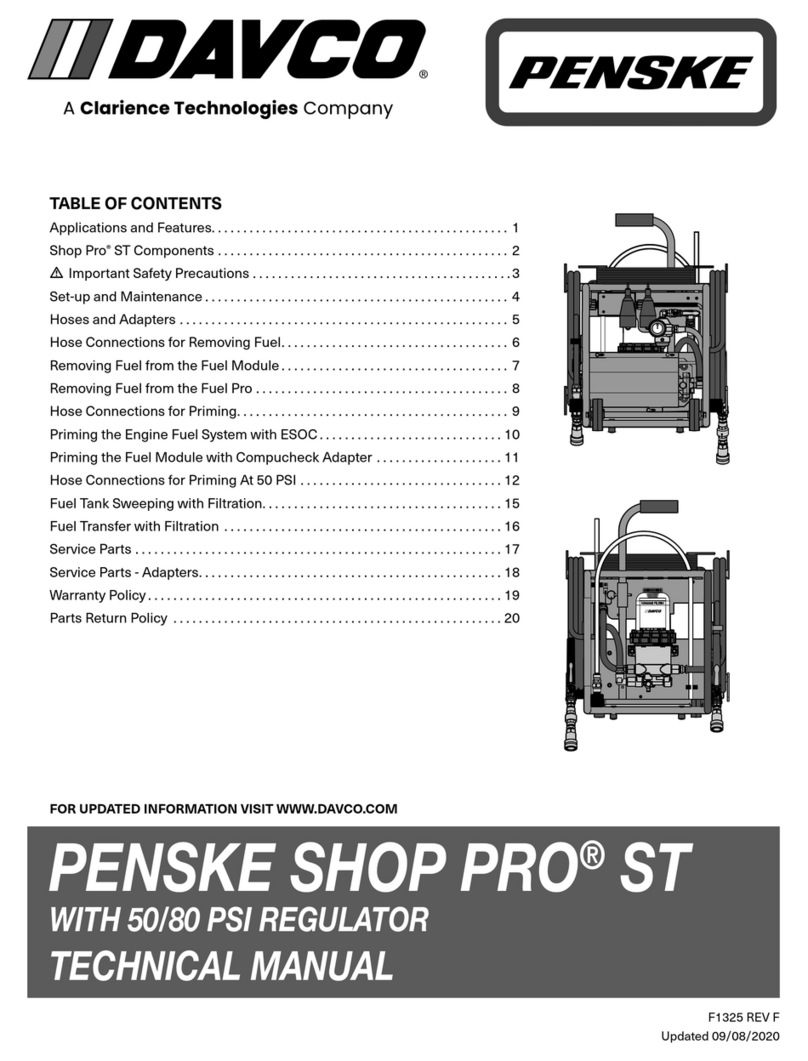
Clarience Technologies DAVCO SHOP PRO FXP 95 User manual

Updated 2/23/22
FOR UPDATED INFORMATION VISIT WWW.DAVCO.COM
DAVCO Technology, LLC www.davco.com800-328-26111600 Woodland Drive, Saline, MI 48176-1629
ECAUTION 95 PSI – DESIGNED TO BE USED
ONLY WITH DETROIT DD 5, 8, 13, 15 AND
16 ENGINES TO OPEN THE TWO-STAGE
VALVE FOR COMPLETE FUEL SYSTEM
PRIMING
SHOPPRO®FXP 95
TECHNICAL MANUAL
SHOPPRO® FXP 95 2021
WITH 95/50 PSI REGULATOR
TECHNICAL MANUAL
F1360 REV A
CONTENTS
Applications and Features..................................1
ShopPro®FXP 95 Components .............................2
Safety Procedures .........................................3
Set-up and Maintenance ...................................4
Priming the Fuel Module with the Compucheck Adapter.....5
Fuel Tank Sweeping/Transfer with Filtration ................6
Warranty and Returns Policy................................7


1
SHOP PRO®FXP 95
TECHNICAL MANUAL
APPLICATIONS AND FEATURES
EProduct Warning: The ShopPro is only
approved for use with diesel fuel. It is
not approved for use with gasoline or
any other flammable liquids.
Applications
• Removing Fuel
• Priming after Filter Service
- Eliminates the use of hand priming pumps after
performing maintenance
- Uses on-board fuel to prime engines and filters, avoids
the hassle of keeping reserve fuel on hand
- Eliminates cross contamination of fuel
• Fuel Transfer
- Filters and transfers fuel in one operation
- Transfers fuel when repairing tanks or crossover lines
- Transfers fuel for trucks being sold or taken out of
service
• Tank Cleaning
- Removes contaminated fuel, sediment and water from
fuel tanks of diesel powered equipment or from diesel
storage tanks
- Cleans fuel tanks during service — can be a value
added service or a new revenue stream
- Eliminates downtime due to fuel contamination
95/50 Regulator Settings
EUse 95 PSI setting (range of 90 PSI to
95 PSI) for priming after complete fuel
system service on DD 5, 8, 13, 15 and
16 engines only.
• Use 50 PSI setting (range of 45 PSI to 50 PSI) for all other
uses and engine applications.
HANDLE DOWN
FOR COMPLETE
FUEL SYSTEM
PRIME
HANDLE UP
FOR FILTER
SERVICING
95
PSI
50
PSI
Specifications
Height: 40.89"
Width: 23.3"
Depth: 17.0"
Weight: 74 lbs
Electric Motor: 120VAC, 3450 RPM
Flow Rate: 150 GPH
ShopPro Filtration
• All-in-one fuel filter and water separator for diesel fuel
• Superior fuel/water separation
• Easy to access drain
• Lightweight aluminum construction
Features
• DETROIT®Fuel System Priming
- Opens the two stage valve for complete fuel system
priming
- Eliminates the use of hand priming pumps after
performing maintenance
• Cart
- Heavy-duty steel construction
- Portable and self-contained
• Electrical
- Circuit Breaker Protection
- UL
®Listed, rear-facing receptacle
- Waterproof ON/OFF switch
- 120VAC connection
• Pump and Motor
- Electric motor/pump combination rated for continuous
operation, UL
®Listed and CSA approved
• Adapters and hoses
- No-drip fittings
- Color-coded for function

2
SHOP PRO®FXP 95
TECHNICAL MANUAL
SHOPPRO®FXP 95 COMPONENTS
HANDLE UP
FOR FILTER
SERVICING
HANDLE DOWN
FOR COMPLETE
FUEL SYSTEM
PRIME
95
PSI
50
PSI
Heavy Duty Cart
Pressure Hose Pressure HosePick-up Wand Pick-up Wand
Switch
Dispensing Wand
Priming Wand
Suction Hose
Regulator
Drain Valves
Drain Hose
Motor
Filtration Unit
Sight Tube
Hose Retainer
Pump

3
SHOP PRO®FXP 95
TECHNICAL MANUAL
SAFETY PROCEDURES
General Safety Precautions
EThe ShopPro is only approved for use
with diesel fuel. It is not approved
for use with gasoline or any other
flammable liquids.
• Read all instructions before use to avoid injury.
• To avoid serious injury or death, follow the safety
information in this document.
• Keep this manual. If you need to replace the manual, call
customer service at 800-328-2611 or visit www.davco.
com for a replacement.
• Read all product safety labels.
• Refer to appropriate regulations for environmental and
workplace safety rules.
EWARNING: To prevent personal injury
• Recommended Personal Protection Equipment:
Eye Protection and chemical resistant gloves are
recommended.
• Avoid Fuel Spillage: When disconnecting attachments
equipped with Quick connect fittings, wrap a shop rag
around the fitting to catch any residual fuel.
• Do not leave the ShopPro running unattended. Follow
engine manufacturer guidelines for proper priming
procedures. Always disconnect the power supply when
the ShopPro is not in use.
• Scalding hazard: When diesel fuel is circulated through
an operating engine, it can become very hot. Do not allow
fuel to come in contact with eyes or unprotected skin.
Allow the engine and fuel to cool to ambient temperature
before replacing the fuel filter or performing service
operations which could result in spillage of fuel from the
fuel system.
• Fire Prevention: Heated fuel can form combustible
vapor mixtures in the area around the fuel source. To
eliminate the potential for fire, keep open flames, sparks
or other potential ignition sources away from the work
area. Do not smoke during filter replacement or service
operations.
• Inhalation Precaution: Always perform engine or vehicle
fuel system maintenance in a well ventilated area that is
kept free of bystanders.
• Government Regulations: Engine fluids (oil, fuel, and
coolant) may be a hazard to human health and the
environment. Handle all fluids and other contaminated
materials (such as filters and rags) in accordance with
applicable regulations. Recycle or dispose of engine
fluids, filters, and other contaminated materials according
to applicable regulations.

4
SHOP PRO®FXP 95
TECHNICAL MANUAL
SETUP AND MAINTENANCE
Set-up and First Use
1. Unpack the ShopPro and remove the cable ties from
hoses.
2. Remove the vent cap from the filtration unit. Pour diesel
fuel into the clear cover until it reaches the black band on
the filter element (approximately 1 gallon). (This fuel will
be on the “dirty” side of the filter, meaning that the fuel
will be filtered before flowing through the ShopPro FXP
to the engine or tank.)
3. Reinstall the vent cap and tighten by hand until it clicks.
4. Connect the ShopPro to a power source. Install the
pick-up wand on the green and dispensing wand on the
red pressure hose. Put the wands in a five gallon (mini-
mum) fuel container or truck fuel tank. Open the valve on
the dispensing wand. Turn the ShopPro power on and
circulate fuel until there are no bubbles in the sight tube.
Turn off the ShopPro. Close the ball valve on the dispens-
ing wand. Remove the wands from the hoses and return
them to their storage area. Connect the hoses to the hose
retainers.
Filtration Unit Maintenance
The Shop Pro filter should be changed at one-year inter-
vals unless a drop of flow is noticed, then it needs to be
performed sooner.
Filtration Unit
Vent Cap
Black Band
Clear Cover
Upper Drain Valve
Lower Drain Valve
Filters (from OEM dealers)
DDC A0000905051
Fleetguard FS20083
1. Open the vent cap to break the vacuum. Place a container
under the drain hose and the drain valve on the filtration
unit. Open both drain valves and drain the filtration unit
completely.
2. Remove the vent cap and dispose of the o-ring. Clean the
threads of the vent cap and on the top of the cover. Set
the vent cap aside.
3. Using the collar wrench, loosen the collar.
4. Remove the clear cover and collar from the FuelPro.
Discard the cover o-ring and install a new o-ring (sup-
plied with the filter) on the cover. Clean the threads on
the collar and the body. Install the new o-ring on vent cap
(supplied with thefilter).
5. Remove the filter element by pulling upward.
6. Record the date of the filter change on the filter wrap.
Install the new filter element. Position the filter element
so the key is lined up with the keyway on the separator
plate of the housing. Use the arrow on the top of the
endplate to align the filter. Ensure the filter element is
fully seated by firmly pushing on the endplate. The filter
should not rotate freely.
Key
Endplate
Separator plate
Keyway
Arrow
7. After checking to make sure the new o-ring seal is seated
correctly on the base of the cover, install the cover and
collar.
8. Apply downward pressure on the top of the cover and
rotate the collar until contact.
9. Close the drain valves. Pour approximately a gallon of
fuel into the vent cap opening. Reinstall the vent cap (turn
it until it clicks).

5
SHOP PRO®FXP 95
TECHNICAL MANUAL
PRIMING THE FUEL MODULE WITH THE COMPUCHECK ADAPTER
1. Attach the pick-up (60") wand to the suction hose (green)
and insert it into the fuel tank.
2. Attach the Compucheck Adapter (blue hose) to the
pressure hose (red) on the ShopPro.
3. Connect the Compucheck fitting to the priming port on
the fuel module.
4. Turn the ShopPro FXP ON. Prime the fuel system for four
minutes.
EIf you are priming a DD 5 or DD 8
engines, turn the Shop Pro OFF before
starting the engine.
5. If you are priming an engine other than a DD 5 or DD8
engine, start the engine while the Shop Pro is running.
Allow the engine to idle until the engine reaches full oil
pressure. Run the engine at high idle for one minute.
Return the engine to idle and turn off the Shop Pro.
6. Turn off the engine.
7. Remove the Compucheck adapter from the fuel module.
8. With the pickup wand still in the tank, disconnect the
suction hose. Raise the tube as high as possible. Press
the pickup wand anti-drip ball valve and allow the fuel to
drain completely.
9. Remove the pick-up wand from the fuel tank.
10. Return the adapters to the cart. Return the hoses to the
hose retainers.
11. Restart the truck and check for leaks.
COMPUCHECK
ADAPTER
FUEL PRIMING
COMPUCHECK FITTING PRESSURE
HOSE
SUCTION
HOSE
PRESSURE
SUCTION
FUEL TANK
PICK-UP WAND
HANDLE UP
FOR FILTER
SERVICING
HANDLE DOWN
FOR COMPLETE
FUEL SYSTEM
PRIME
95
PSI
50
PSI
Regulator Settings: 95/50 Regulator Settings
• Use 95 PSI setting (range of 90 PSI to 95 PSI) for priming after complete fuel system service on DD 5, 8, 13, 15 and 16
engines only.
• Use 50 PSI setting (range of 45 PSI to 50 PSI) for all other priming uses and engine applications.

6
SHOP PRO®FXP 95
TECHNICAL MANUAL
FUEL TANK SWEEPINGTRANSFER WITH FILTRATION
Pro Tip: Remove the anti-siphon fill cap from the fuel tank before sweeping.
Pro Tip: Elevate the end of the truck to allow water and contaminants to collect closest to the fuel fill point.
1. Connect the ShopPro to a power source. Attach the 60" pick-up wand to the suction hose (green) and insert it into the fuel
tank. Attach the 20" dispensing wand to the pressure hose (red). Insert the dispensing wand into the fuel tank and open the
valve.
2. Turn the ShopPro ON.
3. With the pick up wand, slowly sweep the bottom and sides of the fuel tank with a side-to-side motion. Refer to the appear-
ance of the fuel in the sight tube to determine when sweeping is complete. If the tank being cleaned has excessive water
(visible in the clear cover) turn the ShopPro off and drain the filtration unit.
4. When sweeping is complete, run for one additional minute to flush residual water from the ShopPro to prevent gear corro-
sion. Turn the ShopPro OFF.
5. With the pickup wand still in the tank, disconnect the pressure hose and raise the wand as high as possible. Press the
pickup wand anti-drip valve ball and allow the fuel to drain completely. Close the valve on the dispensing wand.
6. Remove the wands from the fuel tank and return them to the cart. Return the hoses to the hose retainers.
Fuel Transfer with Filtration Overview:
The suction hose (green) is connected to the pick-up wand
(60” white wand). The pressure hose (red) is connected to
the dispensing wand (20” white wand). The fuel is filtered
as it is drawn from the Tank A or storage container and
transfered to Tank B. Water and contaminants that have
settled in the tank are removed as the fuel is transferred
between the tanks. FUEL TANK
PRESSURE
HOSE
SUCTION
HOSE PRESSURE
SUCTION
PICK-UP WAND
DISPENSING
WAND
1. Connect the ShopPro to a power source. Turn the regulator handle to the 95 PSI setting.
2. Attach the 60" pick-up wand to the suction hose (green) and insert it into the fuel tank.
3. Attach the 20" dispensing wand to the pressure hose (red). Insert the dispensing wand into the fuel tank or container that
the fuel is to be transferred to. Open the ball valve on the dispensing wand.
4. Turn the ShopPro ON. If the tank the fuel is being transfered from has excessive water (visible in the clear cover) turn the
ShopPro off and drain the filtration unit.
5. When the fuel transfer is complete, run for one additional minute to flush residual water from the ShopPro to potential
pump corrosion. Turn the ShopPro OFF.
6. With the pickup wand still in the tank, disconnect the pressure hose. Raise the wand as high as possible. Press the pickup
wand anti-drip valve and allow the fuel to drain completely.
7. Close the valve on the dispensing wand. Return wands to the cart and the hoses to the hose retainers.
Fuel Tank Sweeping Overview:
The suction hose (green) is connected to the pick-up wand
(60" white wand). The pressure hose (red) is connected to
the dispensing wand (20" white wand). The fuel is filtered
as it is drawn from the tank and returned to the same tank
(or auxiliary tank). By moving the wand along the sides
and bottom of the tank, water and contaminants that have
settled in the tank are removed. The sight tube aids in
determining the length of time needed to clean the tank.
FUEL TANK
SUCTION
PICK-UP WAND
DISPENSING WAND
HOSE
PRESSURE
HOSE PRESSURE
SUCTION
Use 95 PSI setting on regulator.
Use 95 PSI setting on regulator.

7
SHOP PRO®FXP 95
TECHNICAL MANUAL
Warranty
Please review DAVCO’s Product Warranty terms and conditions carefully before installing and/or using a DAVCO product.
DieselPro®243, 245, Fuel Pro®382, 385, 482, 483, 485, 487, 488, Industrial Pro®, Pro-Chek®, Sea Pro®
DAVCO Technology, LLC warrants these products to be free of defects in material and workmanship for five years, 500,000 miles
or 10,000 hours (whichever comes first) and electrical parts for two-years, 200,000 miles or 4,000 hours (whichever comes first)
from the purchase date*.
ShopPro®
DAVCO Technology, LLC warrants the ShopPro (except for the motor) to be free of defects in material and workmanship for two
years from the date of purchase. The ShopPro motor is warranted for one year from date of purchase.
REN Products, EyeMax®, and Fuel Pro®384
DAVCO Technology, LLC warrants these products to be free of defects in material and workmanship for two-years or 200,000
miles (whichever comes first) from the purchase date.
By installing and/or using the product, you agree to be bound by the following:
This Warranty does not apply to:
• Failure or inadequate performance due to improper installation, misuse, misapplication, faulty installation, alteration/
modification, poor maintenance, neglect, accident, or conditions resulting from actions outside DAVCO’s control, including
but not limited to the use of contaminated, corrosive, and unapproved fluids.
• Downtime, loss of use, loss of profits or income, loss of capital, cost of substitute equipment, living expenses, claims by
purchaser’s customers or other third parties, or other incidental, special or consequential damages.
• Attachments, accessory items, and parts not manufactured or distributed by DAVCO.
• Any aftermarket or OEM component not approved specifically to work with a DAVCO manufactured product
• Product that has been installed with aftermarket parts or altered or modified in any way.
• Normal wear and tear, abuse, vandalism, acts of God, improper storage or handling, disasters such as flood, fire, or war,
failure to operate, maintain or repair in accordance with instructions, or failure to repair the vehicle into which the product is
installed in accordance with the vehicle manufacturer’s instructions or common maintenance practices.
This warranty is the sole warranty made by DAVCO. DAVCO makes no other warranties, expressed or implied, of merchantability
or fitness for a particular purpose.
In the unlikely event of a defective product, DAVCO will either rework the defective product or replace it at DAVCO’s discretion.
If you feel you have a warrantable issue, contact DAVCO at 800-328-2611 for a Return Goods Authorization (RGA) number **. An
RGA number is required prior to the return of any product.
* Purchase Date: The date of the first retail purchase of a new vehicle or piece of equipment from the OEM dealer or factory. For
“Over the Counter” purchase: The date of sale to the first retail customer.
**Products submitted for Warranty consideration will be inspected by DAVCO personnel. Re-work or replacement will be based
on DAVCO’s Warranty procedure and/or the results of their evaluation. DAVCO’s Warranty Program does not in any way consti-
tute a product guarantee.
Parts Return:
A Return Goods Authorization (RGA) must be obtained from DAVCO prior to returning any products. Returns may be
accepted under the following circumstances:
• Order Shipping Error: A credit against the original invoice, including freight charges for both ways will be issued for returns
in which DAVCO inadvertently shipped incorrect quantity or product.
• Overstock: Returns for ordering more product(s) than required, or incorrect part(s), will be accepted within 60 days from
the date of purchase. Proof of purchase will be required, i.e.: original invoice/delivery receipt. These types of return(s) are
subject to a minimum restock fee of 40% or $40.00, whichever is higher. Additional restock fees may apply. Product(s) will
be inspected for “like new” condition and additional costs will be the responsibility of the customer. No obsolete parts may
be returned.
• Freight charges for return(s) will be the responsibility of the customer.
WARRANTY AND RETURNS POLICY

Table of contents
Other Clarience Technologies Cleaning Equipment manuals
Popular Cleaning Equipment manuals by other brands
Caviblaster
Caviblaster 0520-E Operation & maintenance manual

Fantom Professional
Fantom Professional PROCART 360 Assembly manual

Tennant
Tennant 368660 Instruction bulletin
Roam
Roam Huwa-San FOGGER manual
Linsar
Linsar YLW6336/CSC-ECOM Original operating manual

Gardus
Gardus SootEater RCH205 Operator's manual
