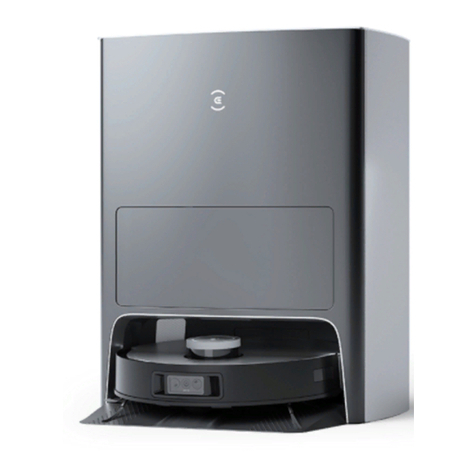
ECOVACS AIRBOT Z1 User manual

Instruction Manual/Bedienungsanleitung/Manual de instrucciones/
Manuel d'instructions/Manuale d'uso/Instrukcja obsługi/
Gebruiksaanwijzing

2
EN
Live Smart. Enjoy Life.
Should you encounter situations that have not been properly addressed in this Instruction Manual,
please contact our Customer Service Center where a technician can address your specific problem or
question.
For more information, please visit the ECOVACS ROBOTICS official website: www.ecovacs.com
The company reserves the right to make technological and/or design changes to this product for
continuous improvement.
Thank you for choosing AIRBOT!

3EN
CONTENTS
1. Important Safety Instructions ..........................................................................................................................................4
2. Package Contents.............................................................................................................................................................7
3. Using AIRBOT..................................................................................................................................................................12
4. Maintenance ....................................................................................................................................................................23
5. Troubleshooting...............................................................................................................................................................29
6. Product Specifications....................................................................................................................................................36

4
EN
When using an electrical appliance, basic
precautions should always be followed, including
the following:
READ ALL INSTRUCTIONS BEFORE
USING THIS APPLIANCE
SAVE THESE INSTRUCTIONS
1. This Appliance is not intended for use by
persons (including children) with reduced
physical, sensory or mental capabilities,
or lack of experience and knowledge,
unless they have been given supervision or
instruction concerning use of the Appliance
by a person responsible for their safety.
2. Children should be supervised to ensure that
they do not play with the Appliance.
3. This Appliance can be used by children
aged from 8 years and above and persons
with reduced physical, sensory or mental
capabilities or lack of experience and
knowledge if they have been given
supervision or instruction concerning use of
the Appliance in a safe way and understand
the hazards involved. Children shall not
1. Important Safety Instructions
play with the Appliance. Cleaning and user
maintenance shall not be made by children
without supervision.
4. Clear the area to be puried. Remove power
cords and small objects from the oor that
could entangle the Appliance. Tuck rug fringe
under the rug base, and lift items such as
curtains and tablecloths off the oor.
5. If there is a drop off in the purifying area due
to a step or stairs, you should operate the
Appliance to ensure that it can detect the step
without falling over the edge. It may become
necessary to place a physical barrier at the
edge to keep the robot from falling. Make sure
the physical barrier is not a trip hazard.
6. Only use as described in this manual. Only
use attachments recommended or sold by
the manufacturer.
7. Please make sure your power supply voltage
matches the power voltage marked on the
Charging Dock and AC Adapter.
8. For INDOOR household use ONLY. Do not
use the Appliance in outdoor, commercial or
industrial environments.
9. Use only the original rechargeable battery,

5EN
AC Adapter and Charging Dock provided
with the Appliance from the manufacturer.
Non-rechargeable batteries are prohibited.
For battery information, please refer to
Specications section.
10. Do not use without Filters in place.
11. Do not operate the Appliance in an area
where there are lit candles or fragile objects.
12. Do not use in extremely hot or cold
environments (below -5˚C/23˚F or above
40˚C/104˚F).
13. Do not use Appliance on wet surfaces or
surfaces with standing water. Do not use
Appliance in areas where they may be present.
14. Do not touch the plug or the Appliance with
wet hands.
15. Take care not to damage the power cord.
Do not pull on or carry the Appliance AC
Adapter or Charging Dock by the power
cord, use the power cord as a handle, close
a door on the power cord, or pull power cord
around sharp edges or corners.
16. Do not run Appliance over the power cord.
Keep power cord away from hot surfaces.
17. If the supply cord is damaged, it must be
replaced by a special cord or assembly available
from the manufacturer or its service agent.
18. Do not place the power cord under carpets,
furniture, product, etc. Keep the power cord
away from crowded areas.
19. Do not use the Charging Dock or AC Adapter
if it is damaged.
20. Do not use with a damaged power cord or
receptacle. Do not use the Appliance, AC
Adapter or Charging Dock if it is not working
properly, has been dropped, damaged, left
outdoors, or come in contact with water. It
must be repaired by the manufacturer or its
service agent in order to avoid a hazard.
21. Turn OFF the power switch before cleaning
or maintaining the Appliance.
22. The plug must be removed from the
receptacle before cleaning or maintaining the
Charging Dock and AC Adapter.
23. Remove the Appliance from the Charging
Dock and AC Adapter, and turn OFF the
power switch to the Appliance before
removing the battery for disposal of the
Appliance.
24. The battery must be removed and discarded

6
EN
Direct current
Alternating current
according to local laws and regulations
before disposal of the Appliance.
25. When not using the Charging Dock or AC Adapter
for a long period of time, please unplug it.
26. The Appliance must be used in accordance
with the directions in this Instruction Manual.
ECOVACS ROBOTICS cannot be held liable
or responsible for any damages or injuries
caused by improper use.
27. The Robot contains batteries that are only
replaceable by skilled persons. To replace
the Robot’s battery, please contact Customer
Service.
28. If the Robot will not be used for a long time,
fully charge the Robot and power OFF for
storage, and unplug the Charging Dock and
AC Adapter.
29. WARNING: For the purposes of recharging
the battery, only use CH2110 Charging
Dock, GM95-240375-D Power Adapter unit
provided with this appliance.
30. This appliance contains a UV-C emitter.
Unintended use of the appliance or damage
to the housing may result in the escape of
dangerous UV-C radiation. UV-C radiation
may, even in little doses, cause harm to the
eyes and skin. The UV-C emitter cannot be
replaced by user.
To satisfy RF exposure requirements, a separation
distance of 20 cm or more should be maintained
between this device and persons during device
operation.
To ensure compliance, operations at closer than
this distance is not recommended. The antenna
used for this transmitter must not be co-located in
conjunction with any other antenna or transmitter.
Output power of the Wi-Fi module is less than
100mW.
Device Update
Typically, some devices are updated bi-monthly,
but not always so specic.
Some devices, especially those that went on sale
more than three years ago, will only be updated if
a critical vulnerability is found and xed.

7EN
2. Package Contents/2.1 Package Contents
AIRBOT
Quick Start Guide
USB Cable of Air Quality
Monitor
UV Sanitizer Module
Charging Dock Instruction Manual
Air Quality Monitor
Note: Figures and illustrations are for reference only and may differ from actual product appearance.
Instruction ManualQuick Start Guide

8
EN
2. Package Contents/2.2 Product Diagram
Top
Front
TrueDetect 3D
Sensor
AIVI Camera
Microphone
Microphone
Anti-collision
Bumper
Air Outlet
TrueMapping
Distance Sensor
Control Panel
(Power ON)
Back
PM2.5* & VOC* Sensor
Filter
Charging Dock
Signal Sensor Anti-collision
Bumper
UV Sanitizer Module
UV Light
* VOC means Volatile Organic Compounds, such as benzene, toluene,
formaldehyde, etc. AQ (Air Quality) represents the comprehensive
value of PM2.5 status and VOC status.
* PM2.5 means particulate matter in the atmosphere less than or equal
to 2.5 microns in diameter.

9EN
Bottom
Universal Wheels
Charging Contacts
Anti-drop Sensors
Upgrade Port
(For Customer
Service only)
Anti-drop Sensors
Driving Wheels
Battery Cover
Back (Filter Uninstalled)
RESET Button
For network setup: Press the RESET Button.
To restore the factory setting: Press and hold RESET Button for 5
seconds.
Wi-Fi Indicator Power Switch
(“I”=ON; “O”=OFF)

10
EN
Charging Dock Air Quality Monitor
Infrared Signal
Emitter
Charging Contacts
Wi-Fi Indicator
PM2.5 Value
AQ (Air Quality) Indicator
Humidity Value Indicator
Temperature Value Indicator
VOC Value Indicator
Function Button
For Network setup: Press and hold the Function Button, Wi-Fi Indicator flashes
ORANGE.
Scan the QR Code on the Air Quality Monitor to complete Manual Binding.
For completed Network setup: Wi-Fi Indicator on Air Quality Monitor glows WHITE.
To turn off screen: Press the Function Button.
To call for AIRBOT: Double-click the Function Button.
Type-C Plug
USB Cable of Air Quality Monitor
Standard USB Plug
Back of Charging Dock (Open Back Cover)
Power Cord Plug
Power Adapter

11 EN
2. Package Contents/2.3 Sensors
Name Functional Description
TrueMapping Distance Sensor With Laser Ranging-measuring the distance between AIRBOT and surroundings through the time
difference of reection, it can map according to the objects around while AIRBOT is moving.
AIVI Camera With AI Camera’s surrounding image collection, it can realize the video recording and meanwhile assist in
drawing the 3D map. Through the interaction with the MIC, it can realize the Remote Voice Call.
TrueDetect 3D Sensor With Infrared Ranging-measuring the distance between AIRBOT and surroundings through the time
difference of reection, it can identify and avoid the obstacles nearby.
PM2.5 & VOC Sensor
PM2.5 Sensor: According to Laser Scattering, the PM2.5 value of the place can be calculated by
mathematical model and algorithm.
VOC Sensor: According to the resistance value changes of sensitive element caused by the REDOX
reaction of the gas on the semiconductor surface, VOC Sensor can calculate the concentration of VOC
gas in the located space by the algorithm.
Microphone Vibrating the diaphragm through air by human voice, it can realize Voice Recording and ask AIRBOT to
complete the assigned work by Voice Control.
Charging Dock Signal Sensor
With Infrared Emission and Reception by placing Infrared Emission Source in the Charging Dock and
Infrared Receiver in AIRBOT, AIRBOT can identify the position of the Charging Dock and connect to it
when receiving the Infrared Signal, realizing the automatic recharging.
Anti-drop Sensor
With Infrared Ranging-detecting the distance between the bottom of AIRBOT and ground by Infrared
Sensor at the bottom, AIRBOT will not move forward when there are stairs in front or the identied
distance exceeds the preset one, realizing the Anti-drop.

12
EN
Before each use, tidy up the area by putting furniture in their proper
place and remove sundries such as power cords and toys.
AIRBOT can pass a space of no less than 65 centimeters in width.
Please avoid blocking AIRBOT during Mobile Purification.
Open the room doors to allow AIRBOT to explore the home
environment during the first Mobile Purification. AIRBOT may can't
enter the bathroom and the kitchen because of the thresholds.
Do not place items on top of AIRBOT or use AIRBOT as a seat.
3. Using AIRBOT/3.1 Notes Before Use
≥65cm
≥65cm

13 EN
Do not push or tip AIRBOT. Please place guard rail at the entrance of compound staircases and
the edge of steps. Do not place the Charging Dock near stairs or a
drop-off to prevent AIRBOT from falling over the edge.
Do not place the Charging Dock in direct sunlight or near reflective
objects such as mirrors. The strong light and reflection may keep
AIRBOT from finding its way back to the Charging Dock.
Avoid moving the Charging Dock. If the Charging Dock is moved,
AIRBOT may fail to locate itself and may lose the map.

14
EN
Do not use AIRBOT on an angled slope to prevent falling down. Do not place the Charging Dock on a carpet. AIRBOT may fail to
recharge.

15 EN
Remove Protective Materials of AIRBOT
3. Using AIRBOT/3.2 Quick Start
1
Pull out the Handle and Take out the Filter Remove the Package of Filter
2 3

16
EN
Install Air Freshener Module (Sold Separately)
Add Water to Fog-free Humidification Module (Sold Separately)
Install Fog-free Humidification Module (Sold Separately)
Power ON and Install Filter
12
“I”= ON; “O”=OFF.
AIRBOT is powered ON when the control panel is illuminated.
*Press again to remove Air Freshener Module (Sold Separately) .
4 6
5 7
Press

17 EN
Charge AIRBOT
Charging Dock Bottom
Place Charging Dock
Place the Charging Dock on a level oor surface against a wall with the
base perpendicular to the ground. Keep the immediate area 1.5m / 5' in
front of and 0.5m/1.6' on both sides clear of objects and reective surfaces.
Remove Protective Materials of Charging Dock
Note:
* Before charging AIRBOT, please power it ON.
* Charge AIRBOT for a minimum of 4 hours before the rst use.
Place AIRBOT near the Charging Dock. Press and hold on the control
panel for 3 seconds. AIRBOT will return to charge automatically. ashes
when charging starts. glows solid WHITE when AIRBOT is fully charged.
appears when the battery is low.
4
8
9
10
Open the Back Cover and Adjust the Length of Power Cord
Power the Air Quality Monitor
Note:
*The Air Quality Monitor might not be able to be powered via computer
USB ports.
*Please place Air Quality Monitor vertically, and avoid placing it
against the wall
.
2. After the USB connection is completed, Air Quality Monitor starts to
monitor the air quality.
1. Choose the room to monitor and connect Air Quality Monitor to a
home USB port (Rated Input: 5V 1A) with the USB cable.
1
2

18
EN
3. Using AIRBOT/
3.3 ECOVACS HOME App
Method 1: Scan the SN code to download ECOVACS HOME App.
AIRBOT can be operated via ECOVACS HOME App. Download
ECOVACS HOME App to access more features: Mobile Purification,
Area Purfication, In-situ Purification, and Linked Purification.
Method 2: Search the App Store for "ECOVACS HOME" to download
ECOVACS HOME App.
Note:
1. Before network setup, please make sure your mobile phone is
connected to home Wi-Fi.
2. After installing ECOVACS HOME App, please complete the network
setup according to App guidance.
ECOVACS HOME
SN code
3. Using AIRBOT/3.4 Use AIRBOT
Control Panel
1
Indicator Status
Glowing RED Microphone Mute On
Goes out Microphone Mute Off
Glowing WHITE Full battery/Standby/Purifying
Flashing WHITE Charging
Flashing RED Malfunction Alert
Glowing RED Low Battery
UV Sanitizing Indicator
Microphone Mute Button
Air Freshening Indicator
AQ (Air Quality)
Indicator
Humidity Value Indicator
Standby Button
PM2.5 & VOC Indicator
Tempera ture Va lue I ndicator
Humidifying Indicator

19 EN
Indicator Status
Glowing WHITE Air Freshening Started
Flashing WHITE Air Freshening Module is Empty.
Please Replace it
Glowing WHITE UV Sanitizing Started
Flashing WHITE UV Sanitizing Module is out of Service.
Please Replace it
Glowing WHITE Humidifying Started
Flashing WHITE
No Water in Water Tank or Humidification Filter
Expired
PM2.5 Status
0-10——Excellent
11-20——Good
21-50——Medium
51——Poor
VOC Status
Excellent
Good
Medium
Poor
AQ(Air Quality) Status
BLUE
Both VOC Status and PM2.5 Status are Excellent
GREEN
Either VOC Status or PM2.5 Status is Good
ORANGE
Ether VOC Status or PM2.5 Status is Medium
RED
Either VOC Status or PM2.5 Status is Poor
Humidity Value Status
40%-45%
Slight Moisture
50%-55%
Medium Moisture (by default)
60%-65%
Heavy Moisture

20
EN
Turn on Air Freshening/UV Sanitizing via ECOVACS HOME App.
You can switch on Airflow in ECOVACS App or by voice control.
Press
to turn on default In-situ Purification.
Press twice to switch to Mobile Purification. You also can switch
mode by voice control.
Turn on Air Freshening/UV Sanitizing
Mode and Airflow SwitchIn-situ Purification.
Mobile Purification
5
42
3
Note: The PM2.5 value and VOC value will be displayed in the App after
binding.
Air Quality Monitor can monitor the real-time air quality and call for
AIRBOT to turn on Linked Purification.
Scan the QR Code on the Air Quality Monitor. Complete the network
setup according to the instruction. Then, return to AIRBOT main screen
in ECOVACS App and enter into "Map Management --- Air Quality
Monitor" to select the corresponding purification area to complete the
binding.
*Make sure AIRBOT stays connected to the Charging Dock and keeps
charging before the first Mobile Purification. When purification is
enabled, AIRBOT will firstly explore the home environment to create a
map. Please do not follow in case of affecting AIRBOT's recognition
of the surrounding environment.
Bind Purification Areas through Air Quality Monitor
6
*Click the unbinding button in the App to complete unbinding the Air
Quality Monitor.
*
You can use several Air Quality Monitors to monitor the air quality of
more rooms. If necessary, please visit https://www.ecovacs.com/global.
AUTO
Short Press
Press Twice
AUTO
Table of contents
Languages:
Other ECOVACS Cleaning Equipment manuals
Popular Cleaning Equipment manuals by other brands

cedis
cedis e 125.DUS operating instructions

Build with Robots
Build with Robots Breezy Blue Response user manual

SSI
SSI T Series Installation and operation manual

Omegasonics
Omegasonics Viking Pro Plu Operation & instruction manual

Kärcher
Kärcher 4.115-000.0 manual

Cleantecs
Cleantecs SOLA-TECS W Series manual