manuals.online logo
Brands
  1. Home
  2. •
  3. Brands
  4. •
  5. Clarion
  6. •
  7. Car Receiver
  8. •
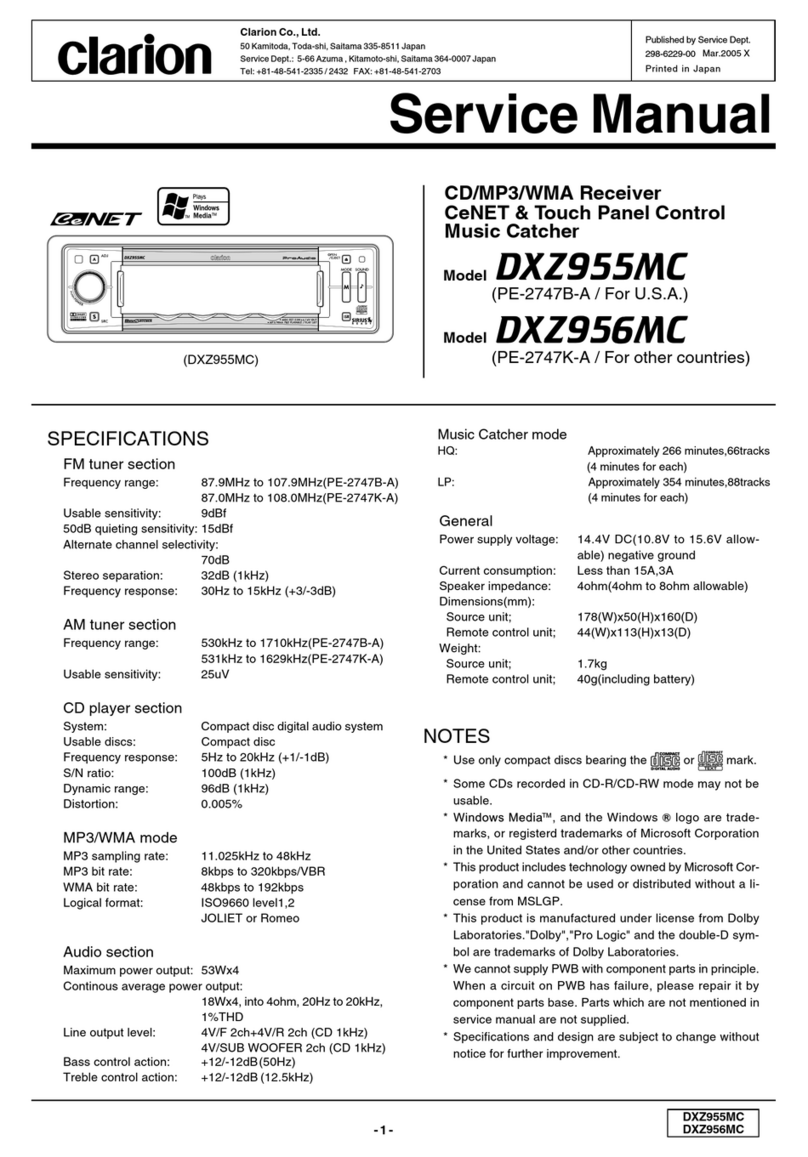
  9. Clarion SIRIUS DSC920S User manual

Clarion SIRIUS DSC920S User manual

Other manuals for SIRIUS DSC920S

1

Other Clarion Car Receiver manuals

Clarion ADB340MP  ADB340MP ADB340MP Instruction Manual

Clarion

Clarion ADB340MP ADB340MP ADB340MP Instruction Manual

Clarion DB156 User manual

Clarion

Clarion DB156 User manual

Clarion DXZ578RUSB User manual

Clarion

Clarion DXZ578RUSB User manual

Clarion EN-1286S-A User manual

Clarion

Clarion EN-1286S-A User manual

Clarion ARX8370R User manual

Clarion

Clarion ARX8370R User manual

Clarion ADB340MP  ADB340MP ADB340MP User manual

Clarion

Clarion ADB340MP ADB340MP ADB340MP User manual

Clarion DXZ555MP Instruction Manual

Clarion

Clarion DXZ555MP Instruction Manual

Clarion DXZ665MP User manual

Clarion

Clarion DXZ665MP User manual

Clarion DXZ865MP Assembly instructions

Clarion

Clarion DXZ865MP Assembly instructions

Clarion VRX6570Rz User manual

Clarion

Clarion VRX6570Rz User manual

Clarion M235 User manual

Clarion

Clarion M235 User manual

Clarion DB358RMP User manual

Clarion

Clarion DB358RMP User manual

Clarion Addzest DXZ825 User manual

Clarion

Clarion Addzest DXZ825 User manual

Clarion DRX4575 User manual

Clarion

Clarion DRX4575 User manual

Clarion DB346MP User manual

Clarion

Clarion DB346MP User manual

Clarion NXS09 Repair manual

Clarion

Clarion NXS09 Repair manual

Clarion DXZS1SUSB User manual

Clarion

Clarion DXZS1SUSB User manual

Clarion Net iDXZ275MP User manual

Clarion

Clarion Net iDXZ275MP User manual

Clarion BKX-1214-11 User manual

Clarion

Clarion BKX-1214-11 User manual

Clarion DB158R User manual

Clarion

Clarion DB158R User manual

Clarion DRX7375R User manual

Clarion

Clarion DRX7375R User manual

Clarion VB475 User manual

Clarion

Clarion VB475 User manual

Clarion DXZ538R User manual

Clarion

Clarion DXZ538R User manual

Clarion FB278RBT User manual

Clarion

Clarion FB278RBT User manual

Popular Car Receiver manuals by other brands

Linear Series LS5050 Operation and installation manual

Linear Series

Linear Series LS5050 Operation and installation manual

Kenwood KRC-160 instruction manual

Kenwood

Kenwood KRC-160 instruction manual

Sony XR-CA430X Service manual

Sony

Sony XR-CA430X Service manual

T+A Elektroakustik K1 CD-RECEIVER operating instructions

T+A Elektroakustik

T+A Elektroakustik K1 CD-RECEIVER operating instructions

SoundMax SM-CDM1052 instruction manual

SoundMax

SoundMax SM-CDM1052 instruction manual

Xtrons HD107HD user manual

Xtrons

Xtrons HD107HD user manual

Mopar RB3 manual

Mopar

Mopar RB3 manual

Sony XAV-601BT Specifications

Sony

Sony XAV-601BT Specifications

PIE GM12-POD/S Operation manual

PIE

PIE GM12-POD/S Operation manual

Hyundai H-910H instruction manual

Hyundai

Hyundai H-910H instruction manual

Sony XR-C6100 Service manual

Sony

Sony XR-C6100 Service manual

Sony CDX-L600X - Fm/am Compact Disc Player Installation/connections

Sony

Sony CDX-L600X - Fm/am Compact Disc Player Installation/connections

Motorola VWA63 Service manual

Motorola

Motorola VWA63 Service manual

Sound Storm STM93R user manual

Sound Storm

Sound Storm STM93R user manual

Nextar D3201 instruction manual

Nextar

Nextar D3201 instruction manual

Alpine CDE-163BT owner's manual

Alpine

Alpine CDE-163BT owner's manual

Kenwood KDC-X303 quick start guide

Kenwood

Kenwood KDC-X303 quick start guide

Axxera XDMA7600 Installation & owner's manual

Axxera

Axxera XDMA7600 Installation & owner's manual

manuals.online logo
manuals.online logoBrands
  • About & Mission
  • Contact us
  • Privacy Policy
  • Terms and Conditions

Copyright 2025 Manuals.Online. All Rights Reserved.

SIRIUS SATE
LUTE
RADIO
RECEIVER CONTROLLER
CONTROLADOR DEL
SINTONIZADOR SIRIUS DE
RECEPCION RADIO VIA
SATE
UTE
\/
~\
SIRIUS
Satellite
Radio
Thank you for purchasing this
* Please read this owner’s manual in its entirety before operating this equipment.
+After reading this manual, be sure to keep it in a handy place (e.g., glove compartment).
* Check the contents of the enclosed warranty card and keep it carefully with this manual.
........................................................................................................ 2
....................................................................................................... 2
.................................................................................................................................... 3
Buttons and their Functions ...................................................................................... 3
.................................................................................................................................. 4
................................................................................................................................. 5
.................................................................................................................... 8
The DSC920S can easily be damaged by
moisture, high temperatures or high humidity.
Keep the inside of the car clean and well
ventilated.
Never subject the DSC92OS to strong shocks
or open its case. Doing so may result in dam-
age.
Use a soft, dry cloth to wipe dirt off the
DSC920S. Never use a hard cloth or thinner,
alcohol, etc. For tough dirt, apply some cold
or lukewarm water to a soft cloth and wipe off
the dirt gently.
The DSC920S has been designed to activate
the Clarion Sirius Satellite Radio Receiver in the
Stand alone mode.
tvloreover, even if the unit was connected with
the main unit compatible with the CeNET con-
nection (Sirius-ready unit built-in), the SIRIUS
Satellite Receiver can be controlled from the
DSC920S or the main unit.
tain a subscriber contract and enable reception
of Sirius Satellite Radio is to call the Sirius Ser-
vice Center (888”539-SIAI) and inform us of
your Sirius ID and a few other details.
“, refer to the subsection
Thank you for purchasing this
Clarion
DSC920S.
*Please read this owner's manual in its entirety before operating this equipment.
*After reading this manual, be sure to keep it in ahandy place (e.g., glove compartment).
*Check the contents
of
the enclosed warranty card and keep it carefully with this manual.
Contents
1. PRECAUTIONS 2
2. SUMMARY
OFTHE
DSC920S 2
3. CONTROLS 3
Names of the Buttons and their Functions 3
Display Items 4
4. OPERATIONS 5
5. INSTALLATION 8
1.
The DSC920S can easily be damaged by
moisture, high temperatures
or
high humidity.
Keep the inside of the car clean and well
ventilated.
2.
Never subject the DSC920S to strong shocks
or open its case. Doing so may result in dam-
age.
3.
Use asoft, dry cloth
to
wipe dirt off the
DSC920S. Never use ahard cloth or thinner,
alcohol, etc. For tough dirt, apply some cold
or
lukewarm water to asoft cloth and wipe off
the dirt gently.
CHANGES OR MODIFICATIONS NOT EX·
PRESSLY APPROVED
BYTHE
MANUFAC·
TURER FOR COMPLIANCE COULDVOIDTHE
USER'S AUTHOR
lTV
TO OPERATETHE
EQUIPMENT.
'li'iOJ;IJftlUlSJatit°hBW;fil
CHANGES OR MODIFICATIONSTO THIS
PRODUCT NOT APPROVED BYTHE
MANU·
FACTURER
Will
VOIDTHE WARRANTY.
The DSC920S has been designed to activate
the Clarion Sirius Satellite Radio Receiver in the
Stand alone mode.
Moreover, even if the unit was connected with
the main unit compatible with the CeNET con-
nection (Sirius-ready unit built-in), the SIRIUS
Satellite Receiver can be controlled from the
DSC920S or the main unit.
2
DSC920S
III
To
receive Sirius Satellite Radio
The Sirius Satellite Radio Receiver that is con-
nected with the DSC920S holds a"SIRIUS 10"
for user identification. All you have to do to ob-
tain asubscriber contract and enable reception
of Sirius Satellite Radio is to call the Sirius Ser-
vice Center (88S-S39-SIRI) and inform us of
your Sirius ID and afew other details.
For your "SIRIUS 10", refer to the subsection
"Verifying
your
SIRIUS
10"
in
the section "OP-
ERATIONS".
e n
* Used to turn the power on or off.
0 Used to switch the Tuning mode (seek/
manual) when pressed and held for 1 second
or longer.
i
@ he Category selection mode on
or off.
e Used to perform the preset scan when the
button is pressed and held for 1 second or
longer.
n
switch the Text mode.
e The text display in the operation status indica-
tion scrolls when the button is pressed and
held for ‘1second or longer.
Q Used to move the channel up or down.
*JUsed to search up or down the channel in the
Category selection mode.
* Used to switch the adjustment item in the Ad-
just mode.
e Used to move the channel faster when kept
pressed.
Used to move the preset channel up or down,
Used to move the category up or down in the
Category selection mode.
Used to switch the item adjustment or the item
in the Adjust mode. (Contrast adjustment,
SIRIUS ID display switching)
I n
* Used to enter the Preset memory mode.
* Received channels are stored in the preset
channels when the button is pressed and held
for 2 seconds or longer.
e Used to enter the Adjust mode when pressed
and held for 1 second or longer. When
pressed, the Adjust mode is terminated.
osc92os
[P-M] button
•Used to enter the
•Received channels are stored in the preset
channels when
lhe
bUtton.
is pres
for 2seconds
Or
longer.
[,&],
[T]
Dutton
•Used to move the preset channel
up
•Used to move the category up.
or
d
Category selection mode.
•Used to switch.the item adjustment
in
the Adjust mode. (Contq3stadjust
SIRIUS
10
display sWitching)
[55]
button
•Used to switch the screen saver.
OFF
SS1
SS2 OFF .
•Used to enter the Adjust mode when pressed
and held for 1second
or
longer. When
pressed, the Adjust mode is terminated.
Names
of
the Buttons
and
theirFunc
[SCAN] outton
oUsed to perform the category scan.
oUsed to perform the preset scan when the
button is pressed and held for 1second
or
longer.
[SAT] button
•Used to turn the power on
or
off.
[CAT] button
•Used to turn the Category selection mode on
or off.
[BAND] button
•Used to switch the reception band.
@Used to switch the Tuning mode (seek!
manual) when pressed and held for 1second
or longer.
[DISP] button
•Used to switch the Text mode.
•The text display
in
the operation status indica-
tion scrolls when the button is pressed and
held for 1second or longer.
[<<III],
[~>]
button
•Used to move the channel up or down.
•Used to search up or down the channel
in
the
Category selection mode.
~
Used to switch the adjustment item in the Ad-
justmode.
•Used to move the channel faster when kept
pressed.
DSC920S
-.--- SAT(satellite) indication
Preset channel indication (1 to 6) x.-.-
--- Operation status
indication
MANU (manual) indication ”
__PRESET indication
__ CAT(category) indication
‘%-SCAN indication
a Lights in the SIRIUS mode, goes off in some * Lights when tuning is performed in the tvlanual
other mode or when the power is turned off. mode.
: channel No.
AST : displayed when the contrast
adjustment is selected in the
Adjust mode.
>> : displayed when the SlRllJS ID
is confirmed.
: displayed when the Category
selection mode is selected.
: displayed when a channel is
being tuned in (no signal is yet
received).
~~~ : displayed when a channel not
covered by your contract is se-
lected.
: displayed when the receiver is
turned on or after a reset.
: a channel without a broadcast
has been selected.
2” or
mode.
* Lights when category scan is performed or
when preset scan is performed.
in n:
un the Category se-
lection mode or when category scan is per-
formed.
0 Lights when the unit enters the Preset
memory mode.
DSC92OS
MANU (manual) indication
----
SAT(satellite) indication
Preset channel indication
(1
to 6) _
.•.•
ICAT(category) indication
"-
SCAN indication
SAl" (satellite) indication:
••
Lightsirl
the SIRIUS mode, goes off in some
othl'1fmOde or when the power is turned off.
Operation status indication:
••Station names, etc. are displayed.
•examples
:channel
No.
PSCAN :preset scan
c;PNTRAST:
displayed when the contrast
adjustment is selected in the
Adjust mode.
ESN»
:displayed when the SIRIUS ID
is confirmed.
:displayed when the Category
selectionmode is selected.
LINKING :displayed when achannel is
being tuned
in
(no signal is yet
received).
NOSIGNUP
:.
displayed when achannel not
covered by your contract is se-
lected.
:displayed when the receiver
.is
turned on
or
after areset.
: a channel without abroadcast
has been selected.
Dindication:
t~when
the band ("SATi", "SAT2" or
13")is
being received in the
SAT
mode.
...
DSC920S
MANU (manual) indication:
•Lights when tuning is performed
in
the Manual
mode.
SCAN indication:
•Lights when category scan is performed
or
when preset scan is performed.
CAT
(category) indication:
3Lights when the unit enters the Category se-
lection mode or when category scan is per-
formed.
PRESET indication:
•Lights when the unit enters the Preset
memory mode.
en the power is turned on,
then the display is changed to the channel
being received.
or longer to enter t
Z-2”.
on for 1 second
:I;When the unit enters the SIRIUS ID display
mode, “ESN>>” is displayed and then the dis-
previous mode.
utton to select a band.
2” or ” 3”)
is light in the display.
There are two channel selection modes: seek
mode and manual mode.
ding channels without broad-
casts and channels not covered by the contract
can be selected during manual tuning.
1. Press and hold the [ ] (BMD) button for
1 second or longer.
e seek mode to manual mode
’ indicator on the display lights.
When this operation is performed in manual
mode, the seek mode is engaged and the
I& ” indicator on the display goes off.
notes:
81The receiver automatic verts to
tfJe
seek
button is not used for
7 seconds in the m
moves to channels above or below the cur-
rent channel one by one.
3. Press and hold the [
The receiver moves to seek channels below
or above the current channel and the chan-
nel found when either button is released is
received.
Only channels that can be received are selected
while channels without broadcasts and channels
not covered by the contract are automatically
nel below or above the current channel.
2. Press and hold the [ ] button.
The receiver moves annels below
or above the current channel. If the channel
found when either button is released is avail-
able that channel is received. Otherwise,
seeking continues until an available channel
is found.
for preset memory and 6
channels for each band, a total of 18 channels
can be stored in memory.
The indication concerning the preset memory is
displayed both in the BAND indication for the
band being received (’ 2”, or
preset stations are recalled in a sequential
order. ] button is pressed and the Pre-
set memory mode is engaged, preset stations
cannot be recalled.
* When the button is pressed, the sound is
muted and reception channel data are dis-
olaved in the Ooeration status indication in the
following order.’
Channel number (for example “CH 0%“) -)
abbreviated 8-digit channel name + returned
to the original display mode
DSC920S
and
recE,pti()n
played
in
following order.
Channel number 11m' "'''Am'
....
I''
abbreviated
R-rllinit
"h;~nrIAI
to the original
DSG920S
3.
Press
and
hold the
[<<ill]
or[I»]for
1$
or
longer.
The
receiver moves
to
seek channe.lsbeloIN
or above
the
current channel
ariel
m~ph3r1
nel found
when
either
button
is released is
received.
~
Seek tuning
Only channels
that
can
be
receivedareselepted
while channels without broadcasts and channels
not
covered by
the
contract are automatically
skipped.
1. Press the
[<~]
or
[1»] button.
The receiver
seeks
the next availa.blechan-
nel below
or
above
the
Gyrr~pt
?~anprl.
2. Press and hold the
[<4iI]
or
[1»] button.
The receiver moves
to
seek chcmnels
or above the current
t;IIi:llllH:il.
found when either button
reIEJ,a§E~d
able that channel
is
let;elveu.
OUlenNise,
seeking continues
isfound.
*
Preset
memory
3bands are
av'3.i1a.ble
l(vnr",,,,,,1
channels for a
can
be
stored in memory.
The indication
cOlnc~lmirlg
displayed both
band being
"SAT3") and in
the preset number.
~
Recailinga
1.
Press the
set station. Each
time
the
preset stations
are
recalled
order.
*When the [P-M] button
set memory mode
cannot be recalled.
Tuningmode
There are two channel selection modes: seek
mode
and manual mode.
~
Manual tuning
Any channel including channels without broad-
casts and channels not covered
by
the
contract
can
be
selected during manual tuning.
1. Press
and
hold the [BAND] (BND) button for
1second
or
longer.
*This changes the seek mode to manual mode
and
the "MANU" indicator on the display lights.
When this operation is performed in manual
mode, the seek mode is engaged and the
"MANU" indicator
on
the display goes off.
Notes:
•The receiverautomatically reverts to the seek
mode when the
r<~]
or
r»->]
button is
not
usedfor
7seconds in the manuaimode.
2. Press the
[<4iI]
or
[1»] button.
The
receiver
moves
to
channels above
or
below
the
cur-
rent channel one by one.
'"
When the unit enters the SIRIUS
10
display
mode,
"E8N»"
is displayed and then the dis-
play is changed
to
the high-order 6digits of
the SIRIUS
10
("012345
'V")
in
the Operation
status indication.
3. Press the
['V]
button
to
change
the
low-or-
der
6digits
of
the SIRIUS
10
("678901
A").
"
To
display the high-order 6digits of the
SIRIUS
ID
again, press the
[AJ
button.
4. Press the
[<4iI]
or
[1»] button to return the
previous mode.
Verifying
your
Sirius
lD
1. Press and hold the [58] button for 1second
or longer to enter
the
Adjust mode.
2. Press the
[<4iI]
or
[1»]
to
select
the
"ESN
»11.
Turning the
power
on/off
1. Press the [SAT] button
to
turn the power
on/
off.
When the power is turned on, "SAT" is dis-
played in the Operation status indication
and
then the display is changed to the channel
being received.
Selectinga
band
1. Press
the
[BAND] button to select aband.
BAND indication ("SATi", "SA.2"
or
"SAT3")
is light in the display.
casual memory
1. Select a channel to be memorized.
x:The reception channel number (“CH WI”) in
the Operation status indication blinks and the
PRESET indication light.
3. Press ] button to select a pre-
set nu morized.
+The selected preset number is displayed in
the Preset channel indication.
4. Press and hold the [
onds or longer to store the channel being re-
ceived in memory.
-&Ii]button is released within less than
ds, preset memory is cancelled and
the Preset memory mode is terminated.
There are two scan modes: a category scan
mode and a preset scan mode.
During scanning channels are displayed in ab-
breviated form and the display mode cannot be
In a category scan, broadcast channels in the
same category as the current channel are se-
N] button to start a category
egory scan.
got@:
] button to cancel a cat-
8 Category scanning is not available when no cat-
ory is defined for the current channel.
eset scan
A preset scan scans the channels (up to 18
channels) stored in the preset memory about
every 10 seconds.
1. Press and hold the [ ~A~] button for 1 sec-
ond or longer to start a preset scan.
N] button to cancel a preset
scan.
] button to enter the category
CAT indication is light in the
] button to select a cat-
lion.
e When the category selection mode is entered, the
category of the last received channel is dispiayed
first.
4 The category selection mode is canceled when
no channel with the selected category can be
found.
e Press the [ button withit?7 seconds af-
ter a channel has been set to continue seeking
channels up or down. The category selection
mode is canceled and normal reception is re-
sumed if no operation is performed for 7 seconds.
channel number channel name (long)
Screen saver mode is engaged, the displayed
text cannot be switched. If this happens, re-
lease the Screen saver mode and scroll the
displayed text again.
:kIf the reception channel is changed, the dis-
y changes in the order of channel number
channel name (short) and then the original
display mode is resumed.
* When there is no text information, the indica-
tion “--------‘I will appear on the display.
t
Scrolling is performed once when the title bemg
selected is changed or when the [ ] button
is pressed and held for 1 second or longer.
* Scrolling is not performed when a channel number,
abbreviated channel name or category is displayed.
DSC92OS
Operations
~
Manual
memory
1.
Select
achannel
to
be
memorized.
2. Press
the
[P-M] button to
enter
the
Preset
memory
mode.
*The reception channel number ("CI-! 051")
in
the Operation status indication blinks and the
PRESET indication light.
3. Press
the
[.6.]
or
[V]
button
to
select
apre-
set
number
to
be memorized.
"The selected preset number is displayed in
the Preset channel indication.
4. Press
and
hold
the
[P-M] button for 2sec-
onds
or
longer
to
store
the
channel
being
re-
ceived in memory.
*
If
the [P-M] button is released within less than
2seconds, preset memory is cancelled and
the Preset memory mode is terminated.
Scan function
There
are
two
scan
modes: a
category
scan
mode
and
a
preset
scan
mode.
During scanning
channels
are displayed in
ab-
breviated form
and
the
display
mode
cannot
be
switched.
~
Category
scanning
In a
category
scan,
broadcast
channels
in
the
same
category
as
the
current
channel
are se-
lected
about
every
10
seconds.
1. Press
the
[SCAN] button
to
start
a
category
scan.
2. Press
the
[SCAN] button
to
cancel a
cat-
egory
scan.
Note:
•Category scanning is not available when no cat-
egory
is
defined for the currentchannel.
@Preset scan
A
preset
scan
scans
the
channels
(up
to
18
channels) stored in
the
preset
memory
about
every
10
seconds.
1.
Press
and
hold
the
[SCAN]
button
for
1sec-
ond
or
longer
to
start
apreset scan.
2. Press
the
[SCAN] button
to
cancel a
preset
scan.
()
OSC920S
Receiving
statkms
selected
by
category
1.
Press
the
[CAT] button to
enter
the
category
selection mode. CAT indication is light in
the
display.
2. Press
the
[.6.]
or
[V]
but10n
to
select acat-
egory.
3. Press the
[<411]
or
[~>]
button
to
tune in asta-
tion.
Notes:
•When the categolyselection mode is entered, the
category
of
the last received channel is displayed
first.
•The categoryselection mode is canceled when
no channel with the selected category can be
found.
•Press the
[<<4]
or
[fi»]
button within 7seconds af-
terachannel has been
set
to continue seeking
channels up
or
down. The category selection
mode is canceled
and
normalreception is re-
sumed
if
no operation is performedfor 7seconds.
Switching the text display
1.
Press the [DISP] button. Each time the
[DISP] button is pressed,
the
item
changes
in
the
follOWing order:
channel
number
~
channel
name
(long)
~
title
~
artist
~
category
~
R-
TEXT
"When the
[01131']
button is pressed while the
Screen saver mode is engaged, the displayed
text cannot be switched. If this happens, re-
lease the Screen saver mode and scroll the
displayed text again.
*If the reception channel is changed, the dis-
play changes
in
the order of channel number
-+
channel name (short) and then the original
display mode is resumed.
*When there
is
no text information, the indica-
tion
"--------,,
will appear
on
the display.
About
the scrolling
of
the displayed text
Scrolling is performed
once
when
the
title being
selected is
changed
or
when
the
[DlSP]
button
is pressed
and
held for 1
second
or
longer.
*Scrolling is notperformed when achannel number,
abbreviated channel name orcategoryisdisplayed.
$1 button to switch the screen
saver. Each time the button is pressed, the
screen saver is switched in the order of
:I:If the screen saver is turned on and the button
operation is performed, the screen saver
mode is released.
After information corresponding to the button
operation is displayed for 30 seconds, the
screen saver displayed is returned.
When “c)FF” is selected, the display is not lit.
(only with backlight)
* If some other mode than SIRIUS mode is se-
lected with the system wire bound using
CeNET, the set screen saver works.
t
atch the
angle of installation of the unit.
*zThe factory default setting is “4”. (Adjustment level :
1 to 7)
1. Press and hold the [S ] button for 1 second
or longer ta enter the Adjust mode.
to adjust the contrast.
to return to the previ-
ous mode.
Switching the screen saver
i.
Press
the
[88]
button to switch
the
screen
saver.
Each
time
the
button is pressed,
the
screen
saver
is
switched in
the
order
of
OFF
...
SS1
...
S82
...
OFF.
'"
If
the screen saver is turned on and the button
operation is performed, the screen saver
mode is released.
After information corresponding to the button
operation is displayed for 30 seconds, the
screen saver displayed is returned.
When "OFF" is selected, the display is not lit.
(only with backlight)
'"
If some other mode than SIRIUS mode is se-
lected with the system wire bound using
CeNET,
Hle
set screen saver works.
Adjusting the display contrast
You
can
adjust
the
display
contrast
to
match
the
angle
of
installation
of
the
unit.
'"
The factory default setting is "4". (Adjustment level:
ito
7)
i.
Press
and
hold the
[88]
button for i
second
or
longer
to
enter
the
Adjust
mode.
2. Press
the
("-J
or
[
..
]
to
adjust
the
contrast.
3. Press the
[88]
button
to
return
to
the
previ-
ous
mode.
080920S
1. This set is exclusively for use in cars with a
negative ground, 12 V power supply.
2. Read these instructions carefully.
3. Be sure to disconnect the battery IL” terminal
before starting. This is to prevent short cir-
cuits during installation. (Figure 1)
Car battery
@ Owner’s manual .......................................... 1
@ Warranty card .............................................. 1
@ Power suply cord.. ....................................... 1
@ Connection cord .......................................... 1
@ Parts bag .......................................................
* Cord holder ................................................ 2
eVelcro tape (large A) .................................. 2
eVelcro tape (small B) .................................. 2
Connect the connection cable securely.
Connect the L-shaped side of the connection
cable to the terminal of the Sirius Satellite Radio
(DSl-l920S).
~fffe:
For other connections, refer to the Owner’s manual
provided with the Sirius Safe/life Radio (L?S1392OS).
DSC92os
Before Installation
1.
This set is exclusively for use in cars with a
negative ground, 12 Vpower supply.
2. Read these instructions carefully.
3.
Be sure to disconnect the battery
"-"
terminal
before starting. This is to prevent short cir-
cuits during installation. (Figure 1)
Car battery
Accessories
CD
Owner's manual 1
@Warranty card 1
®Power suply cord......................................... 1
@Connection cord 1
®Parts bag .
eCord holder 2
eVelcro tape (large A) 2
eVelcro tape (small
B)
2
8DSC920S
Connect the connection cable securely.
Connect the L-shaped side of the connection
cable to the terminal of the Sirius Satellite Radio
(DSH920S).
Note:
For otherconnections, refer to the Owner's manual
provided with the Sirius Satellite Radio (08N9208).
e passenger’s seat
or stick the Velcro tape (large A) to the center
console.
(:Before sticking the Velcro tape. clean the sticking
surface.
‘- Choose a location where the driving of a car is not
hindered and the reception of the signals from the
remote control unit is ensured as well (Figure 2).
cro
tape (small B) to secure it (Figure 3).
:::Before sticking the Velcro tape, clean the sticking
surface.
1’To secure the cord, use the cord holder by sticking
it to the center console, etc. (Figure 4).
ofes:
Do not leave the Control unit at a location (dash-
board, etc.) where the temperature goes high. Oth-
erwise, the unit may be deformed or damaged
2%Screws are not enclosed with unit.
* Be sure to check the screw length. (M3 x 6mm
MAX)
Installation
of
the
Control
unit
II
Installing location
Place
the
Control
unit
on
the
passenger's
seat
or
stick
the
Velcro
tape
(large
A)
to
the
center
console.
"'
Before sticking the Velcro tape, clean the sticking
surface.
••
,Choose alocation where the driving
of
acar is not
hindered and the reception of the signals from the
remote control unit is ensured
as
well (Figure 2).
II
How
to
instail
the
Control
unit
When
installing
the
Control
unit,
use
the
Velcro
tape
(small B)
to
secure
it
(Figure
3).
"Before sticking the Velcro tape, clean the sticking
surface.
,.
To
secure the cord, use the cord holder by sticking
it
to
the center console, etc. (Figure 4).
Notes:
Do notleave the Control unit
at
alocation (dash-
board, etc.) where the temperature goes high. Oth-
erwise, the unit maybe deformed
or
damaged.
UP
,
____
'60
-:+-r
----
3·-'-H
"'
\
__
-+117
---
1fp<J'
How
to
install the Control
unit
(in case
of
using screws) Fig 4
"Screws are
not
enclosed with unit.
*Be sure to check the screw length. (M3 x
6mm
MAX)
Dashboard
--,
'(
'rr~/t.
Velcrotape
Fig 2I
~
_
II.
(large
A)
DSC920S
9
etachthissectionofthecardandkeepitwithyourrecords.
,retainyoursalesreceipttovalidatewarrantyservice.
3,IfyoupurchasesaClarionADXSeries,ProVideoorProAudio
~r~~u~t,besuretocompletetheboxonthelastpageofthisform.
informationonClarionauthorizesWarrantyCenters
maybeobtainerbywritingClarionCorporationattheaggressbelow
orbyfalling
:
ClarionSalesCorporation
WarrantyServiceCenter
661 WestRedondoBeachBlvd.
Gardena,CL!90247
(310)327-9100
ClarionCanada,Inc.
Warrant ServiceCenter
2239 WinstonParkDrive
Oakville,OntarioL6l-l331
(905)829-4600
Product
Registration
for
USA
and
Canada
only
IMPORTAN1\
i.
Detach
this
section
of
the
card
and
keep
it
with
your
records.
2.
Retain
your
sales
receipt
to
validate
warranty
service.
3.
If
you
purchased
a
Clarion
ADX
Series,
Pro
Video
or
Pro
Audio
product,
be
sure
to
complete
the
box
on
the
last
page
of
this
form.
Information
on
Clarion
authorized
Warranty
Centers
may
be
obtained
by
writing
Clarion
Corporation
at
the
address
below
or
by
calling
1-800-GO-ClARION.
In
USA:
Clarion
Sales
Corporation
Warranty
Service
Center
661
West
Redondo
Beach
Blvd.
Gardena,
CA
90247
(310)
327-9100
In
Canada
Clarion
Canada,
Inc.
Warranty
Service
Center
2239
Winston
Park
Drive
Oakville,
Ontario
L6H
5R1
(905)829-4600
www.clarionmultimedia.com