Clas Ohlson KS-3398F-UK User manual

EnglishSvenskaNorskSuomi
Stereo System
Musikanläggning
Musikkanlegg
Ministereo
Art.no Model
18-8148 KS-3398F-UK
38-3511 KS-3398F Ver. 201004

2

3
English
CLASS 1
LASER PRODUCT
ENGLISH
Stereo System
Art. No. 18-8148 Model KS-3398F-UK
38-3511 KS-3398F
Read through the entire instructions carefully before using your music centre and keep
them for future use. We disclaim all responsibility for any errors in texts, pictures and
diagrams, or modifications of technical data. For technical problems or other ques-
tions please contact our Customer Service (see address information on reverse side).
1. Rules of safety
• The product may only be repaired by qualified service personnel.
• The product must not be taken apart or modified.
• Do not cover the equipment. Adequate ventilation, with at least 15 cm
between the ventilation openings and surrounding surfaces are necessary
to prevent overheating.
• Remove batteries if you do not intend to use the music centre for an extended
period to prevent leakage from the battery. The components inside the casing
carry dangerous live voltage unprotected. Contact with them can cause fire
or electric shock.
• The product is intended exclusively for indoor use.
• Never expose your music centre to high temperatures, a dusty environment,
strong vibrations, knocks, moisture, or liquids. Do not place any objects that
contain liquids onto the music centre, e.g., a flowerpot or a soft drink bottle.
• Never place the music centre in such a way that it could fall into water or other
liquids.
• Shut down the power supply to the music centre by removing the plug from the
wall socket. The music centre plug must be easily accessible.
2. Remember safety symbols
Warning do not open casing!
The components inside the music centre carry dangerous
high voltage. Contact with them can result in fire or
electric shocks.
CLASS 1 LASER APPARATUS
Warning! Do not open casing! Invisible laser beams that
can cause eye injury are inside the music centre casing.
Do not look straight into the beam and do not look
directly at it via an optical instrument.

4
English
AUX
PHONE FM ANT
1 2 3 4 5 6
7 8
3. Product description
• Stereo system with CD/MP3-player and AM/FM-radio.
• Outlet for USB-memory and SD-card.
• Outlet for stereo headphones, 3.5 mm.
• Low-level input.
• Remote control included.
• Your music centre can also be mounted to a wall.
• Operates on the accompanying battery eliminator.
• Size of main unit 29 x 20 x 9 cm, speakers 12 x 20 x 9 cm.
4. Buttons and functions
1. R – Connection for right speaker
2. L – Connection for left speaker
3. PHONES – Connection for headphones.
4. AUX – Connection for external sound source
5. DC 10 V – DC-connection 10 V, 1 A (+ in centre)
6. Antenna
7. Hole for attaching to wall
8. Table support (extendable)

5
English
AUX
PHONE FM ANT
9
10
11
12 13 14 15 16 17 18 19 20 21 22
23
24
9. CD-lid
10. [FUNCTION/STANDBY] Function selector and power switch.
11. Control lamp. Shines brightly when “STANDBY”-position is enabled.
12. [MEM+/PLAY MODE/AL. ON/OFF] Select desired radio station (from among
stations stored in memory), disable/enable alarm.
13. [MEM/CLK ADJ] Set time, confirm.
14. [– VOLUME/AL.SET] Lower volume, set alarm.
15. [+ VOLUME/SNOOZE] Increase volume, press to enable snooze function.
16. Remote control sensor
17. LCD display
18. [9/-SKIP/TUNE] One tune back.
19. [:/+SKIP/TUNE] One tune forward.
20. [<BAND] Stop Select wavelength AM-FM.
21. [4;/ST/MONO] Start recording or make a pause, choose mono or stereo.
22. [ /OPEN/CLOSE] Open or close CD-lid.
23. Flash Card. Connection for CD Card.
24. USB-Connection.

6
English
25
26
30
34
41
43
44
35
42
45
46
47
48
36
37 38
40
39
27
31
28
32
29
33
49
Remote control
25. [ ] Power switch 0 – 1.
26. [FUNCTION] Function toggle.
Choose among: CD – TUNER – AUX –
USB – SD.
27. [REPEAT] Repeats. Select between
“REPEAT ONE” (repeats the tune
playing) and “REPEAT ALL” (repeats all).
28. [SLEEP] Sleep-function.
Select to enable/disable automatic
switch-off function
29. [OPEN/CLOSE] Open/close CD-lid.
30. [AL.ON/OFF] Alarm enable/disable
automatic alarm function.
31. [AL.SET] Sets alarm time/confirm.
32. [INTRO] Plays the first 10 seconds of
every track.
33. [RANDOM] Randomly plays all tracks.
34. [TRACK -10] Plays track 10 in reverse
35. [TRACK +10] Plays track 10 forward.
36. [FOLDER-M.UP] Go to next radio
station/track in memory/folder.
37. [9] Go back to previous.
38. [SNOOZE/ID3 DISPLAY]
“Sleep”-position for another 5 minutes;
show artist information.
39. [:] Go forward to the next.
40. [FOLDER-M.DN] G] Go to previous
radio station/track in memory/folder
41. [STOP/BAND] CD: Stops playing;
Radio: Switches between AM and FM.
42. [4
;/ST./-MONO] CD
Start or pause play; Radio: Toggle
between stereo and mono.
43.[EQ] Select among different sound
patterns (EQ).
44. [BASS] Enable/disable base
enhancement.
45. [PROGRAM CLOCK ADJ] Saves radio
station/CD-track in memory; sets clock.
46. [MUTE] Temporarily switches off sound.
47. [VOL+] Increases volume.
48. [VOL-] Lowers volume.
49. Battery holder.

7
English
5. Getting started
Insert batteries in remote control
1. Take out remote control battery holder (on one short side).
2. Reinsert battery holder (with battery) in remote control,
3. Insert the battery (CR2025, 3 V) into the battery holder as marked on the holder.
4. Insert the battery holder (with battery) into remote control. Turn the marking
Upward up toward the buttons.
Caution! Do not expose battery to high temperatures.
Placement
Place your music station on a table (first pull out table support) or attach it to a wall.
Connect speakers
Connect the left speaker to connection “L” (2) and the right speaker to
the connection “R” (1).
Caution! Always connect speakers before you switch on the music centre.
6. Use
6.1 CLOCK
Caution! The music centre must be in standby position when the time is set.
1. Press [MEM/CLK ADJ] (13). “24” blinking.
2. Select time display format: 12- or 24-hour display with [9/-SKIP/TUNE] (18) or
[:/+SKIP/TUNE] (19).
3. Press [MEM/CLK ADJ] (13) again to confirm the setting.
4. Press [9/-SKIP/TUNE] (18) or [:/+SKIP/TUNE] (19) to set hour.
5. Press [MEM/CLK ADJ] (13) to confirm setting.
6. Continue in the same way to set the second display.
* Control lamp (11) is illuminated.
6.2 ALARM
The clock must be set before the alarm time can be set.
1. Press [- VOLUME/AL.SET] (14) or [AL.SET] (31) to set the alarm time.
2. Hour display blinking, Press [9] (37) or [:] (39) to set the right hour.
3. Press [AL.SET] (31) to confirm.
4. Minute display blinking. Press [9] (37) or [:] (39) to input the correct minute.
Press [AL.SET] (31) to confirm.
5. “BUZZ” blinking on display. Press [9] (37) or [:] (39) to select desired function:
BUZZ (buzzer), TUNER (radio), CD, USB, CARD (memory card).

8
English
Caution!
• If you select “USB” or “CD” you must not remove the selected sound pattern
from the music centre if the alarm is enabled.
• When the preset time has been reached the buzzer sounds or the music centre
starts automatically. Press [+ VOLUME/SNOOZE] (15) or [SNOOZE/ID3 DISPLAY]
(38) to enable snooze function* for 5 minutes. After 5 minutes the buzzer
sounds again.
*The snooze function works only if “BUZZER” is selected.
Caution! The settings are deleted if you pull out the electrical cord.
6.3 EQ
Setting the equaliser (sound pattern): Press [EQ] (43) several times and choose
among: NO EQ (neutral sound pattern)-CLASSIC-JAZZ-ROCK-POP.
6.4 BASE
Enable/disable base enhancement by pressing [BASS] (44). When this function
is enabled “BASS” appears at top of display.
6.5 SLEEP
Your music centre shuts off automatically after a certain time (up to 90 minutes).
1. Press [SLEEP] (28) several times and select desired time for shutdown. SLEEP
90 appears first on the display; press several times to count down the time to the
desired shutdown time in 10-minute intervals.
2. As soon as the preset time has elapsed, the music centre shuts down.
3. Switch off the SLEEP-FUNCTION by pressing [SLEEP] (28) several times down to
“10” and then press one more time.
6.6 MUTE
Turn off sound temporarily by pressing [MUTE] (46). Press again to restore sound.
6.7 FUNCTION
Select desired function by pressing [FUNCTION] (26) repeatedly: CD (CD-disk) –
TUNER (radio) – AUX (external sound source) – USB (USB-memory) –
SD (memory card).
6.8 Listening to CD/MP3
1. Switch on music centre by pressing [FUNCTION/STANDBY] (10) or [ ] (25).
2. Press [FUNCTION/STANDBY] (10) or [FUNCTION] (26) to select “CD”.
3. Open CD-lid (9) by pressing [ /OPEN/CLOSE] (22) or [OPEN/CLOSE] (29).
4. Press a CD disk firmly onto the spindle.
5. Close CD-lid by pressing [ /OPEN/CLOSE] (22) or [OPEN/CLOSE] (29).

9
English
6.9 Adjusting the volume
Adjust the volume with the knobs: [- VOLUME/AL.SET] (14), [+ VOLUME/SNOOZE]
(15), [VOL+] (47) or [VOL-] (48). Press [BASS] (44) if you wish to enhance base.
6.10 Play and Pause
1. Press [4;/ST/MONO] (21) to start playing.
2. Press [4;/ST/MONO] (21) once more to stop playing temporarily (Pause).
3. Press [4;/ST/MONO] (21) once more to resume playing after play has been
put on pause.
6.11 Select the preceding track or the next track
Press [9/-SKIP/TUNE] (18) or [9] (37) to go to the preceding track.
Press [:/+SKIP/TUNE] (19) or [:] (39) to go to the next track.
6.12 Stopping play
Press [<BAND] (20) or [STOP/BAND] (41) CD: Stops play. Radio: Toggles between
AM and FM.
6.13 Programming a play list
I CD/MP3-position, press [PROGRAM CLOCK ADJ] (45) or [MEM/CLK ADJ] (13) to
enable the memory function.
CD-position
In CD-position with play stopped:
1. “T00” blinking.
2. “P01” appears; select desired track with [9] (37) or [:] (39), Press [PROGRAM
CLOCK ADJ] (45) or [MEM/CLK ADJ] (13) to confirm your selection.
3. Continue in the same way with the other tracks; up to 20 tracks can be stored
in the memory.
MP3-position
In MP3-position with play stopped:
1. “F00” blinking.
2. “P01” appears, select desired folder with [9] (37), [:] (39), [FOLDER-M.DN] (40)
or [FOLDER-M.UP] (36). Press [PROGRAM CLOCK ADJ] (45) or [MEM/CLK ADJ]
(13) to confirm your selection.
3. “T00” blinking.
4. Select desired track with [9] (37) or [:] (39). Press [PROGRAM CLOCK ADJ] (45)
or [MEM/CLK ADJ] (13) to confirm your selection.
5. Continue in the same way with the other tracks; up to 99 tracks can be stored in
the memory. Press [4;/ST/MONO] (21) to start play.

10
English
You can delete the play list by:
• Pressing [<BAND] (20) or [STOP/BAND] (41) to stop play.
• Pressing [ /OPEN/CLOSE] (22) to open CD-lid.
6.14 Repeating
Press repeatedly on [MEM+/PLAY MODE/AL. ON/OFF] (12) or [REPEAT] (27) to repeat
play. The display shows the function selected:
• REPEAT 1 – the track playing is repeated several times.
• REPEAT ALL– the entire CD-disk/USB-memory is played several times.
• REPEAT FOLDER (only in MP3-position) – the entire folder is played again.
• RANDOM –repeats all tracks in random order.
• INTRO – plays the first 10 seconds of each track.
6.15 Listening to the radio
1. Switch your music centre on by pressing [FUNCTION/STANDBY] (10) or [ ] (25).
2. Press [FUNCTION/STANDBY] (10) or [FUNCTION] (26) to select “TUNER”.
3. Press [<BAND] (20) or [STOP/BAND] (41) to select wavelength AM (medium
wave) or FM.
4. Select stereo or mono with [4;/ST./-MONO] (42) or [4;/ST/MONO] (21).
“Stereo” appears on the display when there is a stereo reception. Select Mono
if reception is poor where you are.
Set the desired station
Manual station search: Press repeatedly [9] (37) or [:] (39).
Automatic station search: Press down and hold: [9] (37) or [:] (39) for two seconds
to start search, The search starts when the radio finds a station. Press and hold down
again to find the next station.
Caution! Improve AM-reception by turning the music centre about. Improve FM-
reception by unwinding the wire antenna as far as it goes and try placing the music
centre in another location.
6.16 Store a radio frequency in the memory
The radio station you are listening to can be stored in the memory at any time.
1. Press [PROGRAM/CLOCK ADJ] (45) or [MEM/CLK ADJ] (13).
2. Press [MEM+/PLAY MODE/AL. ON/OFF] (12) to store the station under a specific
number.
3. Press [9] (37) or [:] (39) to select desired radio station.
4. Press [PROGRAM/CLOCK ADJ] (45) or [MEM/CLK ADJ] (13) to confirm and
save the setting.
40 channels can be stored in the memory, 20 channels for FM and 20 for AM.
Caution! Retrieve radio stations from the station memory with the buttons
[FOLDER-M.DN] (40) or [FOLDER-M.UP] (36).
There is no need to delete the station memory, just save another station at
this memory site.

11
English
6.17 Using with an external power source (AUX)
1. Press [FUNCTION/STANDBY] (10) or [FUNCTION] (26) to select “AUX IN”.
2. Connect the sound source to AUX (4) with a cable that has 3.5mm stereo plug
(cable not included).
3. Start play from the connected external sound source,
4. Adjust the volume on the music centre with [VOL+] (47) or [VOL-] (48). Adjust
volume of the connected external sound source if the sound is poor.
6.18 Using with USB-memory
1. Press [FUNCTION/STANDBY] (10) or [FUNCTION] (26) to select USB.
2. Open CD-lid (9) by pressing [ /OPEN/CLOSE] (22) or [OPEN/CLOSE] (29).
3. Insert USB-memory into USB-Connection (24). Close CD-lid.
4. “USB” appears on the display.
5. Start play with [4;/ST./-MONO] (42).
6. Adjust volume on the music centre with [VOL+] (47) or [VOL-] (48).
6.19 Using the SD/MMC memory card
1. Press [FUNCTION/STANDBY] (10) or [FUNCTION] (26) to select SD/MMC CARD.
2. Open CD-lid (9) by pressing [ /OPEN/CLOSE] (22) or [OPEN/CLOSE] (29).
3. Connect memory card to FLASH CARD (23). Close CD-lid.
4. “SD/MMC” appears on display.
5. Start play with [4;/ST. /-MONO] (42).
6. Adjust volume on music centre with [VOL+] (47) or [VOL-] (48).
7. Play stops when all tracks have been played
6.20 Listening with the headphones
Adjust the volume downward and connect the headphones to PHONES (3). When the
headphones are connected the speakers automatically go silent.
7. Care and Maintenance
Dry the music centre with a soft, dry cloth to clean the music centre, Do not use
detergent containing alcohol, ammonia, gasoline or polisher as they could damage
the casing.

12
English
8. Trouble-shooting chart
The music centre will not switch on.
Check that battery eliminator and DC-plugs are correctly connected.
No sound from speakers.
• Check that the speakers are connected correctly.
• Check whether the volume is on “0”.
• Check that the correct ”FUNCTION” has been selected: CD – TUNER –
AUX – USB – SD.
• Check that the headphones are connected to the output (3). If they are, the
speakers are automatically shut off.
Poor sound.
• Sources of interference (TV, refrigerator etc.) are located close by.
Move the music centre.
• Check that the radio is correctly tuned (for radio listening).
• Decrease the volume.
Remote control does not work.
• Ensure that there are no obstructions between the remote control and
the music centre’s sensor (16).
• Aim remote control straight at the music centre’s sensor (16).
• Bright sunlight beaming directly into the sensor (16) can interfere with transmission.
• Check the batteries in the remote control. Replace if needed.
CD-disc cannot be read.
• When there are major changes of temperature, vapour can form on the player’s
lens. Wait a while to allow the vapour to evaporate
Cannot record files from USB or SD/MMC.
• Use only USB-MSC (USB-MTP is not supported).
• Check that memory has files in MP3- or WMA-format.
• Check that the memory card is not more than 2 GB (HCSD not supported).
• DRM-encrypted WMA-files are not supported.
CD-player will not start.
• Check that the CD-disc is correctly placed in the player.
• Check that the CD-disc is not damaged, scratched or dirty.
• Check that the disc has files in MP3 or WMA format.
• DRM-encrypted WMA-files are not supported.
Play is marred by brief interruptions.
• Check that the CD-disc is not damaged, scratched or dirty. Make sure your music
centre is situated in a place without vibrations.
One single track plays over and over.
• Check REPEAT-setting (if it is enabled, it will show on the display).
• Check that CD-lid (9) is shut.
”FUNCTION” cannot be used.
• Check that CD-lid (9) is shut.

13
English
9. Disposal
Make sure you comply with local regulations when discarding the device.
If you are not sure what to do, contact your local authorities.
10. Specifications
Power supply: 230 V AC, 50 Hz
Output: 2 x 2.5 W
Measured: Main music centre 29 x 20 x 9 cm
Speakers12 x 20 x 9 cm
Radio
Frequency range: AM 522 – 1620 KHz
FM 88 – 108 MHz
CD-player
Pickup: 3-beam
Frequency range: 100 Hz ~ 16 KHz

14
Svenska
CLASS 1
LASER PRODUCT
ENGLISH
Musikanläggning
Art.nr 18-8148 Modell KS-3398F-UK
38-3511 KS-3398F
Läs igenom hela bruksanvisningen före användning och spara den sedan för framtida
bruk. Vi reserverar oss för ev. text- och bildfel samt ändringar av tekniska data. Vid tek-
niska problem eller andra frågor, kontakta vår kundtjänst (se adressuppgifter på baksidan).
1. Säkerhetsföreskrifter
• Produkten får endast repareras av kvalificerad servicepersonal.
• Produkten får inte demonteras eller ändras.
• Täck inte över anläggningen. Tillräcklig ventilation, med ett minsta avstånd på
15cm mellan ventilationsöppningarna och omgivande ytor, är nödvändig för att
förhindra överhettning.
• Tag ur batterierna om enheten inte ska användas under en längre period.
Detta för att förhindra att batterierna börjar läcka.
• Produkten får inte demonteras eller ändras. Farlig spänning finns oskyddat på
komponenter inuti produktens hölje. Kontakt med dessa kan leda till brand eller
ge elektriska stötar.
• Produkten är avsedd endast för inomhusbruk.
• Utsätt aldrig produkten för höga temperaturer, dammig miljö, starka vibrationer,
stötar, fukt eller väta.
• Placera inte produkten så att den kan falla ner ivatten eller annan vätska. Ställ
inte heller några föremål som innehåller vätska på produkten, t.ex. en blomvas
eller läskedryck.
• Bryt strömmen till apparaten genom att dra apparatens stickpropp ur vägguttaget.
Apparatens stickpropp måste vara lättåtkomlig.
2. Lägg märke till dessa säkerhetssymboler
Varning! Öppna inte höljet! Farlig spänning finns oskyddat på
komponenter inuti produktens hölje. Kontakt med dessa kan leda
till brand eller ge elektriska stötar.
KLASS 1 LASERAPPARAT
Varning! Öppna inte höljet! Osynlig laserstrålning som kan orsaka
ögonskador finns inuti produktens hölje. Rikta inte blicken in mot
strålen och titta inte direkt på den genom optiska instrument.

15
Svenska
AUX
PHONE FM ANT
1 2 3 4 5 6
7 8
3. Produktbeskrivning
• Musikanläggning med CD/MP3-spelare och AM/FM-radio
• Uttag för USB-minne och SD-kort
• Uttag för stereohörlurar, 3,5 mm
• Lågnivåingång
• Fjärrkontroll medföljer
• Musikanläggningen kan även väggmonteras
• Drivs med medföljande batterieliminator
• Storlek huvudenhet 29 x 20 x 9 cm, högtalare 12 x 20 x 9 cm
4. Knappar och funktioner
1. R – Anslutning för höger högtalare
2. L – Anslutning för vänster högtalare
3. PHONES – Anslutning för hörlurar
4. AUX – Anslutning för yttre ljudkälla
5. DC 10 V – DC-anslutning 10 V, 1 A (+ icentrum)
6. Antenn
7. Upphängningshål
8. Bordsstöd (utfällbart)

16
Svenska
AUX
PHONE FM ANT
9
10
11
12 13 14 15 16 17 18 19 20 21 22
23
24
9. CD-lock
10. [FUNCTION/STANDBY] Funktionsväljare och strömbrytare
11. Kontrollampa Lyser starkt vid aktiverat ”STANDBY”-läge
12. [MEM+/PLAY MODE/AL. ON/OFF] Välj önskad radiostation (av de stationer
som är sparade iminnet), stäng av/aktivera alarm
13. [MEM/CLK ADJ] Inställning av tid, bekräfta
14. [- VOLUME/AL.SET] Sänk volym, inställning av alarm
15. [+ VOLUME/SNOOZE] Öka volym, tryck för att aktivera snoozefunktion
16. Sensor för fjärrkontroll
17. LCD display
18. [9/- SKIP/TUNE] Stega bakåt
19. [:/+ SKIP/TUNE] Stega framåt
20. [<BAND] Stoppa uppspelning, välj våglängd AM-FM
21. [4;/ST/MONO] Starta uppspelning eller gör paus, välj mono eller stereo
22. [ /OPEN/CLOSE] Öppna eller stäng CD-locket
23. USB-anslutning
24. Flash Card. Anslutning för minneskort

17
Svenska
25
26
30
34
41
43
44
35
42
45
46
47
48
36
37 38
40
39
27
31
28
32
29
33
49
Fjärrkontrol
25. [ ] Strömbrytare 0 – 1
26. [FUNCTION] Funktionsomkopplare.
Välj mellan: CD – TUNER – AUX –
USB – SD
27. [REPEAT] Repetition. Välj mellan
”REPEAT ONE” (repetera den
pågående) och ”REPEAT ALL”
(repetera alla)
28. [SLEEP] Sleep-funktion. Välj att
aktivera/stänga av automatisk
avstängningsfunktion
29. [OPEN/CLOSE] Öppna/stäng CD-locket
30. [AL.ON/OFF] Alarm aktivera/stäng av
automatisk alarmfunktion
31. [AL.SET] Inställning av alarmtid/bekräfta
32. [INTRO] Spela upp de första
10sekunderna av varje spår
33. [RANDOM] Spela upp alla spår
i slumpvis ordning
34. [TRACK -10] Spela upp spår 10 bakåt
35. [TRACK +10] Spela upp spår 10 framåt
36. [FOLDER-M.UP] Gå till nästa
radiostation/spår på minne/mapp
37. [9] Gå tillbaka till föregående
38. [SNOOZE/ID3 DISPLAY] ”Sleep”-läge
i 5 minuter till; visa artistinformation
39. [:] Gå framåt till nästa
40. [FOLDER-M.DN] Gå till föregående
radiostation/spår på minne/mapp
41. [STOP/BAND] CD: Stoppa avspelning;
Radio: Växla mellan AM och FM
42. [4;/ST./-MONO] CD: Starta eller
gör paus vid avspelning; Radio: Växla
mellan stereo och mono
43. [EQ] Välj mellan olika ljudbilder (EQ)
44. [BASS] Aktivera/stäng av bashöjning
45. [PROGRAM CLOCK ADJ] Spara
radiostation/CD-spår iminnet; Inställning
av klocka
46. [MUTE] Stäng av ljudet tillfälligt
47. [VOL+] Öka volymen
48. [VOL-] Minska volymen
49. Batterihållare

18
Svenska
5. Kom igång med produkten
Sätt ibatterier ifjärrkontrollen
1. Dra ut fjärrkontrollens batterihållare (på ena kortsidan).
2. Tryck in batterihållaren (med batteri) ifjärrkontrollen.
3. Sätt ibatteriet (CR2025, 3 V) ibatterihållaren enligt märkningen på hållaren.
4. Tryck in batterihållaren (med batteri) ifjärrkontrollen. Vänd märkningen Upward
uppåt mot knapparna.
Obs! Utsätt inte batteriet för hög temperatur.
Placering
Placera musikanläggningen på ett bord (vik ut bordsstödet före) eller häng upp den på
en vägg.
Anslut högtalare
Anslut den vänstra högtalaren till anslutningen L (2) och den högra till anslutningen R (1).
Obs! Anslut alltid högtalarna innan du slår på musikanläggningen.
6. Användning
6.1 Klocka
Obs! Musikanläggningen måste vara istandbyläge* när tiden ställs in.
1. Tryck på [MEM/CLK ADJ] (13). ”24” blinkar.
2. Välj visningsformat: 12- eller 24-timmarsvisning med [9/-SKIP/TUNE] (18) eller
[:/+SKIP/TUNE] (19).
3. Tryck på [MEM/CLK ADJ] (13) igen för att bekräfta inställningen.
4. Tryck på med [9/-SKIP/TUNE] (18) eller [:/+SKIP/TUNE] (19) för att ställa in
timangivelsen.
5. Tryck på [MEM/CLK ADJ] (13) för att bekräfta inställningen.
6. Fortsätt på samma sätt med minutangivelsen.
* Kontrollampan (11) lyser.
6.2 Alarm
Klockan måste ställas in innan alarmtiden går att ställa in.
1. Tryck på [- VOLUME/AL.SET] (14) eller [AL.SET] (31) för att ställa in alarmtid.
2. Timangivelsen blinkar, Tryck på [9] (37) eller [:] (39) för att ställa in rätt timme.
3. Tryck på [AL.SET] (31) för att bekräfta.
4. Minutangivelsen blinkar. Tryck på [9] (37) eller [:] (39) för att ställa in rätt minut.
Tryck på [AL.SET] (31) för att bekräfta.
5. ”BUZZ” blinkar på displayen. Tryck på [9] (37) eller [:] (39) för att välja önskad
funktion: BUZZ (summer), TUNER (radio), CD, USB, CARD (minneskort).
Obs! Om du väljer ”USB” eller ”CD” får du inte ta bort den valda ljudkällan från
musikanläggningen om alarm är aktiverat.

19
Svenska
6. När den inställda tiden nås ljuder summern eller så startar musikanläggningen
automatiskt. Tryck på [+ VOLUME/SNOOZE] (15) eller [SNOOZE/ID3 DISPLAY] (38)
för att aktivera snoozefunktionen* i5 minuter. Efter 5 minuter ljuder summern igen.
*Snoozefunktionen fungerar endast om ”BUZZER” är valt.
Obs! Inställningarna raderas om du drar ur nätsladden.
6.3 EQ
Inställning av equalizer (ljudbild): Tryck på [EQ] (43) upprepade gånger och välj mellan:
NO EQ (neutral ljudbild)-CLASSIC-JAZZ-ROCK-POP.
6.4 BASS
Aktivera/stäng av bashöjning genom att trycka på [BASS] (44). När denna funktion är
aktiverad visas ”BASS” överst på displayen.
6.5 SLEEP
Automatisk avstängning av musikanläggningen efter en viss tid (upp till 90 minuter).
1. Tryck på [SLEEP] (28) upprepade gånger och välj önskad tid till avstängning.
”SLEEP 90” visas först på displayen, tryck flera gånger för att räkna ner tiden till
avstängning i10 minutersintervaller.
2. Efter inställd tid stängs musikanläggningen av.
3. Stäng av SLEEP-FUNCTION genom att trycka på [SLEEP] (28) upprepade gånger
ner till 10 och tryck sedan en gång till.
6.6 MUTE
Stäng av ljudet tillfälligt genom att trycka på [MUTE] (46). Tryck en gång till för att
aktivera ljudet igen.
6.7 FUNCTION
Välj önskad funktion genom att trycka på [FUNCTION] (26) upprepade gånger:
CD (CD-skiva) – TUNER (radio) – AUX (yttre ljudkälla) – USB (USB-minne) –
SD (minneskort).
6.8 Lyssna på CD/MP3
1. Slå på musikanläggningen genom att trycka på [FUNCTION/STANDBY] (10) eller
[ ] (25).
2. Tryck på [FUNCTION/STANDBY] (10) eller på [FUNCTION] (26) för att välja ”CD”.
3. Öppna CD-locket (9) genom att trycka på [ /OPEN/CLOSE] (22) eller [OPEN/
CLOSE] (29).
4. Tryck fast en CD-skiva på spindeln.
5. Stäng CD-locket genom att trycka på [ /OPEN/CLOSE] (22) eller [OPEN/CLOSE] (29).

20
Svenska
6.9 Justera volymen
Justera volymen med knapparna: [- VOLUME/AL.SET] (14), [+ VOLUME/SNOOZE] (15),
[VOL+] (47) eller [VOL-] (48). Tryck på [BASS] (44) om du vill öka basåtergivningen.
6.10 Play och Paus
1. Tryck på [4;/ST/MONO] (21) för att starta uppspelning.
2. Tryck på [4;/ST/MONO] (21) en gång till för att tillfälligt stoppa
uppspelningen (Paus).
3. Tryck på [4;/ST/MONO] (21) en gång till för att återuppta uppspelningen
där den avbröts.
6.11 Välj föregående spår eller nästa spår
Tryck på [9/-SKIP/TUNE] (18) eller [9] (37) för att gå till föregående spår.
Tryck på [:/+SKIP/TUNE] (19) eller [:] (39) för att gå till nästa spår.
6.12 Stoppa uppspelning
Tryck på [<BAND] (20) eller [STOP/BAND] (41) CD: Stoppa avspelning; Radio: Växla
mellan AM och FM.
6.13 Programmera in en spellista
I CD/MP3-läge, tryck [PROGRAM CLOCK ADJ] (45) eller [MEM/CLK ADJ] (13) för att
öppna minnesfunktion.
CD-läge
I CD-läge med stoppad uppspelning:
1. ”T00” blinkar.
2. ”P01” visas välj önskat spår med [9] (37) eller [:] (39), Tryck på [PROGRAM
CLOCK ADJ] (45) eller [MEM/CLK ADJ] (13) för att bekräfta ditt val.
3. Fortsätt lika med de övriga spåren. Upp till 20 kan sparas iminnet.
MP3-läge
I MP3-läge med stoppad uppspelning:
1. ”F00” blinkar.
2. ”P01” visas, välj önskad mapp med [9] (37), [:] (39), [FOLDER-M.DN] (40) eller
[FOLDER-M.UP] (36). Tryck på [PROGRAM CLOCK ADJ] (45) eller [MEM/CLK
ADJ] (13) för att bekräfta ditt val.
3. ”T00” blinkar.
4. Välj önskat spår med [9] (37) eller [:] (39). Tryck på [PROGRAM CLOCK ADJ]
(45) eller [MEM/CLK ADJ] (13) för att bekräfta ditt val.
5. Fortsätt lika med de övriga spåren. Upp till 99 kan sparas iminnet.
Tryck på [4;/ST/MONO] (21) för att starta uppspelning.
This manual suits for next models
3
Table of contents
Languages:
Other Clas Ohlson Stereo System manuals

Clas Ohlson
Clas Ohlson KW-1009 User manual

Clas Ohlson
Clas Ohlson Z-789-PM3UCiA-UK User manual

Clas Ohlson
Clas Ohlson KW-1021MP3USB User manual

Clas Ohlson
Clas Ohlson MDU156C-UK User manual

Clas Ohlson
Clas Ohlson KW-1019iPH User manual

Clas Ohlson
Clas Ohlson F71-UK User manual

Clas Ohlson
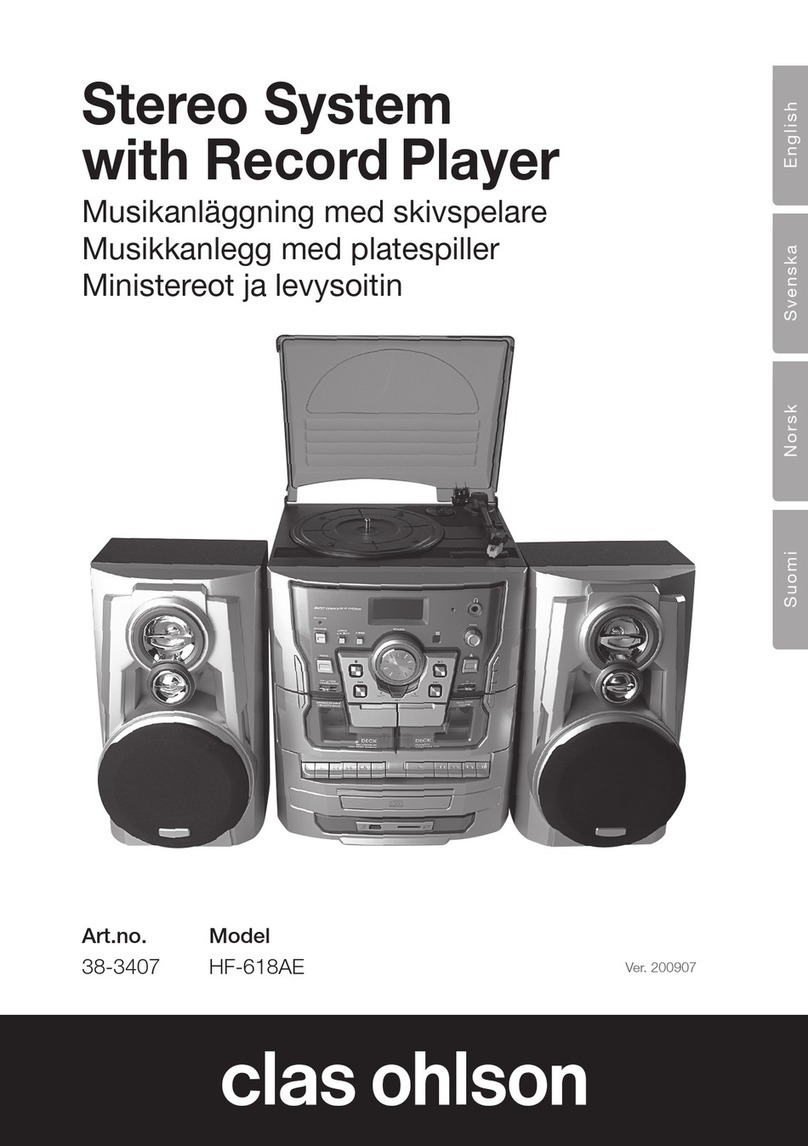
Clas Ohlson HF-618AE User manual