Clas Ohlson KW-1019iPH User manual

EnglishSvenskaNorskSuomi
Stereo system with
iPod/iPhone dock
Musikanläggning med iPod-/iPhonedocka
Musikkanlegg med iPod-/iPhone-dokkingstasjon
Ministereot joissa iPod/iPhone-telakka
Art.no Model
18-8229 KW-1019iPH-UK
38-4097 KW-1019iPH Ver. 201104

2
English
Stereo system with iPod/iPhone dock
Art.no 18-8229 Model KW-1019iPH-UK
38-4097 KW-1019iPH
Please read theentire instruction manual before use and save it for future reference.
Wereserve theright for any errors in text or images and for making any necessary
technical changes to this document. Ifyou should have any questions concerning
technical problems please contact our Customer Services.
Safety
• Do not dismantle or modify theproduct. Unprotectedhazardous voltage is present
on components inside thecase of theproduct. Contactwith these components
may result in fire or electric shock.
• Do not cover theproduct. Sufficientventilation is essential to prevent theproduct
from overheating. Theremust be agap of at least 15 cm between theventilation
holes and surrounding surfaces.
• Use only therecommended power adaptor supplied.
• Make sure that thepower adaptor is connected to awall socket supplying
100–240 V AC, 50–60 Hz.
• Make sure that thewall socket into which thepower adaptor is plugged is
accessible, since theplug on themains lead is used to disconnect theproduct
from thesupply.
• Do not place theproduct where it may fall into water or some other liquid. Donot
place objects containing liquid, such as aflower vase or adrink, on theproduct.
• The product is only intended to be used indoors.
• Never expose theproduct to high temperatures, adusty environment, severe
vibrations, impacts, humidity and moisture.
• Do not mistreat themains lead. Neveruse themains lead to carry theproduct.
Donot pull on themains lead. Gripthebody of theadapter when unplugging it.
Makesure that themains lead does not come into contact with heat or sharp
edges and that it is not crushed.
• If there is lightning or if theproduct is to be unused for along time, unplug
thepower adaptor from thewall socket.
• The standby switch on theproduct is in thesecondary circuit and does not isolate
theproduct from theelectrical supply. Toisolate thedevice completely from
thepower supply it must be unplugged from thewall socket.
• Protect your hearing. Listeningwith thevolume set too high for along time may
result in permanent damage to your hearing.
• Only qualified service personnel may repair theproduct.

3
English
CLASS 1
LASER PRODUCT
ENGLISH
Specifications
Frequency range FM: 87.5–108 MHz
Mp3 32–320 kbps (max 999 files)
USB stick Max 16 GB
Output power 4 W
Mains supply 100–240 V, 50–60 Hz
Power consumption 15 W
Size (w x h x d) 480 x 280 x 150 mm
Weight 2.3 kg
Caution: Do not open the casing! Certain unprotected
components within the product’s casing carry
dangerous currents. Contact with these can lead to
fire or give electric shocks.
CLASS 1 LASER PRODUCT
Caution: Do not open the casing! Product contains
invisible laser beams which can cause eye damage.
Do not look directly into the laser beam or look directly
at it through an optical instrument.
Note the following safety symbols

4
English
OPEN/CLOSE
15
1 4 9 122 5 10 133 6 7 8 11 14
OPEN/CLOSE
OPEN/CLOSE
16 17 18 19 20 21 22
Controls and functions
Front
Back Top

5
English
1. [ ] On/Off
2. [ VOLUME – ] Lower volume
3. [ PRE – ] Choose apreset radio station, downwards in thefrequency band;
choose folder on mp3 playback
4. [ FUNCTION ] Choose Tuner, CD, USB, iPod or AUX
5. [ VOLUME + ] Raise volume
6. [ PRE + ] Choose apreset radio station, upwards in thefrequency band;
choose folder on mp3 playback
7. Display
8. [ ENTER ] Move forward in theiPod menu
9. [ MEMORY/CLOCK ] Store radio channels/set clock/program playback
10. [ MENU ] Go back in theiPod menu
11. [ |◄◄ ] Previous
12. [ ] Open/close CD door. Thedoor can only be opened when
theCD function has been chosen.
13. [ ►/II ] Play/Pause
14. [ ►►| ] Next
15. IR sensor for signals from theremote control
16. Wall brackets
17. Connection for supplied power adaptor (12 V DC, 1500 mAh)
18. Wire aerial for FM reception
19. Wall brackets
20. Port for USB memory stick
21. iPod/iPhone dock
22. AUX IN

6
English
OPEN/CLOSE
24
23
25
26
27
28
29
30
31
32
33
34
35
36
37
38
39
40
41
42
43
Remote control
23. [ ] On/off
24. [ ST./MONO/ID3/ESP ] Choose
stereo/mono when receiving radio.
Todisplay ID3 on mp3 playback,
hold down thebutton for two
seconds. ESP (anti-shake function).
25. [ EQ ] Choose equaliser settings
26. [ FUNCTION ] Choose Tuner, CD,
USB, iPod or AUX
27. [ MENU ] Go back in theiPod menu
28. [ |◄◄ ] Go back in theplaylist by
pressing thebutton briefly or rewind
in thechosen track by holding down
thebutton.
29. [ ►/II ] Play/Pause
30. [ MEMORY/CLOCK ] Store radio
channels/set clock/program playback
31. [ FOLDER/PRE ] Choose mp3 folder
or preset radio station
32. [ REPEAT ] Choose from repeat options
33. [ 0–9 ] Number keys
34. [ SLEEP ] Set sleep timer
35. [ ] Open/close CD door. Thedoor
can only be opened when theCD
function has been chosen.
36. [ MUTE ] Silent
37. [ DBBS ] Bass boost
38. [ ENTER ] Move forward in
theiPod menu
39. [ |◄◄ ] Go forward in theplaylist
by pressing thebutton briefly or
fast-forward in thechosen track by
holding down thebutton.
40. [ STOP ] Stop playback
41. [ VOLUME ] +/- Volume control
42. [ RANDOM ] Random playback
43. [ TIMER ] Wake-up timer

7
English
IR sensor
Max distance 7 metres
Getting started
Insert thebatteries (2 x AAA/LR03) into theremote control, making sure that
thepolarity is correct.
Setting theclock
When theunit is plugged into awall socket, theclock display starts to flash.
Do not press [ ] to start theunit. Itmust be off to set theclock.
Procedure:
1. Hold down [ MEMORY/CLOCK ] for two seconds. Thedisplay shows, “12 HOUR”.
The“12” is flashing. Press[ |◄◄ ] or [ ►►| ] to choose 24-hour display.
2. Press [ MEMORY/CLOCK ] to confirm. Thehours digits flash.
3. Press [ |◄◄ ] or [ ►►| ] to set thehours.
4. Press [ MEMORY/CLOCK ] to confirm. Theminutes digits flash.
5. Press [ |◄◄ ] or [ ►►| ] to set theminutes.
6. Press [ MEMORY/CLOCK ]. Thepresent time is displayed.
When an iPod or iPhone is connected
• The clock in theunit is synchronised automatically to theiPod/iPhone clock
within60 seconds.
• The clock can be synchronised manually with an iPod/iPhone by holding
down[ MEMORY/CLOCK ].
• The clock is set for 12-hour display thefirst time it is synchronised.
• Set 24-hour display as explained above.
• The display only shows theclock when theunit is in standby mode.

8
English
Use
The unit has wall mounting brackets (16, 19). Ifit is mounted on awall, make sure that
it is securely fixed and that thepower lead is not trapped.
Use theremote control or thetouch controls on theunit to choose and control
thevarious functions.
Certain functions can only be operated from theremote control. Theseare:
DBBS: Bass boost. Thedisplay shows “DBBS” when this function is chosen.
EQ: Preset equaliser settings are chosen by pressing [ EQ ] repeatedly:
FLAT, CLASSIC, ROCK, POP, JAZZ. Thechosen setting (apart from “FLAT”) appears
on thedisplay. Findout by experiment which setting sounds best for thetype of music
you listen to and theroom where theunit is located.
MUTE: Press [ MUTE ] to silence thesound temporarily. “MUTE” flashes on thedisplay.
Pressagain to unmute thesound.
REPEAT: Press [ REPEAT ] repeatedly to choose from thevarious repeat options on
playback from CD, USB or iPod.
• On playback from CD:
The display shows – repeat one track.
The display shows ALL – repeat all tracks.
• On playback from USB memory stick or aCD with mp3 files:
The display shows – repeat one track.
The display shows and “ALBUM flashes” – repeat all tracks in thecurrent folder.
The display shows ALL – repeat all tracks.
• On playback from iPod:
By pressing [ REPEAT ] you can control therepeat options of your iPod.
• On playback from iPhone:
The repeat options cannot be controlled with theremote control of theunit. Setup
your iPhone for therepeat options you want before you connect it.
RANDOM: Press [ RANDOM ] to activate random playback from CD, USB or iPod.
• On playback from iPhone:
The RANDOM function cannot be controlled with theremote control of theunit.
Ifyou want random playback, set your iPhone to RANDOM before you connect it.
CD
As well as standard 12 cm CDs, theCD player can also play mini-CDs (8 cm).
1. Press [ FUNCTION ] repeatedly and choose CD.
2. Press [ OPEN/CLOSE ] to open theCD door. LoadaCD with its label facing outwards.
3. Press [ OPEN/CLOSE ] to close theCD door. Thedisplay flashes “READING” for
afew seconds, then shows thetotal number of tracks and thetotal playing time.

9
English
Track number Position on the playlist
4. Control theplayback and repetition of various tracks with theremote control or
theunit’s touch controls as described above.
5. You can also choose tracks by using thenumber keys of theremote control.
6. Example: Press [ 0 ][ 3 ], then [ ►/II ] to start playback of track 3.
Programmed playback
Up to 64 tracks can be pre-programmed to be played back in agiven order.
• The tracks can only be programmed when playback is stopped.
• The same track can be programmed more than once.
1. Load theCD you want to program. Press[ FUNCTION ] repeatedly and choose CD.
2. Press [ MEMORY/CLOCK ].
3. Choose thetrack you want to program as track 1 with [ |◄◄ ] or [ ►►| ]
(or use thenumber keys on theremote control to choose tracks).
4. Press [ MEMORY/CLOCK ] to open thenext position in theplaylist to program
atrack.
5. Repeat steps 2 and 3 above to program more tracks.
6. Press [ ►/II ] to start theprogrammed playback.
- When all theprogrammed tracks have been played back, playback ends.
- The programming is stored in memory.
- To check theorder of theprogrammed tracks press [ MEMORY/CLOCK ]
repeatedly when playback has been stopped.
- To play theCD in thenormal way, press [ STOP ], then [ ►/II ].
- To return to programmed playback, press [ STOP ] – [ MEMORY/CLOCK ] – [ ►/II ].
Adding anew track to thepre-programmed playlist
1. Stop theplayback and press [ MEMORY/CLOCK ] repeatedly until thedisplayed
track number is “00”.
2. Choose atrack as described above.
3. Press [ MEMORY/CLOCK ].
Changing apre-programmed track
1. Stop theplayback and press [ MEMORY/CLOCK ] repeatedly until thetrack
number you want to change is displayed.
2. Choose anew track as described above.
3. Press [ MEMORY/CLOCK ].

10
English
Folder number Track number
Mp3
1. Connect aUSB memory stick containing mp3 files to theUSB port (20) or load
aCD containing mp3 files.
2. Press [ FUNCTION ] repeatedly and choose USB or CD.
3. The display flashes “READING” for afew seconds, then shows thetotal number of
folders and files.
4. Control theplayback and repetition of various tracks with theremote control or
theunit’s touch controls as described above.
• Choosing afolder: Press [ FOLDER/PRE ] UP or DN.
• For ascrolling display of track title, artist name and album name: Hold down
[ ST./MONO/ID3/ESP ] for two seconds. Toreturn to normal display, hold down
[ ST./MONO/ID3/ESP ] again.
• Searching for certain tracks or folders:
- Press [ ST./MONO/ID3/ESP ] once during playback to show thefile name.
- Press [ |◄◄ ] or [ ►►| ] to choose thefirst letter (A-Z) or number (0–9) of
thefile name.
- Press [ ST./MONO/ID3/ESP ] twice during playback to show thefolder name.
- Press [ |◄◄ ] or [ ►►| ] to choose thefirst letter (A-Z) or number (0–9) of
thefolder name.
- To return to normal display, press [ ST./MONO/ID3/ESP ] once.
Programmed playback of mp3 files
• The procedure is thesame as for programmed playback from CD described
above, but theappearance of thedisplay is different:
iPod/iPhone
1. Open thedoor of theiPod/iPhone dock.
2. When connecting your iPod/iPhone, use one of theplastic holders supplied.
Ifaplastic holder was supplied with your iPod/iPhone when you bought it, you can
use that. NOTE: Take care not to damage theunit or thedock when connecting
your iPod/iPhone. YouriPod/iPhone is on charge while theunit is switched on.
3. Press [ FUNCTION ] repeatedly and choose IPOD or IPHONE.

11
English
Your iPod can be controlled with theunit’s remote control or with thetouch controls
on theunit, as follows:
• [ ENTER ]: Move forward in theiPod menu.
• [ MENU ]: Move back in theiPod menu.
• [ FOLDER/PRE UP-DN ]: Move up or down in theiPod menu.
• Press [ |◄◄ ] or [ ►►| ] to move forward or back in theplaylist.
• Press [ ►/II ] to start or pause playback.
• Press [ RANDOM ] and/or [ REPEAT ] on theremote control to control
these functions in your iPod.
• To stop playback completely, do so on your iPod, not on theunit.
Your iPhone can be controlled with theunit’s remote control or with thetouch controls
on theunit, as follows:
• Press [ |◄◄ ] or [ ►►| ] to move forward or back in theplaylist.
• Press [ ►/II ] to start or pause playback.
• To stop playback completely, do so on your iPhone, not on theunit.
Radio
• Press [ FUNCTION ] repeatedly and choose TUNER.
Tuning radio stations automatically
• Hold down [ |◄◄ ] or [ ►►| ] for two seconds to search down or up in
thefrequency band. Theunit stops at thefirst station it finds. Tocontinue
searching, press again.
Tuning radio stations manually
• Briefly press [ ◄◄ ] or [ ►►| ] to move down or up in thefrequency band.
Storing preset radio stations
Up to 20 preset stations can be stored in thememory.
1. Tune in thestation to be stored, as described above.
2. Press [ MEMORY/CLOCK ]. Thechannel number flashes.
3. If necessary, press [ FOLDER/PRE ] UP/DN to choose achannel number to store
thestation. Youcan also choose achannel number by using thenumber keys of
theremote control.
4. Press [ MEMORY/CLOCK ]. Thechannel number flashes. Thepreset radio station
isnow stored.
5. Repeat theabove steps to store more preset stations.

12
English
Hours Minutes
Listening to preset stations
• Use [ FOLDER/PRE ] UP/DN or [ PRE + ]/[ PRE – ] to scroll through thepreset stations.
Youcan also choose stations by using thenumber keys of theremote control.
Stereo/mono
The display shows “ST” if theradio station being received is transmitting in stereo.
Press [ ST./MONO/ID3/ESP ] to choose stereo or mono.
Tip!
If radio reception is poor, thesound may be better if you choose mono.
Listening to other audio sources
1. Press [ FUNCTION ] repeatedly and choose AUX.
2. Connect theother audio source to theAUX input (22) on top of theunit.
Wake-up timer
1. Make sure theclock is set to thecorrect time.
2. To use theradio, choose theradio station you want.
3. Connect an iPod/iPhone or aUSB memory stick or load aCD, if you want to use
one of these sources.
4. Hold down [ TIMER ] for two seconds. Thetimer symbol appears and
thedisplay briefly shows “ON TIME”. Thehours setting starts to flash.
5. Press [ |◄◄ ] or [ ►►| ] to set thehours.
6. Briefly press [ TIMER ]. Theminutes start to flash.
7. Press [ |◄◄ ] or [ ►►| ] to set theminutes.
8. Briefly press [ TIMER ]. Settingof theon time is now complete and “OFF TIME”
starts to flash on thedisplay.
9. Repeat steps 5–8 above to set theoff time.
10. Press [ TIMER ]. “TUNER” flashes on thedisplay. Press[ |◄◄ ] or [ ►►| ] to choose
an audio source.
11. Press [ TIMER ]. “VOL” flashes on thedisplay.
12. Press [ |◄◄ ] or [ ►►| ] to set thevolume you want.
13. Press [ TIMER ]. Yoursettings are displayed in turn. Thedisplay then returns to normal.
14. Press [ ]. Thedisplay shows thetimer symbol.

13
English
• If theunit was in standby mode when you started to do thesettings, step 11 is not
necessary. Theunit turns off automatically.
• The wake-up timer repeats daily.
• To cancel thewake-up timer, press [ TIMER ]. Thesymbol disappears from thedisplay.
• If iPod/iPhone, USB memory stick or CD is chosen as an audio source for
thewake-up timer and if none of these is connected/loaded, theunit uses radio as
theaudio source.
Sleep timer
1. Press [ SLEEP ] repeatedly and choose thesleep time you want: 120, 90, 60, 30 or
15 minutes. Thedisplay shows a“sleep symbol”.
2. To disable thesleep timer, press [ SLEEP ] repeatedly and choose OFF.
Care and maintenance
• If theunit is to be unused for along period, unplug it from thewall socket and
remove thebatteries from theremote control.
• Never touch thelaser in theCD player. Removeany dust by blowing.
• Clean theoutside of theunit with aslightly damp cloth. Neveruse strong cleaning
agents or solvents.
Troubleshooting guide
• The unit does not work/
cannot be controlled with
theremote control.
• The appearance of
thedisplay is not normal.
Switch off theunit and unplug thepower adaptor
from thewall socket.
Plug thepower adaptor into thewall socket again.
• The remote control does
not control theunit.
Replace thebatteries in theremote control.
Aim theremote control directly at theunit.
Max angle 15º, max distance 7 metres.
Disposal
When thetime comes to dispose of theproduct, do so in accordance with local
regulations. Ifyou are not sure what to do, ask your local authority.

14
Svenska
Musikanläggning med
iPod-/iPhonedocka
Art.nr 18-8229 Modell KW-1019iPH-UK
38-4097 KW-1019iPH
Läs igenom hela bruksanvisningen före användning och spara den sedan för framtida
bruk. Vireserverar oss för ev. text- och bildfel samt ändringar av tekniska data.
Vidtekniska problem eller andra frågor, kontakta vår kundtjänst (se adressuppgifter
påbaksidan).
Säkerhet
• Produkten får inte demonteras eller ändras. Farligspänning finns oskyddad på
komponenter inuti produktens hölje. Kontaktmed dessa kan leda till brand eller
geelektriska stötar.
• Täck inte över anläggningen. Tillräckligventilation, med ettminsta avstånd på
ca15 cm mellan ventilationshålen och omgivande ytor, är nödvändig för att
förhindra att anläggningen blir för varm.
• Använd endast medföljande eller rekommenderad nätadapter.
• Se till att nätadaptern ansluts till ettvägguttag som har 100–240 V AC, 50–60 Hz.
• Se till att uttaget där nätadaptern sitter är lättillgängligt eftersom nätadaptern på
apparatens nätsladd används som frånkopplingsanordning från nätet.
• Placera inte produkten så att den kan falla ner ivatten eller annan vätska. Ställinte
heller några föremål som innehåller vätska på produkten, t.ex. enblomvas eller dryck.
• Produkten är endast avsedd för inomhusbruk.
• Utsätt aldrig produkten för höga temperaturer, dammig miljö, starka vibrationer,
stötar, fukt eller väta.
• Misshandla inte nätsladden. Bäraldrig produkten inätsladden. Ryckinte isladden,
ta tag inätadaptern när du bryter strömmen. Setill att nätsladden inte kommer
ikontakt med värme, vassa kanter eller kläms på något sätt.
• Dra ur nätadaptern ur vägguttaget vid åska eller om produkten inte ska användas
under enlängre period.
• Standbyomkopplaren på apparatens framsida är sekundärt kopplad och skiljer
inte apparaten från elnätet. Föratt fullständigt skilja apparaten från elnätet måste
apparatens nätadapter tas ur vägguttaget.
• Skydda din hörsel. Att lyssnamed hög volym under lång tid kan leda till
beståendehörselskador.
• Produkten får endast repareras av kvalificerad servicepersonal.

15
Svenska
CLASS 1
LASER PRODUCT
ENGLISH
Specifikationer
Frekvensområde FM: 87,5–108 MHz
Mp3 32–320 kbps (max 999 filer)
USB-minne Max 16 GB
Uteffekt 4 W
Nätanslutning 100–240 V, 50–60 Hz
Strömförbrukning 15 W
Storlek (B x H x D) 480 x 280 x 150 mm
Vikt 2,3 kg
Varning! Öppnainte höljet! Farligspänning finns
oskyddad på komponenter inuti produktens hölje,
kontakt med dessa kan leda till brand eller ge
elektriska stötar.
KLASS 1 LASERAPPARAT
Varning! Öppnainte höljet! Osynliglaserstrålning kan
orsaka ögonskador. Riktainte blicken in mot strålen
och titta inte direkt på den genom optiskainstrument.
Lägg märke till dessa säkerhetssymboler

16
Svenska
OPEN/CLOSE
15
1 4 9 122 5 10 133 6 7 8 11 14
OPEN/CLOSE
OPEN/CLOSE
16 17 18 19 20 21 22
Knappar och funktioner
Framsida
Baksida Ovansida

17
Svenska
1. [ ] Standby (På/Av)
2. [ VOLUME – ] Minska volym
3. [ PRE – ] Välj förinställd radiostation, nedåt ifrekvensbandet,
välj mapp vid mp3-uppspelning.
4. [ FUNCTION ] Välj Tuner, CD, USB, iPod eller AUX
5. [ VOLUME + ] Öka volym
6. [ PRE + ] Välj förinställd radiostation, uppåt ifrekvensbandet,
välj mapp vid mp3-uppspelning.
7. Display
8. [ ENTER ] Gå framåt iiPodmenyn
9. [ MEMORY/CLOCK ] Lagra radiokanaler/ställ klockan/programmera uppspelning
10. [ MENU ] Gå bakåt iiPodmenyn
11. [ |◄◄ ] Föregående
12. [ ] Öppna/stäng CD-luckan, kan bara öppnas när CD-funktionen är vald
13. [ ►/II ] Play/Paus
14. [ ►►| ] Nästa
15. IR-sensor för fjärrkontrollens signaler
16. Väggfästen
17. Anslutning för medföljande nätadapter (12 V DC, 1500 mAh)
18. Trådantenn för FM-mottagning
19. Väggfästen
20. Anslutning för USB-minne
21. iPod-/iPhonedocka
22. AUX IN

18
Svenska
OPEN/CLOSE
24
23
25
26
27
28
29
30
31
32
33
34
35
36
37
38
39
40
41
42
43
Fjärrkontroll
23. [ ] Standby (Av/På)
24. [ ST./MONO/ID3/ESP ]
Välj stereo/mono vid radio-
mottagning. Förvisning av ID3
vid mp3-uppspelning, håll in
knappen i2 sekunder. ESP
(antiskakfunktion).
25. [ EQ ] Välj olika equaliserinställningar
26. [ FUNCTION ] Välj Tuner, CD, USB,
iPod eller AUX
27. [ MENU ] Gå bakåt iiPodmenyn
28. [ |◄◄ ] Gå bakåt ispellistan
genom att trycka in knappen kort
eller spola bakåt idet valda spåret
genom att hålla in knappen.
29. [ ►/II ] Play/Paus
30. [ MEMORY/CLOCK ] Lagra
radiokanaler/ställ klockan/
programmera uppspelning
31. [ FOLDER/PRE ] Välj mp3-mapp
eller förinställd radiostation
32. [ REPEAT ] Välj olika
repetitionsalternativ
33. [ 0–9 ] Siffertangenter
34. [ SLEEP ] Ställ in insomningstimer
35. [ ] Öppna/stäng CD-luckan, kan
bara öppnas när CD-funktionen
är vald.
36. [ MUTE ] Tyst
37. [ DBBS ] Förstärkt basåtergivning
38. [ ENTER ] Gå framåt iiPodmenyn
39. [ ►►| ] Gå framåt ispellistan
genom att trycka in knappen
kort eller spola framåt idet valda
spåret genom att hålla in knappen.
40. [ STOP ] Stoppa uppspelning
41. [ VOLUME ] +/- Volymkontroll
42. [ RANDOM ] Slumpvis uppspelning
43. [ TIMER ] Uppvakningstimer

19
Svenska
IR-sensor
Max 7 meters avstånd
Att komma igång
Sätt ibatterierna (2 x AAA/LR03) ifjärrkontrollen, se till att polariteten blir rätt.
Ställ in klockan
När anläggningen ansluts till ettvägguttag börjar klockdisplayen blinka.
Tryck inte på [ ] för att starta anläggningen, den ska vara avslagen.
Gör så här:
1. Håll in [ MEMORY/CLOCK ] i2 sek, ”12 HOUR” syns idisplayen. ”12” blinkar, tryck
[ |◄◄ ] eller [ ►►| ] för att välja 24-timmarsvisning.
2. Tryck [ MEMORY/CLOCK ] för att bekräfta. Timmarnablinkar.
3. Tryck [ |◄◄ ] eller [ ►►| ] för att ställa in timmarna.
4. Tryck [ MEMORY/CLOCK ] för att bekräfta. Minuternablinkar.
5. Tryck [ |◄◄ ] eller [ ►►| ] för att ställa in minuterna.
6. Tryck [ MEMORY/CLOCK ], den aktuella tiden visas.
När eniPod eller iPhone ansluts
• Anläggningens klocka synkroniseras automatiskt till iPod-/iPhoneklockan inom
60sekunder.
• Klockan kan när som helst manuellt synkroniseras med eniPod/iPhone genom att
hålla in [ MEMORY/CLOCK ].
• Klockan kommer att bli inställd på 12-timmarsvisning vid första synkronisering.
• Ställ in 24-timmarsvisning enligt ovan.
• Klockan syns bara idisplayen när anläggningen är istandbyläge.

20
Svenska
Användning
Anläggningen har fästen för väggmontering (16, 19). Omden väggmonteras, se till att
den sitter fast ordentligt och att inte nätsladden kommer ikläm.
Använd fjärrkontrollen eller touchkontrollerna på anläggningen för att välja och styra de
olika funktionerna.
Några funktioner kan bara styras från fjärrkontrollen, dessa är:
DBBS: Förstärker basåtergivningen, ”DBBS” syns idisplayen när funktionen väljs.
EQ: Genom att trycka upprepade gånger på [ EQ ] kan olika förinställda equaliserin-
ställningar väljas: FLAT, CLASSIC, ROCK, POP, JAZZ. Deolika inställningarna som
väljs (utom ”FLAT”) kommer att visas idisplayen. Provadig fram till vad som låter bäst
beroende på musiktyp och det rum där anläggningen är placerad.
MUTE: Tryck [ MUTE ] för att tillfälligt stänga av ljudet, ”MUTE” blinkar idisplayen.
Trycken gång till för att slå på ljudet igen.
REPEAT: Tryck [ REPEAT ] upprepade gånger för att välja olika repetitionsalternativ vid
uppspelning från CD, USB eller iPod.
• Vid uppspelning från CD:
syns idisplayen – upprepa ettspår.
ALL syns idisplayen – upprepa alla spår.
• Vid uppspelning från USB-minne eller CD med mp3-filer:
syns idisplayen – upprepa ettspår.
syns idisplayen och ALBUM blinkar – upprepa alla spår iden aktuella mappen.
ALL syns idisplayen – upprepa alla spår.
• Vid uppspelning från iPod:
Genom att trycka [ REPEAT ] kan repetitionsalternativen idin iPod styras.
• Vid uppspelning från iPhone:
Repetitionsalternativen kan inte styras med anläggningens fjärrkontroll. Ställin din
iPhone på de repetitionsalternativ som önskas innan den ansluts.
RANDOM: Tryck [ RANDOM ] för att aktivera slumpvis uppspelning från CD, USB
elleriPod.
• Vid uppspelning från iPhone:
RANDOM-funktionen kan inte styras med anläggningens fjärrkontroll.
Om så önskas ställ in din iPhone på RANDOM innan den ansluts.
CD
CD-spelaren kan förutom vanliga CD-skivor (12 cm) även hantera mini-CD (8 cm).
1. Tryck upprepade gånger på [ FUNCTION ] och välj CD.
2. Tryck [ OPEN/CLOSE ] för att öppna CD-luckan. PlaceraenCD-skiva på sin plats
med etiketten utåt.
3. Tryck [ OPEN/CLOSE ] igen för att stänga CD-luckan. ”READING” blinkar idisplayen
inågra sekunder och sedan visas det totala antalet spår och den totala speltiden.
This manual suits for next models
1
Table of contents
Languages:
Other Clas Ohlson Stereo System manuals

Clas Ohlson
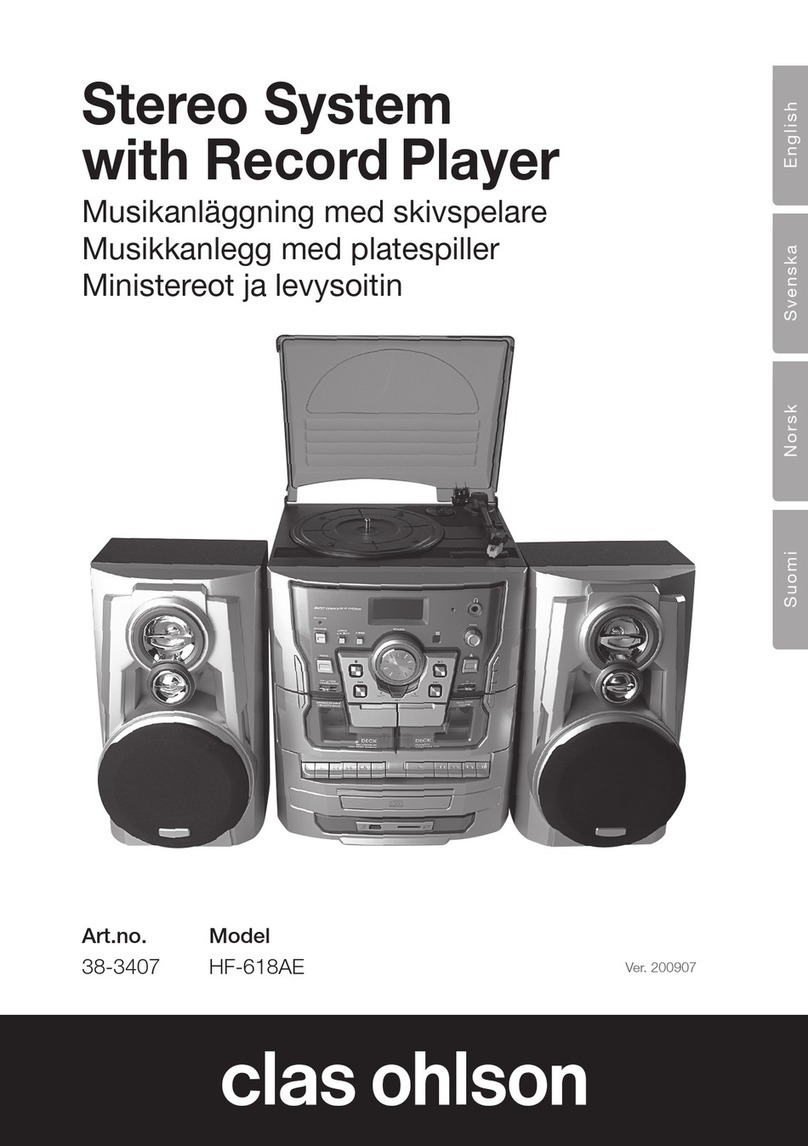
Clas Ohlson HF-618AE User manual

Clas Ohlson
Clas Ohlson MDU156C-UK User manual

Clas Ohlson
Clas Ohlson KW-1021MP3USB User manual

Clas Ohlson
Clas Ohlson KW-1009 User manual

Clas Ohlson
Clas Ohlson KS-3398F-UK User manual

Clas Ohlson
Clas Ohlson Z-789-PM3UCiA-UK User manual

Clas Ohlson
Clas Ohlson F71-UK User manual