Clavitech MP6110 User manual

USER S MANUAL
,
MP6110
Digital Piano

1) Read these instructions.
2) Keep these instructions.
3) Heed all warnings.
4) Follow all instructions.
5) Do not use this apparatus near water.
6) Clean only with dry cloth.
7) Do not block any ventilation openings,install in accordance with the manufacturer s instructions.
8) Do not install near any heat sources such as radiators, heat registers,stoves,or other apparatus (including am
plifiers) that produce heat.
9) Do not defeat the safety purpose of the polarized or grounding-type plug.A polarized plug hase two blades
with one wider than the other.A grounding type plug has two blades and a third grounding prong.The wide blade
or the third prong are provided for your safety,if the provided plug does not fit into your outlet.consult an elec
trician for replacement of the obsolete outlet.
10) Protect the power cord from being walked on or pinched particularly at plugs.convenience receptacles,and
the point where they exit from the apparatus.
11) Only use attachments/accessories specified by the manufacturer.
12) Use only with the cart,stand,tripod,bracket,or table specified by the manufacturer,or sold with the
apparatus.When a cart is used,use caution when moving the cart/apparatus combination to avoid injury from
tip-over (Figure 1).
13) Unplug this apparatus during lightning storms or when unused for a long periods fo time.
14) Refer all servicing to qualified service personnel.Servicing is required when the apparatus has been dam
aged in any way,such as power-supply cord or plug is damaged,liquid has been spilled or objects have fallen
into the apparatus,the apparatus has been exposed to rain or moisture,does not operate normally,or has been
dropped.
WARNING:To reduce the risk of fire or electric shock,do not expose this apparatus to rain or moisture.
CAUTION:Apparatus shall not be exposed to dripping or splashing and no objects filled with liquids,such as
vases,shall be placed on the apparatus.
(Figure 1)
Thank you for purchasing this digital instrument.For perfect operation and security,please
read the manual carefully and keep it for future reference.
Precaution
Safety Precautions
Important Safety Instructions
DO NOT OPEN
RISK OF ELECTRIC SHOCK
CAUTION
The lightning flash with arrowhead symbol within an equilateral triangle is in
tended to alert the user to the presence of uninsulated “dangerous voltage”
within the product s enclosure that may be of sufficient magnitude to constitute a
risk of electric shock to persons.
The exclamation point within an equilateral triangle is intended to alert the user
to the presence of important operating and maintenance(servicing) instructions in
the literature accompanying the product.
’

Thanks for using our digital piano
Your instrument is a high-quality digital piano with 61 standard
size keyboard and utilizes the advanced PCM tone generation tech-
nology. Your instrument has 100 accompaniment styles that can be
used to provide fully orchestrated Auto Accompaniment. The multi-
functional LED(MULTI DISPLAY) make your operation more con-
veniently.
In order to obtain maximum performance and enjoyment, please
read this manual thoroughly while trying out the various features
described.
DIGITAL PIANO
1

Contents
DIGITAL PIANO
2
Panel controls ...............................................................................
Preparation .................................................................................
Using an AC Power Adaptor ..........................................................
Using Headphones ........................................................................
Using MIC .... ............................................................................
The Sustain Pedal .........................................................................
The Music Stand ..........................................................................
MIDI IN/MIDI OUT .....................................................................
Listen to the Demo .......................................................................
Selecting and Playing the Voices ...................................................
Select a Voice ..............................................................................
Keyboard Percussion ...................................................................
Split Mode ..................................................................................
Overall Control ...........................................................................
Sustain ....................................................................................
Touch ......................................................................................
Auto Accompaniment ..................................................................
Selecting a Style ..........................................................................
Auto Accompaniment Fingering ...................................................
Accompaniment Control ..............................................................
Accompaniment Volume ..............................................................
Tempo Control ............................................................................
Recording Functions ...................................................................
Record .......................................................................................
Play ...........................................................................................
Appendix ....................................................................................
Voice List ...................................................................................
Style List ....................................................................................
Percussion List ............................................................................
Specifications ..............................................................................
3
5
5
5
5
5
5
5
6
7
7
7
8
8
8
8
9
9
10
11
12
13
14
14
14
15
15
16
17
17

Panel Controls
Top Panel Controls
1.POWER Button
2.MASTER VOLUME Control
3.ACCOMPANIMENT CONTROL SECTION
SYNCHRO Button
START/STOP Button
INTRO/FILL Button
4.FINGERING Buttons
NORMAL Button
S.FINGER Button
FINGERED Button
SPLIT Button
5.ACCOMP. VOLUME +/-Buttons
6.TEMPO+/- Buttons
7.TOUCH Button
8.DEMO Button
9.RECORDING SECTION
RECORD Button
PLAY Button
10.MULTI LED DISPLAY
11.VOICE/STYLE Button
12.SUSTAIN Button
13.Number [0]-[9], [+],[-] Buttons
Rear Panel Controls
14.DC 12V IN Jack
15.MIC Jack
16.PEDAL Jack
17.MIDI IN/OUT Connector
18.PHONE Jacks
DIGITAL PIANO
3

DIGITAL PIANO
4
DC 12V
MICPEDAL MIDI IN
MIDI OUT
1
4
7
2
5
8
3
6
9
+
0
VOICE/STYLE
SUSTAINDEMO
TOUCH
ACC TEMPO RECORD PLAY
POWER
ON
OFF
MASTER VOLUME
MIN MAX
OFF S.FINGER FINGERED SPLIT
SYNCHRO START/STOP INTRO/FILL IN
DEMO
1
4
7
2
5
8
3
6
9
+
0
VOICE/STYLE
SUSTAIN
TOUCH
ACC TEMPO RECORD PLAY
POWER
ON
OFF
MASTER VOLUME
MIN MAX
OFF S.FINGER FINGERED SPLIT
SYNCHRO START/STOP INTRO/FILL IN
124
3
5 6
7
8
9
10
11
12 13
14
1516
17
18

Preparation
DIGITAL PIANO
5
This section contains information about setting up your instrument and preparing
to play. Be sure to go through this section carefully before using this instrument.
1. Using an AC Power Adaptor
Your instrument will run from a power adaptor(DC
12V,1000mA). Plug the DC output cable from the Power adaptor
into the DC IN jack on the rear panel of your instrument, then plug
the Power adaptor(or the AC cable of the Power Adaptor)into a
AC 220V 50HZ
PHONE
2. Using Headphone
A standard pair of stereo headphones can be plugged into the phone
jacks located under the keyboard for private practice or late-night
playing. The internal speaker system is automatically shut off when a
pair of headphones is plugged into the PHONE jack.
A Micphone can be plugged into the rear-pannel MIC jack .
3. Using MIC
4. The Sustain Pedal
A foot switch can be plugged into the rear-panel PEDAL jack. The
Sustain Pedal is a damper pedal controlling sustain function. Press the
pedal and you can sustain the notes after the keys are released. Don't
press the pedal while inserting the plug into the PEDAL jack or while
turning on the instrument.
PEDAL
5. The Music Stand
Insert the two stickings of the music stand into the holes located at the top of the piano control
panel.
MIDI IN: Receive MIDI data of the external MIDI device such as computer and the data is played in your
instrument.
MIDI OUT: Output MIDI data of this instrument to control other MIDI device.
6. MIDI IN/MIDI OUT
MIC

Listen to the Demo
Once you've set up your , try listening to the pre-programmed
demonstration songs - they'll give you a good idea of what the piano can do.
instrument
1. Turn the Power ON and Set the Volume.
Before playing the demo turn the power on by pressing the POWER switch (the panel indicators
and MULTI DISPLAY will light up) and set the MASTER VOLUME about half way between the "MIN"
and "MAX" settings. You can adjust the volume to accommodate your play.
2. Press DEMO to start
between 01 and 50 by pressing the Number buttons or the [+] and [-] buttons ,then press [START/STOP]
button to start playback and use the MASTER VOLUME control to set the ideal listening level.
Press [DEMO] button the current demo will display,You can select a single demonstration
3. Press DEMO to stop
Press [DEMO] button or [START/STOP] again to stop demo playback.
DIGITAL PIANO
6
POWER
ON
OFF MASTER VOLUME
MIN MAX
DEMO OFF S.FINGER FINGERED SPLIT

Selecting and Playing the Voices
Your instrument has 100 beautiful voices and 29 percussion sounds that you can
select and play.
1. Select a Voice
.Press the [VOICE/STYLE] button. The [Ton] will appear on the
MULTI DISPLAY for a short time. Then the voice number appears
on the MULTI DISPLAY.
DIGITAL PIANO
7
Press the [VOICE/STYLE] button to let the“Ton”appear on, you don't need to do this if the voice
number has been on the Multi Display.
.Select a Voice Number
Use the Number buttons or the [+] and [-] buttons to select the required voice number(00-100).The
[+] and [-] buttons can be used to increment (increment by one) or decrement (decrement by one) the
currently selected voice number. Press the [+] button briefly to increment the value , or the [-] button to
decrement. If you hold the [+] or [-] button down , the value will inc or dec continuously -simply release
the button when the desired value has been reached.
The number buttons allow direct numeric entry of the desired value, and it's therefore the fastest
way to edit in many situations. for example 23, first press [2] and [3]. The number "23" should show on
the LED.
1
4
7
2
5
8
3
6
9
+
0
VOICE/STYLE
SUSTAIN
Your instrument has 29 different percussion sounds that can be played on left 29 keys of the
keyboard when selecting VOICE 100.
2. Keyboard Percussion
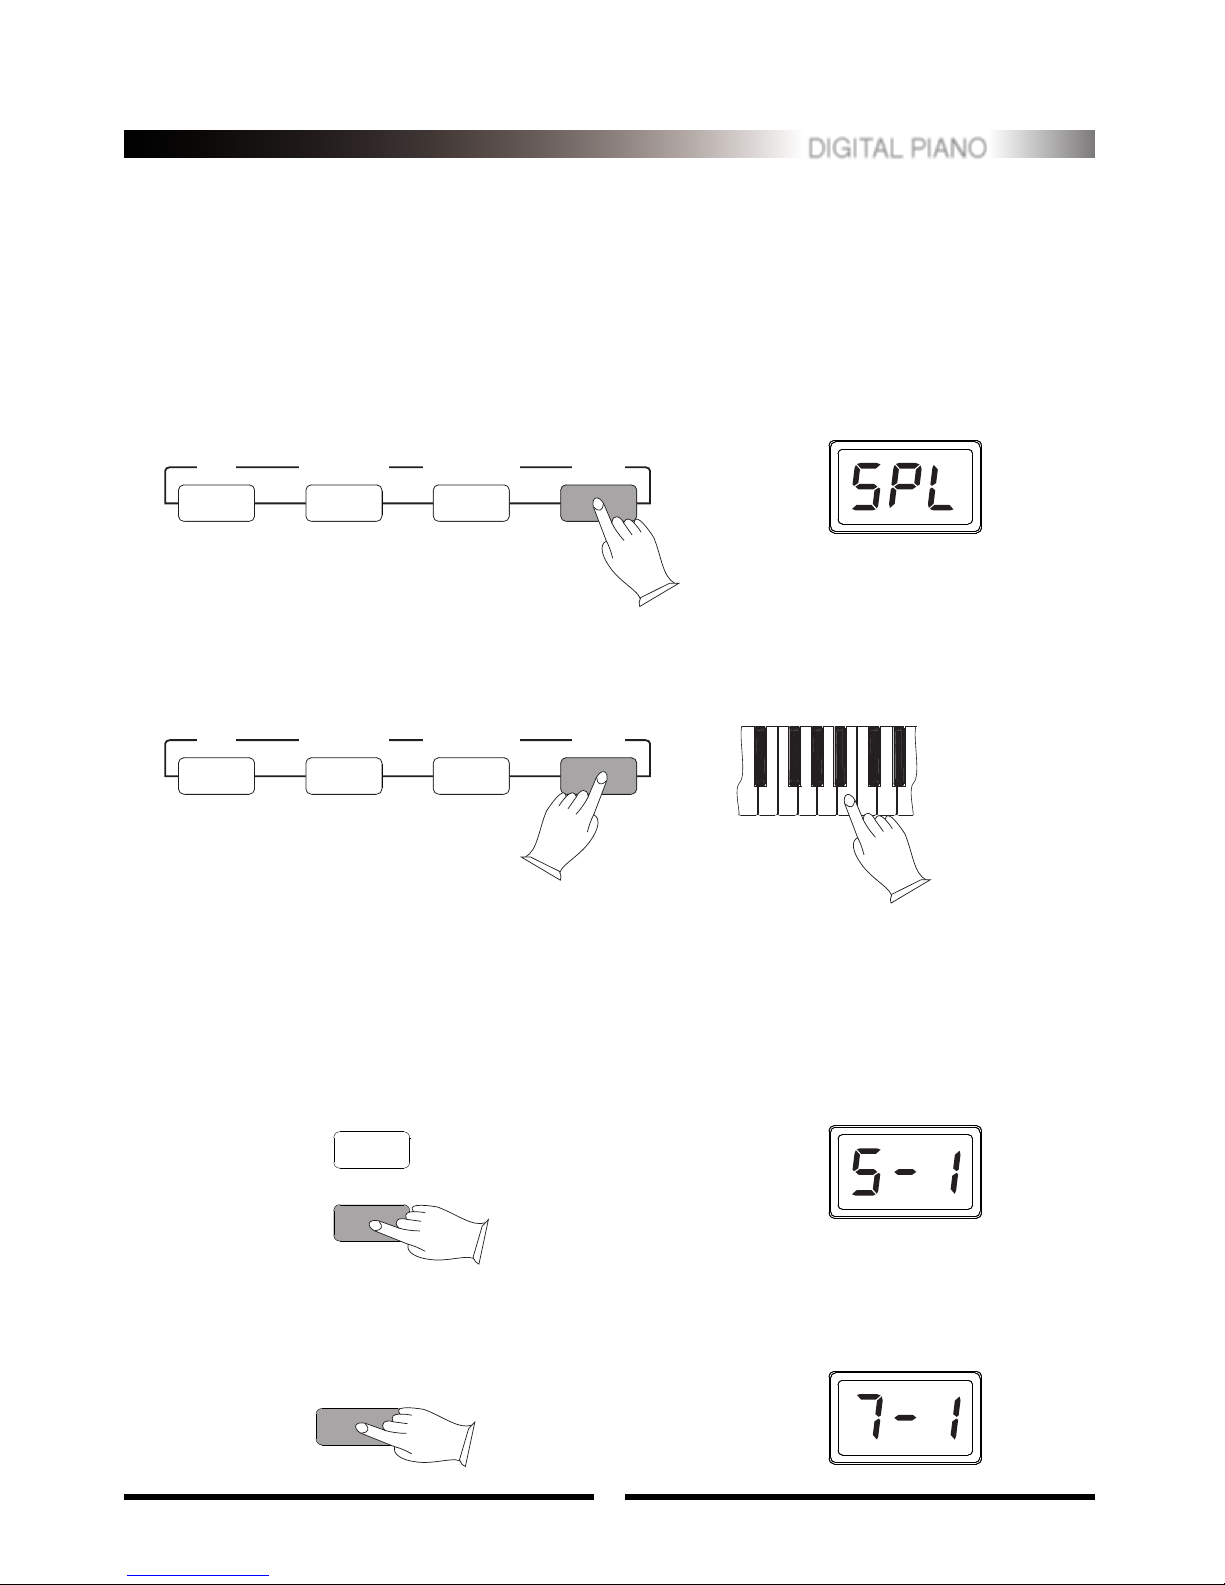
Your keyboard can be split into two sections which means different voices can be played with the
left and right hands at the same time.
.Select a Split Voice
Press [SPLIT] button so that the “SPL”appear in the display, indicating Split mode ON, then
press [VOICE/STYLE]button to select the split voice number status.Use the Number buttons or the [+]
and [-] buttons to select the desired split voice number(00 through 100).
3. Split Mode
.Split Point Change
Press [SPLIT] button so that the “SPL”appears on and hold the button while at the same time
pressing any key between C1 and C6 to select split point (01 through 61).
.Sustain
Press [SUSTAIN] button to let the strings“S-1”appear on the Multi Display so that to
Sustain ON. It can be used as a damper pedal.
Turning Sustain on to sustain notes after the keys are released.
Press [SUSTAIN] button again to turn Sustain OFF.
turn
4. Overall Control
VOICE/STYLE
SUSTAIN
.Touch
Press [TOUCH] button, you can turn ON/OFF the touch function.When the Touch function is ON,
the volume will be varied according to how hard you play on the keyboard.
TOUCH
DIGITAL PIANO
8
OFF S.FINGER FINGERED SPLIT
OFF S.FINGER FINGERED SPLIT

Auto Accompaniment
Auto Accompaniment Normal
Left hand fingering
specifies the auto
accompaniment chords.
The right hand plays normally
Auto Accompaniment
DIGITAL PIANO
9
Your instrument has 100 accompaniment styles that can be used to provide fully
orchestrated Auto Accompaniment.
When the Auto Accompaniment function is turned ON, this instrument creates
fully-orchestrated rhythm, bass, and chord accompaniment based on chords you play
with the left hand in the Auto Accompaniment section of the keyboard (i.e. all keys to
the left of the Auto Accompaniment split point).The right-hand section of the key-
board is available for normal playing.
The default Auto Accompaniment
split point is the G2 key. The Auto
Accompaniment section of the keyboard
consists of all keys to its left .
done either before or during accompaniment playback.
.Select the Style mode.
Press [VOICE/STYLE] button until the“rhy”appear on to select the style mode.
.Select the desired style number.
Refer to the STYLE list , use the Number buttons or the [+] and [-] buttons to select the required
style number(00 through 99).
Any of your instrument's 100 styles can be selected via the normal editing procedure. This can be
1. Selecting a Style
1
4
7
2
5
8
3
6
9
+
0
VOICE/STYLE
SUSTAIN

DIGITAL PIANO
10
Press [FINGERED] button to select FINGERED mode and press [SINGLE] button to select
SINGLE mode.
.SINGLE Mode
SINGLE Mode fingering makes it simple to produce beautifully orchestrated accompaniment
using major , seventh , minor and minor-seventh chords by pressing a minimum number of keys in the
Auto Accompaniment section of the keyboard.The accompaniment produced is perfectly matched to the
currently selected accompaniment style.
.Major Chords:
If you press a "C" key in the left-hand section of the keyboard,for example , a C-major accompani-
ment will be played.Press another key in the left hand section of the keyboard to select a new chord. The
key you press will always determine the "root" of the chord played (i.e. "C" for a C chord).
.Minor Chords:
Simultaneously press the root note and the nearest black key to the left of it.
.Seventh Chords:
Simultaneously press the root note and the nearest white key to the left of it.
.Minor-Seventh Chords:
Simultaneously press the root note and the nearest white and black keys to the left of it.
The Auto Accompaniment will continue playing even if you lift your fingers from the Auto
Accompaniment keys. You only need to press the Auto Accompaniment keys when changing chords.
Your instrument has two Auto Accompaniment fingering mode: FINGERED and SINGLE.
2. Auto Accompaniment Fingering
C C7Cm7
Cm
Single Finger mode Fingered mode
.FINGERED Mode
FINGERED Mode is ideal if you already know how to play chords on a keyboard, since it allows
you to supply your own chords for the Auto Accompaniment feature.

DIGITAL PIANO
11
The instrument will recognize the following chord type:
.Press [OFF] button to turn Auto Accompaniment function OFF.
There is only ONE voice over the entire keyboard, the instrument is in SOLO status.
C7
( )
Cm7
( )
Cm
C
select to control the "flow" of the accompaniment to achieve the desired musical results. Accompani-
ment start/stop and sections are controlled by the ACCOMPANIMENT CONTROL buttons.
.Straight Start
.The [START/STOP] button starts the selected accompaniment style immediately.
Press the [FINGERED] button or the [SINGLE] button to select the mode before starting the
accompaniment. The accompaniment will start with the rhythm sound only when the [START/STOP]
button is pressed, then the bass and chord parts will playing as soon as the first note or chord is played
on the Auto Accompaniment section of the keyboard.
A different accompaniment style can be selected at any time while the accompaniment is
playing.The style number on the MULTI DISPLAY will change as soon as the selection is made.
.Synchro Start
Press the [SYNCHRO] button if you want the accompaniment to start when you play the first note
or chord on the AUTO ACCOMPANIMENT section of the keyboard(It's still valid while the AUTO
ACCOMPANIMENT function is OFF).
If you press the [SYNCHRO] button, the BEAT indicator dots will flash at the current tempo. The
synchro start mode can be disengaged by pressing the [SYNCHRO] button again so that the BEAT
indicator dots go out.
Your instrument provides a range of accompaniment "sections" - introduction,fill-in that you can
3. Accompaniment Control
SYNCHRO START/STOP INTRO/FILL IN
SYNCHRO START/STOP INTRO/FILL IN
DIGITAL PIANO
12
.Starting the Accompaniment with an Introduction
Any of your instrument accompaniment patterns can be started with an appropriate introduction by
pressing the [INTRO/FILLIN] button directly.
If you press the [SYNCHRO] button and then the [INTRO/FILL IN] button, the accompaniment
will start from the introduction as soon as a chord is detected in the AUTO ACCOMPANIMENT section
of the keyboard.
.Adding Fill-In
Press the [INTRO/FILL IN] button at any time while the accompaniment is playing to add a one-
measure fill-in .
If you hold the [INTRO/FILL IN] button , the fill-in pattern will repeat until the button is released ,
then the MAIN section will play from the beginning of the next measure.
If the [INTRO/FILL IN] button is pressed after the last beat of a measure , the fill-in will begin
from the first beat of the next measure. If pressed at any other time the fill-in will begin immediately.
If you press the [SYNCHRO] button and then the [INTRO/FILL IN] button, the accompaniment
will start from the fill-in as soon as a chord is detected in the AUTO ACCOMPANIMENT section of the
keyboard.
It's also possible to start the accompaniment with a fill-in by pressing the [INTRO/FILL IN] button
directly.
SYNCHRO START/STOP INTRO/FILL IN
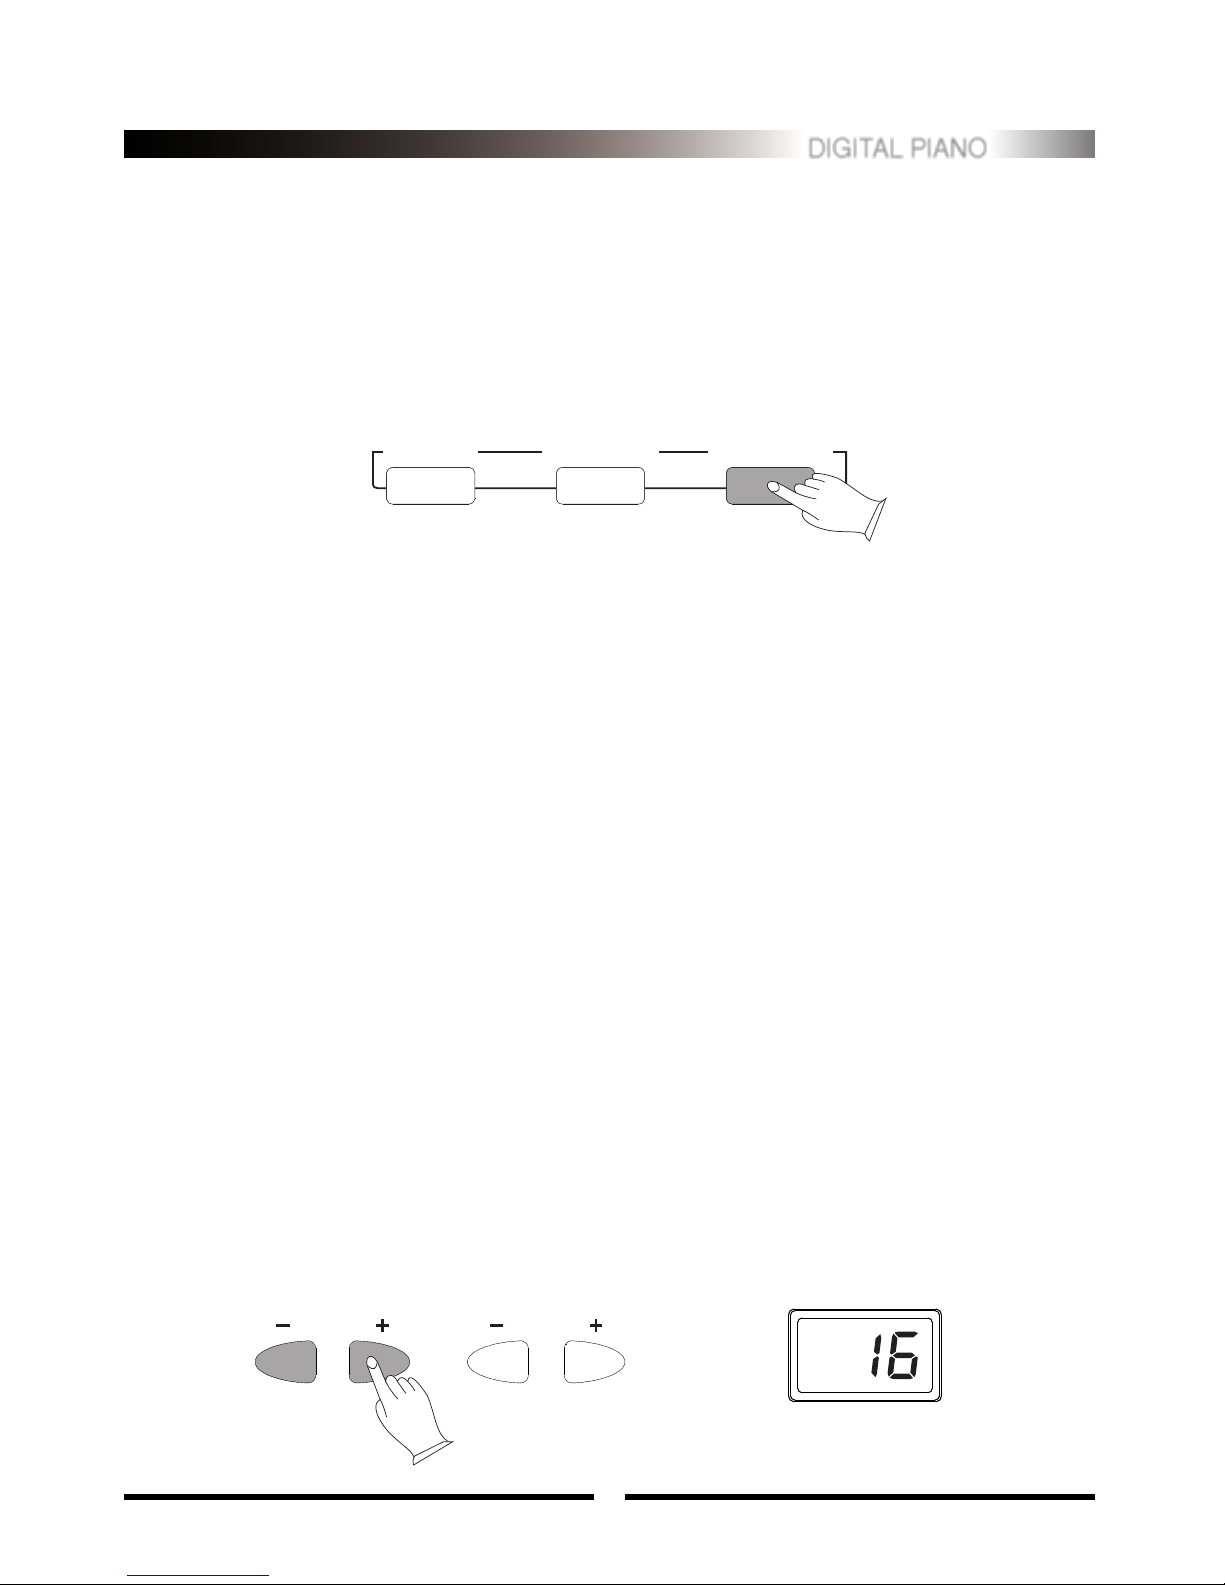
.Press the [ACC] buttons
Press the [ACC+/-] buttons. The current accompaniment volume value will appear on the MULTI
DISPLAY.
.Set the Volume
Use the [ACC+/-] buttons to set the desired volume. The volume range is from 01 (no sound) to 16
(max volume).The default volume value (13) can be recalled instantly by pressing both the [ACC+/-]
buttons at the same time.
The [ACC+/-] buttons can be used to adjust the volume of the selected accompaniment .
4. Accompaniment Volume
ACC TEMPO

DIGITAL PIANO
13
.Press the [TEMPO+/-] buttons
Press the [TEMPO+/-] buttons. The current tempo (beats per minute) will appear on the MULTI
DISPLAY.
.Set the Tempo
Use the [TEMPO+/-] buttons to set the desired tempo. The available tempo range from 40 to 280
beats per minute. Each accompaniment style has a different "default" tempo which is automatically set
whenever a new style is selected(but not when a new style is selected while the accompaniment is
playing). The default tempo for the currently selected style can be recalled instantly by pressing both
the two [TEMPO+/-] buttons at the same time.
The [TEMPO+/-] buttons can be used to control the tempo of Auto Accompaniment, DEMO.
5. Tempo Control
ACC TEMPO

DIGITAL PIANO
14
Recording Functions
Your instrument allows you to record and play back a song, including chord
sequences created using the Auto Accompaniment feature and the melody you played
with your right hand.
1. Record
.Press the [RECORD] button
Press the [RECORD] button, the [rEC] will appear on the MULTI DISPLAY.
.Start Recording
Press any key on the keyboard , will start recording. If you press SYNCHRO button, the accompa-
niment will be strat at the same time.
.Stop Recording
Press the [RECORD] button again will stop recording. The voice number will be shown on the
MULTI DISPLAY after recording is stopped.
2. Play
Playback will begin as the [PLAY] button is pressed, the [PLy] will appear on the MULTI DIS-
PLAY. Play along on the keyboard if you like. You can also change the tempo during playback.
Accompaniment and melody playback will stop automatically when all recorded data has been
played back.You can also stop playback at any time by pressing the [PLAY] button again. The voice
number will be shown on the MULTI DISPLAY after playback is stopped.
RECORD PLAY
RECORD PLAY

Appendix
DIGITAL PIANO
1). Voice List
Piano
00 Acoustic Grand Piano
01 Bright Acoustic Piano
02 Electric Grand Piano
03 Honky-Tonk Piano
04 Electric Piano 1
05 Electric Piano 2
06 Clavi
Chromatic Percussion
07 Glockenspiel
08 Music Box
09 Vibraphone
10 Marimba
11 Xylophone
12 Dulcimer
Organ
13 Drawbar Organ
14 Percussive Organ
15 Church Organ
16 Reed Organ
17 Harmonica
Guitar
18 Acousticguitar(Nylon)
19 Acoustic Guitar (Steel)
20 Electric Guitar (Jazz)
21 Electric Guitar (Clean)
22 Electric Guitar Muted)
23 Distortion Guitar
24 Guitar Harmonics
Bass
25 Acoustic Bass
26 Finger Bass
27 Pick Bass
28 Fretless Bass
29 Slap Bass 1
30 Synth Bass 1
31 Synth Bass 2
Strings
32 Violin
33 Cello
34 Timpani
Ensemble
35 Strings Ensemble 1
36 Strings Ensemble 2
37 Synth Strings 1
38 Synth Strings 2
39 Voice Oohs
40 Orchestra Hit
Brass
41 Trumpet
42 Trombone
43 Tuba
44 Synth Brass 1
45 Synth Brass 2
Reed
46 Soprano Sax
47 Alto Sax
48 Oboe
49 English Horn
50 Clarinet
Pipe
51 Piccolo
52 Flute
53 Recorder
54 Pan Flute
55 Whistle
56 Ocarina
Synth Lead
57 Lead 2 (Sawtooth)
58 Lead 5 (Charang)
59 Lead 6 (Voice)
60 Lead 7 (Fifth)
Synth Pad
61 Pad 3 (Polysynth)
62 Pad 7 (Halo)
Synth Effects
63 Fx 2 (Soundrack)
64 Fx 3 (Crystal)
65 Fx 5 (Brightness)
66 Fx 7 (Echoes)
Ethnic
67 Sitar
68 Banjo
69 Shamisen
70 Koto
71 Kalimba
72 Bagpipe
73 Fiddle
74 Shanai
Percussive
75 Tinkle Bell
76 Woodblock
77 G.Piano/Vibraphone
78 G.Piano/Finger Bass
79 G.Piano/Strings Ens 2
80 G.Piano/trumpet
81 G.Piano/Soprano Sax
82 G.Piano/Pan Flute
83 Vibraphone/Violin
84 Vibraphone/trumpet
85 Vibraphone/Pan Flute
86 Banjo/Finger Bass
87 Banjo/Synth Bass 2
88 Banjo/Strings Ens 2
89 Sticks
90 Bass Drum H soft
91 Open Rim Shot
92 Snare L
93 Hand Clap
94 Hi-Hat Closed
95 Low Tom
96 Crash Symbal 1
97 Cowbell
98 Claves
99 Wood Block H
No VOICE. No VOICE. No VOICE.
15
100 Percussion

DIGITAL PIANO
No STYLE. No STYLE. No STYLE.
Pop
00 16-Beat Pop
01 8-Beat Pop
02 8-Beat Light
03 Folkrock
04 Detroit Pop
05 Pop Shuffle
06 Pop Rock
07 Showtune
Pop Ballad
08 16-Beat Balled
09 Pop Ballad
10 Big Ballad
11 Piano Ballad
12 Epic Ballad
13 6/8 Ballad
Dance
14 Eurobeat
15 Dance Pop
16 Casa
17 Dance Shuffle
18 Groundbeat
19 Synth Boogie
Disco
20 Disco Party
21 Disco Soul
22 Disco Tropical
23 Disco Funk
24 Disco Pop
25 Polka Pop
Rhythm & Blue
26 R&B
27 R&B Ballad
28 Fast Gospel
29 Gospel
30 6/8 Blues
31 Blues Shuffle
32 Soul
33 Funk
34 Funk Shuffle
Rock
35 Hard Rock
36 Rock Boogie
37 Rock Pop
38 Rock Shuffle
39 6/8 Rock
40 Rock Ballad
41 Rock Classical
Rock &Roll
42 Rock & Roll
43 Boogie Woogie
44 Twist
45 Rockabilly
46 16-Beat Rock&Roll
Traditional Jazz
47 Ragtime
48 Dixieland
49 Big Band
50 Big Band Ballad
51 Swing
52 Swing Waltz
Contemporary Jazz
53 Bebop
54 Jazz Ballad
55 Jazz Waltz
56 Fusion
57 Fusion Shuffle
Latin
58 Mambo
59 Merengue
60 Beguine
61 Bomba
62 Guaguanco
Latin Pop
63 Pop Bossa
64 Bossa Nova Slow
65 Jazz Samba
66 Modern Cha Cha
67 Latin Rock
Caribbean
68 Ska
69 Calypso
70 Reggae 16
71 Reggae 12
Country &Western
72 Bluegrass
73 Country Pop
74 Country Rock
75 Country Ballad
76 Country Waltz
77 Country Shuffle
78 Western Shuffle
World Music
79 Polka
80 Traditional Waltz
81 Sevillianas
82 Bolero Lento
83 Rumba Espagnole
84 Dangdut
March
85 Military March
86 6/8 March
87 Tarantella
Ballroom Standard
88 Slow Waltz
89 Tango Argentina
90 Tango Habanera
91 Slowfox
92 Viennese Waltz
93 Foxtrot
94 Jive
Ballroom Latin
95 Rumba
96 Samba
97 Cha Cha
98 Pasodoble
99 Rap
2). Style List
16

DIGITAL PIANO
Keyboards:
Display:
Polyphony:
Voices:
Keyboard Percussion:
Voice Control:
Auto accompaniment:
Accompaniment Control:
Keyboard Modes:
Demo Song:
Recording:
Setup:
Midi Control:
Auxiliary jacks:
Dimensions:
Weight:
Accessories:
61 Standard-size touch sensitivity keys
Multi-function LED
16
100 Voices (00 to 100)
29 (Voice: 100)
Sustain, Touch
100 Styles (00 to 99)
Synchro, Start/Stop, Intro, Fill in, Tempo, Acc
Normal, Single, Finger, Split
50 (01 to 50)
Real-time Record and Playback
Power( on/off ), Master Volume
Midi in, Midi out
Midi In/Out, Sustain Pedal, MIC, Phone, DC 12V
996mm X 385mm X762mm
20.2 Kgs
Music Stand, Owner's Manual, Power Adaptor
17
5). Specification
4). Percussion List
NOTE
C1
D1
E1
F1
G1
A1
B1
C2
D2
E2
F2
A2
B2
C3
D3
STANDARD KIT
Sticks
Bass Drum Soft
Open Rim Shot
Acoustic Snare
Hand Clap
Closed Hi-Hat
Low Tom
Crash Symbal 1
Cowbell
Claves
Hi Wood Block
Mute Triangle
Brush Slap
Snare Roll
Snare H Soft
NOTE
E3
F3
G3
A3
B3
C4
D4
E4
F4
G4
A4
B4
C5
D5
STANDARD KIT
Acoustic Bass Drum
Bass Drum 1
Side Stick
Electric Snare
Pedal Hi-Hat
Hi Bongo
Mute Hi Conga
Open Hi Conga
Cabasa
Maracas
Short Whistle
Short Guiro
Mute Cuica
Snaker
10505279 V3.0

Table of contents
Other Clavitech Musical Instrument manuals


