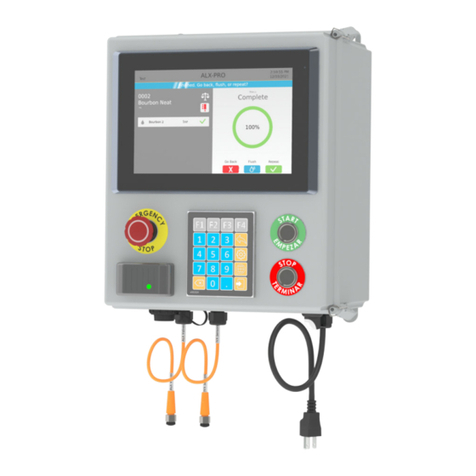
Clean Logix ALX-ELITE User manual

USER
MANUAL
English (Original Instrucons)
Updated: 04/03/17
MODEL:
ALX-ELITE
Chemical Allocaon Controller

Page 2 of 28 ALX-ELITE Manual V1.1 Last Update: 04/03/2017
USER MANUAL: ALX-ELITE
READ ALL INSTRUCTIONS BEFORE OPERATING EQUIPMENT
Table of Contents
General
Overview
Terminology
Specicaons
Installaon
Installaon Requirements
Mounng Controller
Connecng Ethernet
Connecng Devices
Conguraon
Administrator Login
Users
Devices
Applicaons
Permissions
Conguraon (connued)
Unit Conguraon
Unit Info
Set Date & Time
USB Opons
Network Setup
Reporng
Operaon
Dispensing An Applicaon
Retrieving Reports on USB
Troubleshoong
Appendices
System Editor
Parts Callout
Device Calibraons
03
03
03
04
05
05
05
08
08
10
14
16
17
17
17
18
19
20
22
23
24
26
28
29
!
WARNING:
1. Avoid contact of chemicals with skin and eyes. If contact
occurs, see MSDS sheet for further rst aid measures.
2. Always wear appropriate PPE
3. Follow safety instrucons of chemical manufacturer
(MSDS).
4. Always follow plant and OSHA guidelines about the use
of equipment.
5. Disconnect power before servicing equipment.

Page 3 of 28 ALX-ELITE Manual V1.1 Last Update: 04/03/2017
USER MANUAL: ALX-ELITE
READ ALL INSTRUCTIONS BEFORE OPERATING EQUIPMENT
GeneralInstallaonConguraonAppendices Operaon
Troubleshoong General
The ALX-ELITE is a chemical management
controller that can dispense chemicals according
to programmable recipes (Applicaons). Access to
Applicaons can be restricted on a per-user basis over
a rolling me period. Users can be required to use
a 4-digit login passcode or RFID card to login before
dispensing Applicaons. This allows tracking and
recording of chemical usage by User. The ALX-ELITE
will generate and e-mail Reports on demand or on
a daily, weekly or monthly basis. Reports can also
be downloaded to a USB ash drive for immediate
viewing. All conguraon of the ALX-ELITE can be
performed using the built-in keypad and character
display. The ALX-ELITE will also broadcast a local WiFi
network which allows access to the web-browser
based System Editor for conguraon using a laptop.
Overview
Soware
• Maximum number of Users: 999
• Maximum number of Applicaons: 999
• Maximum Dispense Steps per Applicaon: 6
• Dispense Step me range: 00.1s - 99m:99.9s
• Permissions me range: 1-24 hours
• Max Permissions count: 99
Hardware
• Maximum number of Devices: 16*
• Dimensions: 12" x 10" x 7"
*NOTE: A single CAN-SO-4 counts as 4 Devices
Acceptable Chemical Products
• Acids
• Causcs
• Sanizers
• Chlorine
Specicaons
Terminology
• Users - The people who will be using the system
to dispense Applicaons. Up to 999 users can be
stored.
• Permissions - Control the number of mes
each User can access each Applicaon. Can be
disabled.
• Devices - The physical outputs and/or inputs that
connect to the controller to perform a funcon.
The ALX-ELITE is compable CAN-SO-1 and CAN-
SO-4 solenoid valve output devices.
• Applicaons - Recipes which determine the type
and sequence of Dispense Steps. Up to 999
recipes can be stored.
• Dispense Steps - Segments of an Applicaon that
determine which output Device will be energized
and for how long. Each Applicaon can contain up
to 6 Steps.
• Fixed Time Step - Will energize an output Device
for a specied amount of me. Reported Step
volume must be manually entered.
• Calibrated Step - Uses Device Calibraon to
determine how long an output Device should be
energized, based on a specied target volume.

Page 4 of 28 ALX-ELITE Manual V1.1 Last Update: 04/03/2017
USER MANUAL: ALX-ELITE
READ ALL INSTRUCTIONS BEFORE OPERATING EQUIPMENT
Electrical
• 110 VAC, 5A, Single Phase, 50-60 Hz
• NEMA 5-15 GFCI Protected Outlet
• Surge suppression recommended
Network
• Cat 5e or higher Ethernet cable connecon (eld-
wired sealed plug included with unit)
-OR-
• WiFi (802.11n or 802.11b/g), WPA security
Compressed Air (typical installaon)
• Clean, dry air
• 10 CFM (283 L/min) @ 80 psi (5.5 bar) minimum
• 100 psi (6.9 bar) maximum supply pressure
• Recommended regulator seng: 80 PSI (5.5 bar).
Water Supply (typical installaon)
• Cold Portable Water
• 7 GPM (26.5 Lpm) @ 35 psi (2.5 bar) minimum
• 100 psi (6.9 bar) maximum supply pressure
• Recommended regulator seng: 50 PSI (3.4 bar).
NOTE: A back ow preventer must be installed in the
water supply to this unit, per local codes.
Installaon Requirements

Page 5 of 28 ALX-ELITE Manual V1.1 Last Update: 04/03/2017
USER MANUAL: ALX-ELITE
READ ALL INSTRUCTIONS BEFORE OPERATING EQUIPMENT
GeneralInstallaonConguraonAppendices Operaon
Troubleshoong Installaon
AIR OUTPUTS
(3/8" PUSH-FIT)
AIR INLET 2
(3/8" PUSH-FIT)
AIR INLET 1
(3/8" PUSH-FIT)
CONNECT TO
OTHER CAN
DEVICE
CAN-SO-4
AIR OUTPUT
(3/8" PUSH-FIT)
CONNECT TO
OTHER CAN DEVICE
CONNECT TO ALX
CONTROLLER OR
OTHER CAN DEVICE
AIR INLET (3/8"
PUSH-FIT)
CAN-SO-1
1. Determine mounng locaon, with consideraon
of the following:
• User accessibility
• Distance to electrical outlet
• Distance to Devices/pumps
• Accessibility to Ethernet or WiFi
2. Aach the included mounng feet to the
controller.
3. Securely mount unit to wall using appropriate
hardware (not included).
Mounng
Hole
Dimensions
4. Plug power cord into a 115 VAC, GFCI protected
receptacle.
Mounng Controller
1. Connect ethernet using supplied plug. Following
instrucons included with plug.
NOTE: This plug must be used to ensure
environmental sealing of the ethernet port!
Connecng Ethernet (if not using WiFi)
The following types of Devices are compable with
the ALX-ELITE:
• CAN-SO-4: A four output, 3-way solenoid valve
pack for controlling 1/2" or smaller AODD pumps
and/or air operated valves
• CAN-SO-1: A single output, 2-way solenoid valve
for controlling up to a 1" Air Operated Double
Diaphragm (AODD) pumps
Connued on next page
Connecng Devices

Page 6 of 28 ALX-ELITE Manual V1.1 Last Update: 04/03/2017
USER MANUAL: ALX-ELITE
READ ALL INSTRUCTIONS BEFORE OPERATING EQUIPMENT
1. Mount and connect Devices in a daisy-chain fashion using the orange M12 cables. They can be installed in
any order. (NOTE: If purchased as a -KIT, the Devices will be supplied pre-mounted and connected)
2. Hand ghten M12 cable connecons, then ghten two more clicks using wrenches.
3. Plumb compressed air lines and uid lines for pumps and valves as necessary [see below]
Connecng Devices (connued)
Installaon Example

Page 7 of 28 ALX-ELITE Manual V1.1 Last Update: 04/03/2017
USER MANUAL: ALX-ELITE
READ ALL INSTRUCTIONS BEFORE OPERATING EQUIPMENT
GeneralInstallaonConguraonAppendices Operaon
Troubleshoong Installaon
Notes:

Page 8 of 28 ALX-ELITE Manual V1.1 Last Update: 04/03/2017
USER MANUAL: ALX-ELITE
READ ALL INSTRUCTIONS BEFORE OPERATING EQUIPMENT
ELITE Admin Menu
1-Users
2-Devices
3-Applications
4-Permissions
5-Unit Cong
6-Unit Info
7-Set Date & Time
8-USB Options
9-Network Setup
10-Reporting
Edit Users
>00-Add New User
01-administrator
Editing User #02
Name:Jason
Password: 1234
Admin: >NO< YES
RFID: 0000000000
Edit Permissions
(DELETE Entry)
Save changes?
Are you SURE?
Press <= for Yes
Press => for No
1. Press the ADMIN key.
2. Type in a 4-digit administrator passcode.
NOTE: The default Administrator user
passcode is 1234. This passcode can be
changed under the “Users” secon.
NOTE: Users will be automacally logged out
aer 1 minute of inacvity for security.
Administrator Login
Users
Adding a User
1. Log in as an administrator.
2. Use ↑and ↓keys to select Users and press
ENTER.
3. Select 00-Add New User and press ENTER.
4. Enter a Name and a 4-digit Passcode.
NOTE: Each user must have a unique 4-digit
passcode.
5. Use →and ← keys to grant or deny Administrator
privileges.
6. If desired, an RFID card can be scanned to
populate the RFID eld.
NOTE: Only one RFID card can be assigned per
user, cards cannot be shared between other
users.
7. Press the ESC key to exit.
8. When prompted to save changes, press ←for Yes
or →for No.
!
This secon explains how to setup the ALX-ELITE using the built-in keypad and screen. Alternavely, a
laptop or tablet can be used. For more informaon, refer to Appendix A - System Editor.

Page 9 of 28 ALX-ELITE Manual V1.1 Last Update: 04/03/2017
USER MANUAL: ALX-ELITE
READ ALL INSTRUCTIONS BEFORE OPERATING EQUIPMENT
GeneralInstallaonConguraonAppendices Operaon
Troubleshoong Conguraon
Edit Users
00-Add New User
01-administrator
>02-Jason
Delete this User?
Are you SURE?
Press <= for Yes
Press => for No
Editing User #02
Name:Jason
Password: 1234
Admin: >NO< YES
RFID: 0000000000
Edit Permissions
(DELETE Entry)
!
CAUTION:
The unit will always require at least one user to be
an administrator. Be careful not to delete all of the
administrators!
Eding a User
1. Select a user in the list and press ENTER.
2. Edit the user sengs as necessary
3. Press the ESC key to exit.
4. When prompted to save changes, press ←for Yes
or →for No.
Deleng a User
1. Select a user in the list and press ENTER.
2. Use the ↓ key to scroll to the boom of the
screen.
3. Select (DELETE Entry) and press ENTER.
4. When asked to conrm, press ←for Yes or →for
No.
Users (connued)

Page 10 of 28 ALX-ELITE Manual V1.1 Last Update: 04/03/2017
USER MANUAL: ALX-ELITE
READ ALL INSTRUCTIONS BEFORE OPERATING EQUIPMENT
Edit Devices
>0555-CONFIG PUMP
0875-CONFIG PUMP
0689-Water (Red)
Editing Device #0555
Demo Chemical
Type: AODD Pump
Prime (Start/Stop)
Edit Calibration
Replace Controller
(DELETE Entry)
Editing Device #0555
Demo Chemical
Type: Piston Pump
Prime (Start/Stop)
Volume: 000.00oz
ON Time: 00.0s
OFF Time: 00.0s
Replace Controller
(DELETE Entry)
Save changes?
Are you SURE?
Press <= for Yes
Press => for No
Adding a Device
1. Make sure devices are connected and green lights
are illuminated.
2. Log in as an administrator.
3. Use ↑and ↓keys to select Devices and press
ENTER.
4. Select a device from the list and press ENTER.
NOTE: When new Devices are rst connected,
they will appear in the Device list with the
name "CONFIG PUMP"
TIP: A red indicang light will blink on the
currently selected device
5. Type in a name for the device
6. Select the Device Type:
• AODD Pump - Constant output
• Valve - Constant output
• Piston Pump - Pulsed output with user
dened stroke Volume and ON/OFF cycle
Time.
7. If Piston Pump is selected, enter stroke volume
and ON/OFF Time
8. If you wish to prime, press the START key to turn
the Device output on and press STOP when to
turn o.
!
WARNING:
Pressing the START key on this screen will cause
the output to turn on and the pump to run!
Wear PPE and be ready to contain the ow of
chemical in an appropriate vessel!
9. Press the ESC key to exit.
10. When prompted to save changes, press ←for Yes
or →for No.
Devices

Page 11 of 28 ALX-ELITE Manual V1.1 Last Update: 04/03/2017
USER MANUAL: ALX-ELITE
READ ALL INSTRUCTIONS BEFORE OPERATING EQUIPMENT
GeneralInstallaonConguraonAppendices Operaon
Troubleshoong Conguraon
Edit Devices
>0555-Demo Chemical
0875-CONFIG PUMP
0689-Water (Red)
Editing Device #0555
>Edit Calibration
Replace Controller
(DELETE Entry)
Calibrating #0555
>Cal Point 1
Cal Point 2
View Calibrations
Calibrate Point 1
Press START to run
Press STOP to stop
Enter volume & unit
Calibrate Point 1
Running....0008.2s
Press STOP to stop
Enter volume & unit
Calibrate Point 1
Cal Time: 0008.2s
Enter Volume:0128.0
Enter Units: oz
NOTE: For more informaon about Calibraons
refer to Appendix B.
Calibrang a Device
1. Select a device from the list and press ENTER.
2. Use the ↓key to select Edit Calibration
and press ENTER.
NOTE: Devices which are congured as a Piston
Pump cannot be calibrated.
3. Determine which dispense hose will ow liquid
when the Device output is turned on.
4. Arrange a container to catch the liquid.
TIP: Use a container with volume markings!
5. Select Cal Point 1 and press ENTER.
6. Decide on an approximate target volume for the
calibraon point and press the START key.
TIP: For best accuracy, choose a volume target
that is at least half the amount of the largest
volume of the chemical to be dispensed in an
Applicaon
7. When the liquid in the container gets close to your
target, press the STOP key.
8. Take an accurate measurement of the amount
dispensed and enter the Volume and Units on the
screen.
9. Press ESC to exit.
10. Oponal: Repeat steps 5-9 for Cal Point 2.
Devices (connued)

Page 12 of 28 ALX-ELITE Manual V1.1 Last Update: 04/03/2017
USER MANUAL: ALX-ELITE
READ ALL INSTRUCTIONS BEFORE OPERATING EQUIPMENT
#0555 Calibrations
1-0128.0oz 0008.2s
2- NOT SET
Press DEL to clear
Delete Point?
Are you SURE?
Press <= for Yes
Press => for No
Calibrating #0555
Cal Point 1
Cal Point 2
View Calibrations
Edit Devices
>0555-CONFIG PUMP
0875-CONFIG PUMP
0689-Water (Red)
Editing Device #0555
Demo Chemical
Type: AODD Pump
Prime (Start/Stop)
Edit Calibration
Replace Controller
(DELETE Entry)
Eding a Device Calibraon
Calibraon points can be manually edited or deleted
aer they have been created:
1. Select a device from the list and press ENTER.
2. Use the ↓ key to select Edit Calibraon and press
ENTER.
3. Select View Calibrations and press ENTER.
4. Select the calibraon point you wish to edit and
use the →and ←keys and number pad to edit the
values as necessary.
5. Optional: use the DEL key to delete the selected
calibration point.
TIP: Only established calibraon points can be
edited. Once a calibraon point is deleted,
it must be reestablished with the normal
calibraon procedure before it can then be
edited.
Devices (connued)

GeneralInstallaonConguraonAppendices Operaon
Troubleshoong
Page 13 of 28 ALX-ELITE Manual V1.1 Last Update: 04/03/2017
USER MANUAL: ALX-ELITE
READ ALL INSTRUCTIONS BEFORE OPERATING EQUIPMENT
Conguraon
Delete this Device?
Are you SURE?
Press <= for Yes
Press => for No
Replace Controller
Demo Chemical
Current 0555
New 0875
Edit Devices
>0555-CONFIG PUMP
0875-CONFIG PUMP
0689-Water (Red)
Editing Device #0555
Demo Chemical
Type: AODD Pump
Prime (Start/Stop)
Edit Calibration
>Replace Controller
(DELETE Entry)
Replacing a Device
This funcon allows you to replace an exisng Device
and migrate Device informaon to a new one (Device
Name, Type, and Calibraons):
1. Disconnect the current device from the CAN bus
2. Ensure there is no sign of moisture, corrosion,
bent or broken pins in the orange M12 cable
connecons.
3. Connect the new Device.
NOTE: Always hand ghten orange M12 cable
connecons, then ghten two more clicks
using wrenches to ensure a good seal!
4. Select the current Device from the list and press
ENTER.
5. Use the ↓ key to scroll to the boom of the
screen.
6. Select Replace Controller and press
ENTER.
7. Select the new Device number and press ESC
Deleng a Device
1. Select a Device in the list and press ENTER.
2. Use the ↓ key to scroll to the boom of the
screen.
3. Select (DELETE Entry) and press ENTER.
4. When asked to conrm, press ←for Yes or →for
No.
Devices (connued)

Page 14 of 28 ALX-ELITE Manual V1.1 Last Update: 04/03/2017
USER MANUAL: ALX-ELITE
READ ALL INSTRUCTIONS BEFORE OPERATING EQUIPMENT
Edit Applications
>000-Add New App
001-Demo App 1
Editing Application
App# 123
Name:Demo App 2
>Add dispense step
App# 123 Step# 1
Device #0689
Name:Water (Red)
Type: Calibrated
Time: 00m:15s
Volume:
000.50GAL 000.00 oz
Editing Application
App# 123
Name:Demo App 2
Step#1-Water (Red)
Step#2-Demo Chemic
Add dispense step
(DELETE App)
Adding an Applicaon
1. Log in as an administrator.
2. Use ↑and ↓keys to select Applications and
press ENTER.
3. Select 00-Add New App and press ENTER.
4. Enter a 3-digit Access Code and a Name.
NOTE: Each Applicaon must have a unique
3-digit code.
5. Select Add dispense step and press ENTER.
6. Select a Device. The Device name will be
displayed below.
7. Select a Dispense Type and Time/Volume:
• Fixed Time - Will energize the Device for
the amount of me specied in the Time:
eld and requires Volume: to be manually
entered for Reporng purposes.
• Calibrated - Requires Volume: to
be manually entered and uses the Device
Calibraon to automacally calculate and ll
in the Time: eld.
NOTE: If the Device does not have at least one
calibraon point, the Time: eld will remain
at 00m:00s and the Applicaon will not run!
NOTE: If the Device is congured as a Piston
Pump, the Type: eld will show Piston
Pump. Volume: must be manually entered
and Time: is automacally calculated.
8. Press ESC to return to previous screen.
9. Repeat steps 5-7 above to add more dispense
steps or press ESC if nished.
10. When prompted to save changes, press ←for Yes
or →for No.
Applicaons

GeneralInstallaonConguraonAppendices Operaon
Troubleshoong
Page 15 of 28 ALX-ELITE Manual V1.1 Last Update: 04/03/2017
USER MANUAL: ALX-ELITE
READ ALL INSTRUCTIONS BEFORE OPERATING EQUIPMENT
Conguraon
Delete Step#2?
Are you SURE?
Press <= for Yes
Press => for No
Editing Application
App# 123
Name:Demo App 2
Step#1-Water (Red)
Step#2-Demo Chemic
Add dispense step
(DELETE App)
Edit Applications
000-Add New App
001-Demo App 1
>123-Demo App 2
Delete this App?
Are you SURE?
Press <= for Yes
Press => for No
Deleng an Applicaon
1. Select an Applicaon in the list and press ENTER.
2. Use the ↓ key to scroll to the boom of the
screen.
3. Select (DELETE App) and press ENTER.
4. When asked to conrm, press ←for Yes or →for
No.
Deleng a Dispense Step
1. Select an Applicaon in the list and press ENTER.
2. Select the Step# you wish to delete and press
the DEL key.
3. When asked to conrm, press ←for Yes or →for
No.
Applicaons (connued)

Page 16 of 28 ALX-ELITE Manual V1.1 Last Update: 04/03/2017
USER MANUAL: ALX-ELITE
READ ALL INSTRUCTIONS BEFORE OPERATING EQUIPMENT
User to Edit
01-administrator
>02-User 2
03-User 3
04-User 4
ALX-ELITE Admin Menu
Devices
Applications
>Permissions
User #:02 Permission
All Apps Perm <10>
#001 Demo App 1 05
#123 Demo App 2 10
1. Log in as an administrator.
2. Use ↑and ↓keys to select Permissions and
press ENTER.
3. Select a user and press ENTER.
4. Use ↑and ↓keys to select an Applicaon and →
and ←keys to change the Permission counts.
TIP: Use All Apps Perm to quickly add
equal permissions to all Applicaons. Note
that this number will override ALL individual
permissions!
5. Hit the ESC key to save and return to the previous
screen.
Permissions
System Conguration
User Login: ON
Permissions: OFF
Permission Hrs: 00
Units: Imperial
TimeZone: Eastern
Unit Name:_
Language: English
1. Log in as an administrator.
2. Use ↑and ↓keys to select Unit Cong and
press ENTER.
3. Use ↑and ↓keys to select an opon and →and
← keys to change selecons
Unit Conguraon

Page 17 of 28 ALX-ELITE Manual V1.1 Last Update: 04/03/2017
USER MANUAL: ALX-ELITE
READ ALL INSTRUCTIONS BEFORE OPERATING EQUIPMENT
GeneralInstallaonConguraonAppendices Operaon
Troubleshoong Conguraon
01/11/2017 01:27PM
CleanLogix ELITE
Welcome!
Press START To Begin
01/11/2017 01:27PM
CleanLogix ELITE
Welcome!
Enter Passcode
System Information
Unit ID#: 123456
Version #: 1.1
Built: 01/11/2017
Date
M: 01 D: 11 Y: 2017
Time
H: 04 M: 10 PM
• User Login: Turns the user login
requirement ON or OFF
NOTE: When User Login is turned OFF, the
boom of the home screen will read Press
START To Begin. When turned ON, the
screen will read Enter Passcode.
• Permissions: Turns Applicaon
Permissions ON or OFF.
• Permission Hrs: Sets the rolling me
period to use for permissions
• Units: Imperial (Gal, oz) or Metric (L, ml)
• TimeZone: Select the local me zone
• Unit Name: Input a custom name. It will
be referenced in all future Reports
• Language: sets the default language that
the controller will revert to each me it is
rebooted.
Unit Conguraon (connued)
Unit Info
1. Login as an administrator.
2. Use ↑and ↓keys to select Unit Info and
press ENTER.
3. Press ESC to exit.
NOTE: The Unit Info screen is read-only.
Set Date & Time
1. Login as an administrator.
2. Use ↑and ↓keys to select Set Date & Time
and press ENTER.
3. Use →and ←keys to select a field and ↑and ↓
keys to change it.
4. Press ESC to exit.

Page 18 of 28 ALX-ELITE Manual V1.1 Last Update: 04/03/2017
USER MANUAL: ALX-ELITE
READ ALL INSTRUCTIONS BEFORE OPERATING EQUIPMENT
USB Options
Export Settings
Import Settings
Update Dispense Lo
Update Software
!
CAUTION:
Always make sure to install and ghten the
protecve cap aer the USB ash drive is re-
inserted. If using a ash drive other than the one
included, make sure the protecve cap will sll t
in place and screw on all the way!
NOTE: When imporng sengs, the system will
automacally reboot when nished.
The ALX-ELITE includes a 8GB USB drive already
plugged into the port on the boom of the
controller. The controller will store dispense logs on
this USB drive, which can be retrieved manually or
automacally via e-mail. The USB drive can also be
used to import and export controller sengs (Users,
Devices, Applicaons) and for soware updates.
!CAUTION:
Leave a USB drive plugged into the unit at all
mes, except when manually retrieving logs or
imporng/exporng. If the USB drive is removed
indenitely or for long periods of me, the
controller will stop sending e-mail reports!
Export Sengs
This will export the controller sengs for Users,
Devices and Applicaons. It will create a le on the
USB drive named export.db in a folder named export.
1. Make sure a USB drive is plugged into the
controller port.
2. Log in as an administrator.
3. Use ↑and ↓keys to select USB Options and
press ENTER.
4. Use ↑and ↓keys to select Export Settings
and press ENTER.
Import Sengs
This will import previously saved sengs for Users,
Devices and Applicaons.
1. Follow the steps above to export sengs onto a
USB drive and plug it into a laptop.
2. Create folder on the USB drive and call it import.
3. Save a copy of the export.db le into the import
folder and rename the copied le import.db
4. Plug the USB drive back into the controller
5. Use ↑and ↓keys to select Import Settings
and press ENTER.
USB Opons

Page 19 of 28 ALX-ELITE Manual V1.1 Last Update: 04/03/2017
USER MANUAL: ALX-ELITE
READ ALL INSTRUCTIONS BEFORE OPERATING EQUIPMENT
GeneralInstallaonConguraonAppendices Operaon
Troubleshoong Conguraon
Network Setup
Ethernet Status
Ethernet Cong
WiFi Status
WiFi Cong
eth0: Down - Ofine
IP: 000.000.000.000
GW: 000.000.000.00
MASK:000.000.000.000
Ethernet Cong
Cong: DHCP
WiFi: Up - Online
IP: 192.168.002.202
GW: 192.168.002.001
MASK:255.255.255.000
WiFi Cong
Cong: DHCP
SSID: Example
WPA: YES
PASS: eXampl3
TIP: If Ethernet or WiFi are not being used, make
sure to set them to DISABLED. This will allow
faster boot-up mes.
1. Login as an administrator.
2. Use ↑and ↓keys to select Network Setup
and press ENTER.
3. Select an opon and press ENTER:
Ethernet Cong and Status
1. Select Ethernet Cong and press ENTER
2. Select Cong: and use → and ← keys to change
between DISABLE, STATIC and DHCP
3. If STATIC was selected, enter the IP, GW
(Gateway), MASK and DNS
4. Press ESC
5. Select Ethernet Status to verify the
connecvity:
• Down-Ofine - No network connecon
• Up-Online - Network connected
WiFi Cong and Status
1. Select WiFi Cong and press ENTER
2. Select Cong: and use →and ←keys to change
between DISABLE, STATIC and DHCP
3. Enter an SSID: (name of the network).
4. Select WPA: and Press →or ←for YES or NO
5. Select PASS: and enter the network password
6. If STATIC was selected, enter the IP, GW
(Gateway), MASK and DNS.
7. Press ESC
8. Select WiFi Status to verify the connecon:
• Down-Ofine - WiFi is connected but there
is no network connecon
• Up-Ofine - WiFi network connecon
established but no communicaon
• Up-Online - WiFi is connected and is
communicang
Network Setup

Page 20 of 28 ALX-ELITE Manual V1.1 Last Update: 04/03/2017
USER MANUAL: ALX-ELITE
READ ALL INSTRUCTIONS BEFORE OPERATING EQUIPMENT
Reporting Menu
Enabled: YES
Report Timing
Report Addresses
Report Now
Report Timing
Range: Daily
Time: 12:00 AM
Report Addresses
Report Successful
Generating Report
1. Login as an administrator.
2. Use ↑and ↓keys to select Reporting and
press ENTER.
3. Select Enabled: and use →and ←keys to
change between YES and NO
Report Timing
1. Select Report Timing and press ENTER
2. Set Range: using →and ←keys to specify report
frequency (Daily, Weekly or Monthly)
3. Set Time: at which to e-mail the report
4. Press ESC
Report Addresses
1. Select Report Addresses and press ENTER
2. Type in the e-mail addresses that reports will be
sent to
3. Press ESC
Report Now
1. To test the report e-mail addresses, select
Report Now and press ENTER
• The cursor will stop ashing while the report is
being processed
• When the report is sent, the screen will display
Report Successful
2. Press ESC when nished.
Reporng
Table of contents
Other Clean Logix Controllers manuals
Popular Controllers manuals by other brands
Antelope
Antelope Eclipse 384 owner's manual

ATTO Technology
ATTO Technology ThunderLink Desklink FC 1082 Getting started guide
Bosch
Bosch REXROTH IndraMotion MLD Getting started
Fortinet
Fortinet FortiADC 4000F quick start guide
fluidra
fluidra 66178 installation manual
SMC Networks
SMC Networks EX600-SPN1 Operation manuals
