manuals.online logo
Brands
  1. Home
  2. •
  3. Brands
  4. •
  5. Cleanfix
  6. •
  7. Vacuum Cleaner
  8. •
  9. Cleanfix SW 50 Guide

Cleanfix SW 50 Guide

Copyright ©2005 by Cleanfix Cleaning Systems, Inc., 465 West Main St., Wyckoff, NJ 07481.
All rights reserved. Content is subject to change.
Safety, Operations & Maint. Manual
Cleanfix®SW 50 Wet/Dry
Vacuum Cleaner
This unit is intended for commercial use
This manual is furnished with each new SW 50 Wet/Dry Vacuum Cleaner. It provides necessary
operation and maintenance instructions.
READ AND FOLLOW ALL INSTRUCTIONS, WARNINGS AND CAUTIONS BEFORE AND WHEN
USING THIS VACUUM CLEANER.
All information and specifications printed in this manual are current at the time of printing. However,
because of Cleanfix’s policy of continual product improvement, we reserve the right to make changes at
any time without notice.
Safety, Operation and Maintenance Manual for SW 50; Version 1.0 2
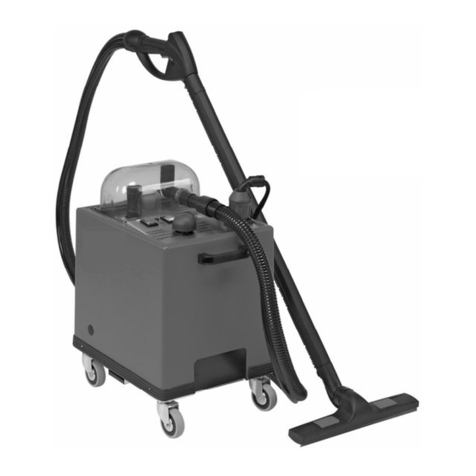
Description
Machine
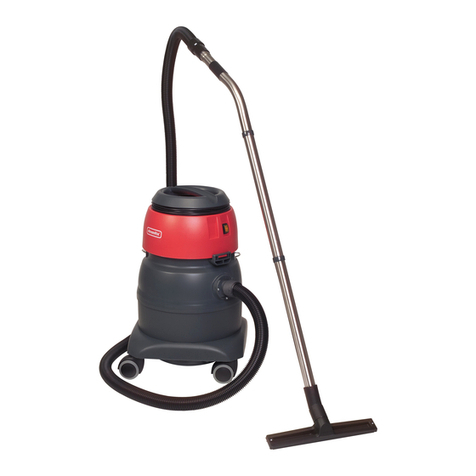
1. Motor head
2. On/Off switch
3. Power cord
4. Latch
5. Handle
6. Tank
7. Drain hose
8. Drain hose connector
9. Vacuum hose connector
10. Handle for tipping tank
11. Wheels
12. Casters
13. Tipping frame
14. Vacuum hose
15. Vacuum hose cuff
16. 2-piece wand
17. Hard-floor tool
Accessories
14. Overflow water shut-off float
15. Vacuum hose
16. Hose connector
17. Hose handle
18. Vacuum hose assy.
19. 2-piece wand
20. Hard-floor tool
21. Squeegee tool
22. Upholstery tool
23. Crevice tool
24. Pan filter basket
25. Pan filter cloth
26. Pan filter compl.
Safety, Operation and Maintenance Manual for SW 50; Version 1.0 3
Operating instructions
These operating instructions provide you with all information necessary for correct, save and prescribed usage and maintenance of
the wet/dry vacuum cleaner SW 50. The instructions must be kept where they are at all times accessible to the user.
1. Warnings
- For 120 volt grounded outlet models. The unit must be
plugged into a properly grounded outlet. Do not operate
the machine with a broken/missing grounding pin. Have
a qualified service person replace the plug immediately.
- Do not leave the vacuum when plugged in. Unplug
from outlet when not in use and before servicing.
- Turn OFF all the controls before unplugging the
vacuum.
- This is NOT a toy. Close attention is necessary when
used around or near children.
- Use only as described in this safety/operations manual.
Use only manufacturer’s recommended attachments
and accessories.
- Do not use this vacuum with damaged cord or plug. If
the vacuum is not working as it should, because it has
been dropped, damaged, left outdoors or dropped into
water, contact authorized service center or factory.
- Do not pull or carry vacuum by the cord, use cord as a
handle, close a door on cord or pull cord around sharp
edges and corners. Do not run vacuum over cord. Keep
cord away from heated surfaces.
- Do not unplug the vacuum by pulling on the cord. To
unplug, grasp the plug, not the cord.
- Do not handle the plug of the vacuum with wet hands.
- Store extractor indoors in a dry area. Do not expose to
freezing temperatures.
- Do not put any objects into openings. Do not use with
any opening blocked; keep free of dust, lint, hair and
anything that may reduce air flow.
- Keep hair, loose clothing, fingers and all parts of body
away from openings and moving parts.
- Do not use the vacuum to pick up flammable or
combustible liquids such as gasoline or use in areas
where they may be present. Do not pick up anything
that is burning or smoking, such as cigarettes, matches
or hot ashes.
- Turn OFF all controls before unplugging.
- Do not use where anesthetics or oxygen is used.
- Do not use an extension cord unless absolutely
necessary. If an extension cord is used, the wire size
must be 14 ga. or larger and should not exceed 50 feet
in length. The extension cord must be three-wire type to
insure grounding protection.
- Replace damaged or worn parts immediately with
genuine original equipment parts to maintain safety and
to protect your limited warranty.
- NEVER drive vacuum over steps.
- When cleaning, servicing or replacing parts, the power
cord must be disconnected from the electrical outlet.
- The power cord must never be driven over, squeezed,
torn or otherwise damaged.
- Regularly examine the power cord for signs or damage
or wear.
- Never operate the vacuum if the power cord is
damaged or worn.
- Only power cord recommended by the manufacturer
may be used.
2. General safety instructions
This machine is designed and constructed according to the
present state of the art and recognized technical safety
standards. It is electrically tested and satisfies European
Safety Standards. Dangers can occur despite of this, in
particular in the case of mal-operation or non-compliance
with the specifications and information in these operating
instructions.
Before using the vacuum cleaner read the operating
instructions and always keep those within reach. The
vacuum is only to be used by authorized and properly trained
persons.
2.1 Intended usage
- All dry and wet/dry vacuum cleaners are only to be
used indoors.
- Any usage of the machine for a purpose not covered in
this manual or the contractually agreed purpose is not
permissible and will waive the manufacturer’s warranty.
- Always adhere to the herein described operations,
service and maintenance instructions.
- This vacuum cleaner is designed to be safe when used
to perform cleaning functions as specified. Should
damage occur to electrical parts, the unit should NOT
be used until the damage is repaired by the
manufacturer of an authorized service center. This will
avoid further damage to the vacuum or injury to the
user.
- Floor coverings must be checked for suitability for this
cleaning method before using the auto-scrubber!
- Pay attention to surface pressure in case of point-
elastic floors such as gymnasium floors. Check that the
wheels will not damage the surface.
- Cleanfix does not accept liability for damage caused to
the machine and floor covering being cleaned if wrong
brush and chemicals have been used.
2.2 Sources of danger, electrical voltage/electric current
Warning: „Danger!!!“
Contact with voltage or current carrying parts carries the risk
of electric shock, which can result in serious injury or even
death. Never touch damaged cords. Always switch-off and
disconnect the power supply before carrying out any work on
the machine. Replace faulty cord immediately. When
transported in elevators always follow the regulations
currently in effect.
2.3 Improper usage
Any usage of the machine for a purpose not covered in this
manual or the contractually agreed purpose is not
permissible. The use of the machine in an unserviceable
condition or not in compliance with the following
prescriptions is prohibited:
,- Protective devices must not be removed or by-passed.
- Conversions and modifications to the machine are not
permitted.
- Defective supply cables are only to be replaced by
authorized persons.
Electrical operation (110 volts)
Safety, Operation and Maintenance Manual for SW 50; Version 1.0 4
2.4 Organisational points
It is the responsibility of the operator to ensure that:
- the machine is operated only by persons who have been
instructed in its handling and are authorized to use it.
- the recognized occupational safety regulations are
observed.
- any further national or international company regulations
are observed.
- all users are acquainted with the safety regulations and
trained in the use of the specific machine.
- all users have read and understood the operating
instructions.
- responsibilities for the operation, maintenance and repair
of the machine are clearly assigned and observed.
- faults and damages are immediately notified to an
authorized service.
2.4 Emergencies
In case of an emergency:
- Disconnect power cord.
- Immediately apply recognized First-Aid measures.
After incidents, do not resume operation with the machine
until it has been inspected by an authorized service center or
the manufacturer.
2.5 Operating for the first time
Delivery, instruction on safety rules, handling and
maintenance, as well as as operation for the first time is
normally carried out by a specialist approved by the
manufacturer. Where this is not the case, the operator is
responsible for instructing the users.
2.6 Grounding Instructions
Electrical equipment must be grounded. If it should
malfunction or breakdown, grounding provides a path of
least resistance for electrical current to reduce the risk of
electric shock.
The extractor is equipped with a cord having equipment
grounding conductor and grounding plug.
The plug must be inserted into an appropriate outlet that is
properly installed and grounded in accordance with all local
codes and ordinances.
If repair or replacement of the cord or plug is necessary, DO
NOT connect the grounded wire to either flat blade terminal.
The wire with insulation having an outer surface that is green
with or without yellow stripes is the grounding wire.
Improper connection of the equipment-grounding conductor
can result in a risk of electric shock. Check with a qualified
electrician or service person if you are in doubt as to whether
the outlet is properly grounded.
Do not modify the plug provided with the equipment. If it will
not fit the outlet, have a proper outlet installed by a qualified
electrician.
Note: In Canada, the use of a temporary adapter is not
permitted by the Canadian Electrical Code.
This electric equipment is for use on a nominal 120-volt
circuit, and has a grounded plug that looks like the plug
illustrated in (Fig. A). A temporary adaptor that looks like the
adaptor illustrated in (Fig. B & C) may be used to connect
this plug to a 2-pole receptacle as shown in (Fig. B) if a
properly grounded outlet is not available.
The temporary adaptor should be used only until a properly
grounded outlet (Fig. A) can be installed by a qualified
electrician. The green color rigid ear, lug or the like
extending from the adaptor must be connected to a
permanent ground such as a properly grounded outlet box
cover. Whenever the adaptor is used, it must be held in
place by a metal screw (Fig. C).
Further saftey instructions concerning operating and maintenance are detailed in the relevant sections and must be
complied with!
3. Operating
3.1 Saftey instructions
- Whilst in operation, caution is to be exercised in respect
to third parties, especially children.
- To avoid injuries, wear sturdy footwear.
- When cleaning and servicing the machine or changing
parts, disconnect power cord.
- The machine must never be left unsupervised when
connected.
- Make sure that the power cord is always in proper
condition.
Warning: Ensure that the power cord is not damaged by being run over, crushed or dragged along.
3.2 Operation, Preparation
Make sure that the voltage indicated on the identification
plate is the same as that available in the building and that
the socket has an earth wire. The machine is to be
connected to a 110V, 15A outlet. Depending on the location
to be used, attach the machine with the applicable
accessories. Because of the two wheels the transport of the
machine is easy even over stairs.
NOTE:
When used as a wet vacuum the float (15) must always be
inserted into the recovery/water tank before machine is put in
operation.
Safety, Operation and Maintenance Manual for SW 50; Version 1.0 5
3.3 Preparation for usage with squeegee wand
- Connect vacuum hose (15/27) to vacuum hose
connector (9) on the tank (6).
- Assemble 2-piece (19) and attach to vacuum hose (18).
- Connect squeegee tool (21) to wand (19) and then
machine is ready to use.
3.4 Preparation for usage with front-mount squeegee
- Place tank (6) with attached motor head (1) onto the
tipping dolley (13).
- Slide front-mount squeegee holder onto holder on the
dolley.
- Adjust with horizontal screw knob.
- Adjust the height of the squeegee blades with the
height-adjustment screw.
- Attach vacuum hose to the front-mount squeegee and
attach to connector on tank.
- Plug in power cord.
- Machine is ready to use.
3.5 Transform into dry vacuum cleaner
- Detach motor head (1) from the tank (6).
- Remove float assy. (14) and replace with pan filter (26).
- For hygienic reasons it is recommended to also insert a
paper filter bag.
- Never use as dry vacuum without the pan filter (26).
- Attach motor head (1) to tank and fasten latch (4).
- Attach suitable accessory to vacuum hose and wand.
3.6 Operation
- Plug power cord into proper outlet. - Turn machine on with on/off switch.
3.7 Emptying the tank
- Turn of machine with on/off switch and unplug power
cord.
- After finishing the job move machine to a water disposal
area or restroom.
- Release latch (4) and remove motor head (1).
- Remove float assy. (14).
- Drain tank by tilting backwards and emptying waste
water into disposal.
- Re-attach vacuum hose (14/9) to connector (8), replace
float assy. (14) and motor head (1) and close latch (4).
Machine is now ready for use again.
3.8 Emptying the tank with drain hose
- Turn of machine with on/off switch and unplug power
cord.
- After finishing the job move machine to a water disposal
area or restroom.
- Take drain hose (7) out of holder.
- Unscrew cap.
- Drain into waste disposal/bucket/etc.
- Screw cap back onto drain hose. Make sure it’s
screwed on airtight.
4. Maintenance
4.1. Safety instructions
When cleaning and servicing the machine or changing parts, always unplug the power cord.
The machine must not be cleaned with high pressure steam cleaners or powerful liquid jets.
For reparations use only original spare parts.
Important: Before commencing any maintenance work, switch of the machine and unplug power cord.
- Place motor head carefully and properly onto tank to
ensure tightness.
- On a regular basis check the gaskets for wear and
tear.
- Always clean machine, wheels, etc. after each use.
- Also clean inside the tank including float assy. after
each use.
- Dry (!) clean pan filter cloth on a regular basis.
5. Corrective maintenance
We recommend that repairs and inspections are carried out
by an authorized service agent.
6. Storage
If the machine is not being used, it is to be cooled and stored
dry and under normal room conditions (not under 0°C).
7. Disposal
Disposal of packaging must take place according to national
regulations.
New Machine Warranty
Copyright ©2007 Cleanfix Cleaning Systems Inc.
All rights reserved. Content is subject to change without notice. Version 5.1.
1. Limited Warranty. These terms and conditions of the New
Machine Warranty are a material part of the agreement
between Buyer and Cleanfix Cleaning Systems Inc., a New
Jersey-based corporation (hereinafter “Cleanfix”), and
supersede warranty terms and conditions in documentation
submitted by Buyer to Cleanfix. Cleanfix warrants new
machines of its manufacture against defects in material and
workmanship under normal use and service to the original end-
user purchaser. No person, agent, representative or distributor
is authorized to give any warranties on behalf of Cleanfix, or to
assume any other liability for Cleanfix in connection with any
Cleanfix machine. Cleanfix reserves the right to make changes
to its equipment without notice. The warranty coverage is
subject to the conditions below.
2. Registration of Warranty. The warranty commences on the
date of purchase by the original end-user from an authorized
Cleanfix distributor or agent, subject to proof of purchase. The
warranty commences latest, however, after six (6) months of
the purchase date by the authorized distributor or agent of
Cleanfix. Any new Cleanfix machine must be registered
immediately with Cleanfix by the original end-user customer by
fully completing and returning the warranty registration form to
Cleanfix. If proof of purchase cannot be identified through a
completed and returned warranty registration form, the warranty
commences from the date of sale to the authorized Cleanfix
distributor.
3. Warranty Coverage. Subject to conditions outlined below,
Cleanfix warrants rotationally molded PE housings and tanks on
all of its machines to be free from defects in material and
workmanship, under normal use and service for ten (10) years
to the original end-user.
Subject to conditions outlined below, Cleanfix warrants
fiberglass housings and tanks on all of its machines to be free
from defects in material and workmanship, under normal use
and service for three (3) years to the original end-user.
Under this warranty Cleanfix warrants the performance of non-
polyethylene and non-fiberglass components to be free from
defects and workmanship for up to one (1) year to the original
end-user. Parts replaced or repaired under this warranty are
warranted for the remainder of the original warranty period.
(See table below)
Rotationally molded PE housings and tanks 10 years
Fiberglass housings and tanks 3 years
Vacuum motors, brush motors, pump motors,
boards and electronics 1 year
Battery and battery charger* 1 year
* The 1 year period warranty commences with the purchase date by the
authorized distributor or agent of Cleanfix.
Service labor charges are covered for up to one (1) year from
the date of purchase through an authorized Cleanfix service
provider. A total maximum of one (1) hour travel time - equal to
one (1) hour labor rate - is covered for large machines, namely
Falcon, Raven, Eagle and larger for 90 days. No coverage is
extended for diagnosis time.
4. Product Exceptions and Exclusions. ALL vacuum cleaners
and air movers are warranted for one (1) year. No warranty is
extended for wear items, accessories and attachments
including, but not limited to, belts, brushes, pad holders,
capacitors, carbon brushes, wheels, casters, glides, clutches,
cords, filters, filter bags, gaskets, hoses, rectifiers, switches,
float switches, valves, squeegees, bearings, pulleys, relays,
actuating cables, wheels, tires, vacuum cleaner attachments.
The purchaser is assured that meticulous care has been
exercised in the selection, assembling and testing of these parts
and components before shipping. No warranty is extended for
machine finish, labels and other cosmetic parts or features.
5. Stated Warranties. Stated warranties are in lieu of all other
warranties, expressed or implied. Any statutory implied
warranties, including any warranty of merchantability or fitness
for a particular purpose, are expressly limited to the duration of
the written warranty. Cleanfix will not be liable for any other
damages, including but not limited to incidental, indirect or
special consequential damages arising out of or in connection
with the furnishing, performance, use or inability to use the
machine, including damages to persons or property. This
remedy shall be the exclusive remedy of the buyer. The
warranty is limited to the warranty.
6. Warranty is null and void for the following.
•Damage, defects, malfunction or other failures caused by
not using the electric current indicated on the spec plate,
including the use of improper extension cords.
•Damage or defect caused by accident, misuse, neglect,
abuse, fire etc., including use of incompatible or corrosive
chemicals or overloading of capacity.
•Failure caused by lack of proper maintenance and care,
including proper machine clean-up after use, proper
charging procedures for batteries.
•Failure caused by loss, damage or removal of protective
components, including, but not limited to, filters and filter
screens, tank covers and lids, skirts and bumpers, float
shut-off assemblies.
•Freezing of any water or chemical related components
(this will void all warranties on water or chemical related
components, internal or external, of the product).
•Deposits and buildup in any water or chemical related
systems due to hardness in water (this will void all
warranties on affected systems).
•Any design alterations, adjustments and/or repairs
performed on the equipment by an organization not
authorized or specified by Cleanfix.
•Use of any parts not approved by Cleanfix, including, but
not limited to, batteries, battery charger, filter bags, belts,
electric components, motors.
•Use of machine for a purpose other than which it was
designed and intended, and use of machine in excess of
design duration.
•Damage in transit.
7. Warranty Claim Procedure. If a difficulty develops during
the specified warranty period, contact the authorized Cleanfix
distributor/partner from whom the machine was originally
purchased. Do not return any products to Cleanfix unless
explicitly authorized by Cleanfix. Cleanfix may elect to require
the return of the machine or component(s) to validate the claim.
Any defective machine or component to be returned must be
shipped freight pre-paid to an authorized Cleanfix
distributor/service center.
Cleanfix will provide and charge for replacement parts, including
shipping and handling, to the original purchaser through an
authorized service center. If the part is returned within 30 days
and is found defective, the purchaser will be credited for the
cost of the replacement part including shipping and handling.
8. Term. This warranty is valid for all products sold after
January 1, 2006. A product sold before that date will be covered
by the limited warranty in effect at the date of sale to the original
purchaser.

Other Cleanfix Vacuum Cleaner manuals

Cleanfix TW 1250 User manual

Cleanfix

Cleanfix TW 1250 User manual

Cleanfix TW 300 S User manual

Cleanfix

Cleanfix TW 300 S User manual

Cleanfix SW 20 plus User manual

Cleanfix

Cleanfix SW 20 plus User manual

Cleanfix RS08B User manual

Cleanfix

Cleanfix RS08B User manual

Cleanfix Homecleaner User manual

Cleanfix

Cleanfix Homecleaner User manual

Cleanfix BS 360C User guide

Cleanfix

Cleanfix BS 360C User guide

Cleanfix SW22 User manual

Cleanfix

Cleanfix SW22 User manual

Cleanfix S 10 Light User manual

Cleanfix

Cleanfix S 10 Light User manual

Cleanfix SW 60 User manual

Cleanfix

Cleanfix SW 60 User manual

Cleanfix S 10 plus User manual

Cleanfix

Cleanfix S 10 plus User manual

Cleanfix S 10 plus User manual

Cleanfix

Cleanfix S 10 plus User manual

Cleanfix TW Compact Guide

Cleanfix

Cleanfix TW Compact Guide

Cleanfix Pelican FloodVac HBP20FV Guide

Cleanfix

Cleanfix Pelican FloodVac HBP20FV Guide

Cleanfix SW 25 K User manual

Cleanfix

Cleanfix SW 25 K User manual

Cleanfix DS 7 User manual

Cleanfix

Cleanfix DS 7 User manual

Cleanfix S 20 User manual

Cleanfix

Cleanfix S 20 User manual

Cleanfix TW 600 User manual

Cleanfix

Cleanfix TW 600 User manual

Cleanfix RS 05 User manual

Cleanfix

Cleanfix RS 05 User manual

Cleanfix TW1200 User manual

Cleanfix

Cleanfix TW1200 User manual

Cleanfix SW 20 User manual

Cleanfix

Cleanfix SW 20 User manual

Cleanfix SW 25 User manual

Cleanfix

Cleanfix SW 25 User manual

Cleanfix RS 05 User manual

Cleanfix

Cleanfix RS 05 User manual

Cleanfix S 10 User manual

Cleanfix

Cleanfix S 10 User manual

Cleanfix TW411 User manual

Cleanfix

Cleanfix TW411 User manual

Popular Vacuum Cleaner manuals by other brands

Samsung POWERbot SR10M70 Series user manual

Samsung

Samsung POWERbot SR10M70 Series user manual

Vax VZL-6017 Series user guide

Vax

Vax VZL-6017 Series user guide

Hitachi CV-400P ECO Service manual

Hitachi

Hitachi CV-400P ECO Service manual

Makita HANDY VAC II 4071D instruction manual

Makita

Makita HANDY VAC II 4071D instruction manual

Kenmore 116.23385C owner's manual

Kenmore

Kenmore 116.23385C owner's manual

dibea UV-10 instruction manual

dibea

dibea UV-10 instruction manual

Nilfisk-Advance AERO 26 M Instructions for use

Nilfisk-Advance

Nilfisk-Advance AERO 26 M Instructions for use

Vitek VT-8125 BK Manual instruction

Vitek

Vitek VT-8125 BK Manual instruction

ecofort ecoQ cleanVac Easy instruction manual

ecofort

ecofort ecoQ cleanVac Easy instruction manual

Taurus Megane 2000 Advance manual

Taurus

Taurus Megane 2000 Advance manual

Hoover Air Mini Quick user guide

Hoover

Hoover Air Mini Quick user guide

HeatPumps4Pools Vektro RC32 user manual

HeatPumps4Pools

HeatPumps4Pools Vektro RC32 user manual

Exido 240-005 Specification sheet

Exido

Exido 240-005 Specification sheet

LG VC9172SH owner's manual

LG

LG VC9172SH owner's manual

Master black provac Operator and parts manual

Master

Master black provac Operator and parts manual

Sullair VS-32 Operator's manual

Sullair

Sullair VS-32 Operator's manual

Simplicity Pixie owner's manual

Simplicity

Simplicity Pixie owner's manual

Cleanmaxx VL-621E-A instruction manual

Cleanmaxx

Cleanmaxx VL-621E-A instruction manual

manuals.online logo
manuals.online logoBrands
  • About & Mission
  • Contact us
  • Privacy Policy
  • Terms and Conditions

Copyright 2025 Manuals.Online. All Rights Reserved.