manuals.online logo
Brands
  1. Home
  2. •
  3. Brands
  4. •
  5. CleanFreak
  6. •
  7. Floor Machine
  8. •
  9. CleanFreak CPL-1500HS-2 User manual

CleanFreak CPL-1500HS-2 User manual

MODE #
MODE # MODE #
MODE #
CP
CPCP
CP
1500HS
1500HS1500HS
1500HS
SERIA #
SERIA # SERIA #
SERIA #
VF53023CP rev.01 (11-2010)
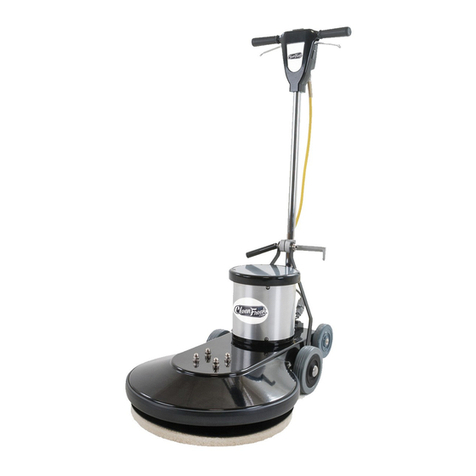
HIGH SPEED BURNISHER
TABLE OF CONTENTS
Safety Precautions
Machine Operation
Machine Maintenance & Storage
Handle Release Assembly Instructions
Parts List
Wiring Diagram
2
3
4
4
5
6-10
11
SAFETYPRECAUTIONS
!!!Thismachinemustbegrounded!
Groundingprovidesthepathofleast
resistanceforelectricalcurrent. Toreduce
theriskofelectricalshockshould the
machinemalfunction, themachinehasa
specialgroundingplug. Donotremovethe
groundpinunderanycircumstances!
Thismachineisintendedforcommercial
use. Itisconstructedforuseinanindoor
environmentandisnotintendedforany
otheruse. Useonlyrecommended
accessories.
All operatorsshall read, understandand
exercisethefollowingsafetyprecautions:
1)Donotoperatemachine:
-Unless trainedandauthorized.
-Unless youhavereadandunderstand
operatorsmanual.
-Inflammableorexplosiveareas.
-Withdamagedcordorplug.
-Ifnotinproperoperatingcondition.
-Inoutdoorareas.
-Instandingwater.
-Withtheuseofextensioncords.
2)Beforeoperatingmachine:
-Makesureall safetydevicesarein
placeandoperateproperly.
3)Whenusingmachine:
-Onlyuseapprovedburnishingpads.
-Donotrunmachineovercord.
-Donotpull machinebycordorplug.
-Donotpull cordaroundsharp
edgesorcorners.
-Ensurethedustcollectionbagisin
placeandistightlysealedtothe
machine.
-Turnpowerswitchto off priorto
unpluggingmachine.
-Donotunplug bypullingonthecord.
-Donotstretch cord.
-Donothandleplug withwethands.
-Keepcordawayfromheated
surfaces.
-Donotpickupburningorsmoking
debrissuchascigarettes, matches
orhotashes.
-Reportmachinedamageorfaulty
operationimmediately.
4)Beforeleavingorservicingmachine:
-Turnoff machine.
-Unplug cordfromoutlet.
5)Whenservicingmachine:
-Unplug cordfromoutlet.
-Usemanufacturersuppliedor
approvedreplacementparts.
Toavoidelectricalshock,please
replacethepowercord
immediatelyif anydamageisbeing
detected. Thereplacementmustbe
performedonlybyanauthorized
person.
-3-
Operation of High Speed Burnisher
*READ OPERATORSMANUAL
THOROUGHLYPRIOR TOOPERATINGOR
SERVICINGTHISMACHINE.
GENERALUSE
1. Removeanyobstructionsorother
obstaclesintheareawhichistobe
cleaned.
2. Placethehandleintheuprightposition
andtiltmachinebackuntilhandlerests
onthefloor
*Besurethemachineisnotpluggedinto
anoutlet
3. Attach thepadtothemachinebyfirst
unscrewingthemaleendofthe big
mouth”fromtheflexiblepaddriver.
Placetheapprovedpadonthepad
driver,placethemaleendof the big
mouth”intothecenterholeof thepad,
andtightenthe bigmouth”firmlyto
thepaddriver.
4. Placemachinebackintoitsupright
position.
5. Plugpowercordintoagrounded outlet.
* Neveruseanextensioncordin
conjunctionwiththestandardpowercord.
6. Thehandleheightmaybe adjustedby
liftingupthecompressionhandlewhich
islocatedontherightsideofthe
handletube about1footabovefloor
level.Releasethecompressionhandle
andadjusthandletosafeoperating
height, thenpushbackdownonthe
compressionhandletolock thehandle
inoperatingposition.
7. Tostartthemachine,press thered
safetybuttononthetopof theupper
switchhousing,andthensqueeze
eitheroftheoperatingtriggers.(the
safetybuttonmustbe depressedprior
tosqueezingtheoperatingtriggers.)
8. Whenthemachineisinoperation,both
handsshouldbeplacedontheswitch
housing(upperhandle).
9. Tostopthemachineat anytime, simply
releasetheoperatingtrigger(s) andthe
machinewillstopautomatically.
MAINTENANCE
Tokeepthemachineperformingwell for
manyyears, pleasefollowthefollowing
maintenanceprocedures.
*Alwaysconfirmthatthemachineis
unpluggedpriortoperformingany
maintenanceorrepairs.
1. Unplugmachineassoonasyouare
doneusingit.
2. Cleantheoutsideof themachinewitha
mildcleaner.
3. Checkpowercordforanydamage. If
damage isdetected,replacepower
cordimmediately.
4. Lubricatewheelswithawaterresistant
lubricantonceamonth.
5. Checkmachineforlooseormissing
nutsandbolts,andreplaceas
necessary.
6. Ifthemachineisused inadusty
environment,youmayremovethe
motorcoverandblowthemotorclean
withcompressed air.Thiswillensure
properventilation,andallowthemotor
toruncooler.
STORAGE
1. Unplugmachinefrompowersourceand
wrapcordonhandle.
2. Tiltmachinesothepadisnottouching
thefloor.
3. Storemachineinuprightpositionandin
adryarea.
-4-
STEP 1
STEP 4
STEP 3
STEP 2
HandleReleaseAssemblyInstructions
-5-
1) Remove nut and space from handle bracket
assembly.
2) Push the two handle brackets forward so
they lean against the motor.
1) Connect the power cords together.
1) Remove handle clamp clocks
with 5mm hex head bolts.
2) Place handle assembly into
handle clamp blocks.
3) Reattach the blocks to the
base with the 5mm hex head
bolts.
1) Place cord wrap assembly (2 pieces) in place and snug them together with
6mm hex bolt. (Actual cord wrap faces to the left of the machine when you are
standing behind it.)
2) Assemble hardware in the following order: spacer, left handle bracket,
nylock nut. (Do not over tighten nylock nut. Only tighten it enough to hold
handle in place when compression lever is in the down position.)
HANDLEGROUP
-6-
HANDLE GROUP PARTS LIST
DIA
DIA DIA
DIA
NO
NO NO
NO
PA
PAPA
PART
RT RT
RT
NUMBER
NUMBER NUMBER
NUMBER DESCRIPTION
DESCRIPTION DESCRIPTION
DESCRIPTION NO
NO NO
NO
REQ'D
REQ'D REQ'D
REQ'D
1
VF30016 HANDLE RELEASE 1
2
VF30017 SCREW PIN, HANDLE RELEASE 1
3
VF30018 WASHER, PLAIN,HANDLE RELEASE 2
4
VF30015 BOLT, HANDLE RELEASE 1
5
VF13503 NUT, M8, NYLON INSERT 1
6
VF30014 COVER, HOOK, CABLE 1
7
VF45125 CORD, HANDLE, 14/3C 1
8
VF50120A GROMMET 1
9
VF14053 HEX SOCKET SCREW, M6x25 4
10
VF30011BD CLAMP BLOCK, HANDLE 2
11
VF13504 NUT, M10, NYLON INSERT 1
12
VF13517 WASHER, PLAIN, φ10xφ20x2.5 1
13
VF14114 SCREW, M8 x 55, HEX 1
14
VF30013 HOOK, CABLE 1
15
VF13493 SCREW, M6x10, HEX SOCKET 1
16
AS321207 TUBE HANDLE 1
17
AS22002 SCREW, M5x16 1
18
GV40238H COVER, LEVER, SOLUTION 1
19
VF48310 HANDLE GRIP 2
20
AS22005S LEVER, LEFT, SWITCH 1
21
VF13650 SCREW, M4x12 2
22
VF48309 CLAMP BLOCK 1
23
VF45119-K CORD, POWER SUPPLY 1
24
AS22009 STRAIN RELIEF, CORD, POWER SUPPLY 1
25
GT13009 SCREW, M5x30 5
26
AS312209 REAR COVER, HANDLE 1
27
GT13008 SCREW, M5x20 2
28
VF52024CP SERIAL TAG 1
29
VF40994 READ MANUAL LABEL 1
30
GV40218 SPRING, SAFETY BUTTON 1
31
GV40209 SAFETY BOTTON 1
32
AS312203 COVER, LEVELING HANDLE 1
33
VF99010C CIRCUIT BREAKER, 17AMPS 1
34
VF45124A JUMP WIRE 1
35
VF44203 SWITCH ASSY 1
36
VF13511 WASHER, LOCK, INTERNAL TOOTH 2
37
VF14212 SCREW, M3x25 2
38
AS22004S LEVER, RIGHT, SWITCH 1
39
AS312208 FRONT COVER, HANDLE 1
40
GV40226B LABEL 1
41
VF13604 EXTERNAL TOOTH WASHER, φ5 4
42
VF14222 SCREW, M5x12 4
43
AS22003 TOOTH WASHER, φ5 2
44
VV13633 NUT, M5 2
BASEGROUP
-8-
BASE GROUP PARTS LIST
DIA
DIA DIA
DIA
NO
NO NO
NO
PART
PART PART
PART
NUMBER
NUMBER NUMBER
NUMBER DESCRIPTION
DESCRIPTION DESCRIPTION
DESCRIPTION NO
NO NO
NO
REQ'D
REQ'D REQ'D
REQ'D
1
ZD41000G MOTOR,120V 1
2
VF99926-2 CARBON BRUSH 1
3
VF44204 RECTIFIER 1
4
VF53110 LABEL 1
5
VF41079TP LABEL, LOGO 1
6
ZD40205 KEY, MOTOR 1
7
VF53112 BRACKET, LEFT 1
8
VF13514 WASHER, PLAIN, φ8xφ16 2
9
VF53107 HEX SCREW, BRACKET 2
10
VF52011A AXLE, TRANSPORT 1
11
VF13520 RETAINING RING, EXTERNAL, φ12 2
12
VF50119 WAVING WASHER, φ12 2
13
VF48202 WHEEL, 5" 2
14
VF13666 WASHER, PLAIN, φ12 2
15
VF44012 SCREW, M5 x 12.7 2
16
GV40235 CLAMP BLOCK, AXLE 2
17
VV13621 SELF-TAPPING SCREW, ST5x20 8
18
VF52010R FRONT AXLE 1
19
VF47038 CLAMP BLOCK, AXLE 2
20
VA13474 SCREW, M5x16 2
21
VF13474A WASHER, PLAIN, φ5xφ16 2
22
VF13517 WASHER, PLAIN, φ8 12
23
VF13518 WASHER, LOCK, φ8 8
24
VF13497 SCREW, 3/8"-16 4
25
VF14009 HEX SCREW, M10x65 1
26
VF14005 NUT, M10 1
27
VF52008 SPACER 1
28
VF52009G DRIVING PULLEY 1
29
VF52021 WASHER, PLAIN,φ8xφ30x5 2
30
VF13519 WASHER, LOCK, φ8 2
31
VF14008 SCREW, 5/16"-18, HEX 1
32
VF99003A BIG MOUTH 1
33
VA13484 ST4x12, PH 3
34
GT13018 SCREW, M8x30, HEX 1
35
VF99024D PAD HOLDER 1
36
VF14079B VEE BELT 1
37
VF52004A DRIVEN PULLEY 1
38
VF14075 BEARING, 6004 2RS 2
BASE GROUP PARTS IST
BASE GROUP PARTS IST BASE GROUP PARTS IST
BASE GROUP PARTS IST
DIA
DIA DIA
DIA
NO
NO NO
NO
PART
PART PART
PART
NUMBER
NUMBER NUMBER
NUMBER DESCRIPTION
DESCRIPTION DESCRIPTION
DESCRIPTION NO
NO NO
NO
REQ'D
REQ'D REQ'D
REQ'D
39
VF52006 SPACER, BEARING 1
40
VF14003 RETAINING RING, INTERNAL, φ42 2
41
VF52001 KEY, DRIVEN SHAFT 1
42
VF52005 DRIVEN SHAFT 1
43
VF14007 HEX SCREW, M10x32 4
44
VF52007 MOUNTING PLATE, DRIVEN SHAFT 1
45
AS321203 BUMPER, FRAME 1
46
AS321201CP FRAME 1
47
VF14059 CAP NUT, M10 4
48
VF14004 RETAINING RING, EXTERNAL, φ19 2
49
VF50123 WASHER, φ19 2
50
VF47027 WAVING WASHER, φ19 2
51
VF47055N WHEEL, 160MM 2
52
VA96851 CAP, FRONT AXLE 2
53
VF53113 BRACKET, RIGHT 1
Power
Cord
Supply
STO 14/3C Handle
Cord Motor
Cord
SwitchHousing
Switch
Black
Green
White
WiringDiagram
Circuit
Breaker
Motor
-11-

This manual suits for next models

1

Other CleanFreak Floor Machine manuals

CleanFreak CPL1500HS User manual

CleanFreak

CleanFreak CPL1500HS User manual

CleanFreak 225FPCF User manual

CleanFreak

CleanFreak 225FPCF User manual

CleanFreak 225BUCF User manual

CleanFreak

CleanFreak 225BUCF User manual

CleanFreak 400BUCF User manual

CleanFreak

CleanFreak 400BUCF User manual

CleanFreak TPL-17-220-CE-HEAT-TCP User manual

CleanFreak

CleanFreak TPL-17-220-CE-HEAT-TCP User manual

CleanFreak DURA-18HD User manual

CleanFreak

CleanFreak DURA-18HD User manual

CleanFreak CPL17FB User manual

CleanFreak

CleanFreak CPL17FB User manual

CleanFreak TPL-12-500-CE-TCP Owner's manual

CleanFreak

CleanFreak TPL-12-500-CE-TCP Owner's manual

CleanFreak CF-3 User manual

CleanFreak

CleanFreak CF-3 User manual

CleanFreak B-1500-P User manual

CleanFreak

CleanFreak B-1500-P User manual

CleanFreak TP-2015 Training manual

CleanFreak

CleanFreak TP-2015 Training manual

Popular Floor Machine manuals by other brands

Kärcher B 60 W Bp quick start guide

Kärcher

Kärcher B 60 W Bp quick start guide

General KC 13 owner's manual

General

General KC 13 owner's manual

HTC 280 Operator's manual

HTC

HTC 280 Operator's manual

Norton CT601MP operating instructions

Norton

Norton CT601MP operating instructions

BETCO e83039-00 Genie B 14" Operator and parts manual

BETCO

BETCO e83039-00 Genie B 14" Operator and parts manual

Tennant 3610 Operator and parts manual

Tennant

Tennant 3610 Operator and parts manual

Nilfisk-Advance MH 4M Series Instructions for use

Nilfisk-Advance

Nilfisk-Advance MH 4M Series Instructions for use

lavina L25LM-S-E user manual

lavina

lavina L25LM-S-E user manual

U-Line H-1630 instructions

U-Line

U-Line H-1630 instructions

Rodtech Click user manual

Rodtech

Rodtech Click user manual

Numatic NuSpeed NR-1500 instruction manual

Numatic

Numatic NuSpeed NR-1500 instruction manual

Windsor NMWU225H Operator instructions

Windsor

Windsor NMWU225H Operator instructions

Kärcher KM 130/300 R D user manual

Kärcher

Kärcher KM 130/300 R D user manual

Ninja NWCU2215N operating instructions

Ninja

Ninja NWCU2215N operating instructions

Numatic LoLine Owner's instructions

Numatic

Numatic LoLine Owner's instructions

lavina SUPERABRASIVE 13G-X user manual

lavina

lavina SUPERABRASIVE 13G-X user manual

NSS CHARGER 2717 DB Operation manual

NSS

NSS CHARGER 2717 DB Operation manual

Tennant 6100E Instruction bulletin

Tennant

Tennant 6100E Instruction bulletin

manuals.online logo
manuals.online logoBrands
  • About & Mission
  • Contact us
  • Privacy Policy
  • Terms and Conditions

Copyright 2025 Manuals.Online. All Rights Reserved.