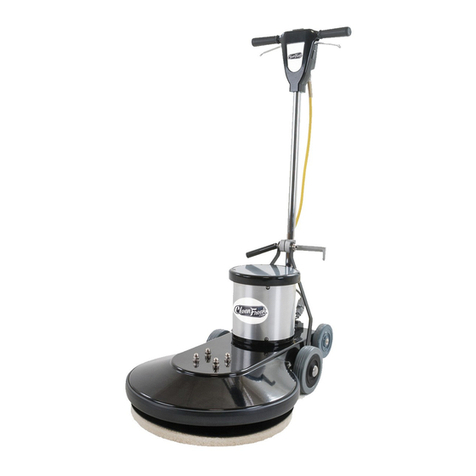
CleanFreak B-1500-P User manual

OPERATION INSTRUCTIONS
MANUAL DE OPERACIÓN
ELECTRIC BURNISHER
ABRILLANTADORA
ELÉCTRICA
CONGRATULATIONS!
YOU HAVE JUSTACQUIREDA CLEAN FREAK BURNISHER,
PLEASE READ THIS MANUAL CAREFULLY BEFORE
CONNECTING YOUR BURNISHER.
KEEP THIS MANUALON HAND FOR FURTHER
REFERENCES.
¡FELICIDADES!
ACABADE ADQUIRIR UNAABRILLANTADORA ELÉCTRICA
CLEAN FREAK, POR FAVOR LEA ESTE MANUALANTES DE
CONECTAR SU ABRILLANTADORA. CONSERVE ESTE
MANUAL PARA FUTURAS REFERENCIAS.
MODELS / MODELOS
B-1500-P (KOB-00-4430-5)
B-1500-C (KOB-00-4403-2)
ELECTRICAL RATING
CARACTERISTICAS ELECTRICAS
V~ A Hz
B-1500-P 120 15 60
(KOB-00-4430-5)
B-1500-C 120 15 60
(KOB-00-4403-2)
19-0316-0 C
GARANTÍA
KOBLENZ ELÉCTRICA, S.A. DE C.V. garantiza este producto por término de 1 (un) año en todas sus partes y mano de obra contra
cualquier defecto de fabricación a partir de la fecha de entrega asÌ como de 3 (tres) años en el motor y transmisión, y tratándose de
productos que requieran de enseñanza o adiestramiento en su manejo o de la instalación de aditamentos, accesorios, implementos o
dispositivos, a partir de la fecha en que se hubiera quedado operando normalmente después de su instalación en el domicilio que señale
el consumidor bajo las siguientes CONDICIONES:
1. Para hacer efectiva esta garantía, no podrán exigirse mayores requisitos que la presentación de esta póliza junto con el producto
en el lugar donde fue adquirido o en cualquiera de los centros de servicio autorizados.
2. La empresa se compromete a reparar o cambiar el producto así como las piezas y componentes defectuosos del mismo sin ningún
cargo para el consumidor, los gastos de transportación que se deriven de su cumplimiento serán cubiertos por el fabricante o el
importador.
3. El tiempo de reparación en ningún caso será mayor de 30 días contados a partir de la recepción del producto en cualquiera de los
sitios donde pueda hacerse efectiva.
4. En cualquiera de los centros de servicio autorizados podrá adquirir refacciones y partes
ESTA GARANTÍANO ES VALIDAEN LOS SIGUIENTES CASOS:
a) Cuando el producto ha sido utilizado en condiciones distintas de las normales.
b) Cuando el producto no ha sido operado de acuerdo con el instructivo de uso en idioma español proporcionado.
c) Cuando el producto ha sido alterado o reparado por personas no autorizadas por la empresa.
El consumidor podrá solicitar que se haga efectiva la garantía ante la propia casa comercial donde adquirió el producto.
NOTA: En caso de que la presente garantía se extraviara, el consumidor puede recurrir a su proveedor para que le expida otra póliza
de garantía previa presentación de la nota o factura respectiva.
Modelos:
B-1500-P (KOB-00-4430-5)
B-1500-C (KOB-00-4403-2)
Descripción: Abrillantadora Eléctrica.
COMO UTILIZAR SU ABRILLANTADORA
SIEMPRE DESCONECTE LAMÁQUINA DELTOMA CORRIENTEANTES DE COLOCAR EL DISCO Y LOS COJINETES.
COMO INSTALAR EL DISCO DE ABRILLANTADO
1. Desconecte el cable de alimentación (9) de la red de alimentación.
2. Incline la máquina girándola sobre sus ruedas, hasta que la tapa (3) toque el piso.
3. Desenrosque el centro del fijador, localizado en la parte inferior del plato (17), girándolo en contra de las manecillas del reloj. Introduzca el fijador
de plástico en el orificio del disco y coloque ambos en el fijador. Proceda a atornillarlo en el sentido de las manecillas del reloj hasta que
manualmente no de más vueltas y quede bien apretado.
COMO ENCENDER SU ABRILLANTADORA
1.Coloque el disco de abrillantado que va a utilizar y conecte el cable de alimentación (9) en un toma corriente aterrizado.
2. Incline ligeramente la máquina apoyándola sobre sus ruedas traseras, accione la palanca de encendido (5) y oprima el seguro (2) hasta el fondo,
conesto el motor encenderá. Permita queel motor alcance su máxima revolución(aproximadamente en 5 segundos), apoyeel disco sobre el piso
y comience el abrillantado.
3. Algunos modelos cuentan con interruptor térmico (1) en el costado derecho de la manija, éste interrumpe el paso de corriente cuando el operador
induce una sobre presión al disco con el piso. Si esto ocurre, espere aproximadamente 30 segundos y oprima el botón rojo del interruptor térmico
hasta escuchar un clic. Después encienda su máquina como se indica en el punto 2.
TIPS DE OPERACIÓN
* Conviene que el operador inicie el abrillantado en un punto cercano al contacto eléctrico y camine tan lejos como el largo del cable lo permita,
luego dé vuelta y en línea recta dirija la máquina en forma paralela al punto de inicio.
* Si desea apagar la máquina simplemente deje de oprimir la palanca de encendido sin soltar el maneral.
* Quite el disco de su abrillantadora antes de guardarla.
* Para subir y bajar escaleras, utilice las ruedas traseras de la máquina y evite que el disco tenga contacto con el piso.
* Debido a su alta velocidad, nunca trate de abrillantar un piso mojado, no utilice shampoo para alfombras, no agregue peso a la máquina y no
use un disco mayor de 20 pulgadas de diámetro.
* Utilice los discos adecuados a la operación de abrillantado: los discos más oscuros son los más abrasivos. La elección correcta del disco le brindará
óptimos resultados de acuerdo con el tipo y las condiciones del piso: dureza, frecuencia con que se lava, mopea y abrillanta la superficie.
OCTOBER 2012

GENERAL DIAGRAM
No. PART LIST
1 Circuit breaker
2 Switch lock
3 Cover
4 Handle grip
5 Starting switch
6 Handle tube
7 Lever assembly
8 Cable support
9 Line cord
10 Female motor cord
11 Motor cord
12 Pressure adjusting knob
13 Clamp
14 Wheels
15 Motor cover
16 Chassis
17 Plate
18 Security nut
19 Box switch insert
20 Dust Control compartment
(only on Dust Control models)
DIAGRAMA GENERAL
No. LISTA DE PARTES
1 Interruptor térmico
2 Seguro de encendido
3 Tapa
4 Maneral
5 Palanca de encendido
6 Tubo manija
7 Palanca leva
8 Soporte del cable
9 Cable de alimentación
10 Cable motor c/contacto
11 Cable motor c/clavija
12 Perilla de ajuste
13 Abrazadera
14 Ruedas
15 Cubierta motor
16 Chasis
17 Plato
18 Tuerca de seguridad
19 Inserto caja de encendido
20 Compartimento de Control de Polvo
(sólo en modelos con Control de Polvo)
123
4
5
19
6
10
11
15
17
9
7
13
18
14
16
8
27
COMO ENSAMBLAR EL TUBO MA NIJA
Modelos: B-1500-P y B-1500-C
1.Antes de ensamblar el tubo manija (6) en su alojamiento, baje la palanca (7), coloque el tubo entre el chasis (16) y la abrazadera (13).
2. El tubo manija (6) debe quedar orientado hacia atrás. Tal y como se muestra en la fig 1.
3.Asegúrese de que coincidan la ranura que tiene el tubo manija (6) en el extremo inferior y la guía que se encuentra en el chasis (16).
4. Suba la palanca leva (7) hasta quedar en posición vertical, como se ilustra en la fig 2., al hacer esto el tubo queda asegurado y no deberá
tener movimiento.
Nota: El apriete que da la abrazadera (13) está ajustado de fábrica. Si por alguna razón requiere mayor o menor presión, apriete o afloje
las tuercas (18).
5. Conecte la clavija del cable motor (11) en el contacto del cable motor (10).
6. Coloque el disco para abrillantar en la forma indicada (lea como instalar el disco de abrillantado).
Nota: Cuide que el disco no tenga contacto con el piso al transportar la máquina.
18
23
10
12
11
Fig.2
6
16
7
1813 9
3
Fig.1
17
6
12
20
16
13
Fig.A
6
12
23
22
13
Fig.B
6
13
7
12
Fig.C
COMO ENSAMBLAR EL TUBO MANIJA
Modelo: B-1500-FP y B-1500-FC
1. Antes de ensamblar el tubo manija (6), compruebe que la abrazadera (13) se coloque con el agujero para el tubo hacia el motor (ver fig.A).
2. Deslice el tubo (6) a través de la abrazadera (13), sostenga el yugo (20) en posición vertical e inserte el tubo sobre el yugo (ver fig. A).
3. Gire el tubo manija para que el inserto (19) quede hacia el motor, alinee los agujeros del tubo con los del yugo e inserte los dos tornillos
(22) con las cabezas hacia el motor (ver fig. B).
4. Ponga las tuercas de seguridad (23) en los tornillos con la cara plana hacia el tornillo, gírelas manualmente hasta que se pongan duras,
luego sostenga la cabeza con una llave y apriete las tuercas con otra llave fuertemente hasta el tope (ver fig. B).
5. Mueva la planca leva manija (7) hacia abajo en la posición de apriete y gire la perilla de ajuste de presión (12) hasta el tope (ver fig. B).
6. Ponga la palanca leva manija (7) hacia arriba en la posición de liberación y gire la perilla de ajuste de presión (12) 1/4 de vuelta más.
7. Ponga la palanca leva manija (7) otra vez hacia abajo, pruebe a inclinar la máquina sobre sus ruedas traseras tirando de la manija.
Si la abrazadera se desliza sobre el tubo, regrese la palanca leva manija hacia arriba a la posición de liberación y apriete la perilla de
ajuste (12) 1/4 de vuelta más.
8. Repita el paso 7 hasta que al inclinar la máquina, la abrazadera no se deslice sobre el tubo.
9. Conecte el cable motor (11) al cable de línea (10).
20
MODELO CON CONTROL DE POLVO B-1500-C Y B-1500-FC
ESTE MODELO INCLUYE UN SISTEMA DE CONTROLDE POLVO QUE MANTIENE ELAMBIENTE LIBRE DE POLVOY
CONTAMINANTES.
COMO INSTALAR EL DISCO DE ABRILLANTADO
1. Desconecte el cable de alimentación de la red de alimentación.
2. Incline la máquina apoyándola sobre sus ruedas traseras.
3. Esta máquina incluye un tubo de plástico localizado en la parte de abajo del plato, retire esta pieza jalándola hacia afuera. (Fig. 3)
4. Coloque el cojinete en posición y asegúrelo con el centro fijador (incluido) girándolo hasta que quede bien apretado.
COMO CAMBIAR LA BOLSA FILTRO
1. Desconecte el cable de alimentación de la red de alimentación.
2. Abra el compatimento ubicado en la parte frontal de su brilladora (Fig.4).
a. Tome la bolsa y jálela con cuidado.
b. Coloque la nueva bolsa alrededor del conector y cierre el compartimento.
3. Cambie el filtro al menos cada 6 meses o cuando la bolsa esté a la mitad de su capacidad total.
ALMACENAMIENTO
Para evitar que el cepillo se dañe, coloque la máquina inclinada hacia atrás apoyada en las 4 ruedas, el plato debe quedar sin
hacer contacto con el piso.
Fig.3 Fig.4
B-1500-P (KOB-00-4430-5)
B-1500-C (KOB-00-4403-2)

IMPORTANT SAFETY INSTRUCTIONS
WHEN USING AN ELECTRICAL BURNISHER, BASIC PRECAUTIONS SHOULD BE FOLLOWED,
INCLUDING THE FOLLOWING:
READ ALL INSTRUCTIONS BEFORE USING THE MACHINE.
SAVE THESE INSTRUCTIONS FOR FURTHER REFERENCE
WARNING
To reduce risk of fire, electric shock or injury:
• "WARNING OF POTENTIAL INJURY". The burnisher contains moving parts, be sure to unplug machine
servicing to reduce the risk of injury.
• Do not put any objects into openings.
• Keep hair, loose clothing, fingers, and all parts of body away from openings and moving parts.
• Make sure the machine is in operating position.
• Do not leave machine unattended when plugged in. Unplug the electrical cord when not in use or before
servicing.
• Use only as described in this manual. Use only manufacturer's recommended attachments.
• Do not use with damaged cord or plug. If machine is not working as it should, has been dropped, damaged,
left outdoors, or dropped into water, return it to service center before using.
• Do not pull or carry by cord, use cord as handle, close a door on cord, or pull a cord around sharp edges
or corners.
• Do not run machine over cord. Keep cord away from heated surfaces.
• Do not use extension cords or outlets with inadequate current carrying capacity.
• Verify if local voltage is 120 V~
THESE MODELS ARE GROUNDED, CONNECT TO A PROPERLY GROUNDED OUTLET ONLY, SEE
GROUNDING INSTRUCTIONS.
GROUNDING INSTRUCTIONS
General. This floor-finishing machine shall be grounded while in use to protect the operator from electric
shock. The machine is provided with a three-conductor cord and a three-contact grounding type attachment
plug to fit the proper grounding type receptacle. The green (or green and yellow) conductor in the cord is the
grounding wire. Never connect this wire to other than the grounding pin of the attachment plug.
WARNING Improper connection of the equipment-grounding conductor can result in a risk of electric shock.
Check with a qualified electrician or service person if you are in doubt of the outlet been grounded and if so
have a proper outlet installed.
This machine is for use on a nominal 120 V~ circuit and has a grounding plug than resembles the plug
illustrated in sketch A. Make sure that the machine is connected to an outlet having the same configuration
as the plug. No adapter should be used with this machine.
Note: In Canada, the use of a temporary adaptor is not permitted by the Canadian Electrical Code.
Warning: The power cord on this product contains lead, a chemical known to the State of California to cause
birth defects or other reproductive harm. WASH HANDSAFTER HANDLING.
GROUNDING PIN
GROUNDING OUTLET
GROUNDED OUTLET BOX
sketch A 3
6
ADVERTENCIAS
ALUTILIZAR SUABRILLANTADORA, SE DEBEN SEGUIRLAS SIGUIENTESPRECAUCIONES: LEATODAS
LAS INSTRUCCIONESANTES DE UTILIZAR SU MÁQUINAABRILLANTADORA.
GUARDE ESTE MANUAL PARA FUTURAS REFERENCIAS.
PRECAUCIONES
Para reducir el riesgo de fuego, choque eléctrico o daño físico:
* PRECAUCIÓN DE POSIBLES DAÑOS: La abrillantadora contiene piezas movibles, desconecte la máquina
antes de darle servicio para reducir el riesgo de daños.
* No ponga objetos en ninguna de las aberturas, no se utilice con alguna abertura bloqueada.
* Mantenga el cabello, ropa suelta, dedos y cualquier parte del cuerpo lejos de las aberturas y partes con
movimiento.
*Asegúrese de que la máquina esté en posición de operación.
* Verifique si el voltaje local es de 120 V~.
*No deje su abrillantadorasola cuando estéconectada.Apáguelay desconéctela cuando no estéen usoy antes
de darle servicio.
* Úsese solo como se describe en este manual. Utilice únicamente accesorios recomendados por el fabricante.
* Si el cordón de alimentación es dañado, este debe ser reemplazado por el fabricante o su agente de servicio
o personal calificado para evitar el riesgo.
* No cargue o jale la abrillantadora del cordón, ni lo use como manija, no jale el cordón sobre orillas o esquinas
filosas y manténgalo alejado de las superficies calientes.
* No permita que la máquina opere sobre el cable de alimentación.
* No utilice extensiones o contactos sin la capacidad de corriente adecuada.
ESTE MODELO ES ATERRIZADO, CONECTE SOLO A UN CONTACTO ATERRIZADO. VEA LAS
INSTRUCCIONES DEATERRIZADO.
INSTRUCCIONES DE ATERRIZADO
General. Este aparato deberá ser aterrizado mientras esté en uso para proteger al operador de un choque
eléctrico. Esta máquina cuenta con un cable de alimentación de 3 conductores y una clavija aterrizada para
conectar a una toma de corriente en la posición correcta de los contactos.
El conductor verde (o amarillo-verde) es el cable de tierra. Nunca conecte este cable a otra conexión que no sea
la de tierra en la clavija.
ADVERTENCIA. Una conexión inapropiada puede provocar riesgo de choque eléctrico, revise por medio de un
electricista capacitado que el contacto que se utilizará esté debidamente aterrizado. No modifique la clavija de
la máquina, si la clavija no ajusta en el contacto, instale uno llamando a un electricista capacitado.
Esta máquina es para utilizarse con un voltaje nominal de 120 V~ y tiene clavija aterrizada, como se ilustra en
lafiguraA.Asegúresede que la máquinasea conectadaen uncontacto conla misma configuraciónde laclavija.
No utilice un adaptador con esta máquina.
CLAVIJAATERRIZADA
CONTACTO ATERRIZADO
CUBIERTA DEL CONTACTO
ATERRIZADO
figura A

HOW TOASSEMBLE THE HANDLE TUBE
Models: B-1500-P and B-1500-C
1. Before assembling the handle tube (6) on chassis (16), lower lever handle (7) and place tube between chassis and clamp (13).
2. The handle tube (6) has to face backwards as in Fig.1
3. Make sure the guide on the handle tube (6) coincides with the guide on the chassis (16).
4. Raise the lever handle (7) until it is in vertical position, as shown in Fig.2. By doing this there should be no play on the handle tube.
Note: The clamp is tightened at the factory, if it requires adjustment tighten or loose the bolts and the security knot (18).
5. Plug in both, the female motor cord (10) and the motor cord (11).
6. Place the pad driver as instructed (see how to install the pad driver).
Note: When moving the machine make sure the pad driver has no
contact with the floor.
Model: B-1500-FP and B-1500-FC
1. Before assembling the handle tube (6), make sure the handle clamp (13) is positioned with the hole in the tube facing the motor
(see FigA).
2. Slide the handle tube (6) through the handle clamp (13), hold the yoke (20) vertical and insert the tube over the yoke (see FigA).
3. Turn the handle tube so the box switch insert faces the motor, align the holes on the tube and the yoke, place the two screws in the
holes with the heads towards the motor (see Fig B).
4. Place the safety nuts (23) on the screws, with the flat part facing the screw, turn them manually until they get hard, then hold the
head with one 7/16 wrench and tight the nut with the other wrench as far as it can go (See Fig B).
5. Move the handle release lever (7) down on the lock position and turn the pressure-adjusting knob (12) as far as it goes (see Fig C).
6. Place the handle release lever (7) up on the release position and tighten the pressure adjusting knob 1/4 more.
7. Place the handle lever (7) down again, and try tilting the machine over the rear wheels pulling down the handle, if the handle clamp
(13) slips over the tube, move the handle lever (7) up to the release position, and turn the adjusting knob 1/4 more.
8. Repeat step No.7 until the handle clamp does not slips when trying to tilt the machine.
9. Connect the motor cord (11) to the female motor cord (10).
6
12
20
16
13
Fig.A
6
12
23
22
13
Fig.B
6
13
7
12
Fig.C
18
23
10
12
11
Fig.2
6
16
7
1813 9
3
Fig.1
17
45
WARRANTY
This warranty gives you specific legal rights, and you may also have other rights, which vary from state to state.
This product is warranted against malfunctions and defects in material and workmanship for a period of 1 (one) year and 3 (three)
years on motor and transmission.
THIS WARRANTY SHALL NOT APPLY to any products or parts there of which have been damaged by tampering, misuse or
abuse or which have been altered or repaired by an unauthorized person or service center.
THIS WARRANTY SHALL NOTAPPLY to brushes, since length of their life depends upon the amount of use.
FOR REPAIR, the inoperative machine must be delivered with shipping and delivery charges prepaid, together with satisfactory
evidence of the purchase date to the dealer from whom it was purchased. Clean Freak will either repair or replace, at its election,
all defective machines during the warranty period.
THE FOREGOING OBLIGATIONS ARE IN LIEU OF ALL OBLIGATIONS AND LIABILITIES INCLUDING NEGLIGENCE AND
STATE KOBLENZ'S ENTIRE AND EXCLUSIVELY LIABILTIY AND PURCHASER'S EXCLUSIVE REMEDY CLEAN FREAK WILL
IN NO EVENT BE LIABLE FOR ANY DIRECT, INDIRECT, SPECIAL, INCIDENTAL OR CONSEQUENTIAL DAMAGES OR
LOSSES WHATSOEVER, AND CLEAN FREAK LIABILITY UNDER NO CIRCUMSTANCES WILL EXCEED THE CONTRACT
PRICE FOR THE GOODS OR PARTS FOR WHICH LIABILITY IS CLAIMED.
Some states do not allow the exclusion or limitation of incidental or consequential damages, so the above limitation or exclusion
may not apply to you.
DUST CONTROL MODEL B-1500-C AND B-1500-FC
THIS MODEL INCLUDESA DUST CONTROL SYSTEM THAT COLLECTS FLOOR FINISH DUST INTOA FILTER BAG, MAINTAINING
CLEANER INDOOR AIR QUALITY.
HOW TO INSTALL PADS
1. Make sure the machine is unplugged.
2. Lower the unit until the box switch is on the ground.
3. This machine includes a plastic tube located at the lower part of the plate that avoids brush skirt damage during transportation.
Remove this piece by pulling it outwards (Fig. 3).
4. Place the pad in position and secure it by using the center plate (included). Turn the center plate clockwise until it is tight.
HOW TO REPLACE FILTER BAG
1. Make sure machine is unplugged.
2. Open the Burnisher’s front compartment (Fig.4).
a. Grasp the bag and pull it carefully from the connector.
b. Place the new bag around the connector and close the front compartment.
3. Change the filter bag at least every 6 months or when the bag is about half of its capacity.
STORAGE
1. To avoid brush skirt damage, while the machine is not in use lean it back on its 4 wheels, lifting the plate from the floor.
Fig.3 Fig.4
HOW TO USE YOUR MACHINE
ALWAYS UNPLUG THE MACHINE BEFORE INSTALLINGTHE DRIVER OR PADS
HOW TO INSTALL THE PAD DRIVER
1. Make sure machine is unplugged (9).
2. Lower the unit until the box switch (3) is on the ground.
3. Unscrew the center plate (17), located at the lower part of the plate, counter clockwise. Insert center plate and turn clockwise until
it is tight.
HOW TO START YOUR MACHINE
1. Place the appropriate pad and connect the line cord into a grounded outlet.
2. Place the machine over the rear wheels. Turn on the starting switch and push the switch lock, with this the motor start working. Wait
5 seconds and place pad on the floor.
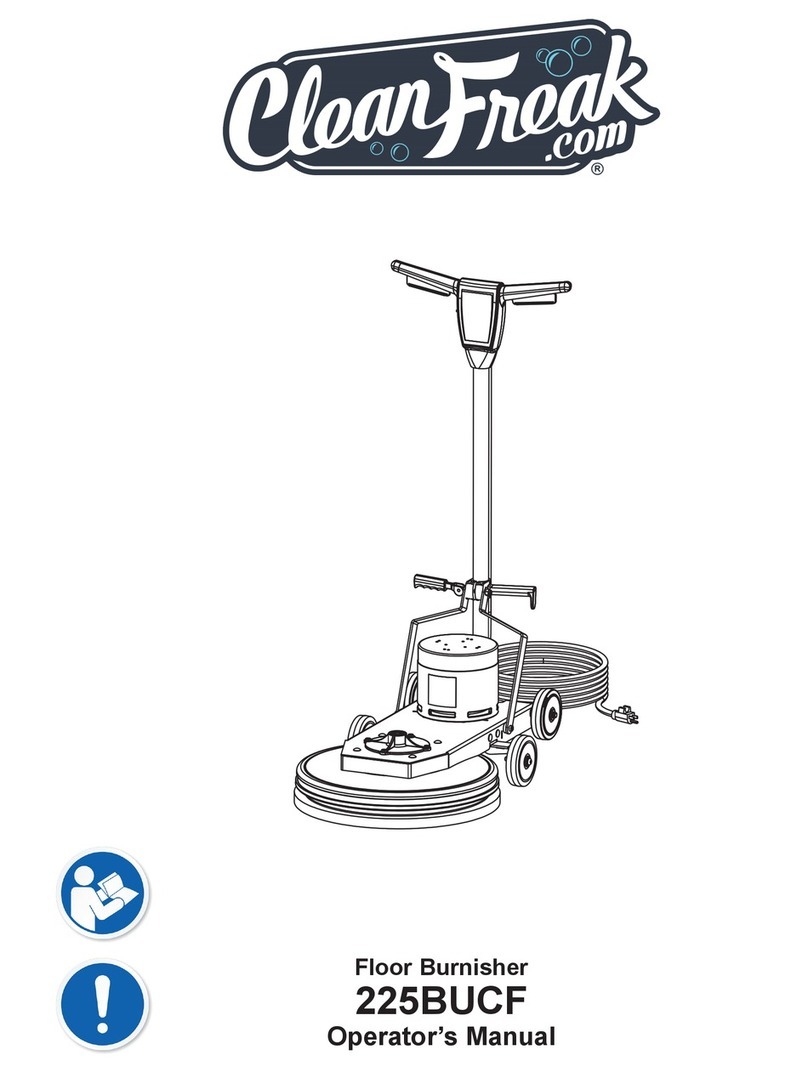
3. Some models are provided with an overload protector that will work if the pad is overloaded. If that occurs, wait 30 seconds,
approximately, and push the red button, you will hear a click. After that you can turn on the machine as described in point 2.
OPERATING TIPS
* It is convenient that the operator start at the position closest to the current outlet and move outward as far as the line cord will go.
Then return to the original point.
* To stop the machine just release the handle levers.
* Remove driver & pads before storing.
* To go up or down stairs use the rear wheels.
* Due to it's high speed never use on wet floors or with pads larger than 20” in diameter.
* Use the appropriate pads: the darker pads are more abrasive. The correct pad will give you the best result according to the floor
condition and type.
This manual suits for next models
1
Table of contents
Languages:
Other CleanFreak Floor Machine manuals

CleanFreak
CleanFreak TPL-17-220-CE-HEAT-TCP User manual

CleanFreak
CleanFreak 225FPCF User manual

CleanFreak
CleanFreak CPL-1500HS-2 User manual

CleanFreak
CleanFreak TP-2015 Training manual

CleanFreak
CleanFreak 225BUCF User manual

CleanFreak
CleanFreak CPL17FB User manual

CleanFreak
CleanFreak CF-3 User manual

CleanFreak
CleanFreak CPL1500HS User manual

CleanFreak
CleanFreak 400BUCF User manual

CleanFreak
CleanFreak TPL-12-500-CE-TCP Owner's manual